BIOMECHANICAL VISUAL LIBRARY · THƯ VIỆN HÌNH ẢNH CƠ SINH HỌC
148 tennis coaching diagrams, 9 topics, in EN & VI.
Every figure in the United Tennis Handbook — force vectors, tensegrity structures, contact-zone maps, kinetic-chain sequences, and diagnostic fault trees.
Toàn bộ hình trong Cẩm Nang Tennis Hợp Nhất — vector lực, cấu trúc tensegrity, bản đồ vùng tiếp xúc, chuỗi động học, và cây chẩn đoán lỗi.
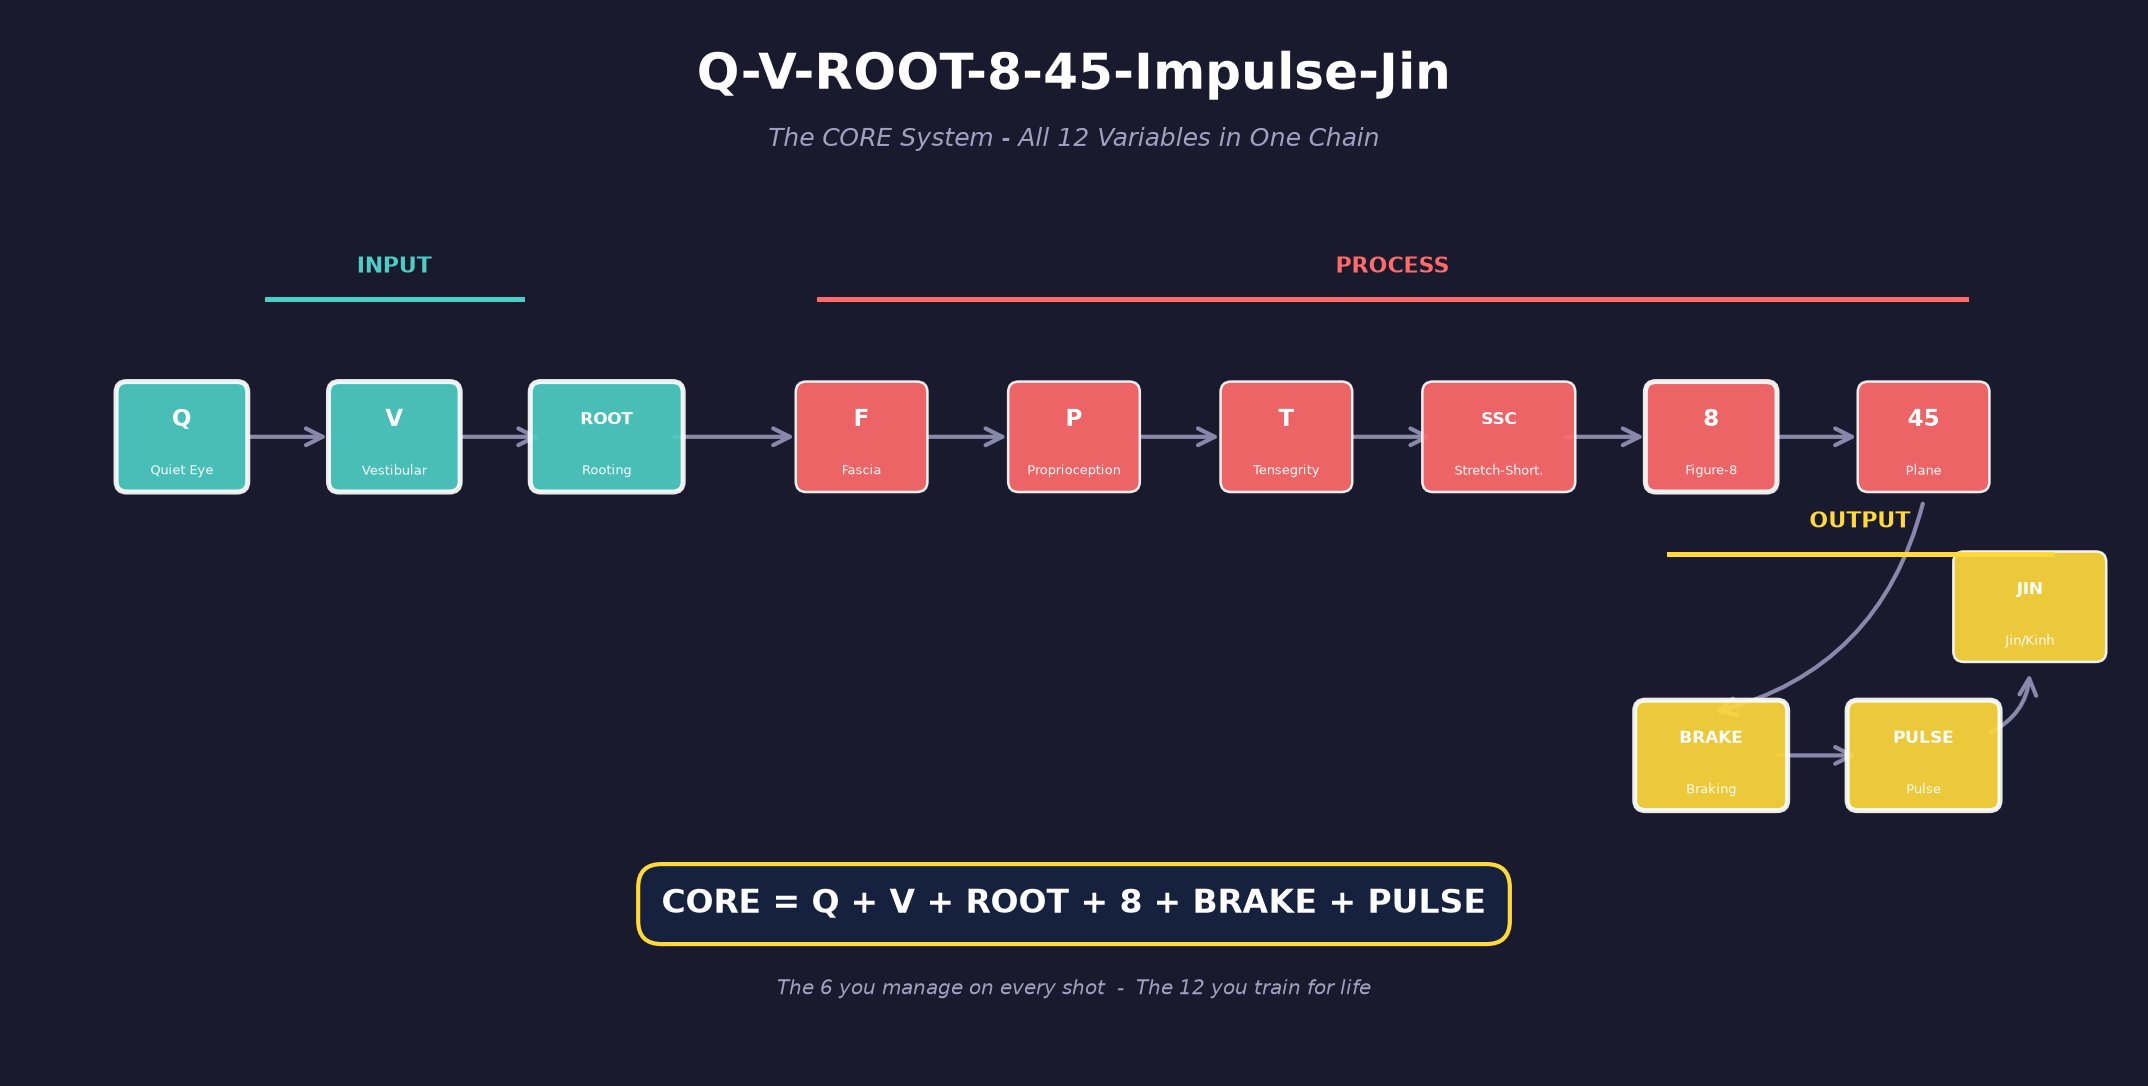
1. CORE Chain Master Diagram
The operational framework integrating Quiet Eye, Vestibular stability, Rooting, Figure-8 loop, Braking, and Pulse release.
2. Browse by Topic · Xem theo chủ đề
Tap a topic to jump to its figures. Chạm vào chủ đề để xem hình.
🎾Forehand · Forehand
Forehand Push System, Court Geometry, contact, swing plane, OK grip.
Hệ Forehand Push, hình học sân, tiếp xúc, mặt phẳng vung, OK grip.
9 figures · Open · Mở →
🎾Backhand · Backhand
1H Saber, 2H Hybrid, integrated arm-racquet switching.
Saber 1 tay, Hybrid 2 tay, chuyển đổi tay-vợt hợp nhất.
8 figures · Open · Mở →
⚡Serve · Giao bóng
Serve Mechanics, Return of Serve, kinetic chain, racquet head path.
Cơ học giao bóng, đỡ giao bóng, chuỗi động học, quỹ đạo đầu vợt.
10 figures · Open · Mở →
🏸Volley · Volley
Volley & Overhead, Slice/Drop Shot/Lob, less-is-more blueprint.
Volley & Overhead, Cắt/Drop/Lob, nguyên lý less-is-more.
11 figures · Open · Mở →
🦶Footwork · Bước chân
Hu-Thuc Footwork, stance types, split step, ready position.
Bước chân Hu-Thức, các loại stance, split step, tư thế sẵn sàng.
4 figures · Open · Mở →
🤚Grip · Cách cầm vợt
Rooting, wrist integrity, contact-palm control, grip types vs shot.
Rooting, toàn vẹn cổ tay, palm control, grip theo cú đánh.
5 figures · Open · Mở →
🧬Biomechanics · Cơ sinh học
CORE chain — Quiet Eye, VOR, Fascia, Tensegrity, SSC, Figure-8, 45°, Brake, Jin.
Chuỗi CORE — Quiet Eye, VOR, Cân cơ, Tensegrity, SSC, Figure-8, 45°, Braking, Jin.
39 figures · Open · Mở →
🧠Strategy · Chiến thuật
Singles & Doubles patterns, Mental Game, anticipation, shot disguise.
Mẫu đơn & đôi, Mental Game, dự đoán, che giấu cú đánh.
10 figures · Open · Mở →
🌐Multi-topic · Đa chủ đề
Foundations — Problem, Tool, Precision, Outcome, Energy, Transmission, CORE; Physical; Unified System.
Nền tảng — Vấn đề, Công cụ, Chính xác, Kết quả, Năng lượng, Truyền lực, CORE; Thể lực; Hệ thống hợp nhất.
46 figures · Open · Mở →
🎾 Forehand · Forehand ↑ back to topics
Forehand Push System, Court Geometry, contact, swing plane, OK grip. Hệ Forehand Push, hình học sân, tiếp xúc, mặt phẳng vung, OK grip.
Chapter 19: Forehand Push System 4 figures
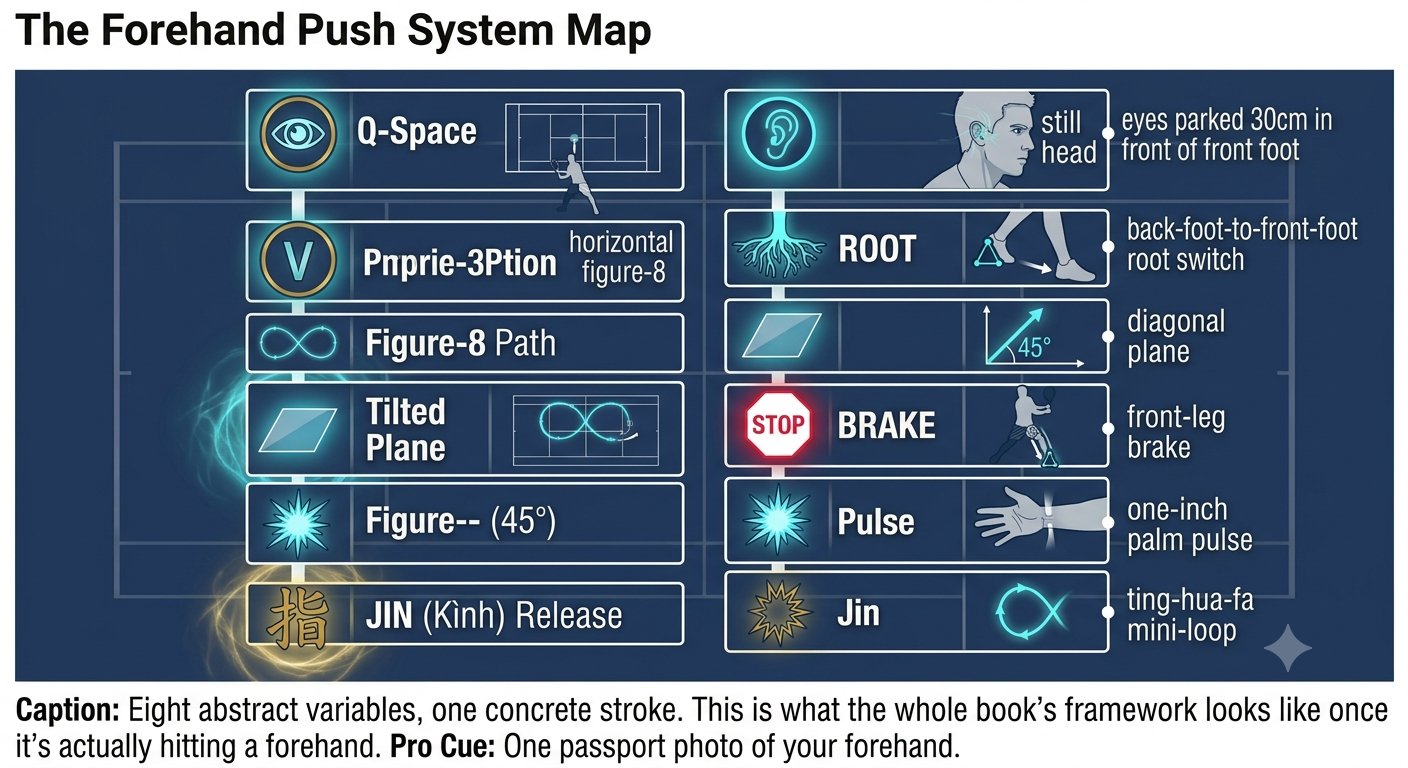
Forehand Push System — Figure 1
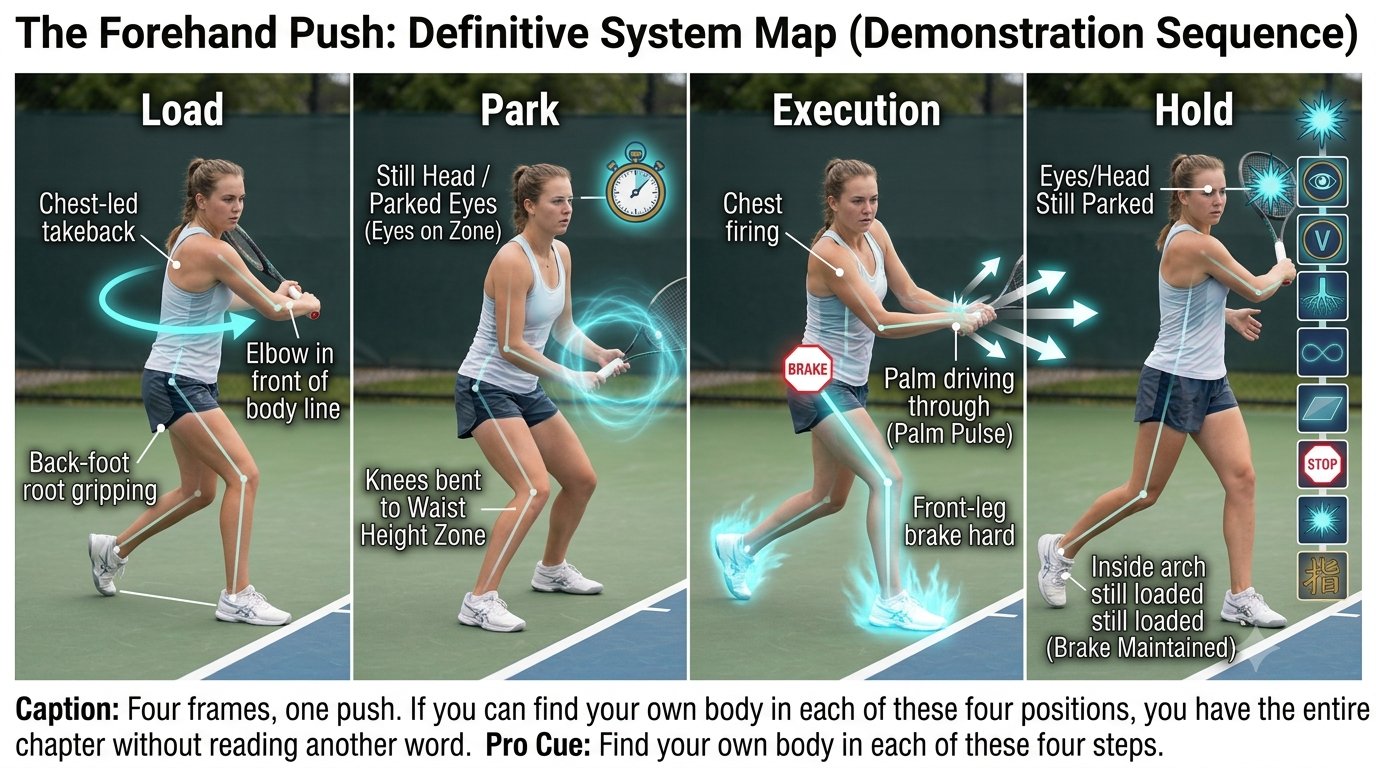
Forehand Push System — Figure 2
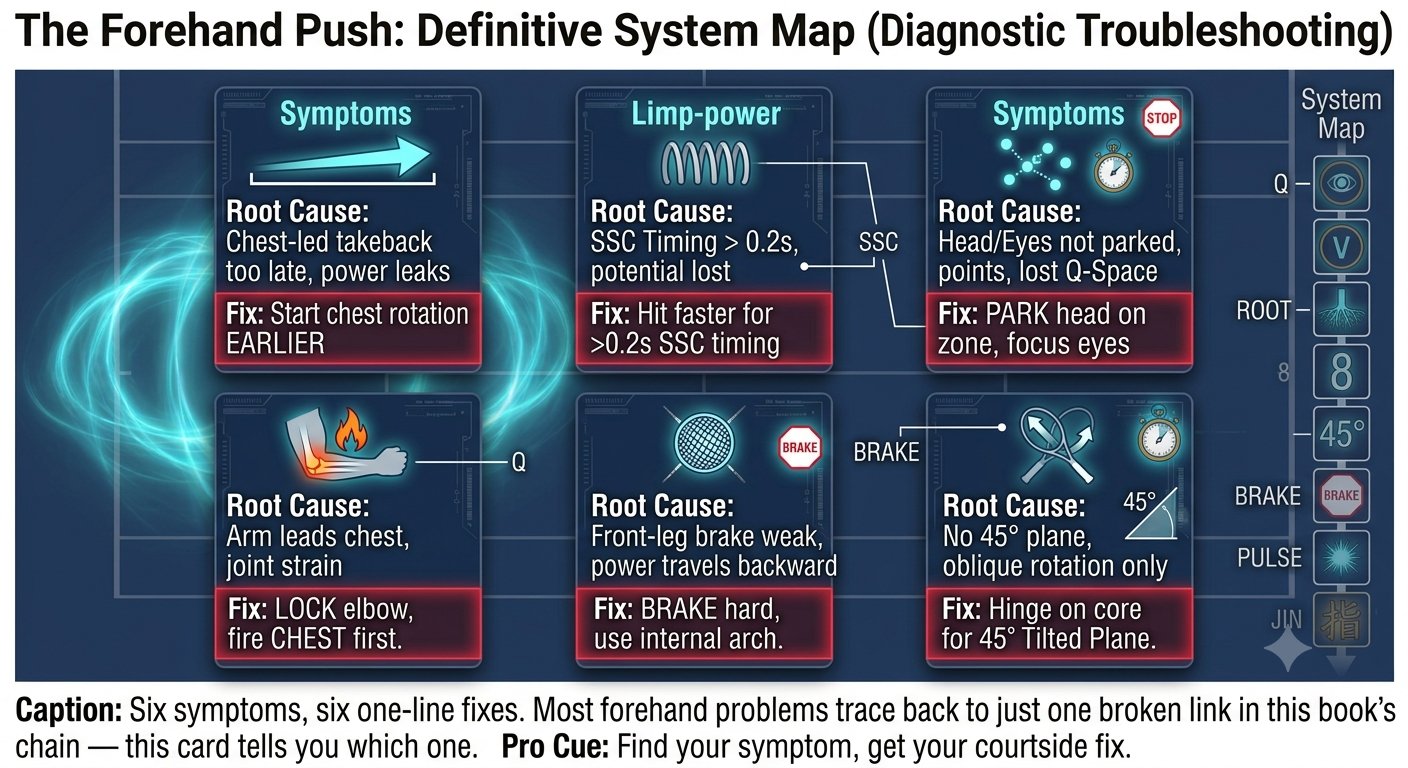
Forehand Push System — Figure 3
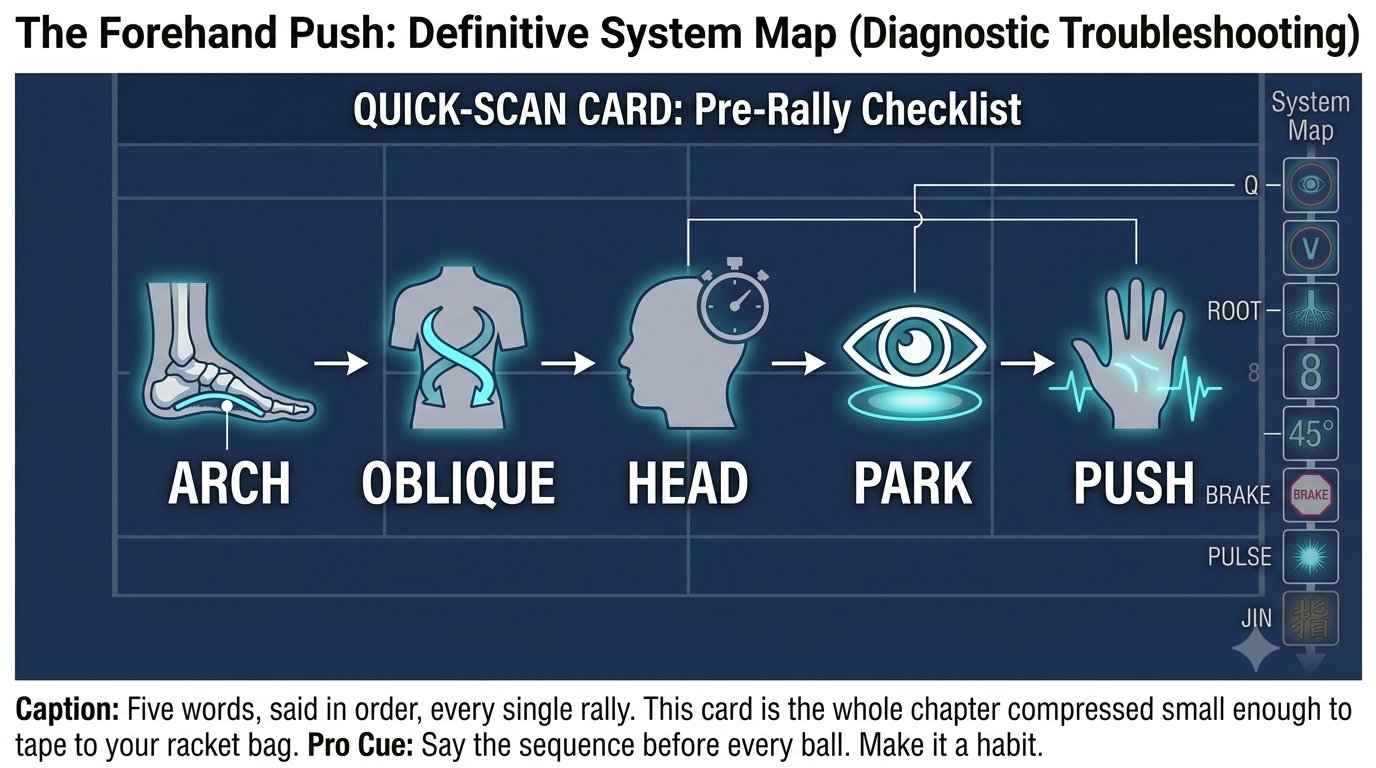
Forehand Push System — Figure 4
Chapter 26: Court Geometry & Shot Selection 5 figures
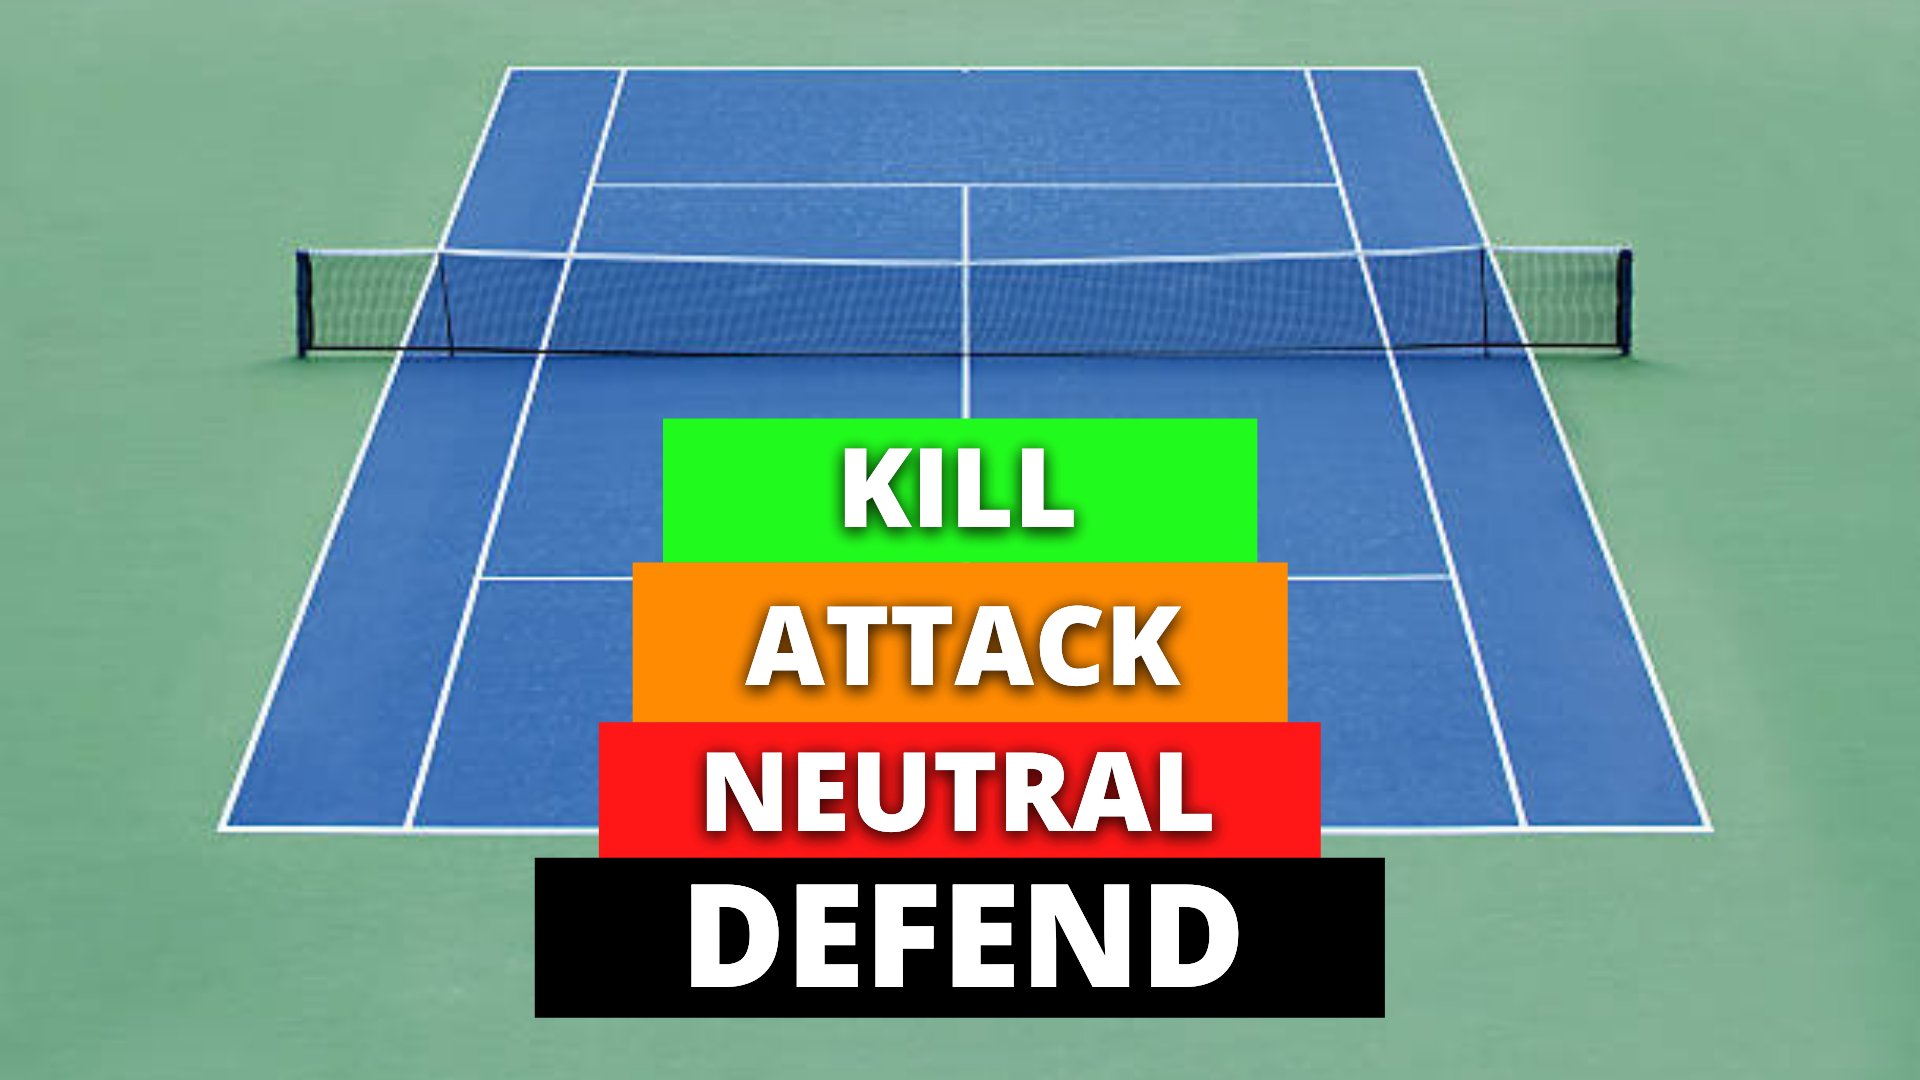
Court Geometry & Shot Selection — Figure 1
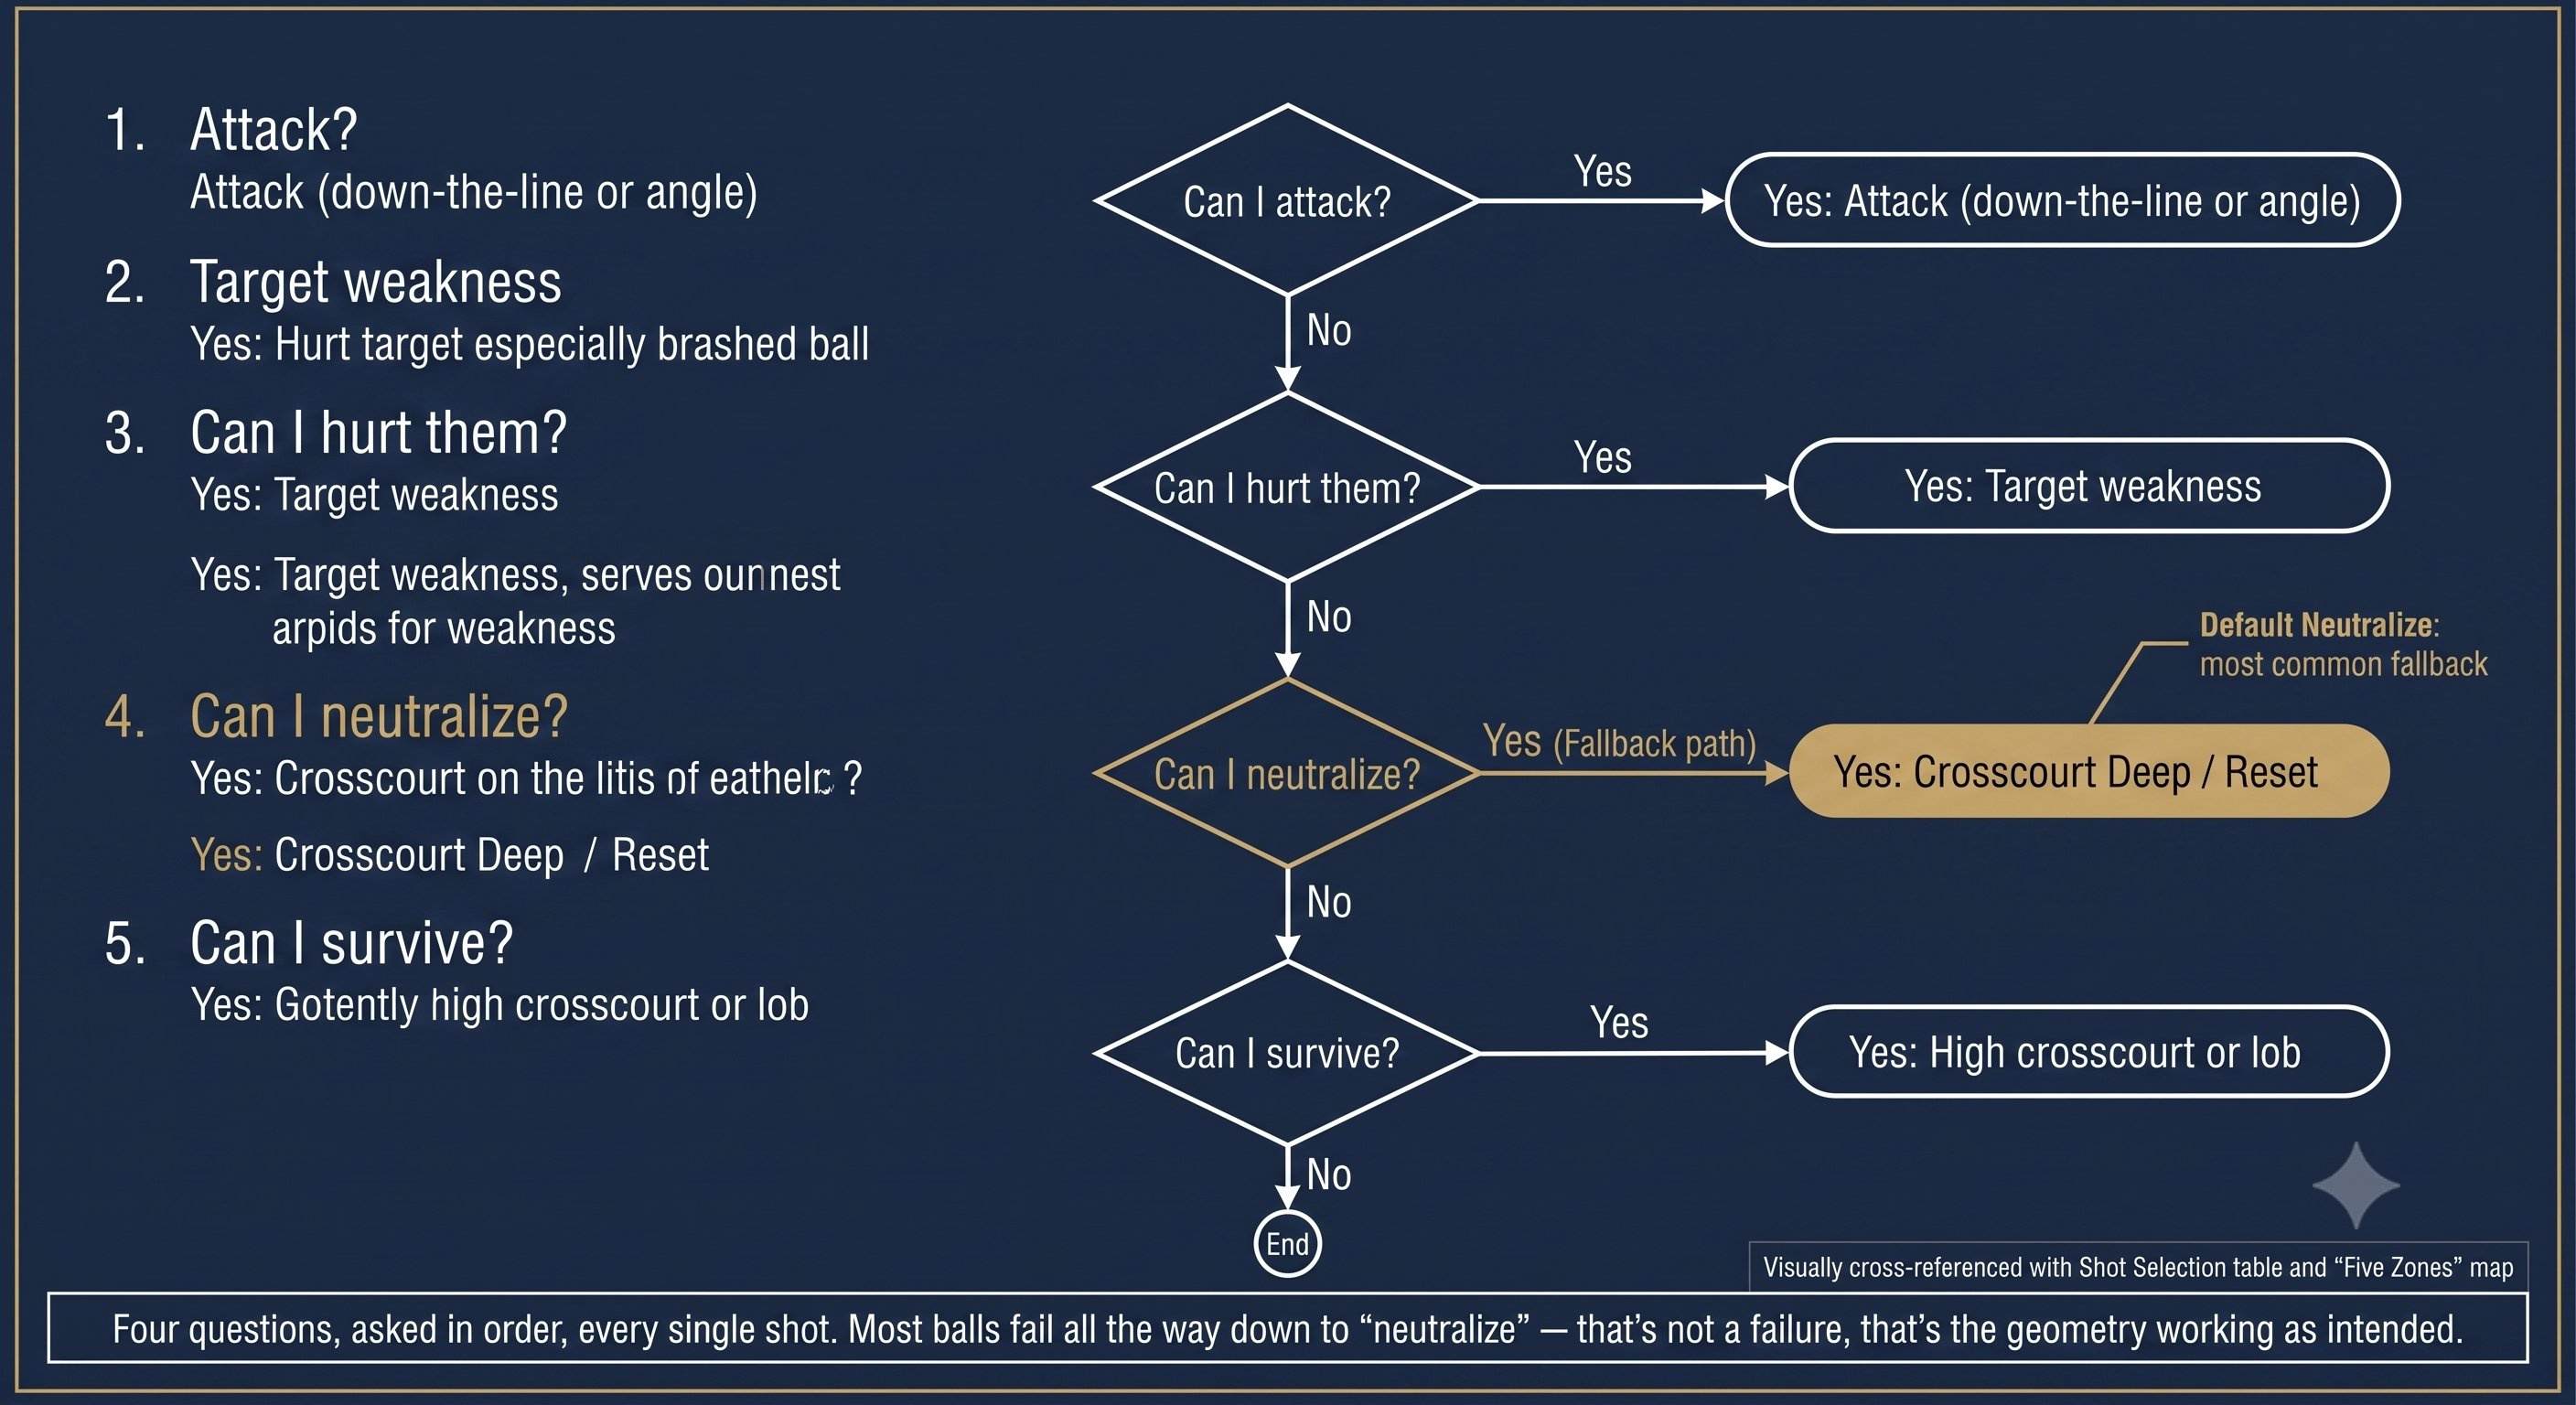
Court Geometry & Shot Selection — Figure 2
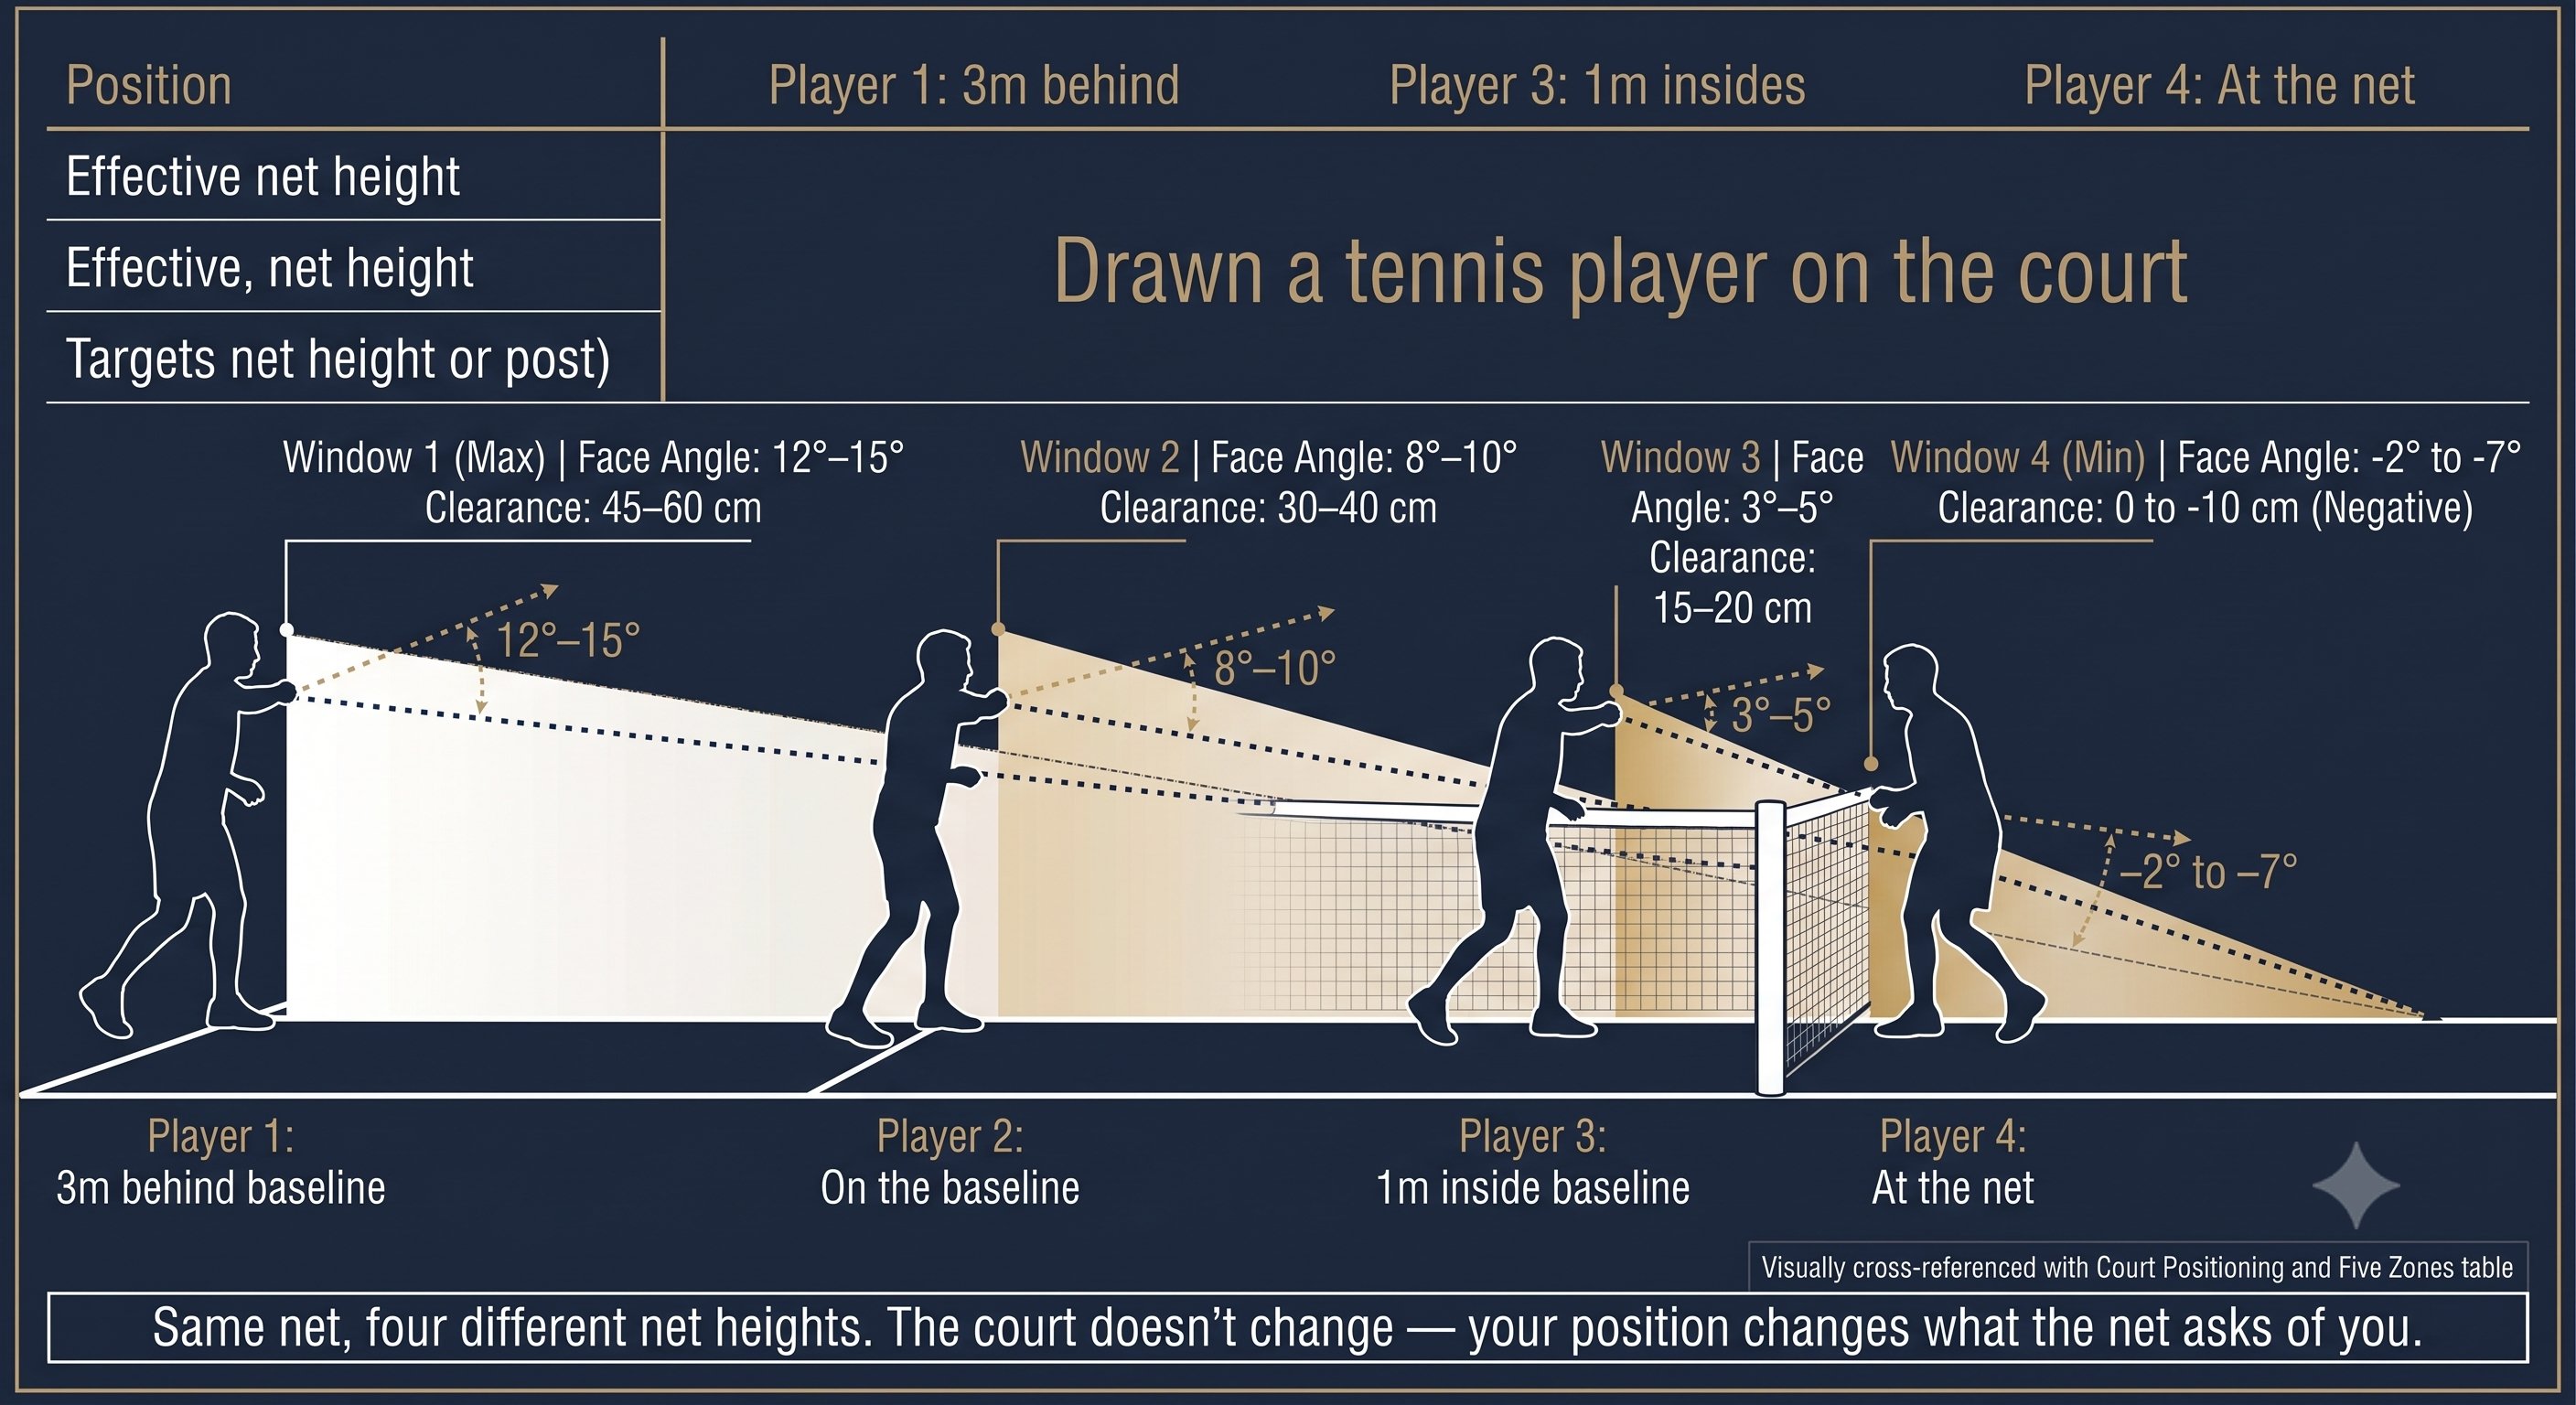
Court Geometry & Shot Selection — Figure 3
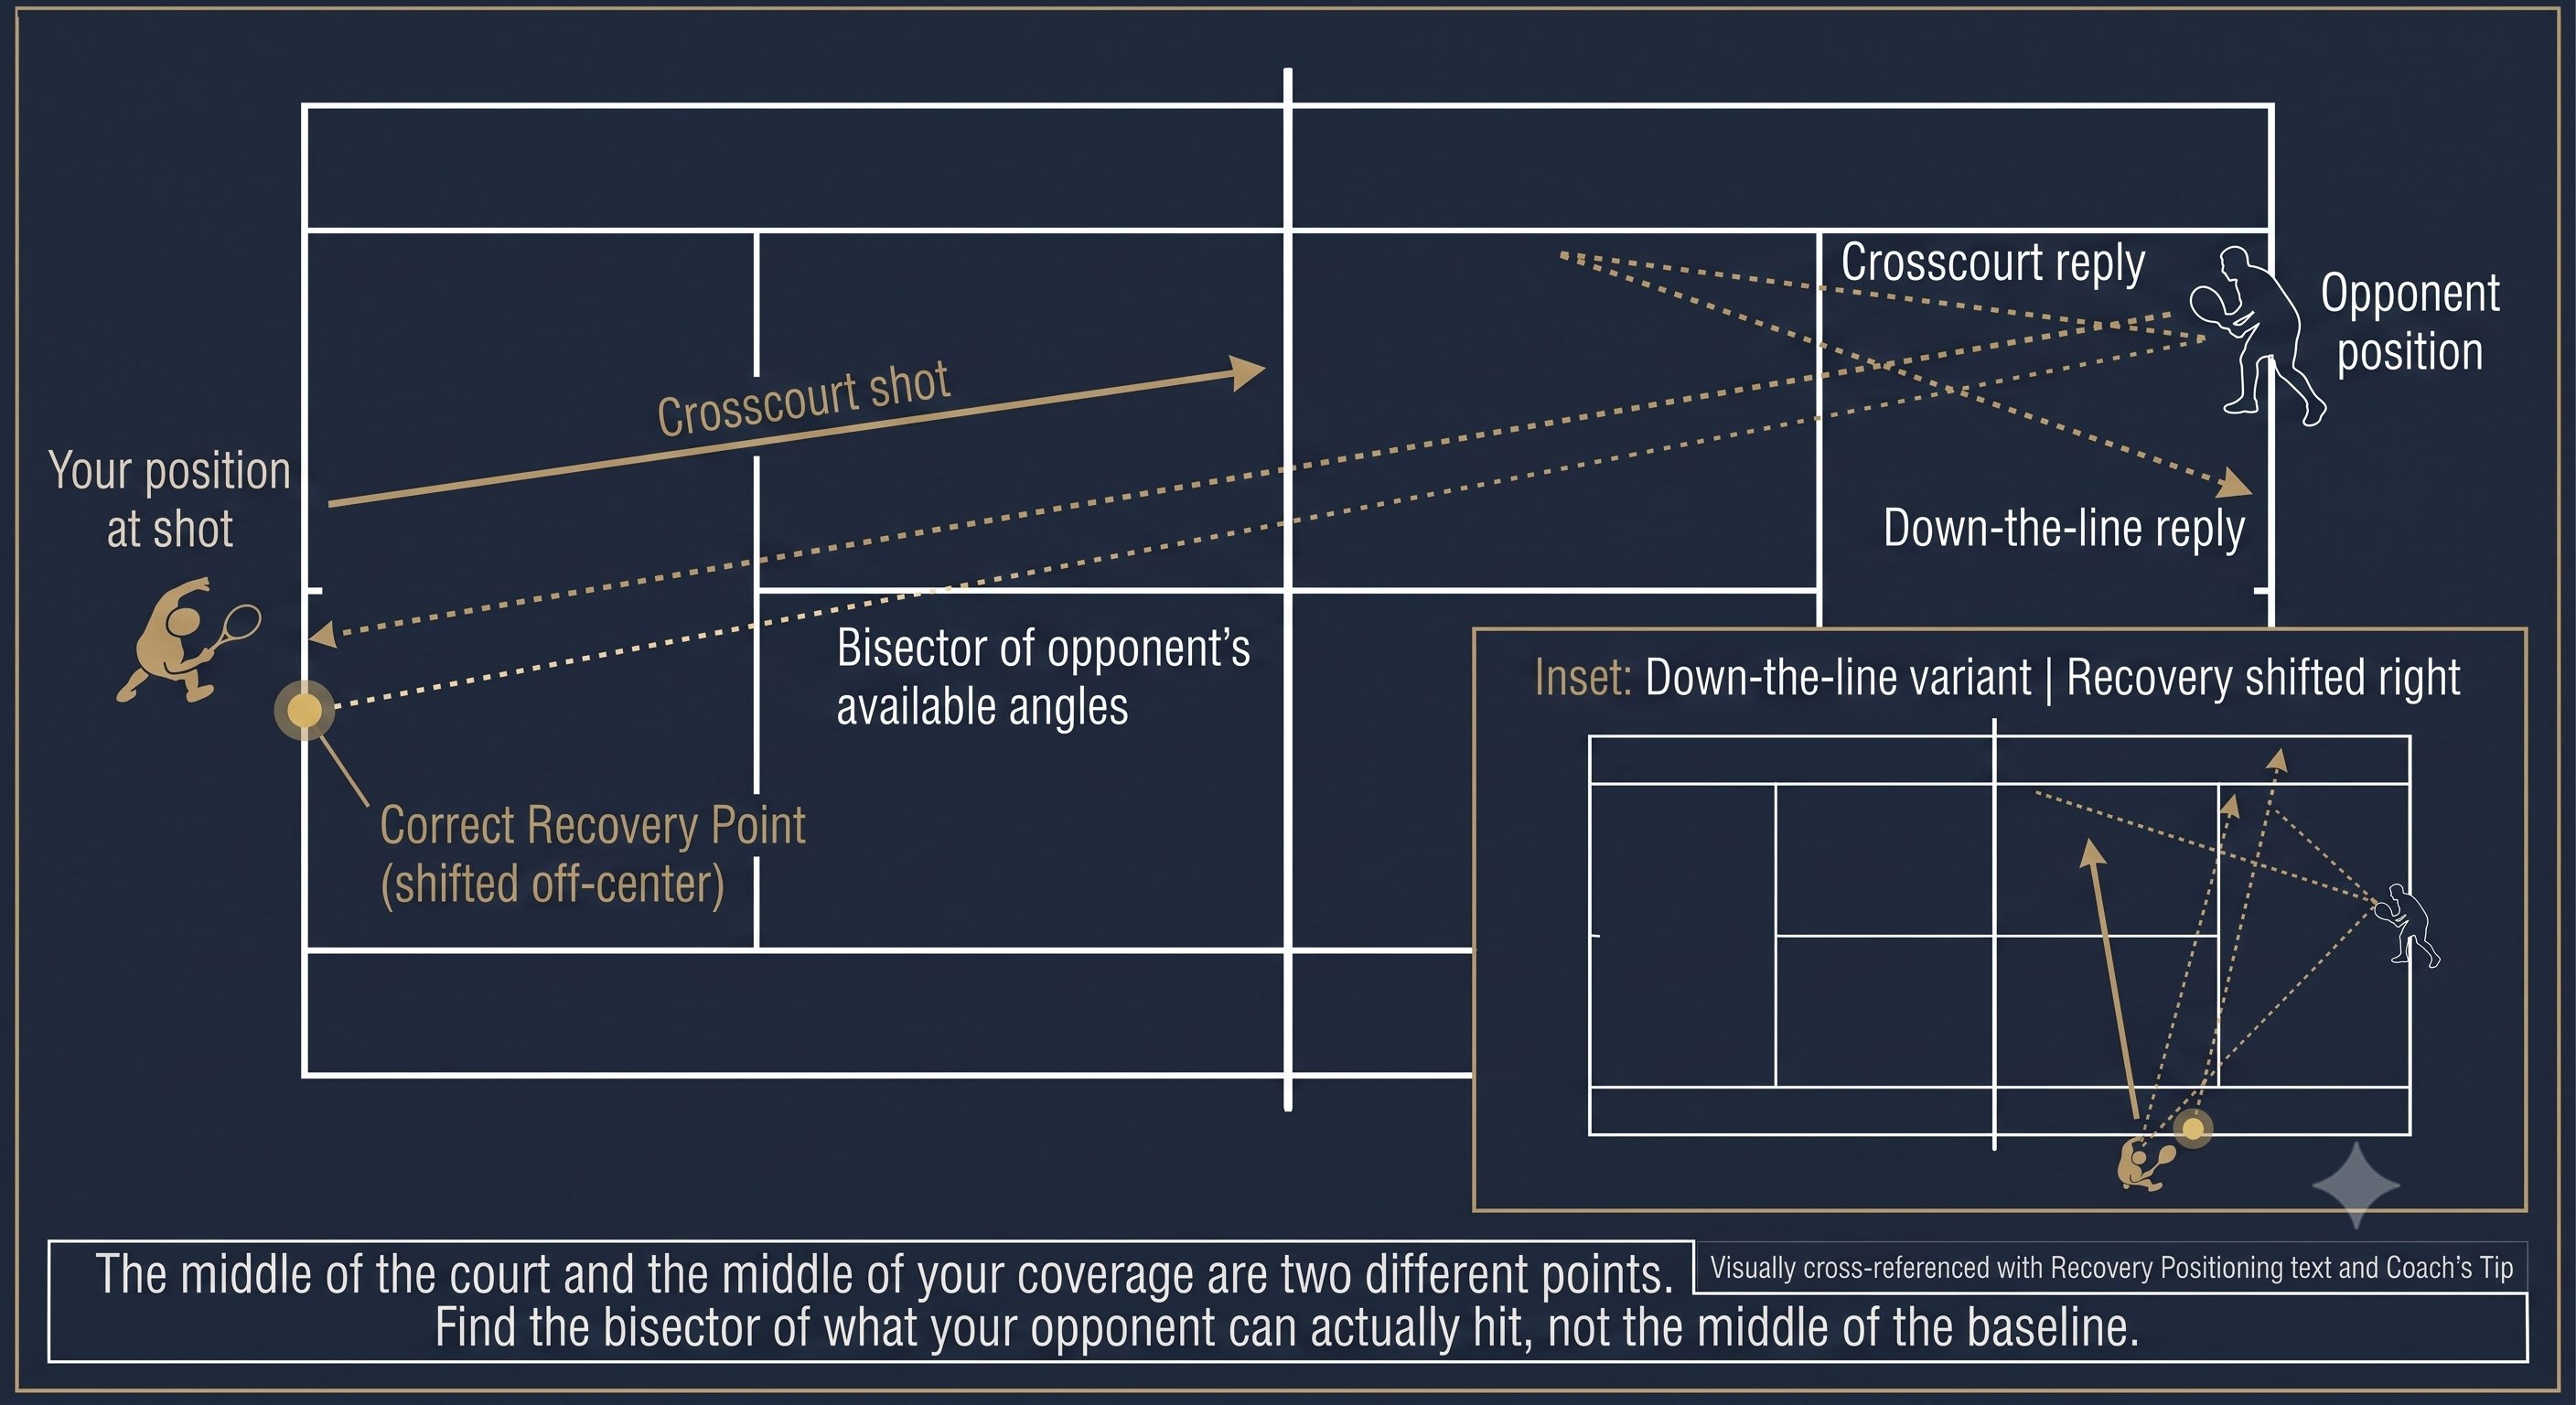
Court Geometry & Shot Selection — Figure 4
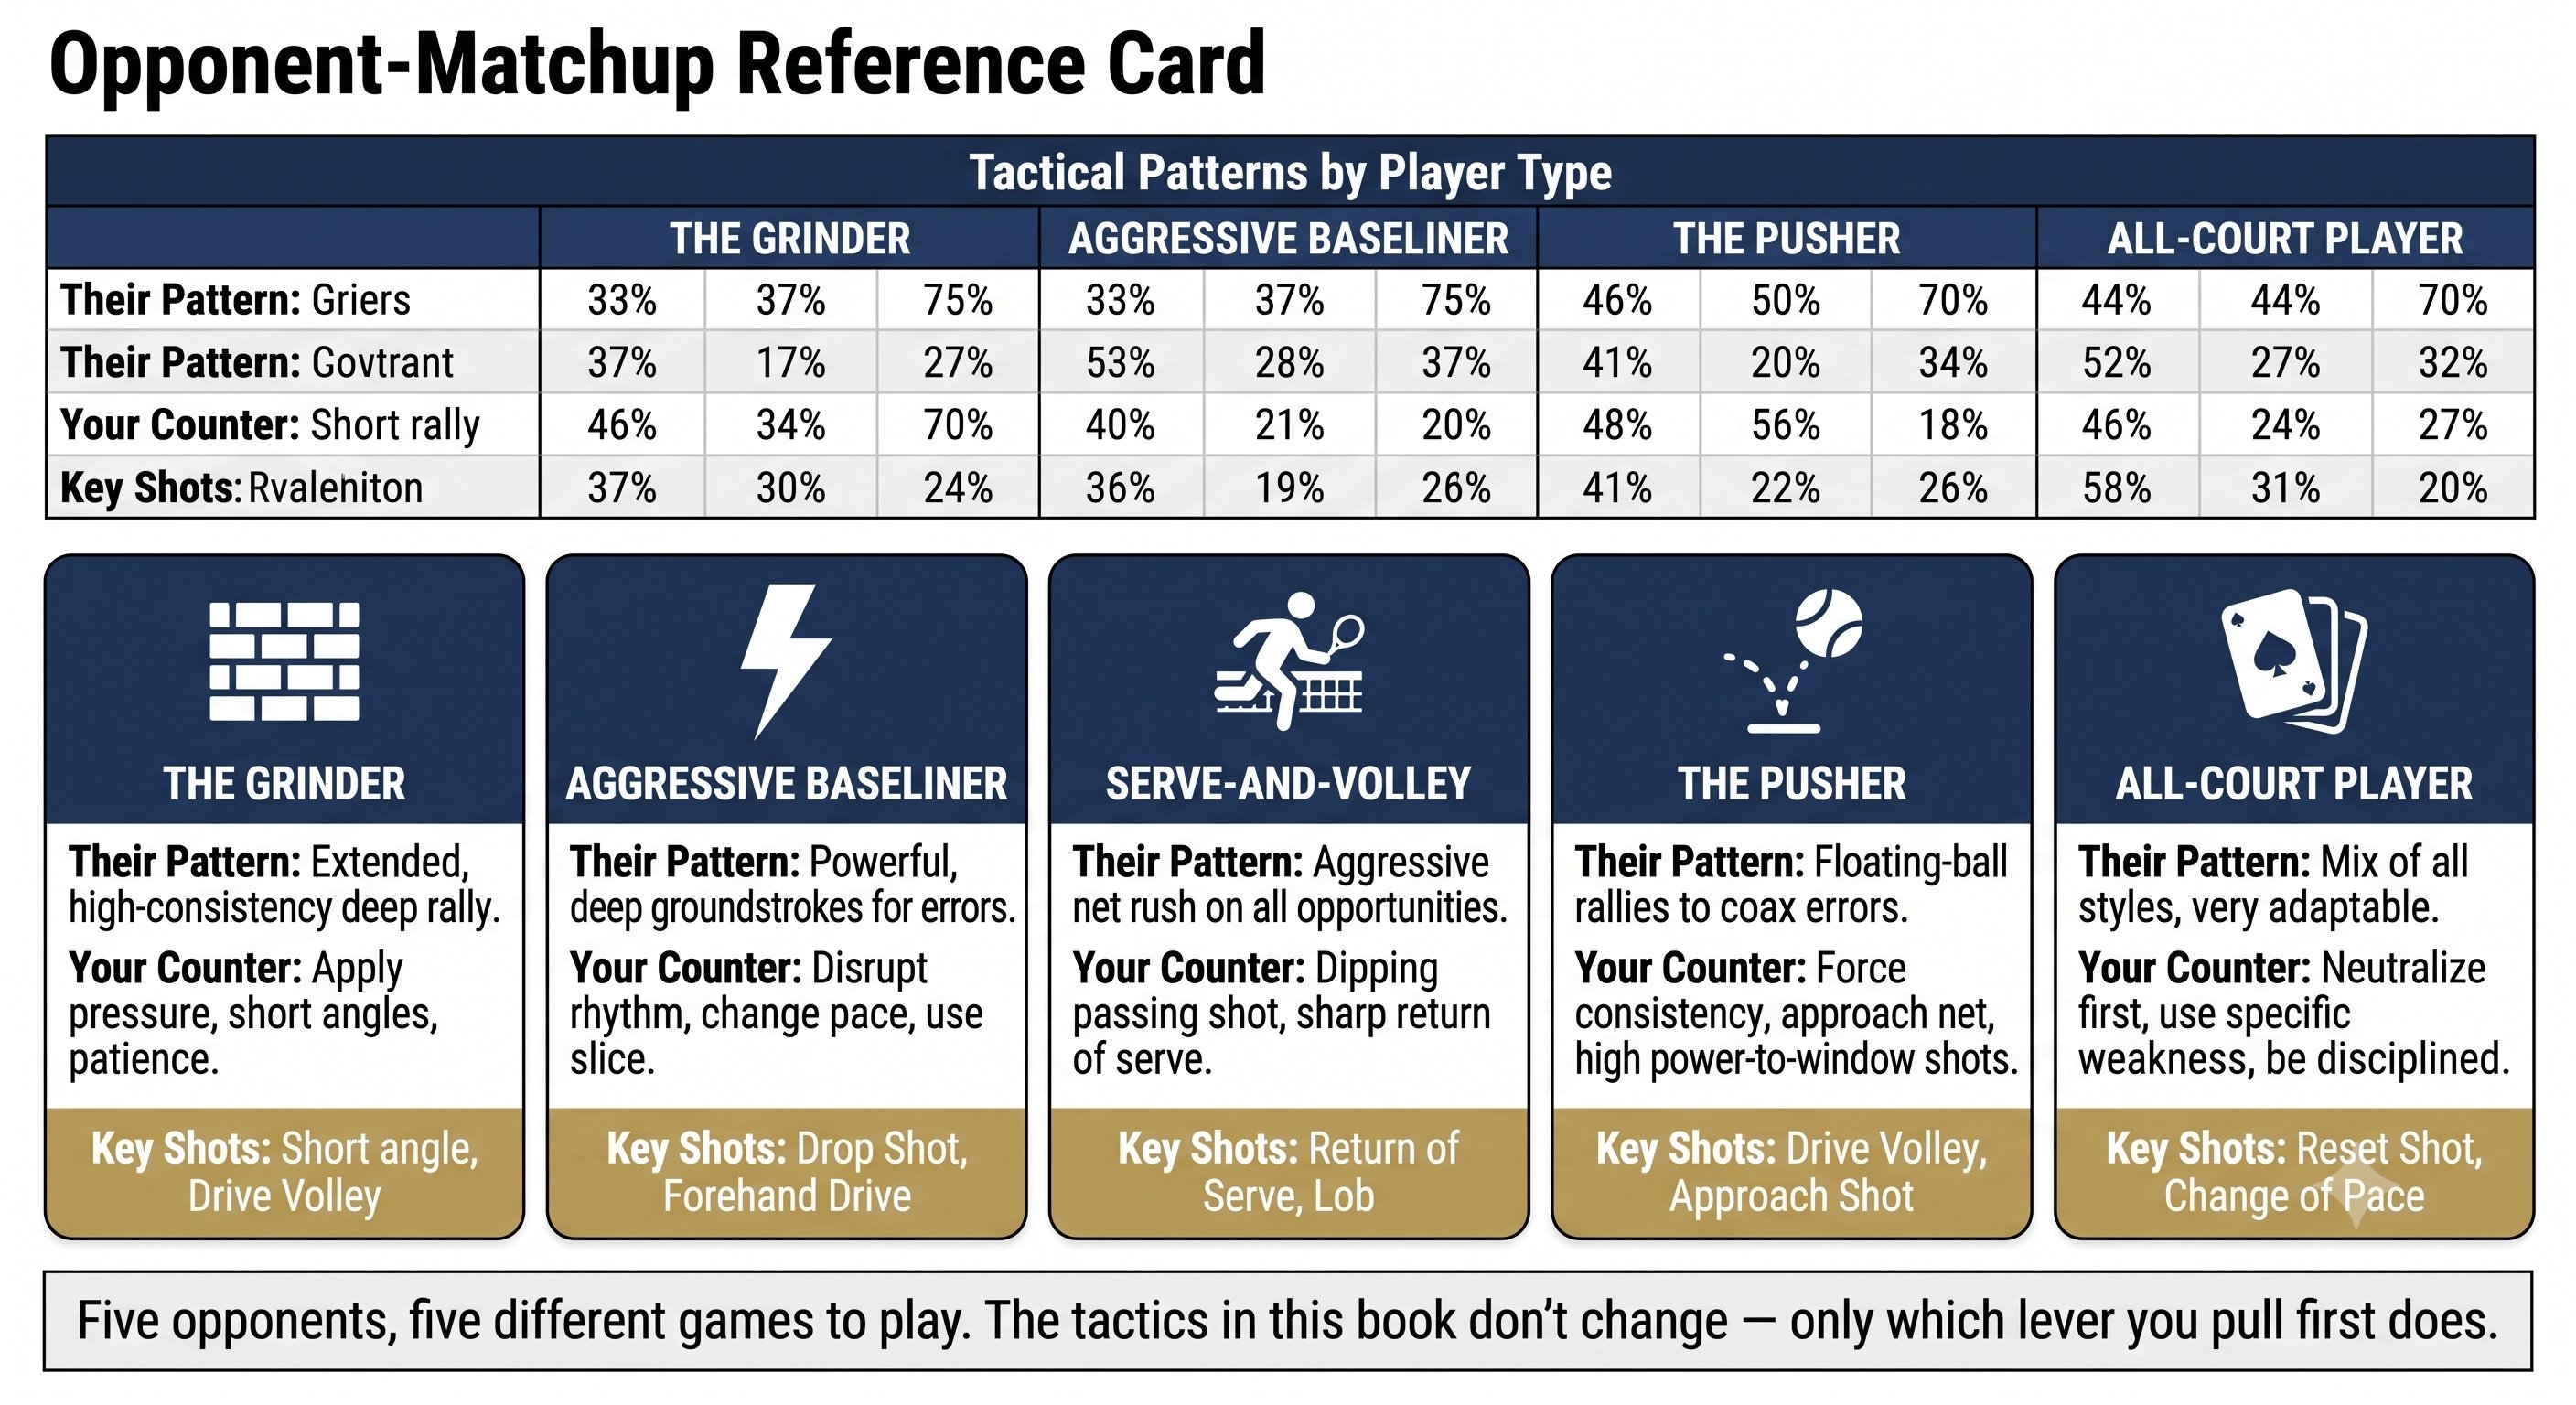
Court Geometry & Shot Selection — Figure 5
🎾 Backhand · Backhand ↑ back to topics
1H Saber, 2H Hybrid, integrated arm-racquet switching. Saber 1 tay, Hybrid 2 tay, chuyển đổi tay-vợt hợp nhất.
Chapter 20: 1H Backhand Saber 4 figures
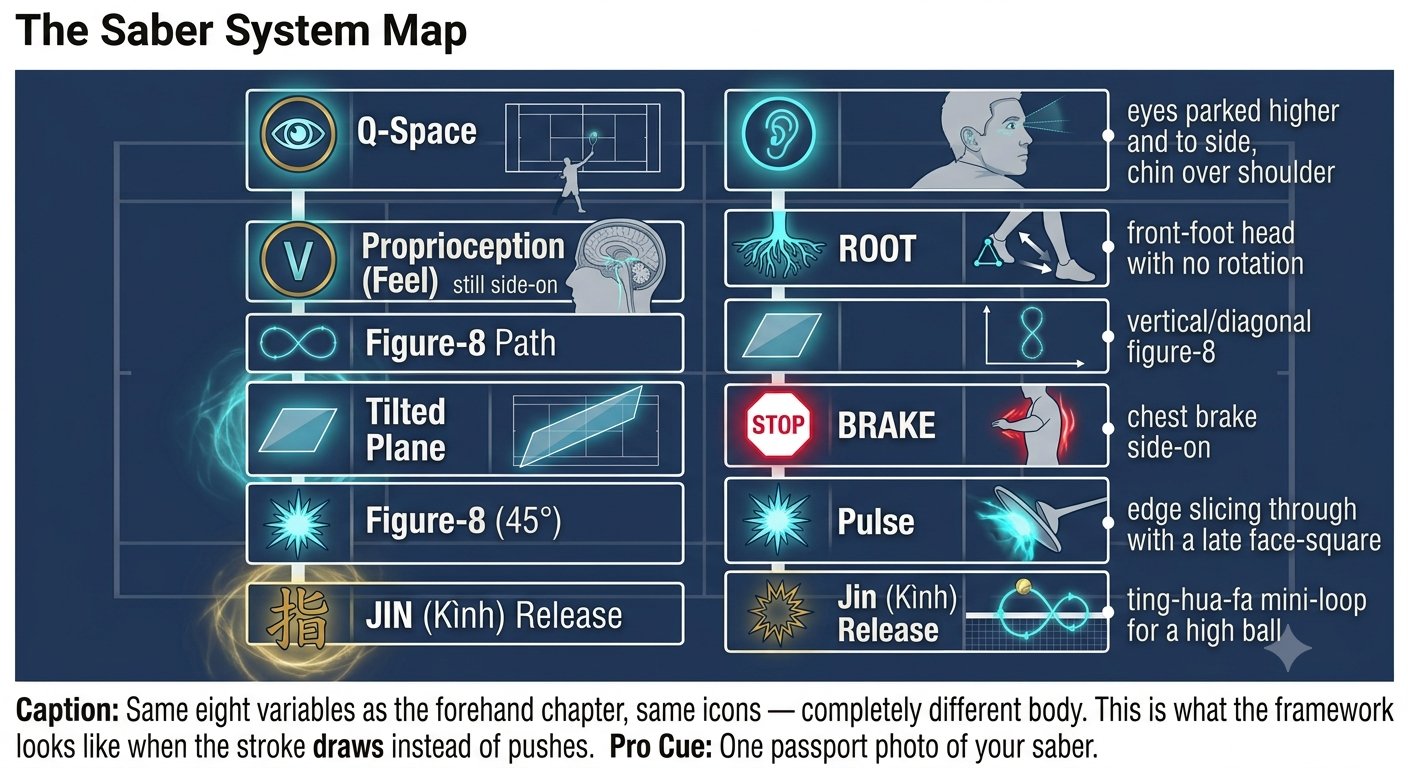
1H Backhand Saber — Figure 1
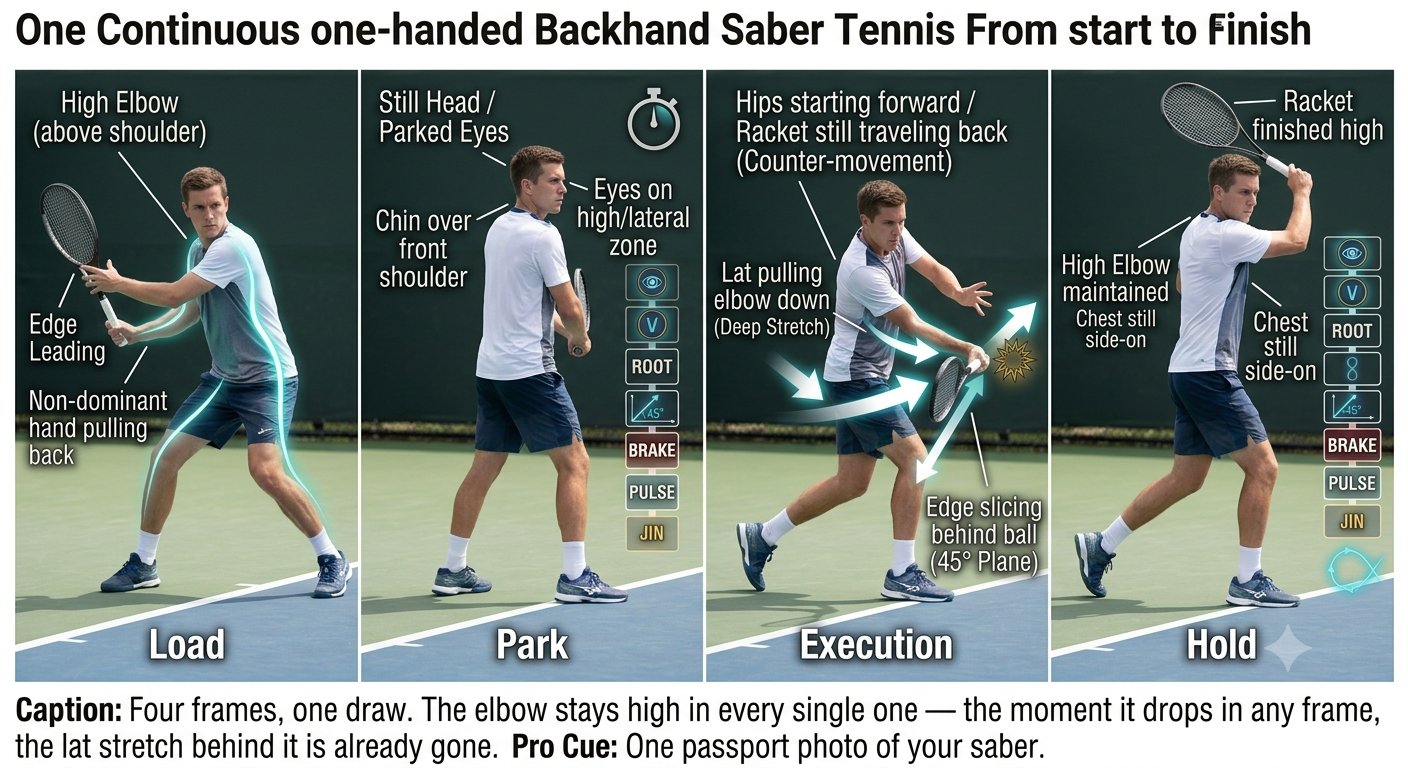
1H Backhand Saber — Figure 2
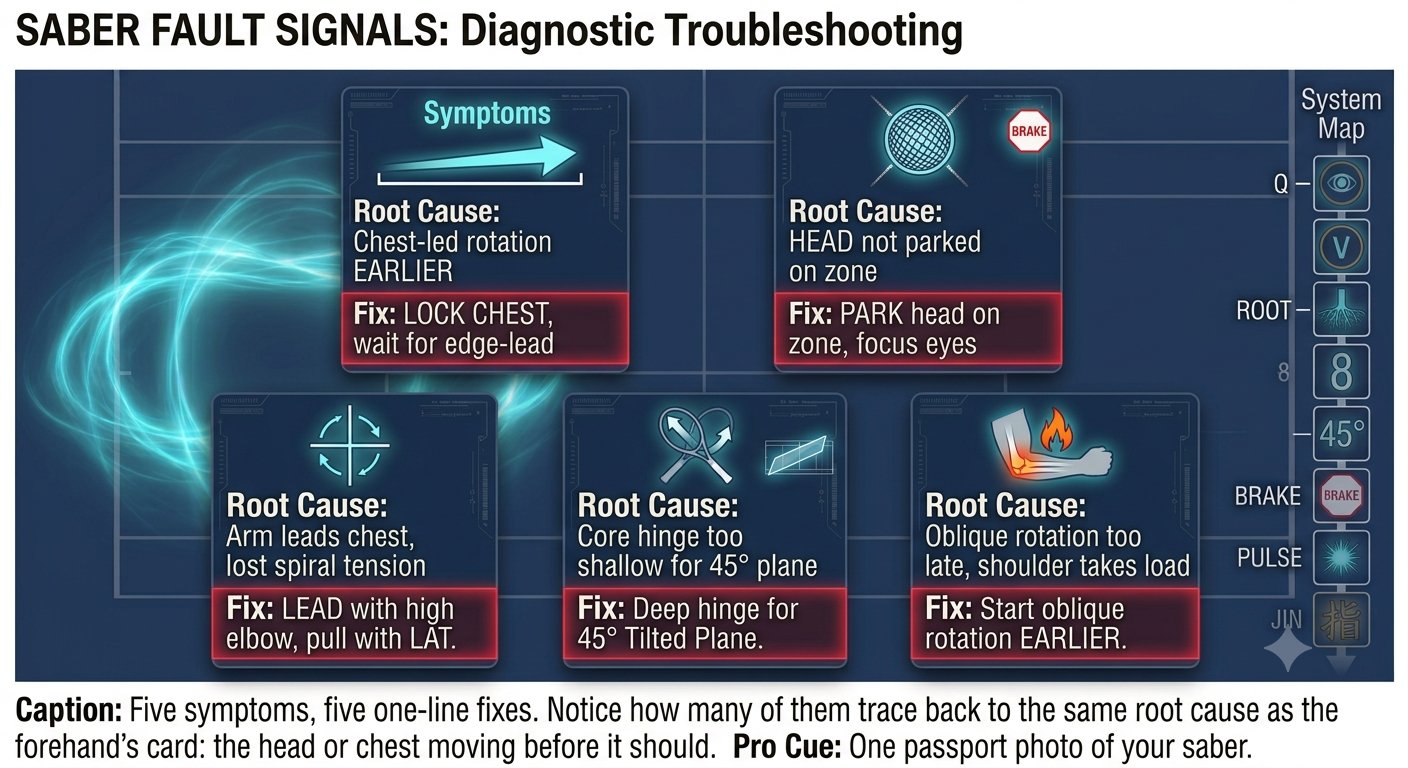
1H Backhand Saber — Figure 3
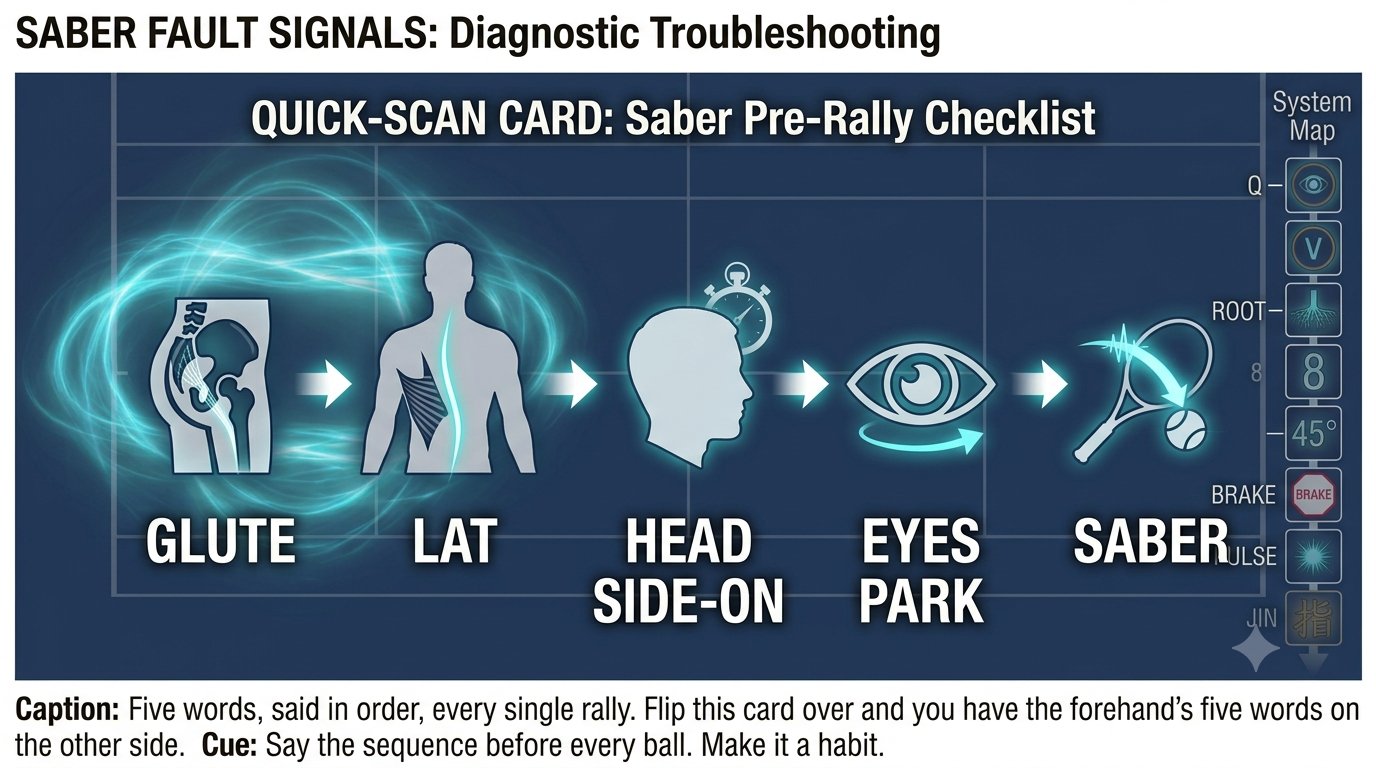
1H Backhand Saber — Figure 4
Chapter 21: 2H Backhand Hybrid 4 figures
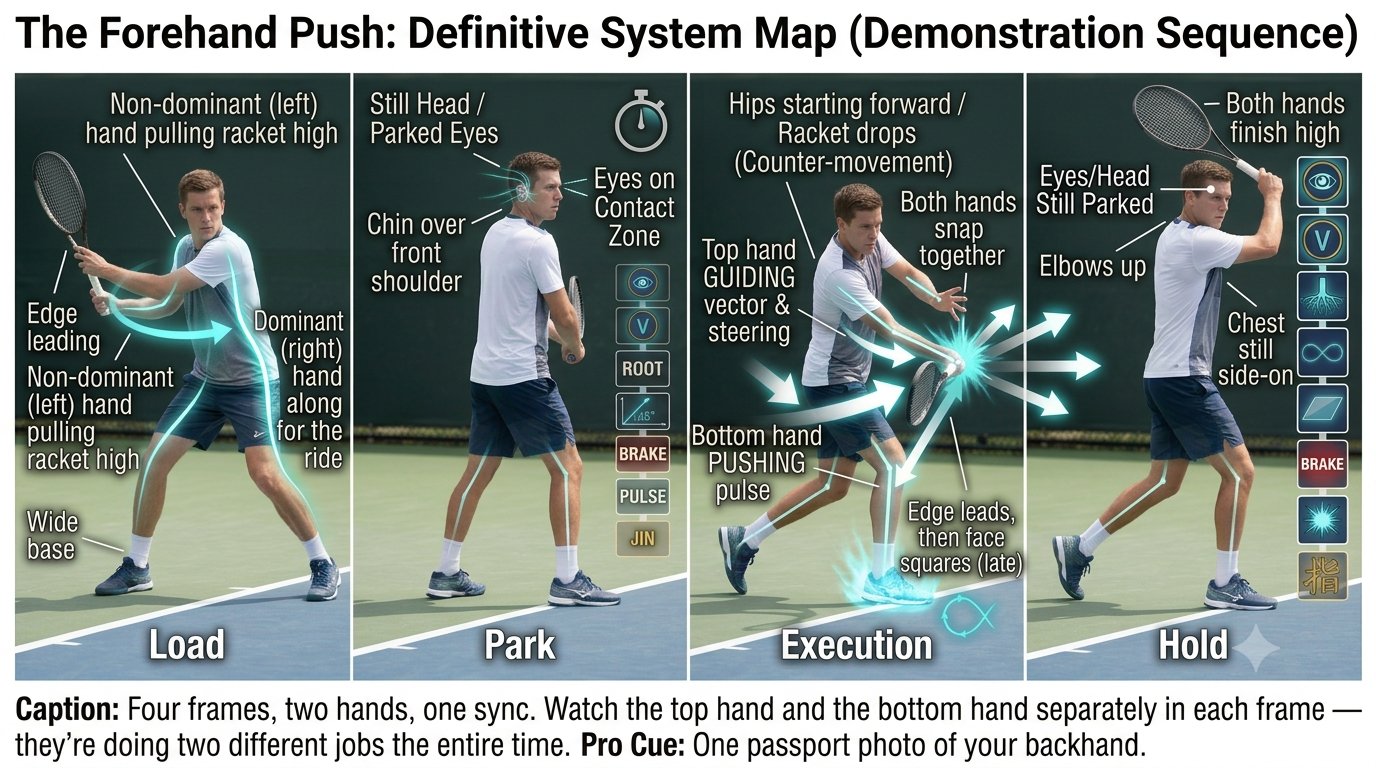
2H Backhand Hybrid — Figure 1
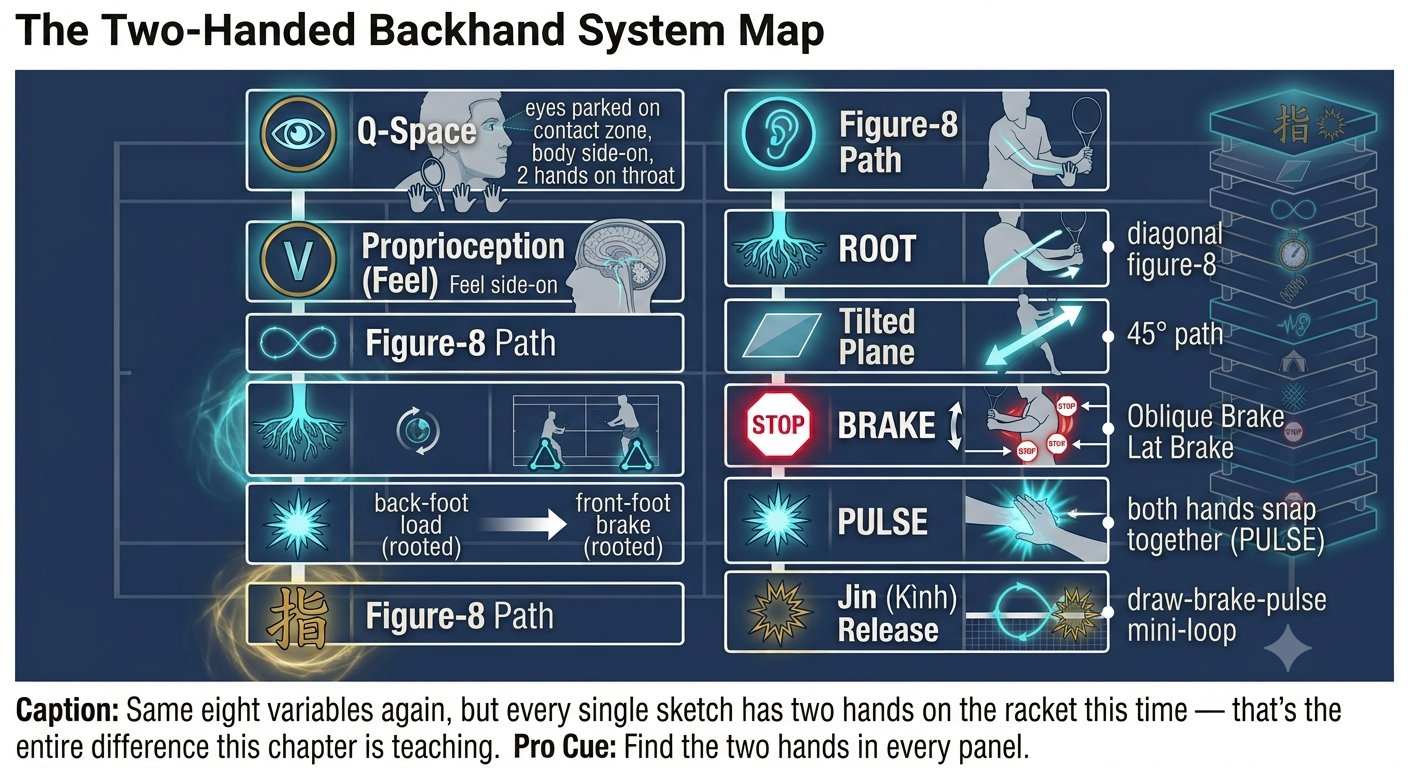
2H Backhand Hybrid — Figure 2
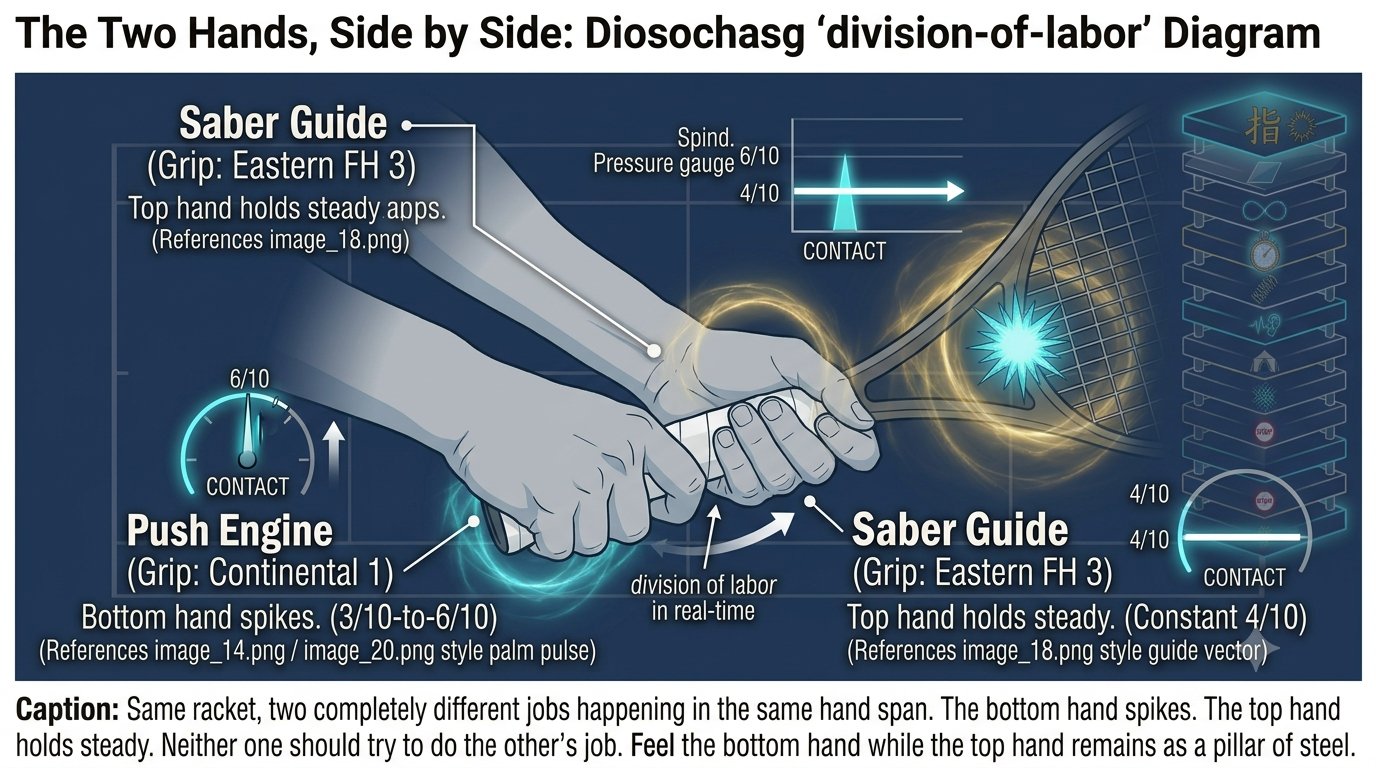
2H Backhand Hybrid — Figure 3
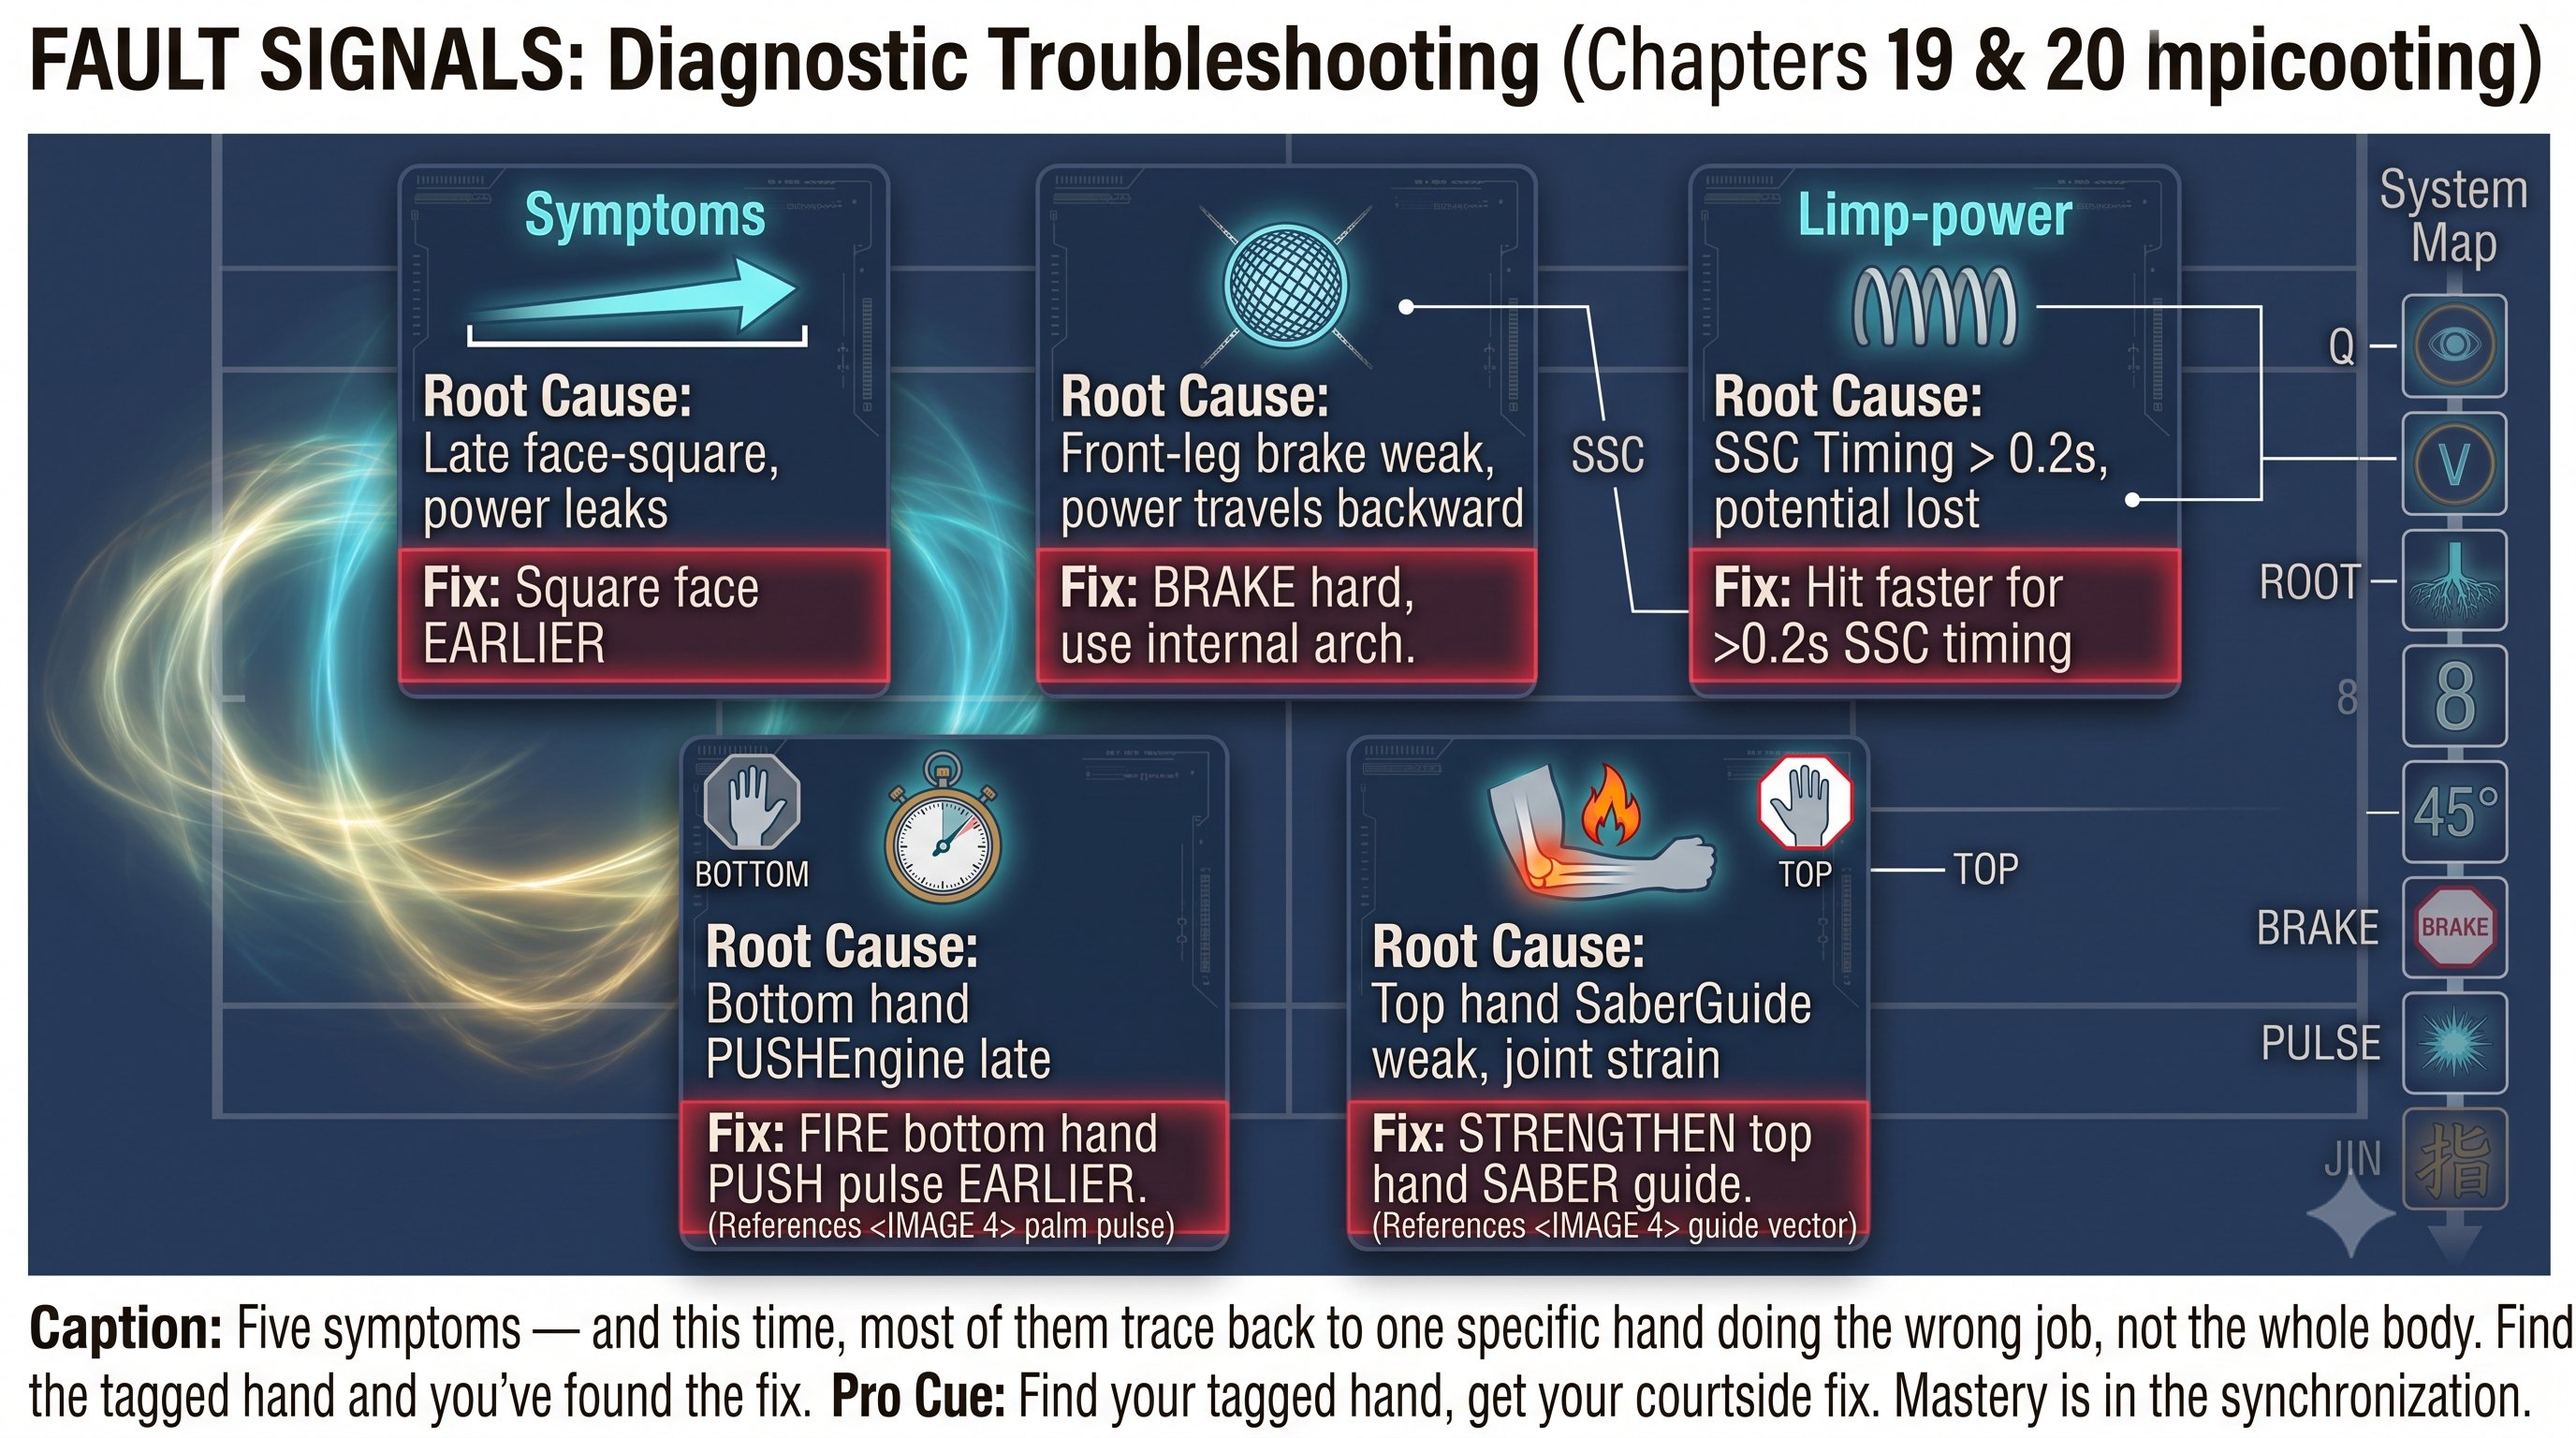
2H Backhand Hybrid — Figure 4
⚡ Serve · Giao bóng ↑ back to topics
Serve Mechanics, Return of Serve, kinetic chain, racquet head path. Cơ học giao bóng, đỡ giao bóng, chuỗi động học, quỹ đạo đầu vợt.
Chapter 22: Serve Mechanics 5 figures
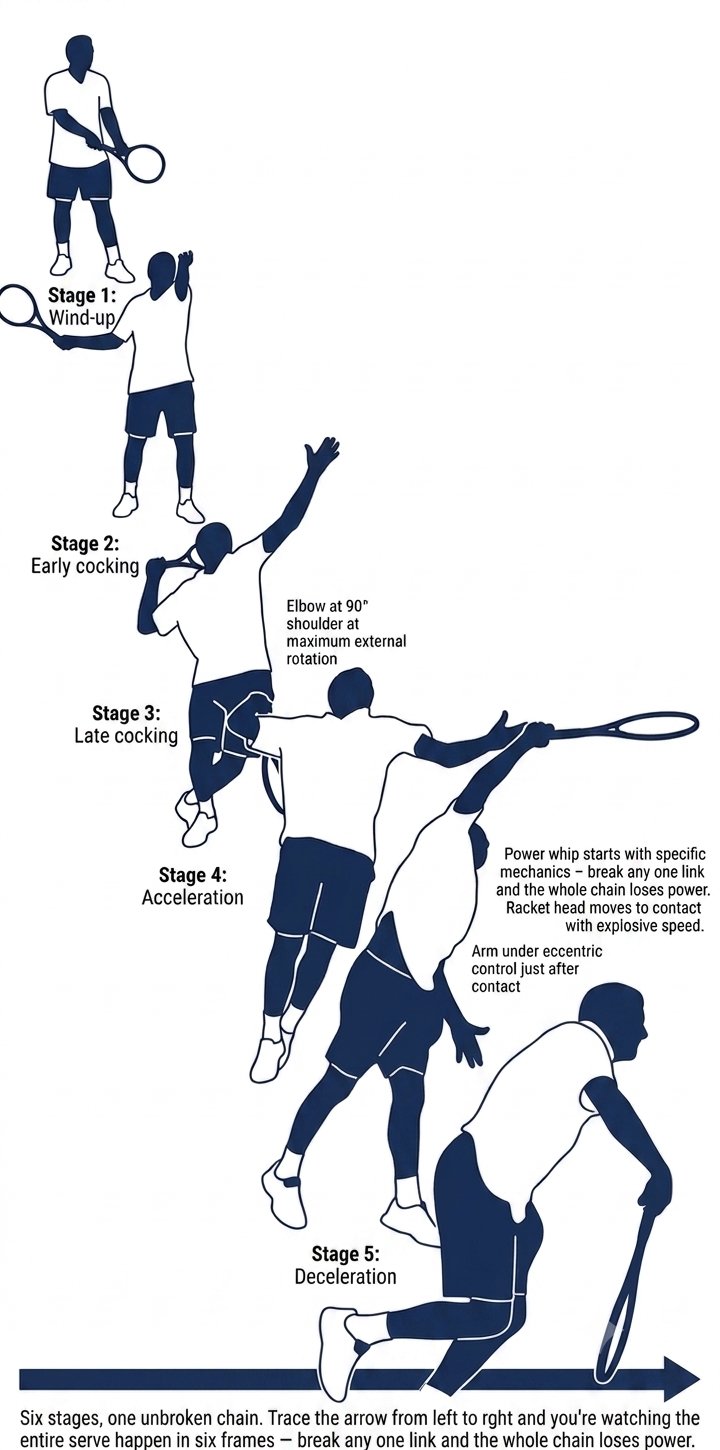
Serve Mechanics — Figure 1
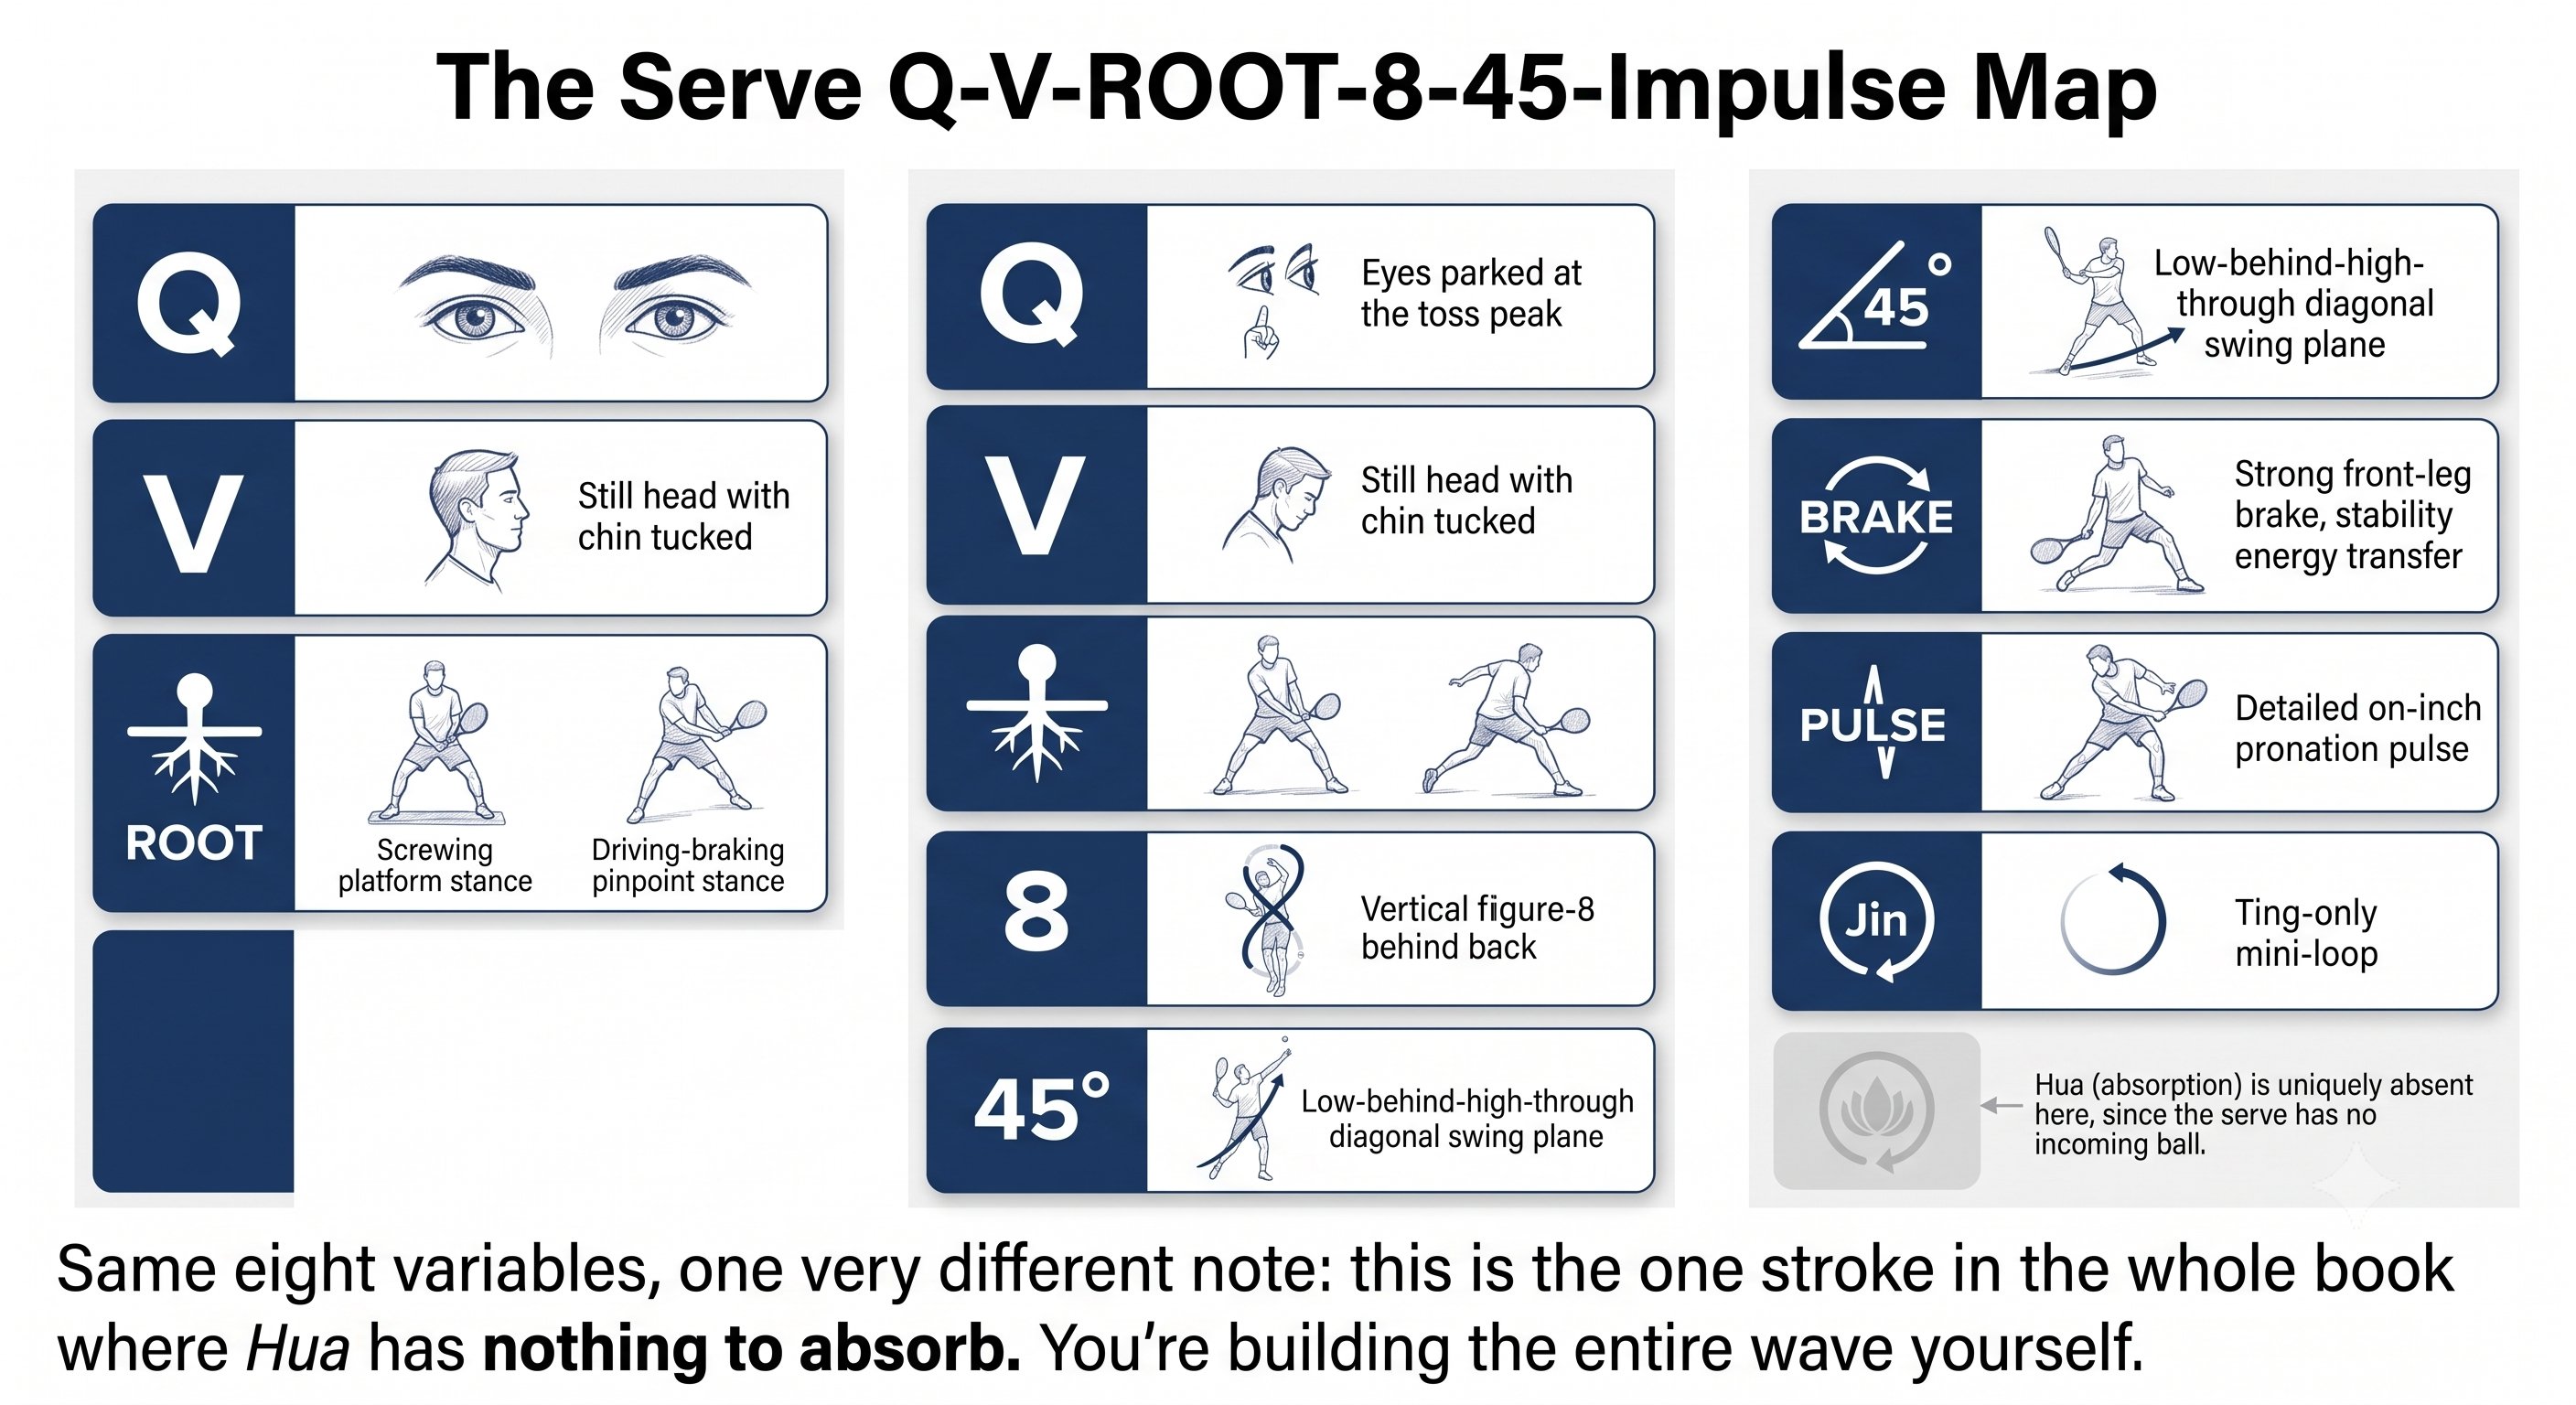
Serve Mechanics — Figure 2
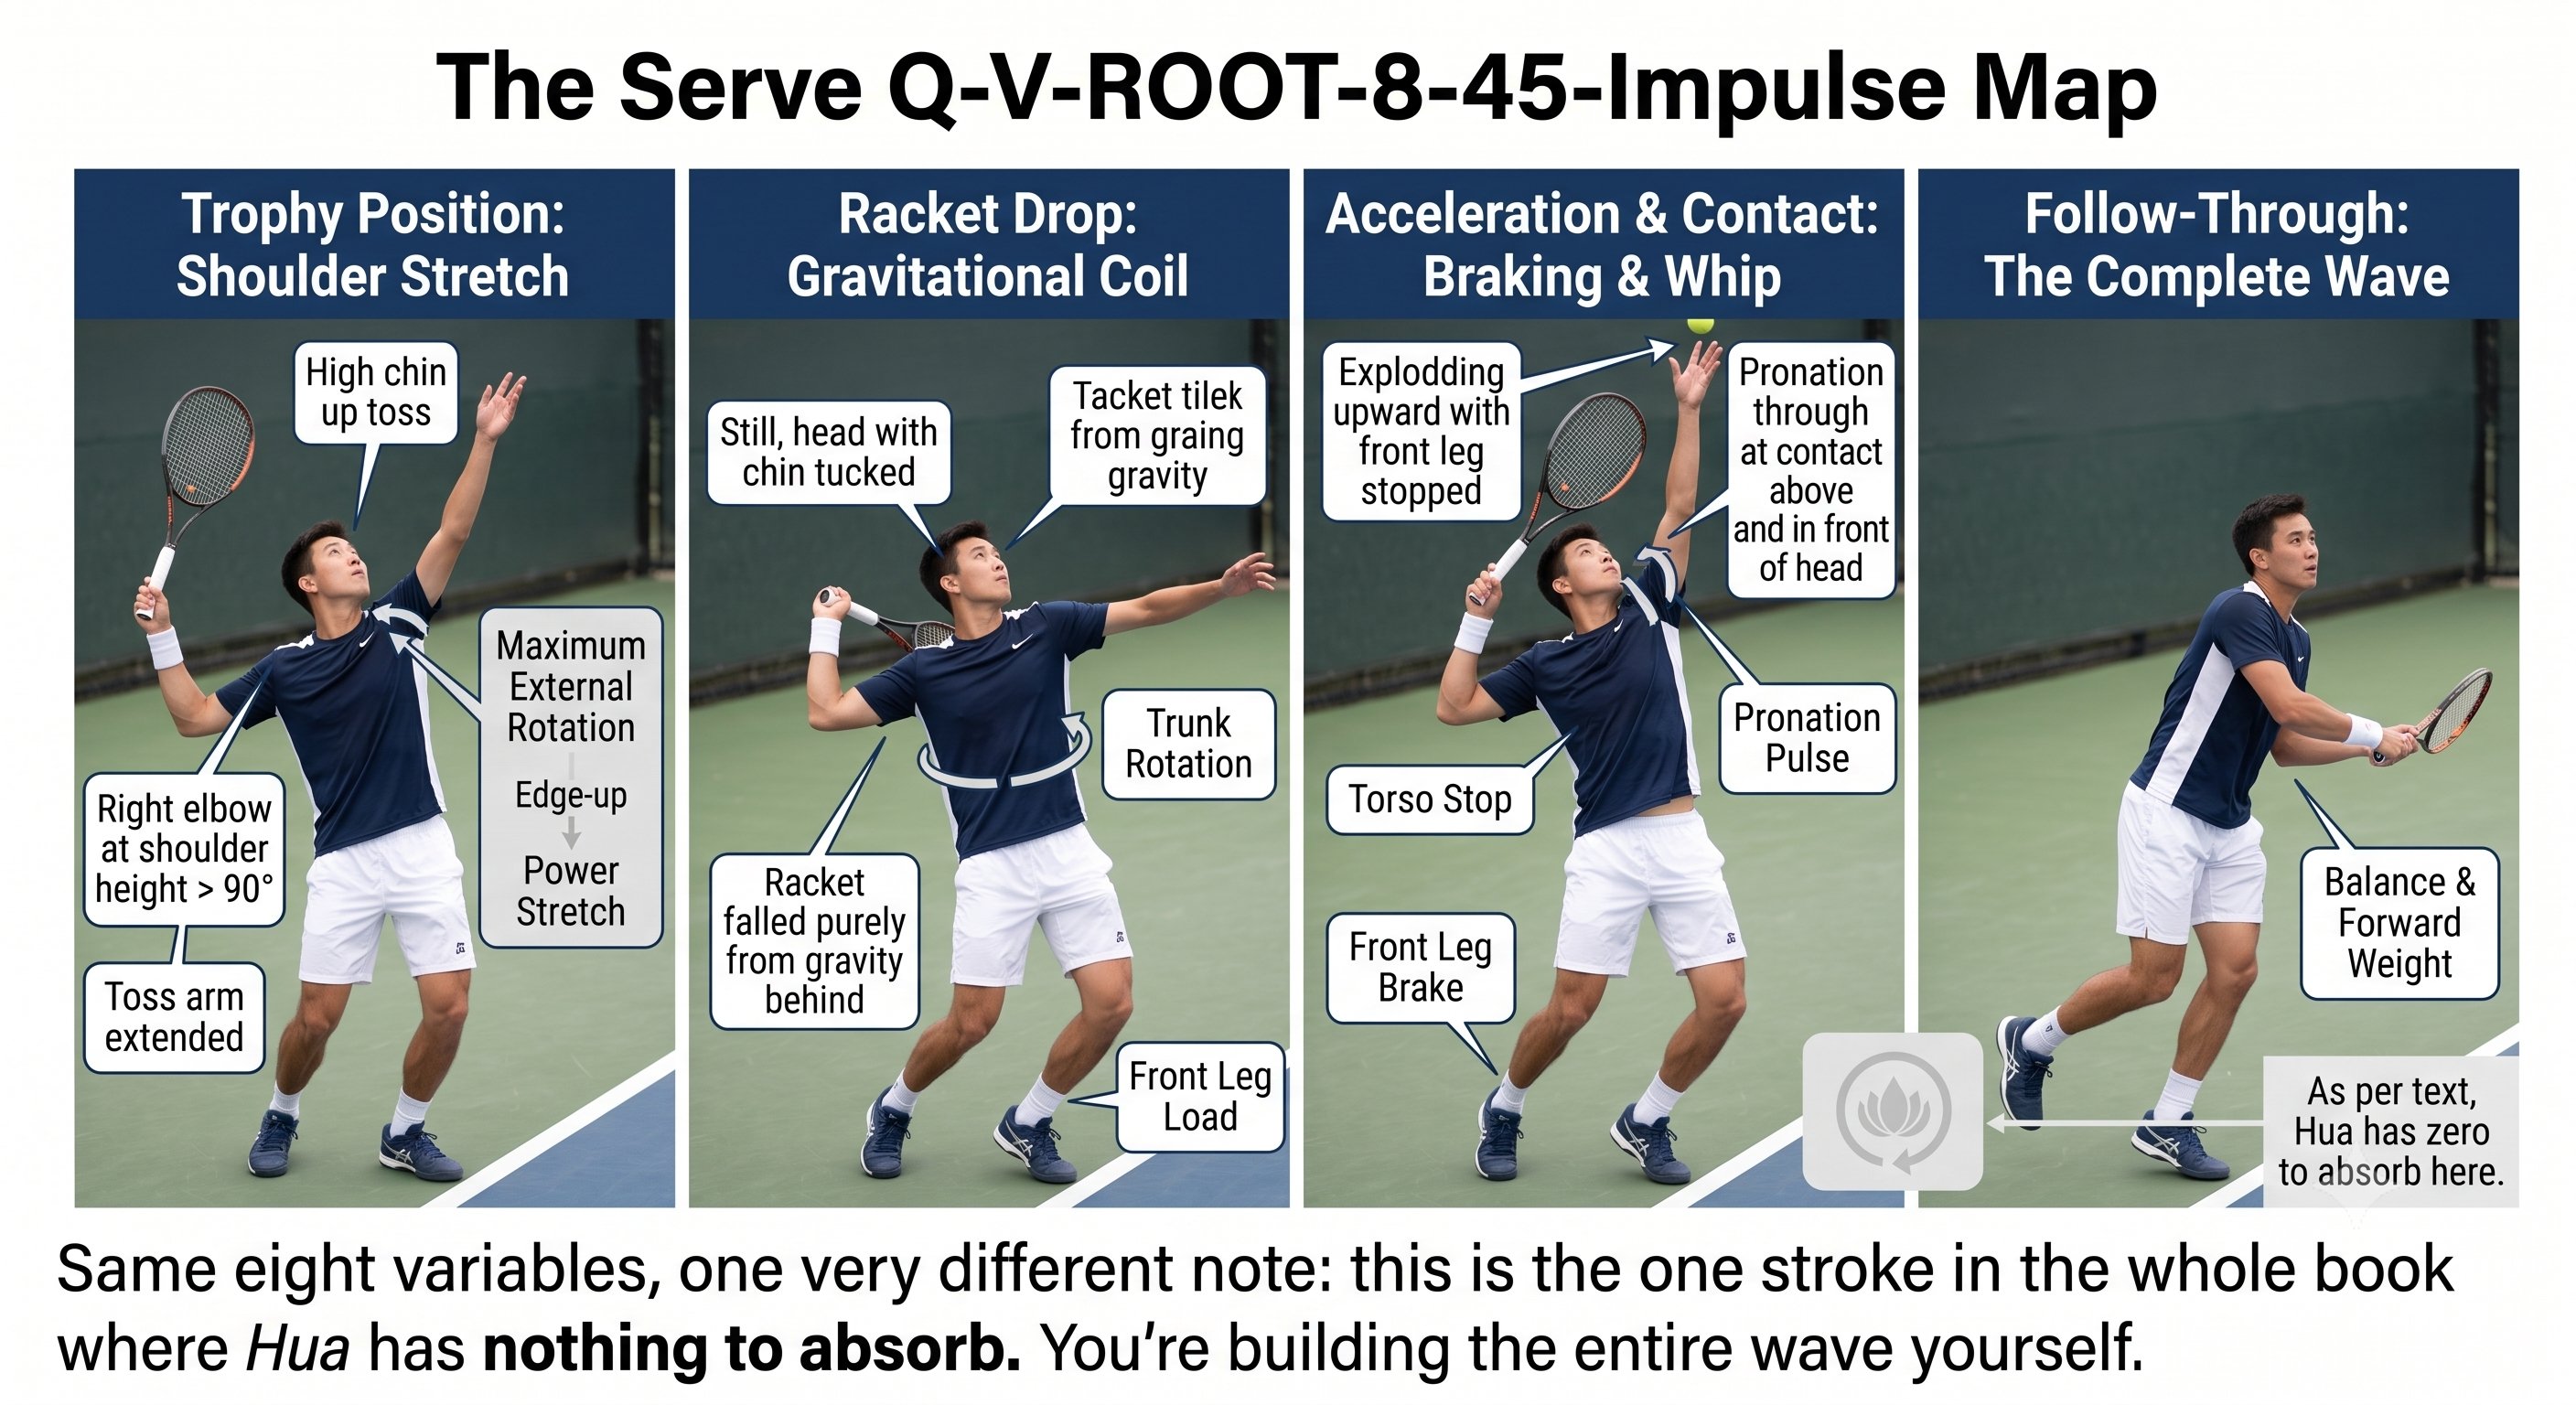
Serve Mechanics — Figure 3
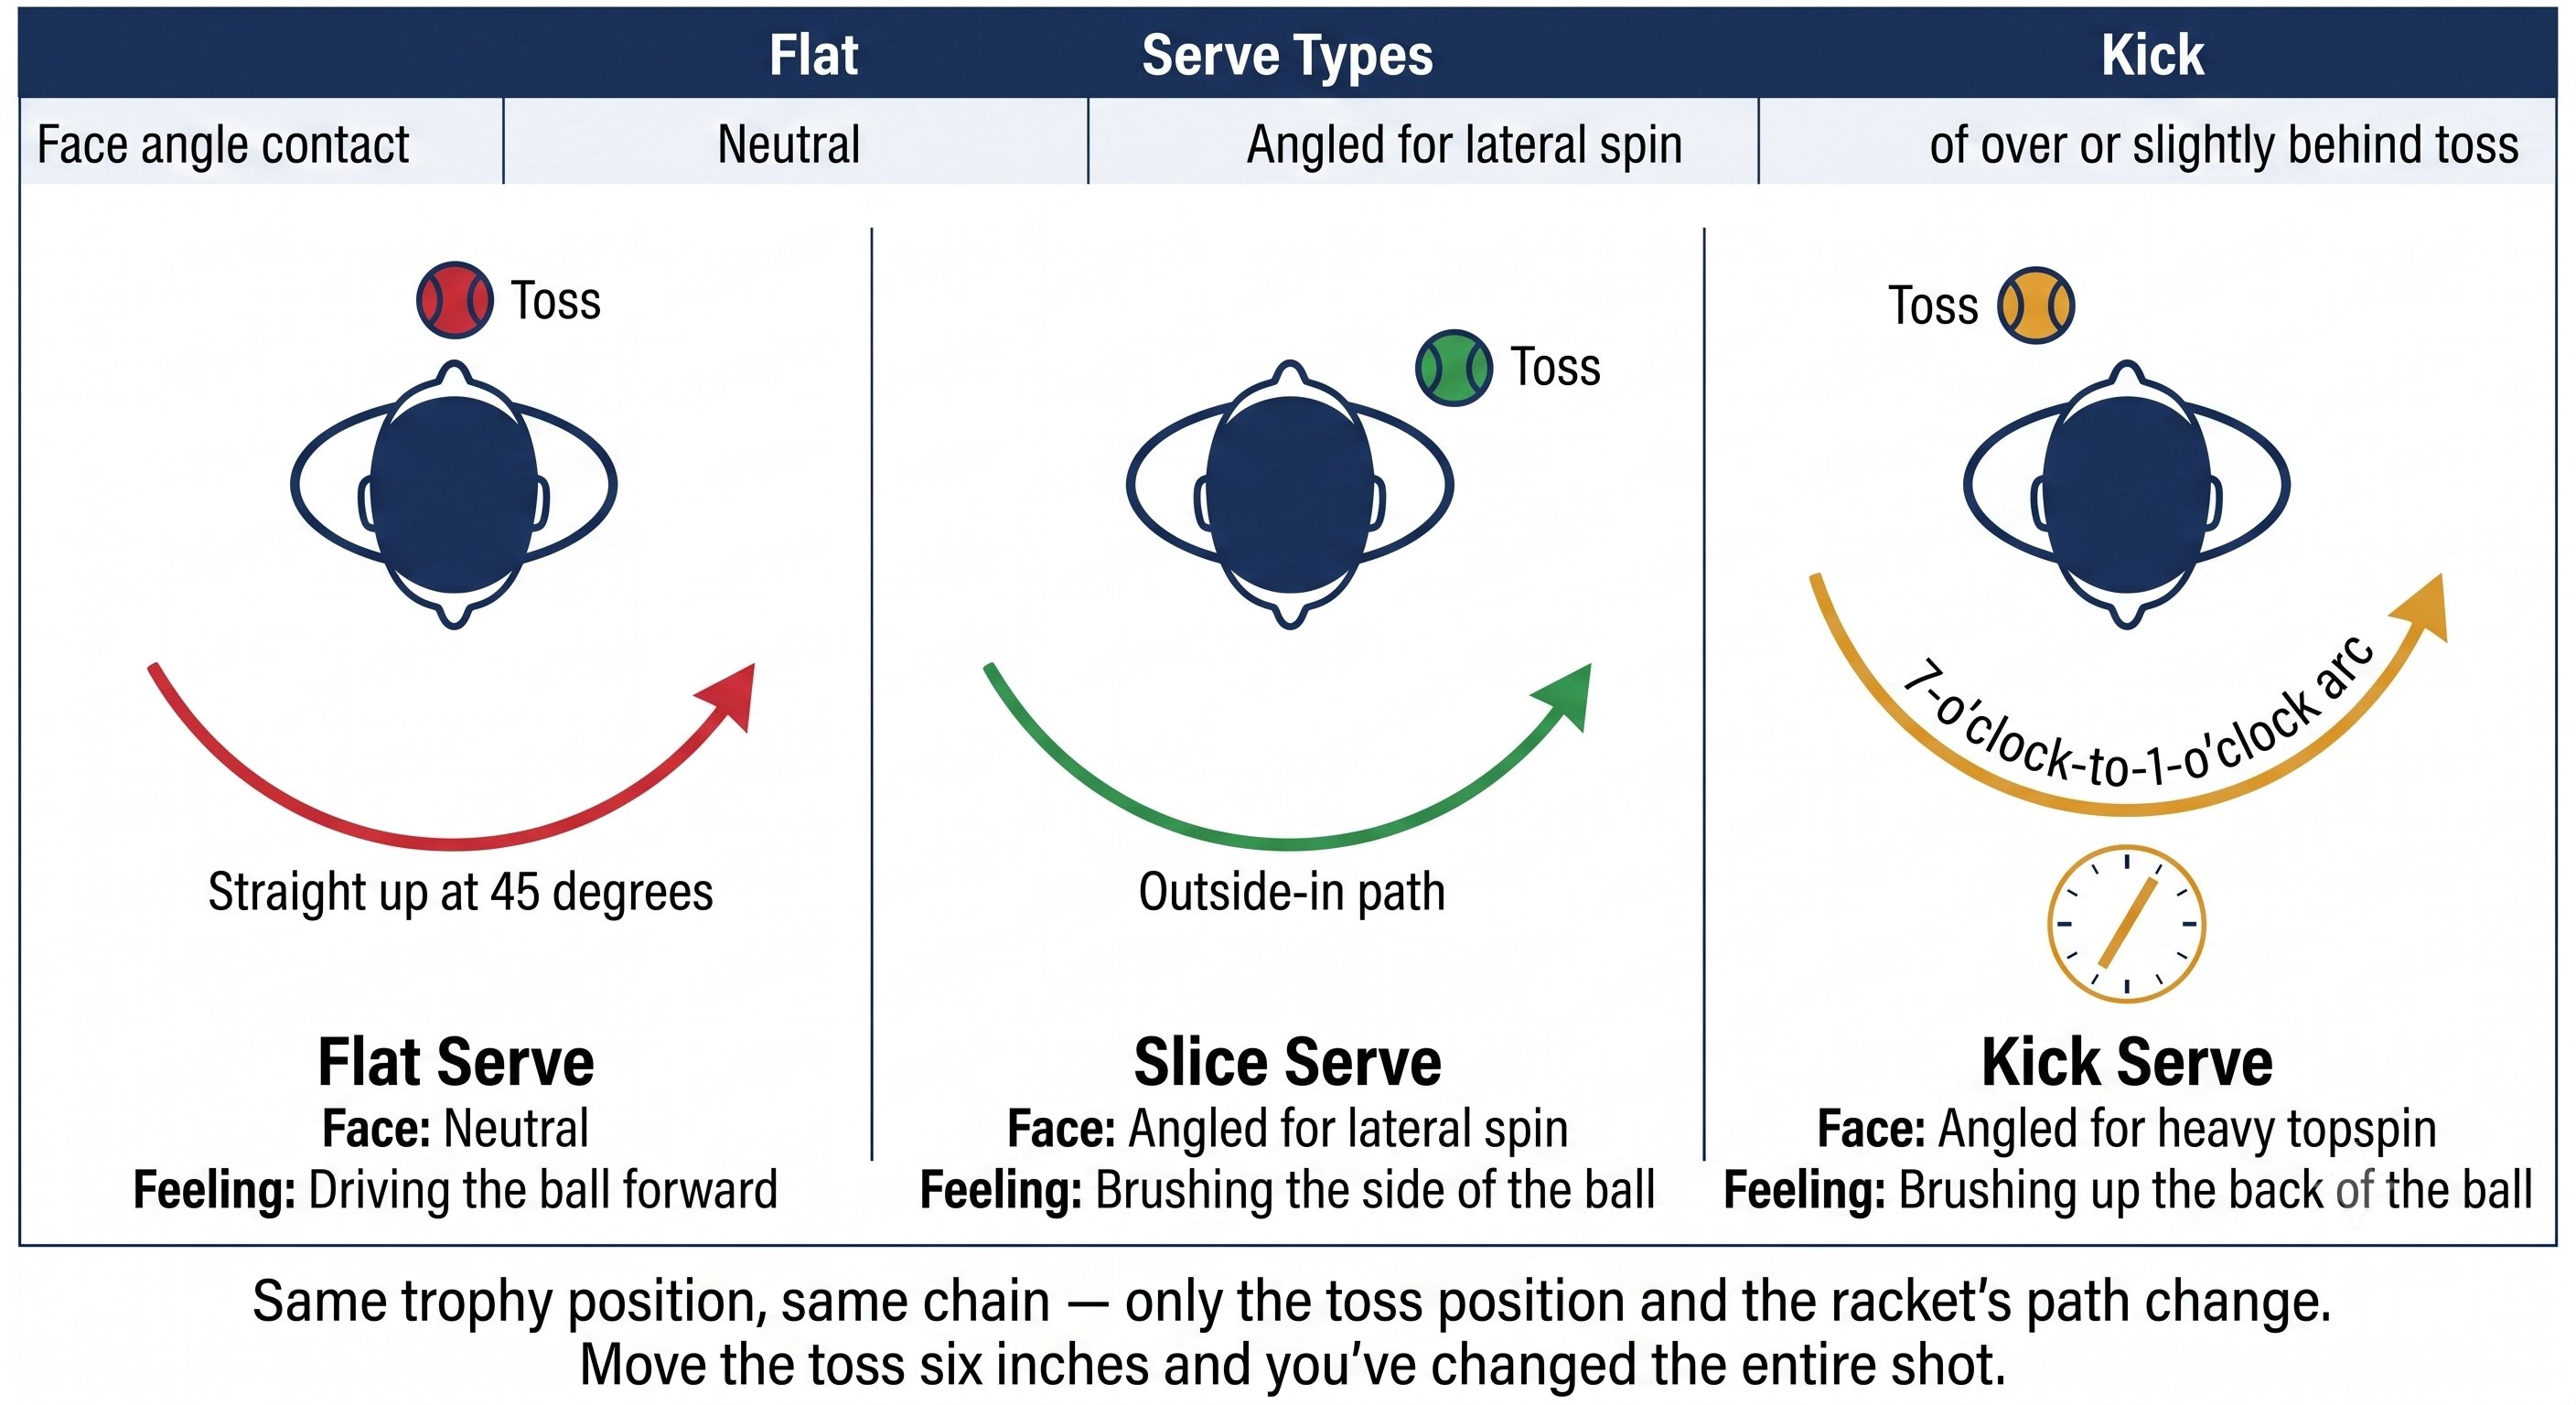
Serve Mechanics — Figure 4
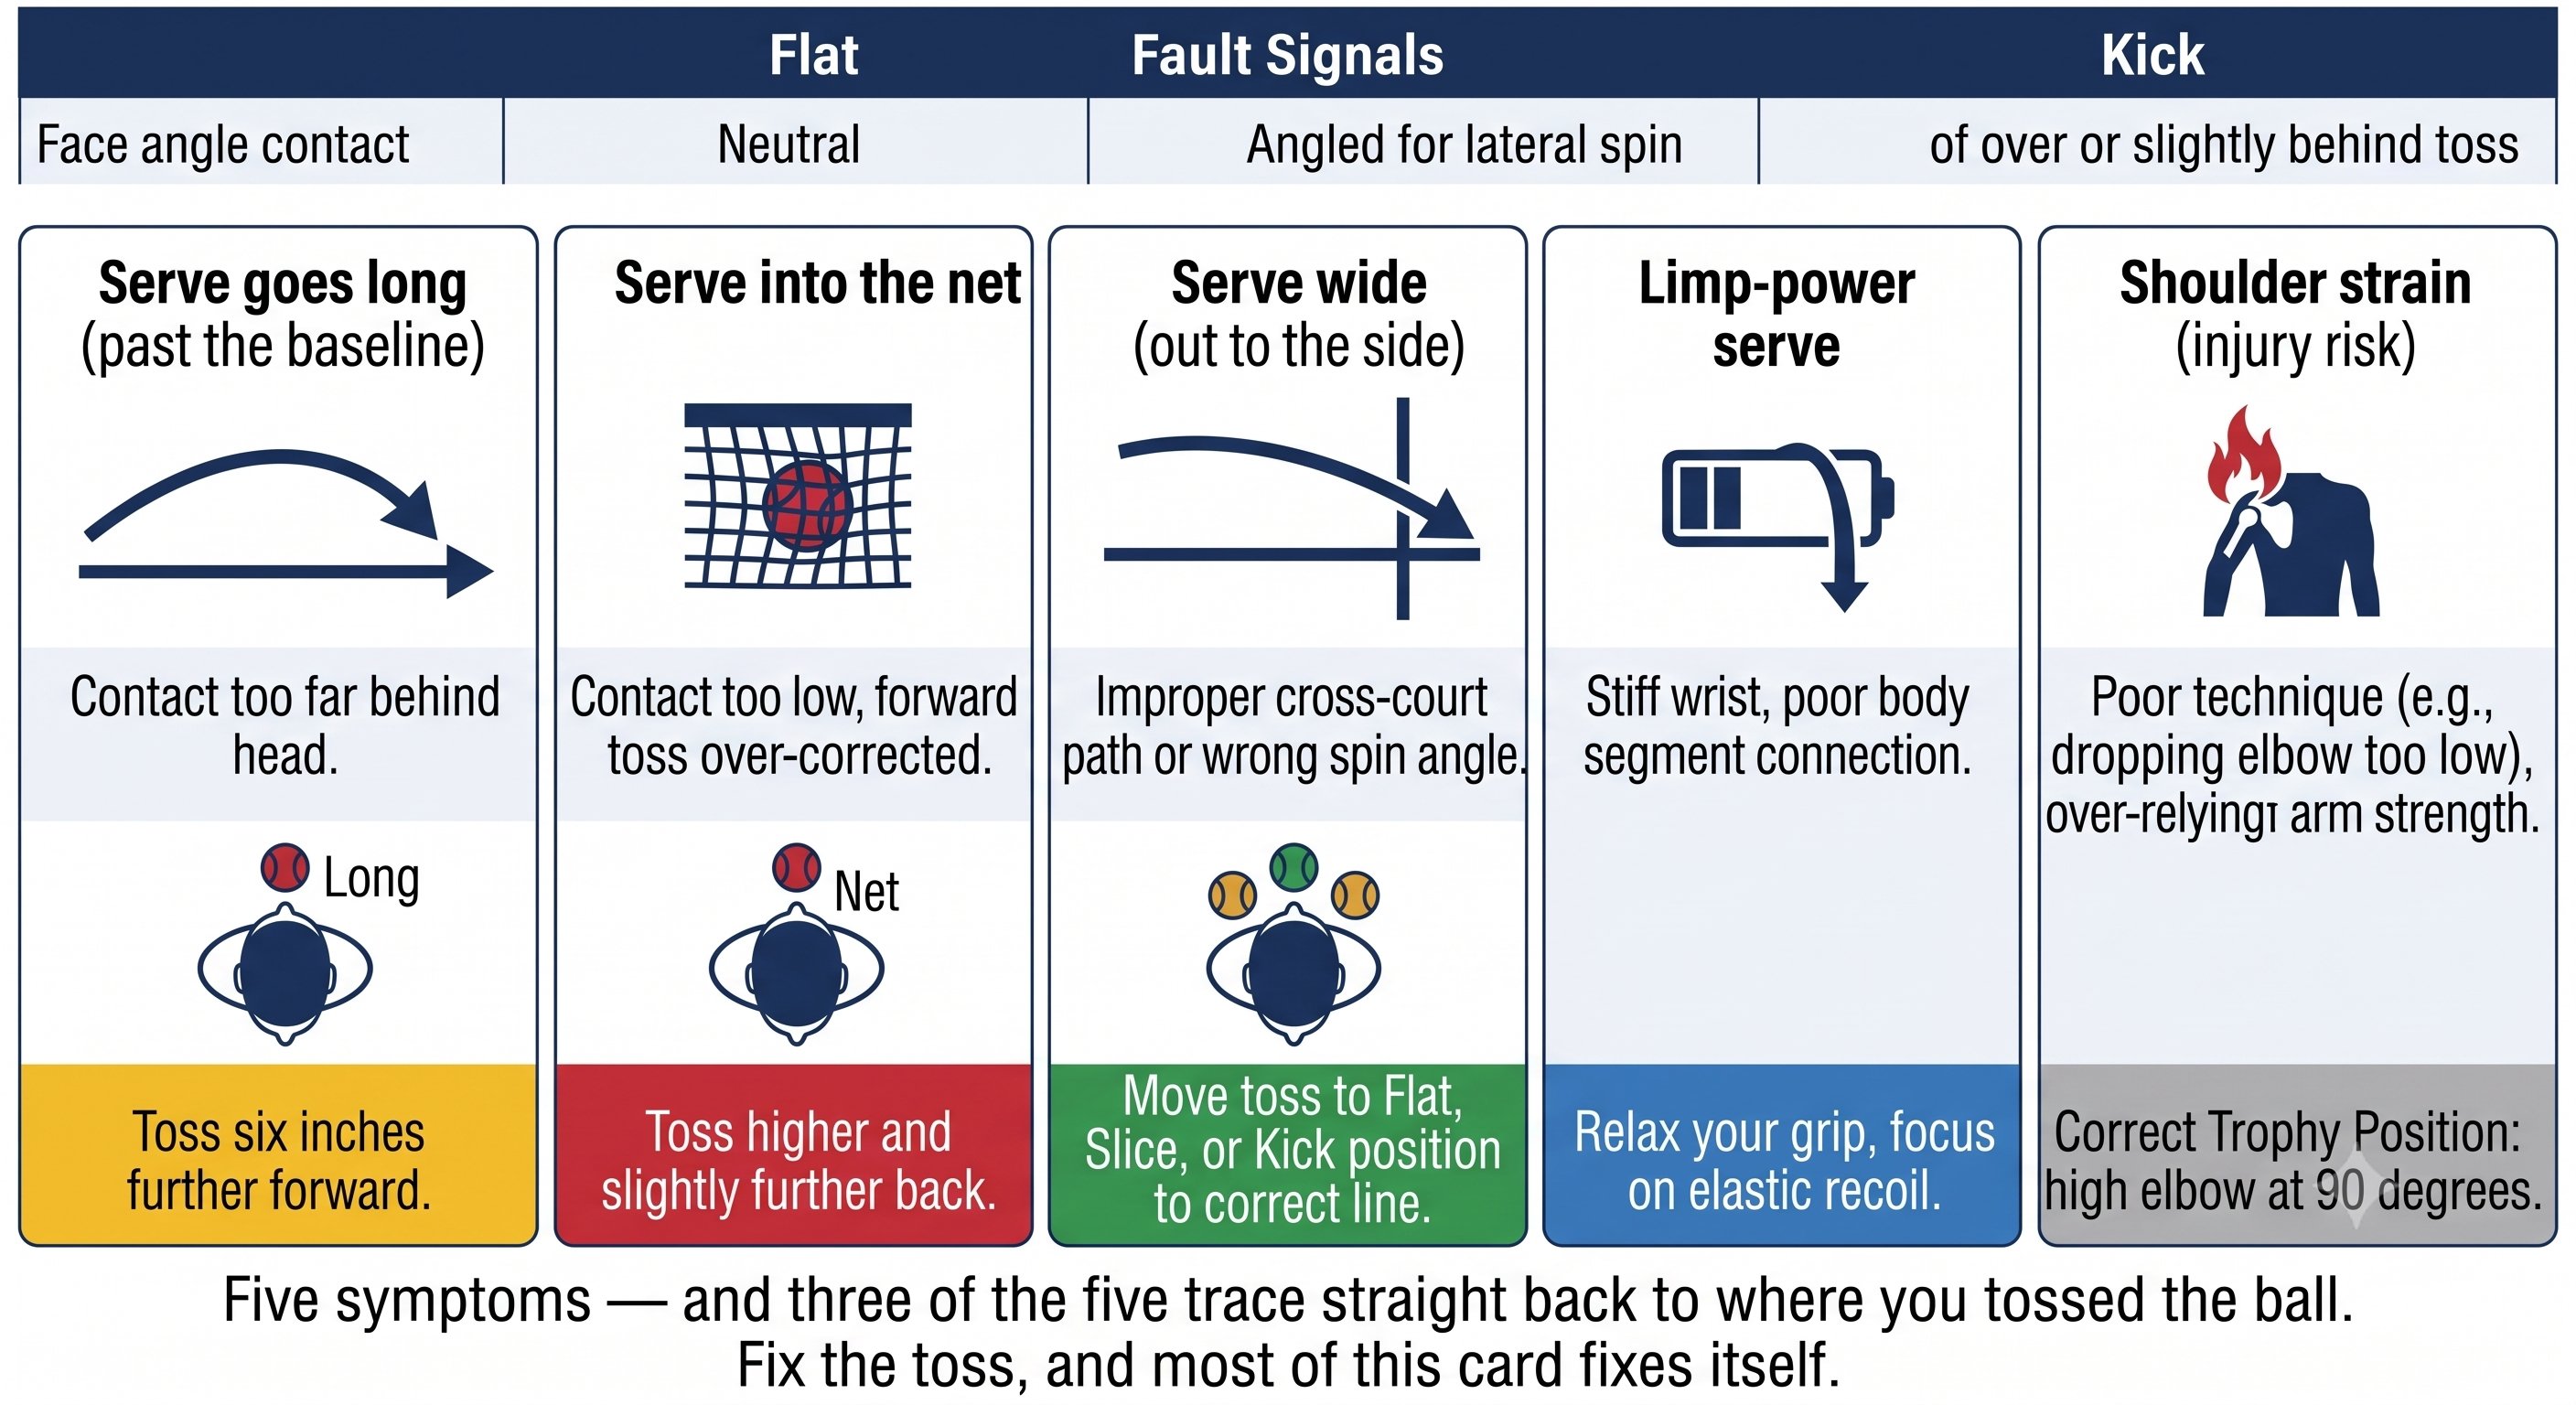
Serve Mechanics — Figure 5
Chapter 23: Return of Serve 5 figures
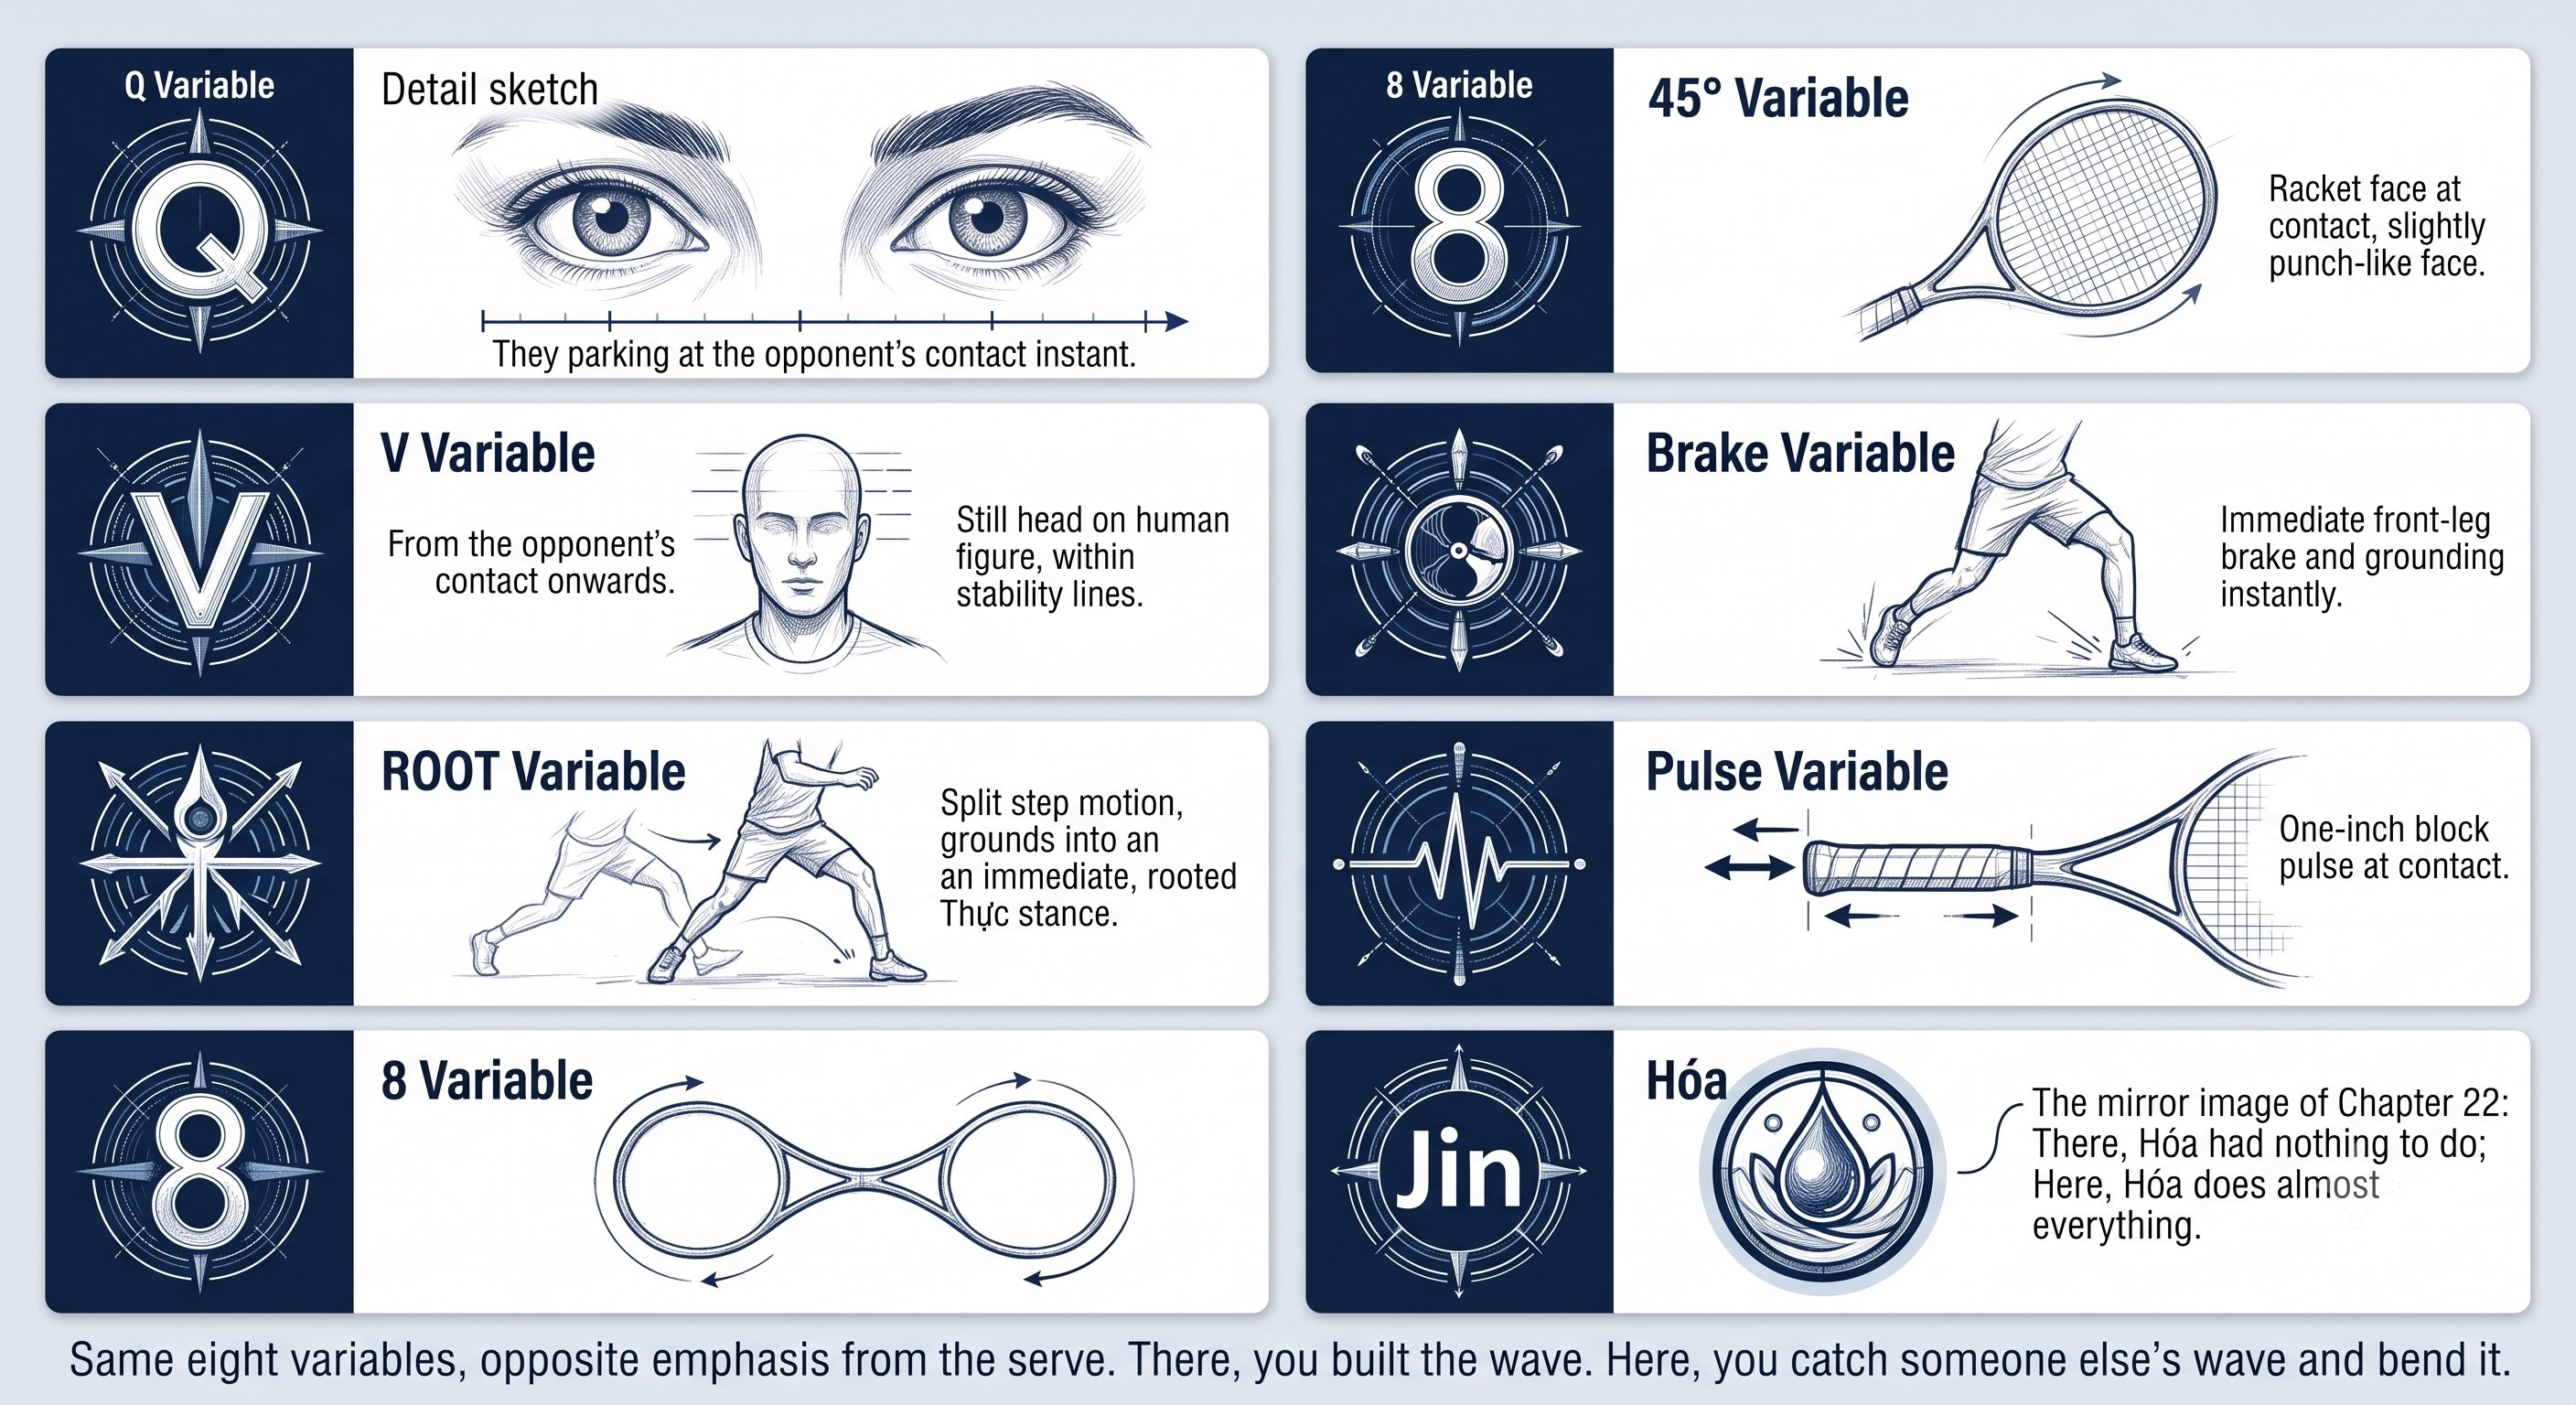
Return of Serve — Figure 1
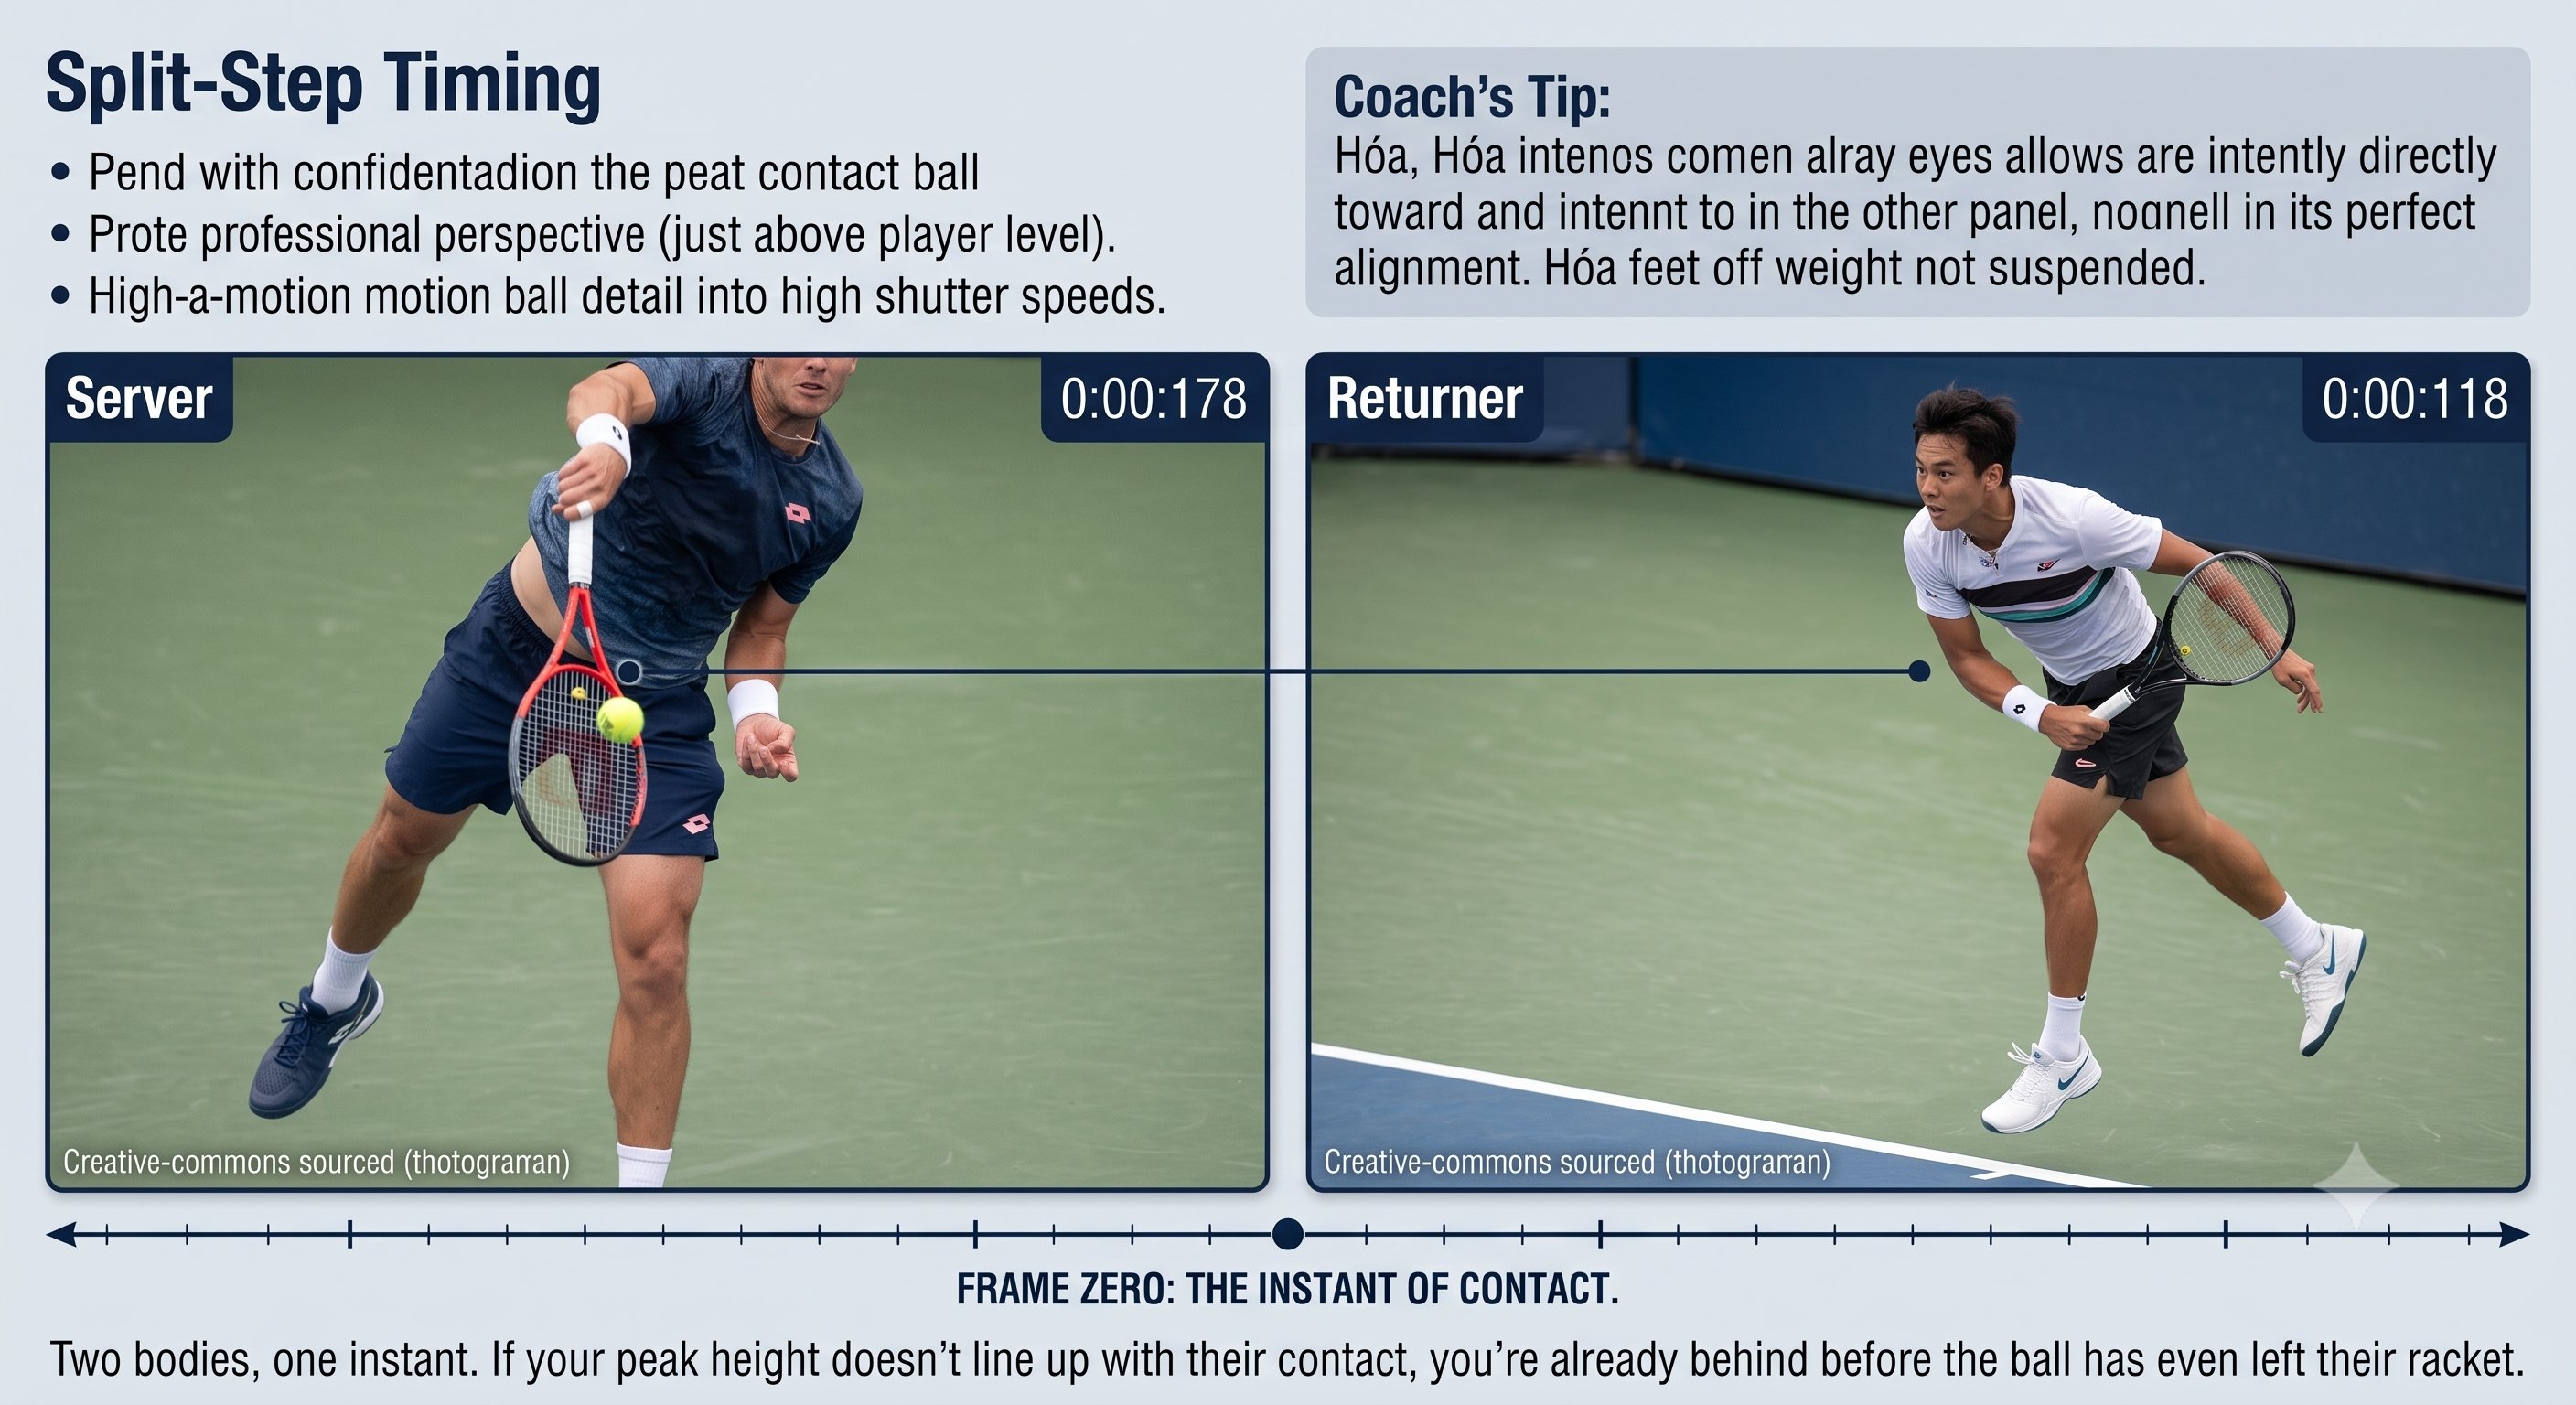
Return of Serve — Figure 2
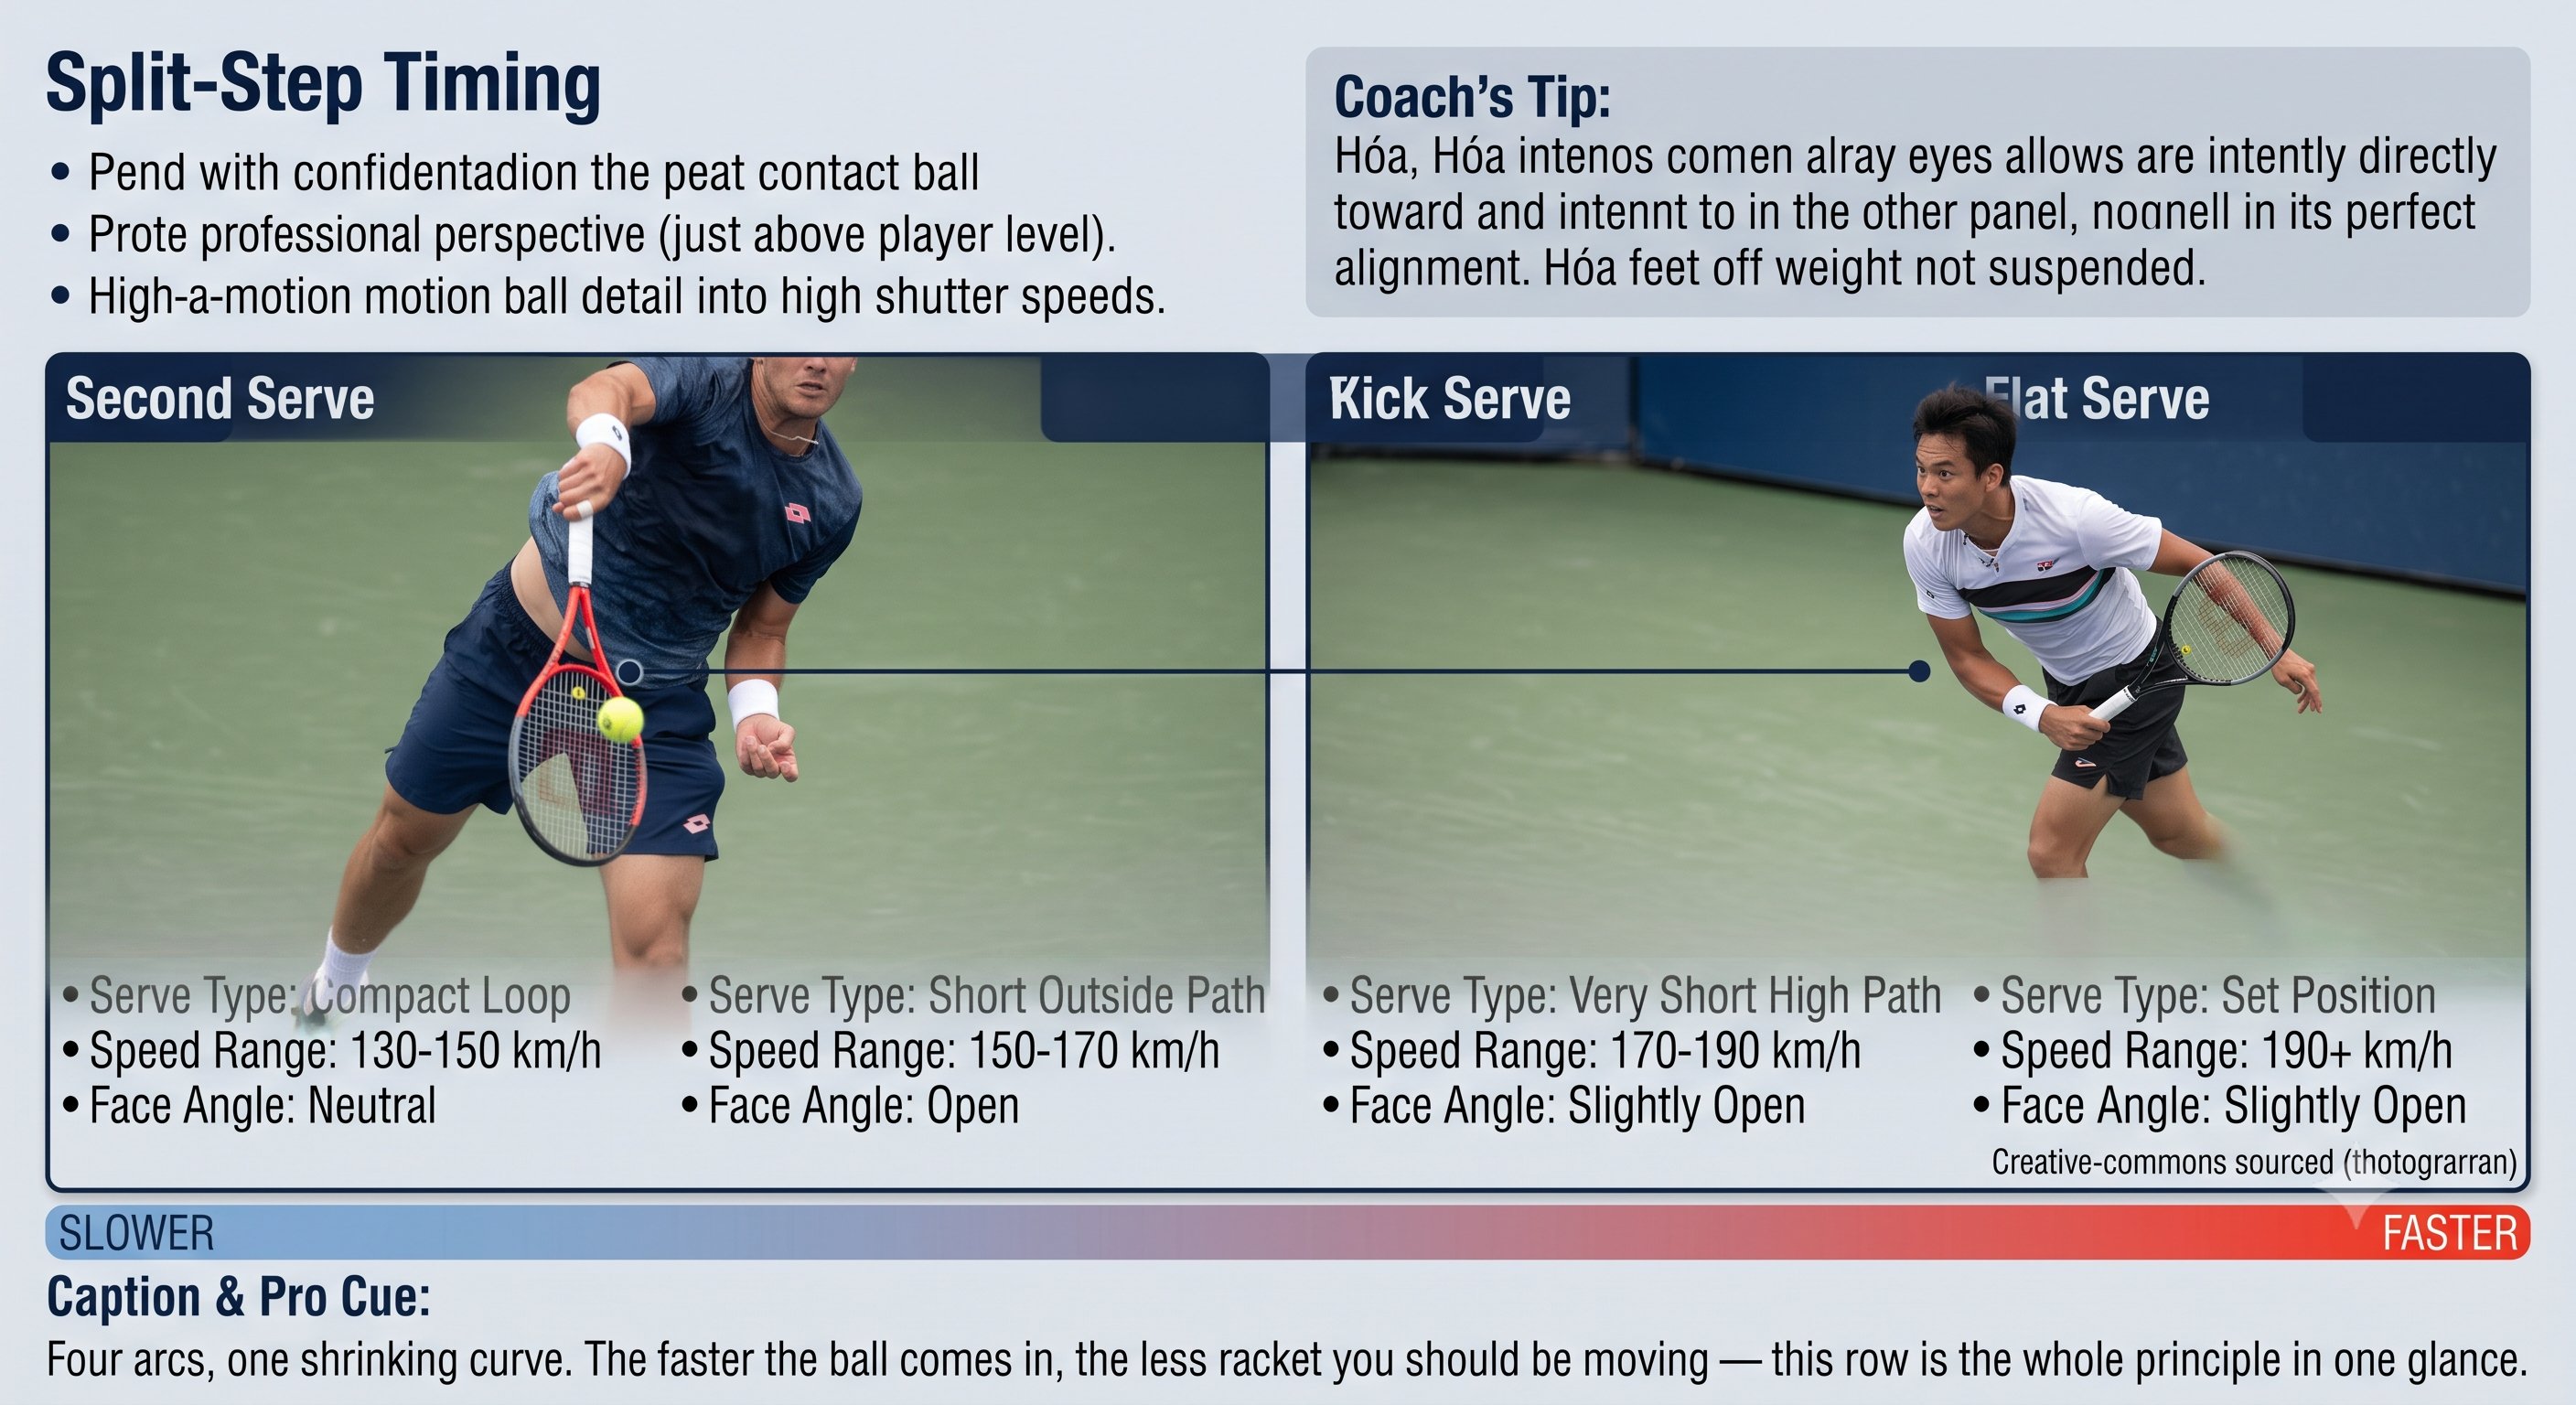
Return of Serve — Figure 3
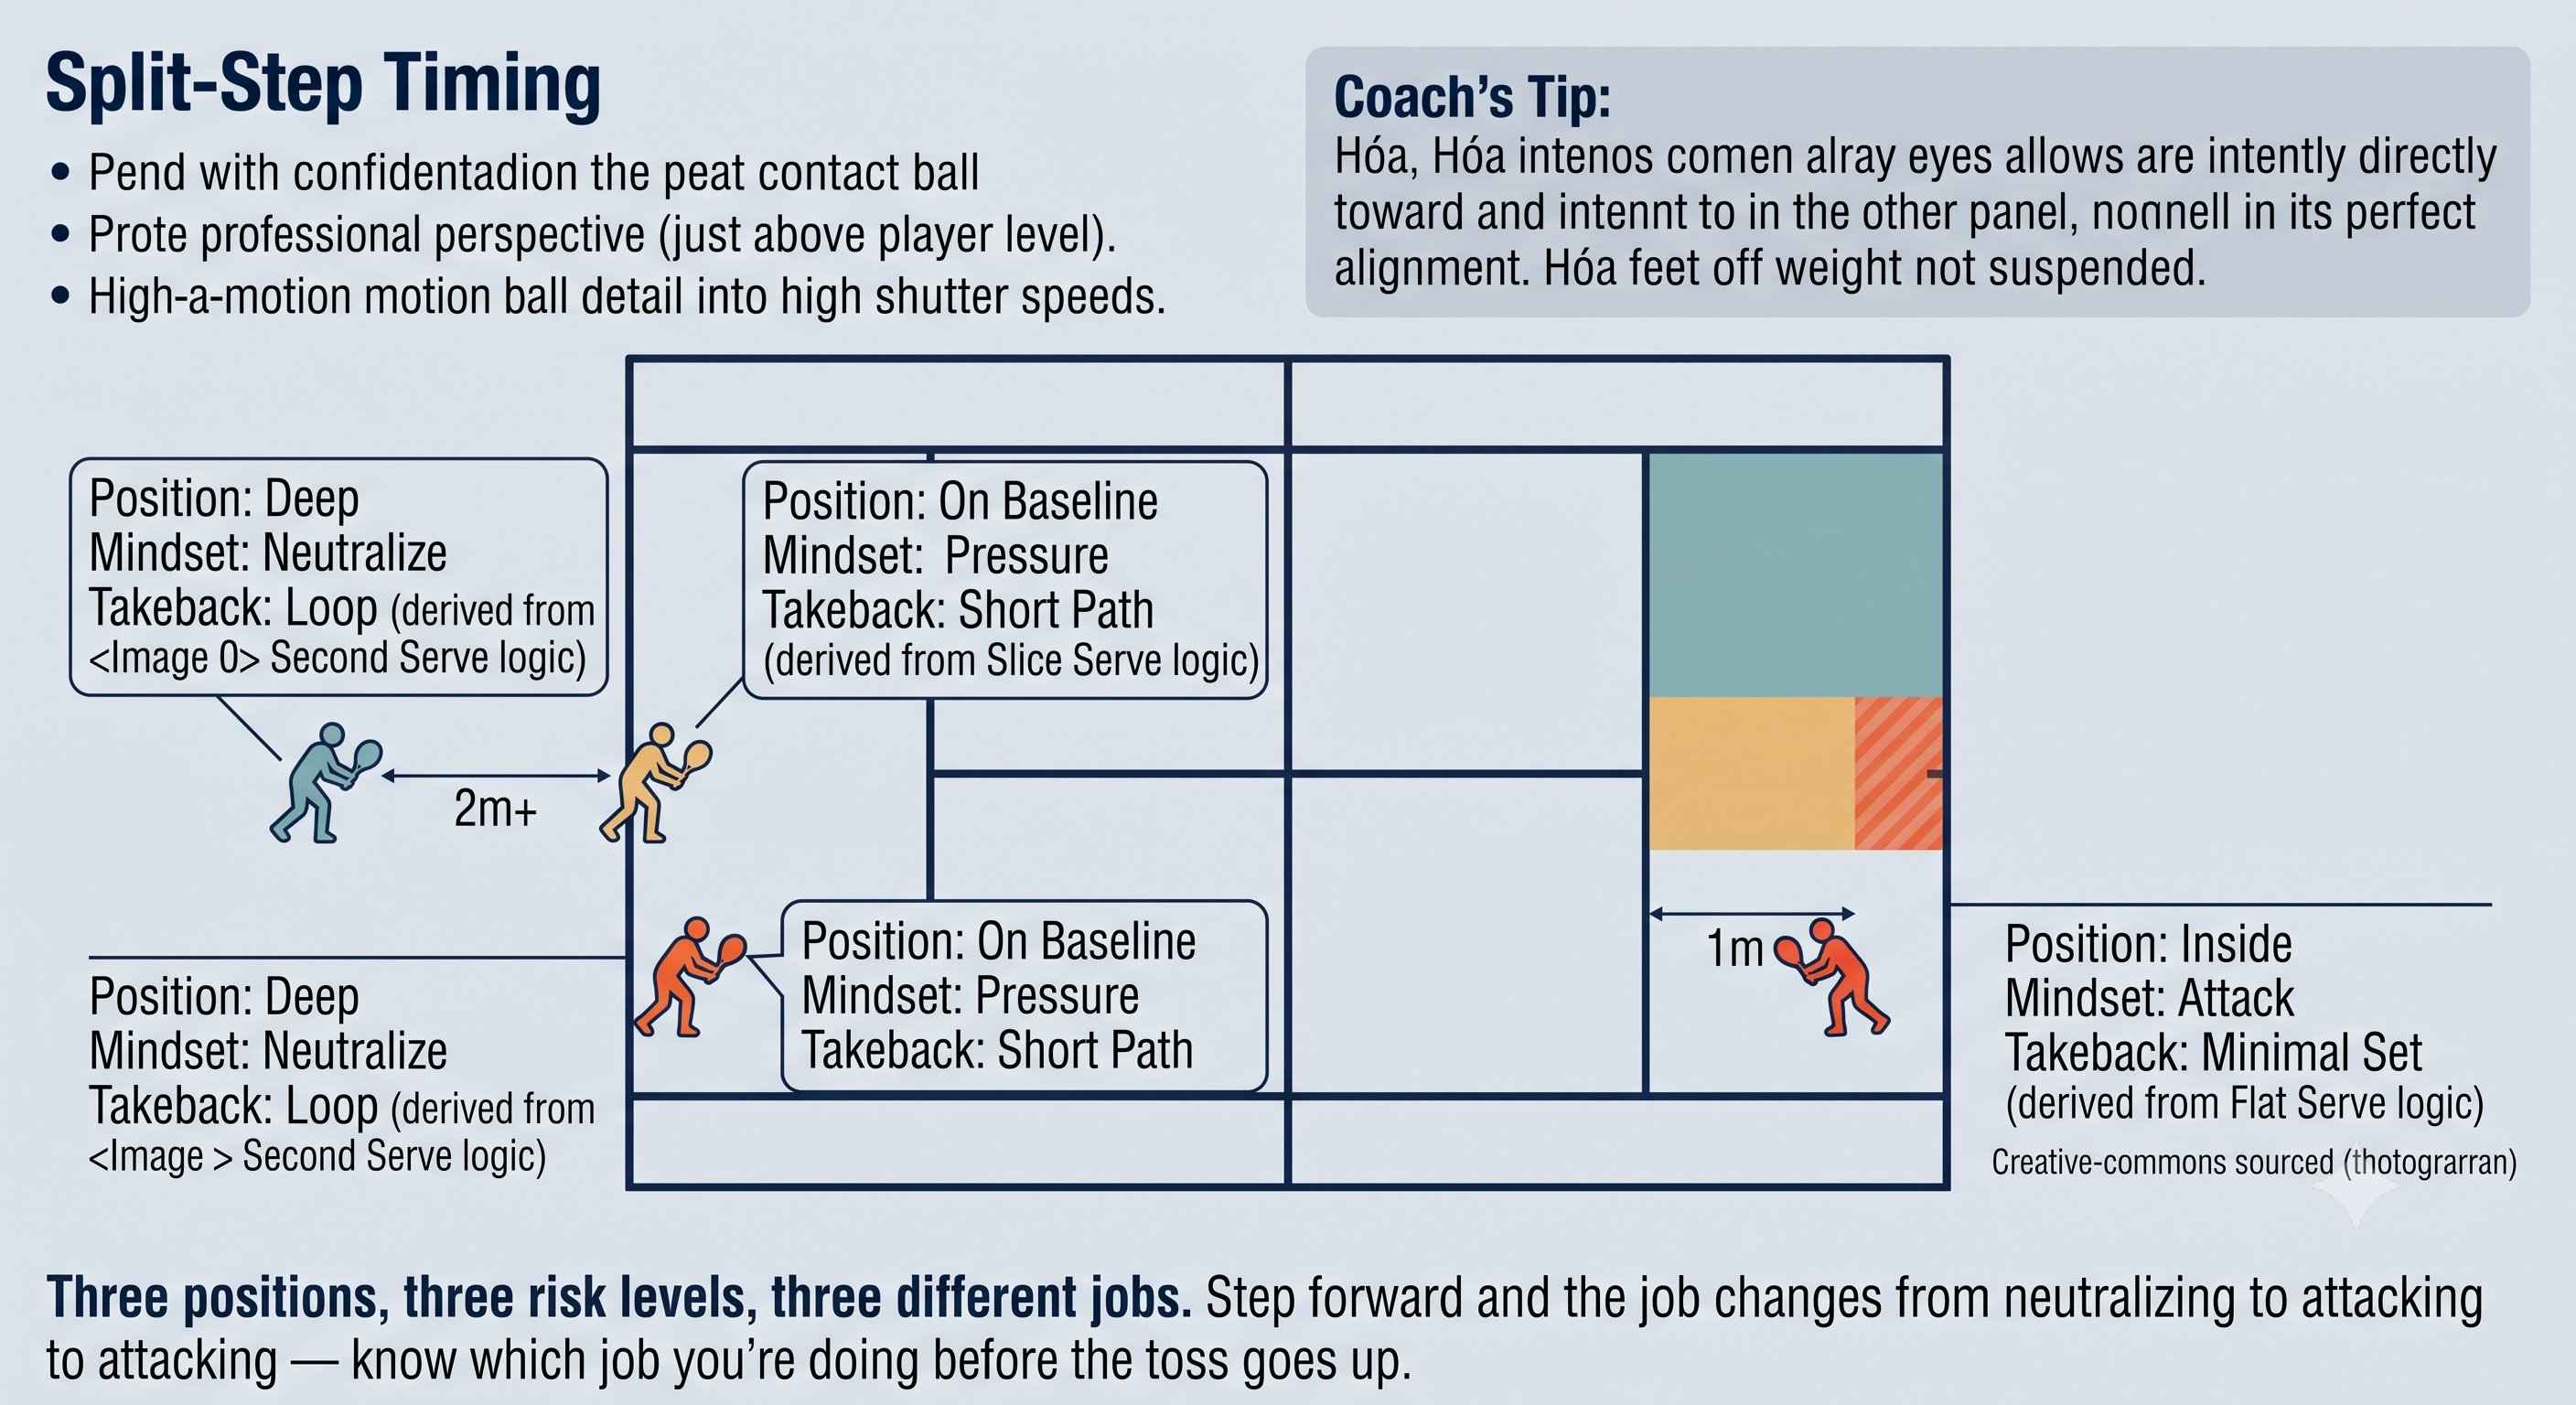
Return of Serve — Figure 4
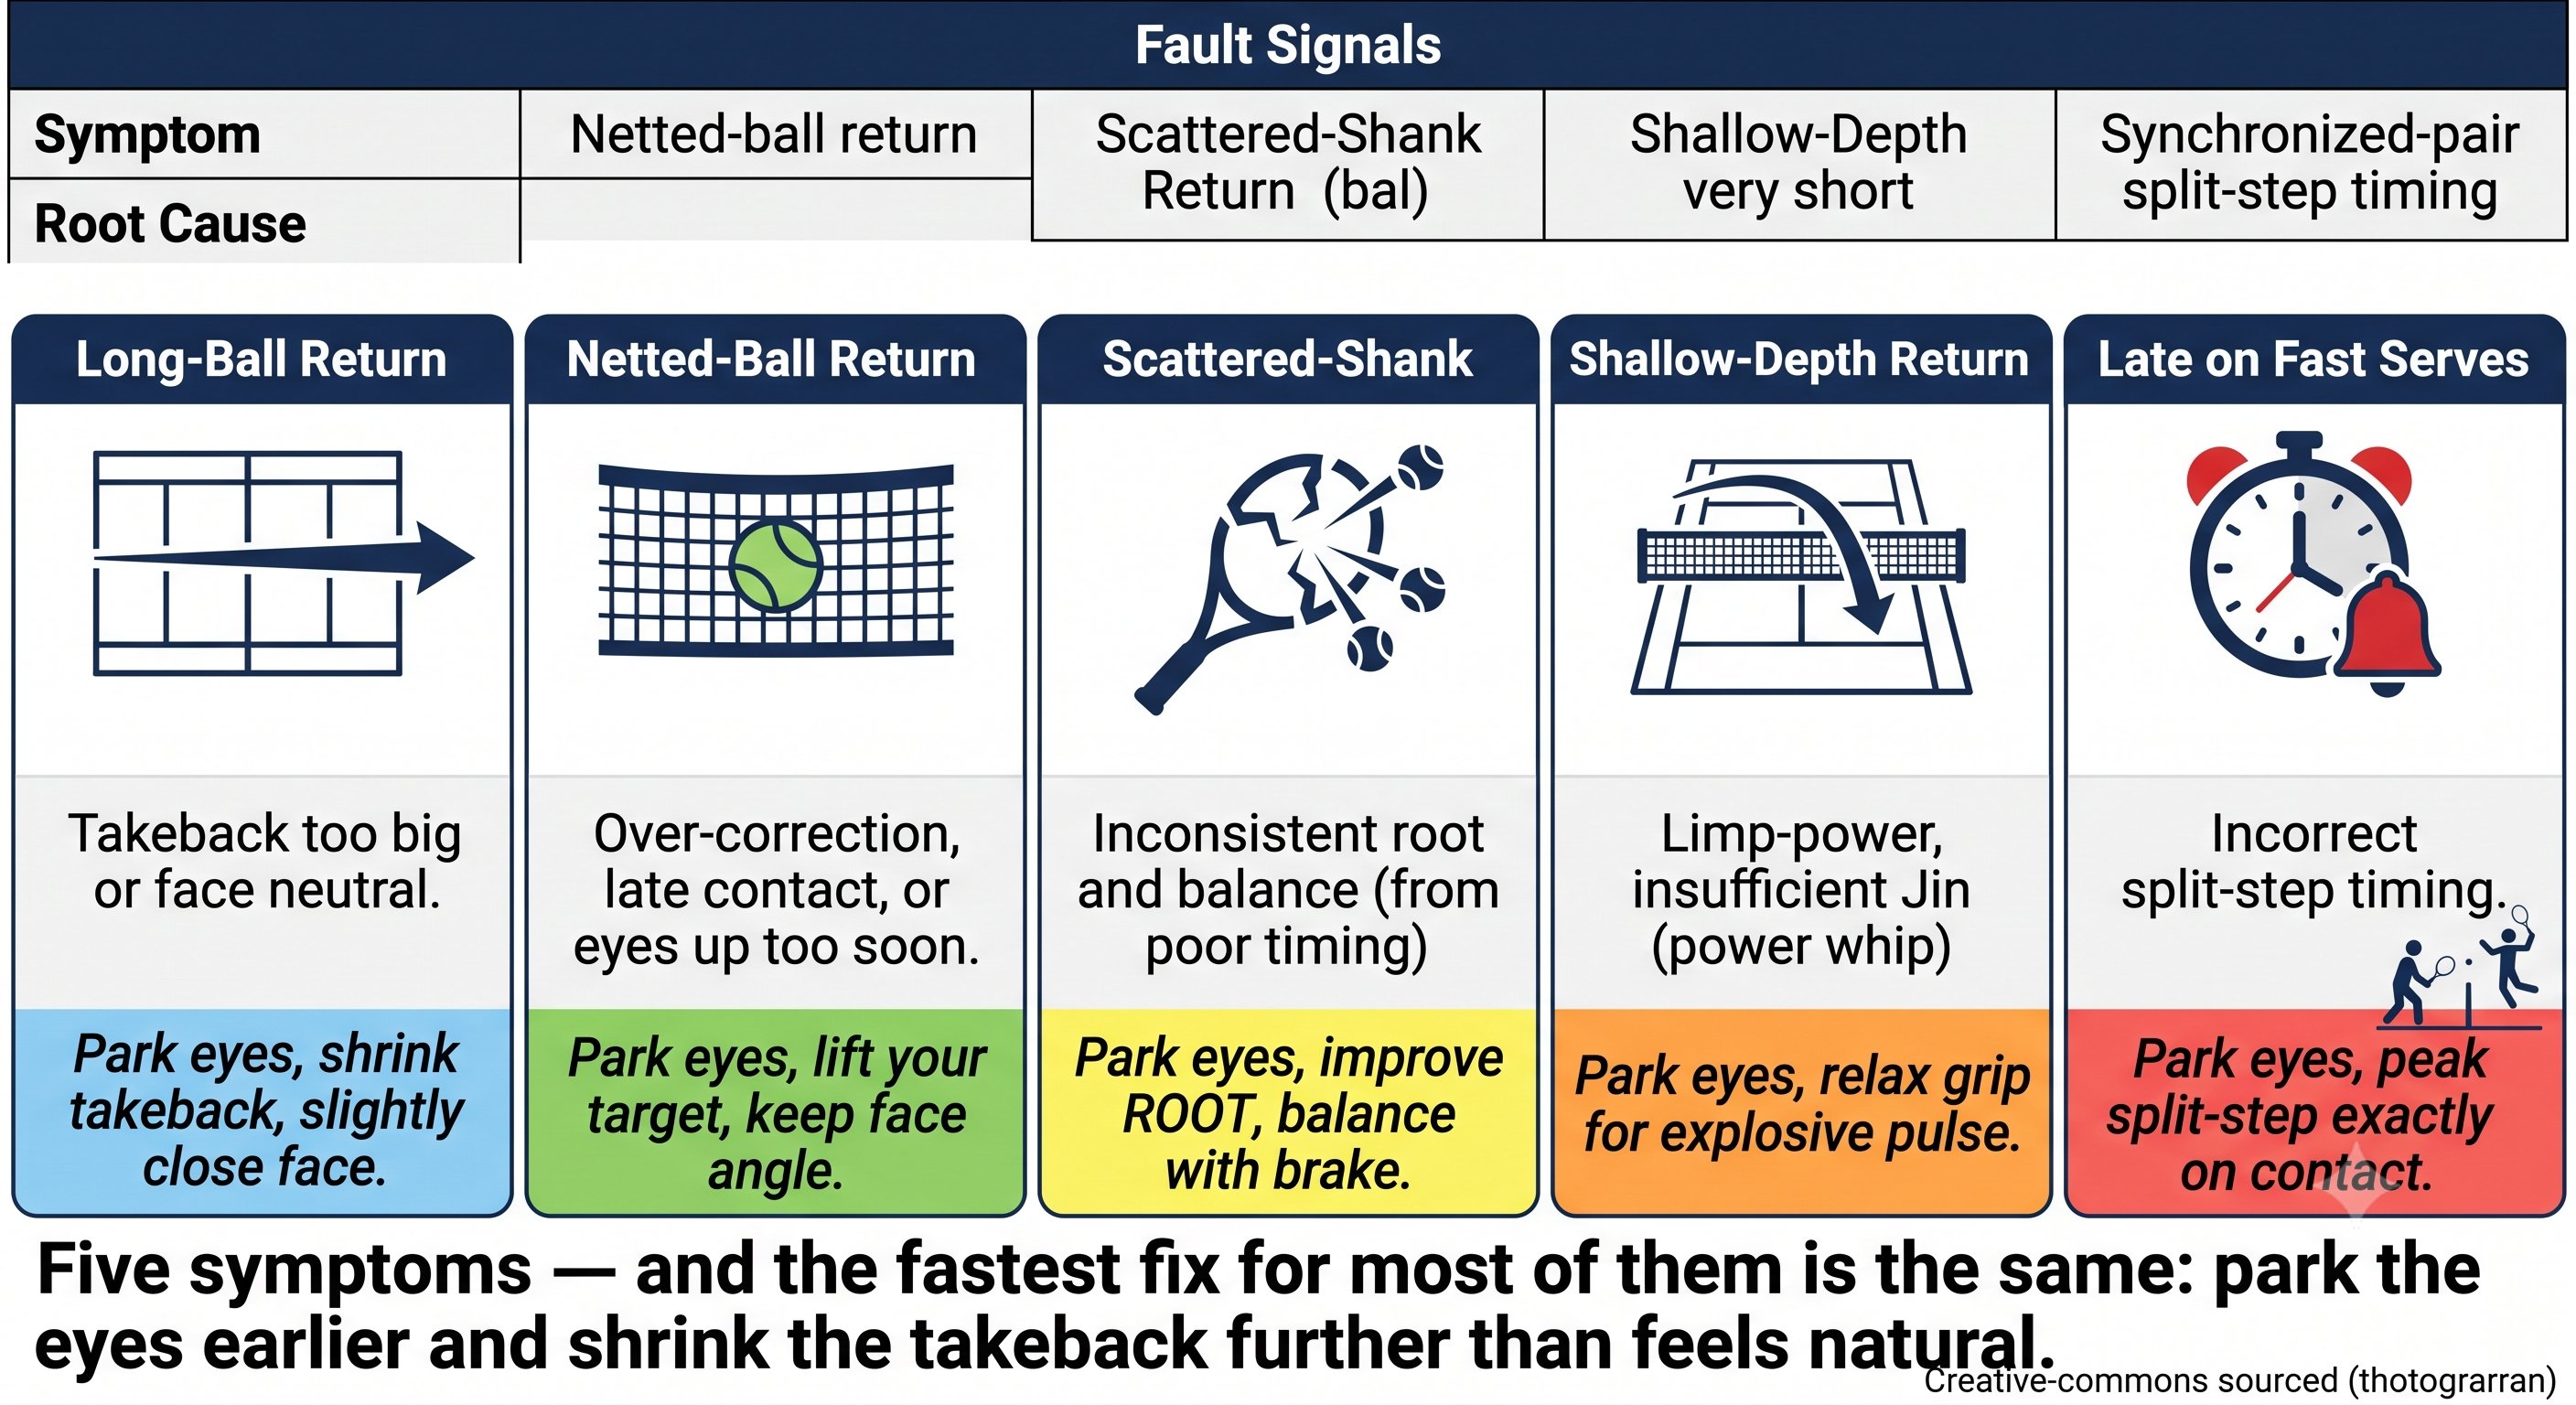
Return of Serve — Figure 5
🏸 Volley · Volley ↑ back to topics
Volley & Overhead, Slice/Drop Shot/Lob, less-is-more blueprint. Volley & Overhead, Cắt/Drop/Lob, nguyên lý less-is-more.
Chapter 24: Volley & Overhead 6 figures
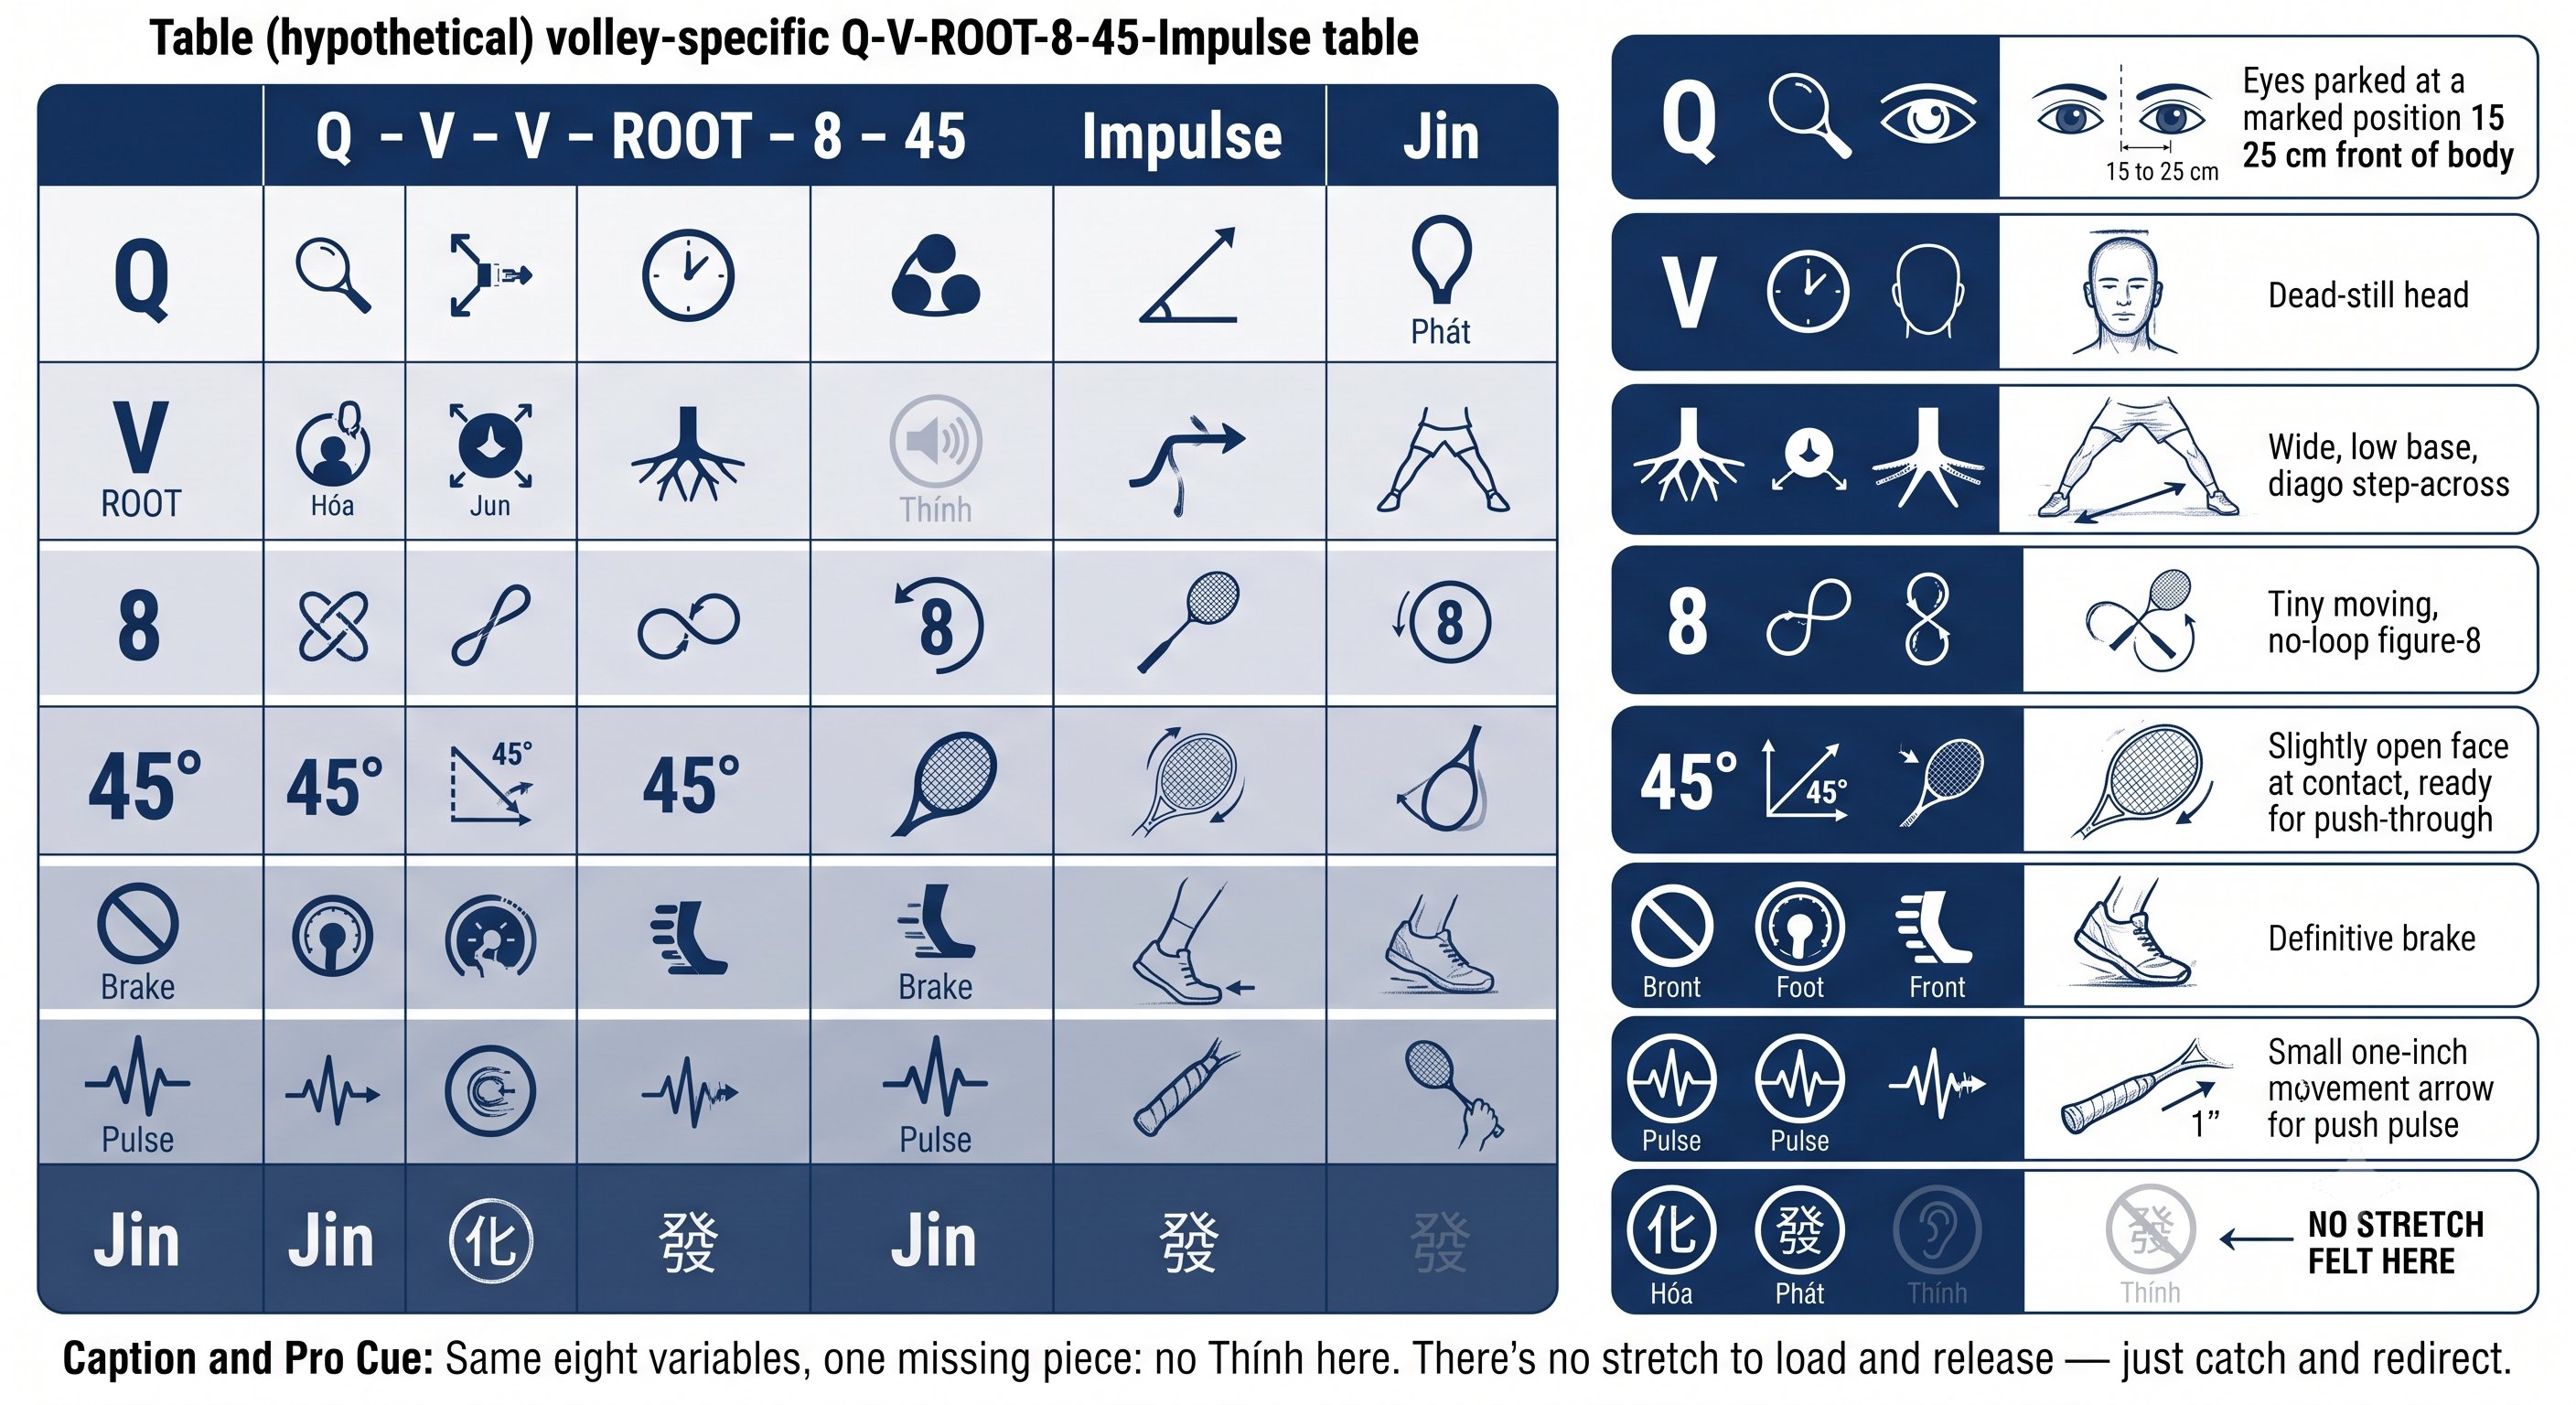
Volley & Overhead — Figure 1
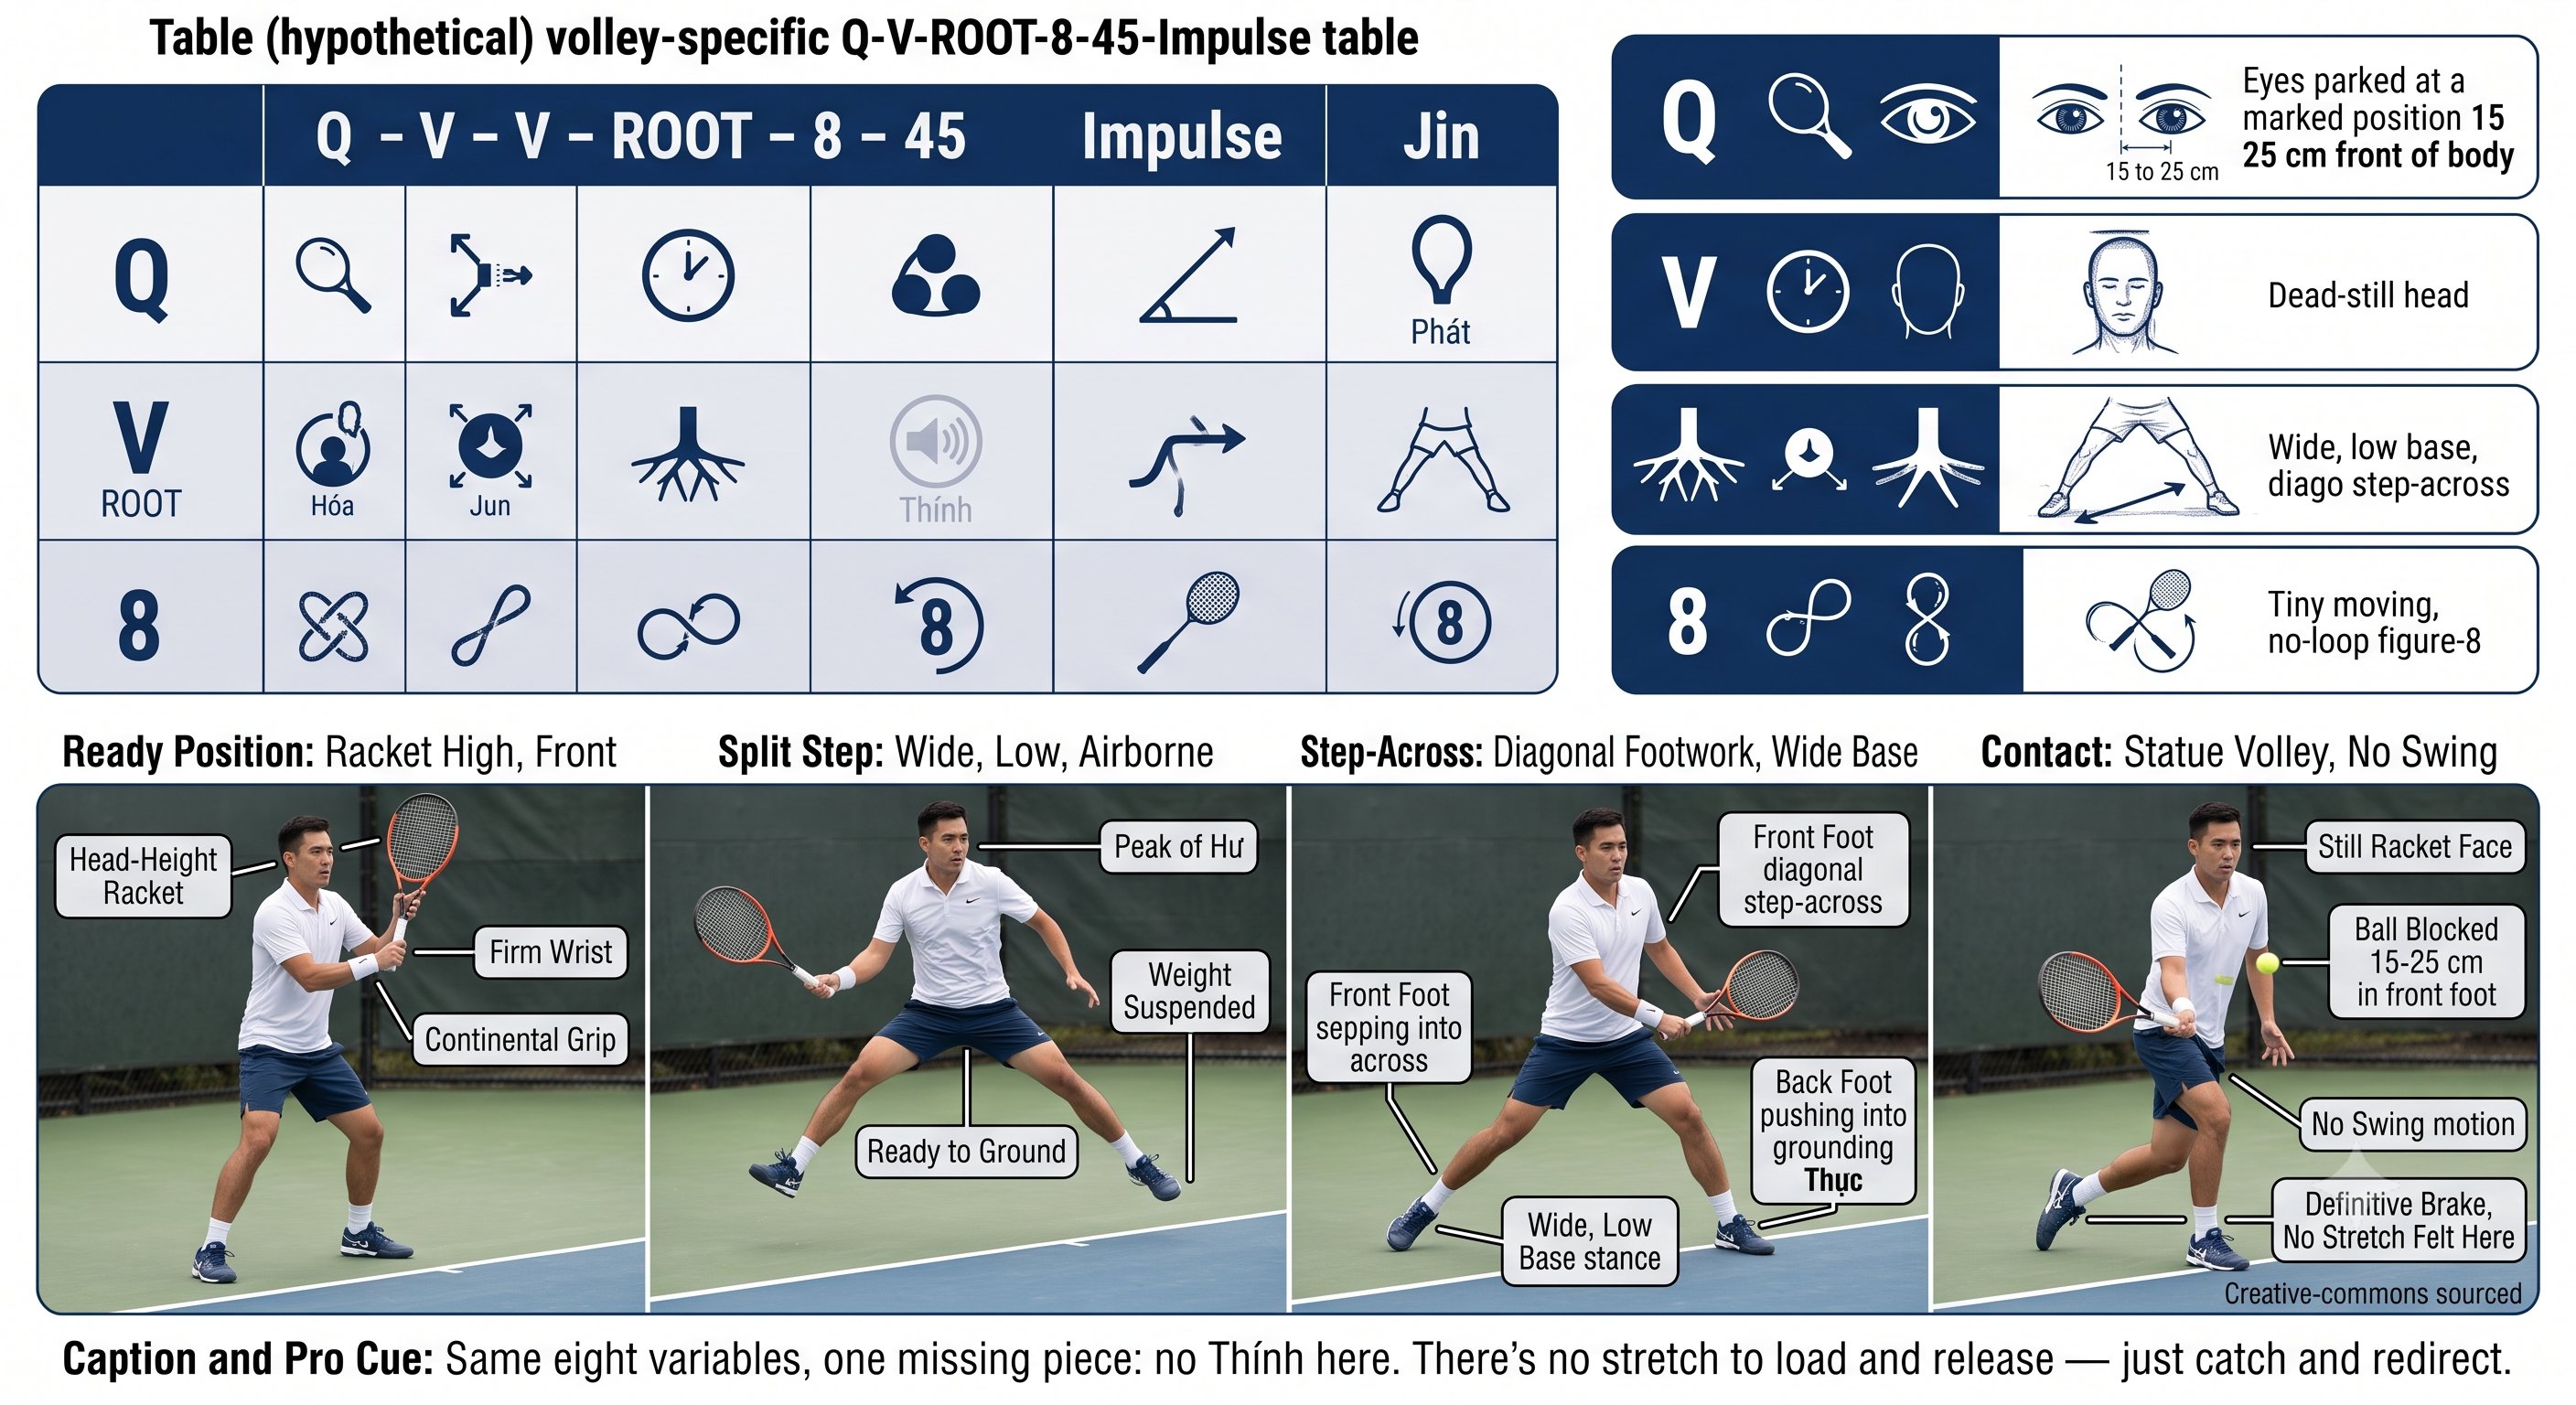
Volley & Overhead — Figure 2
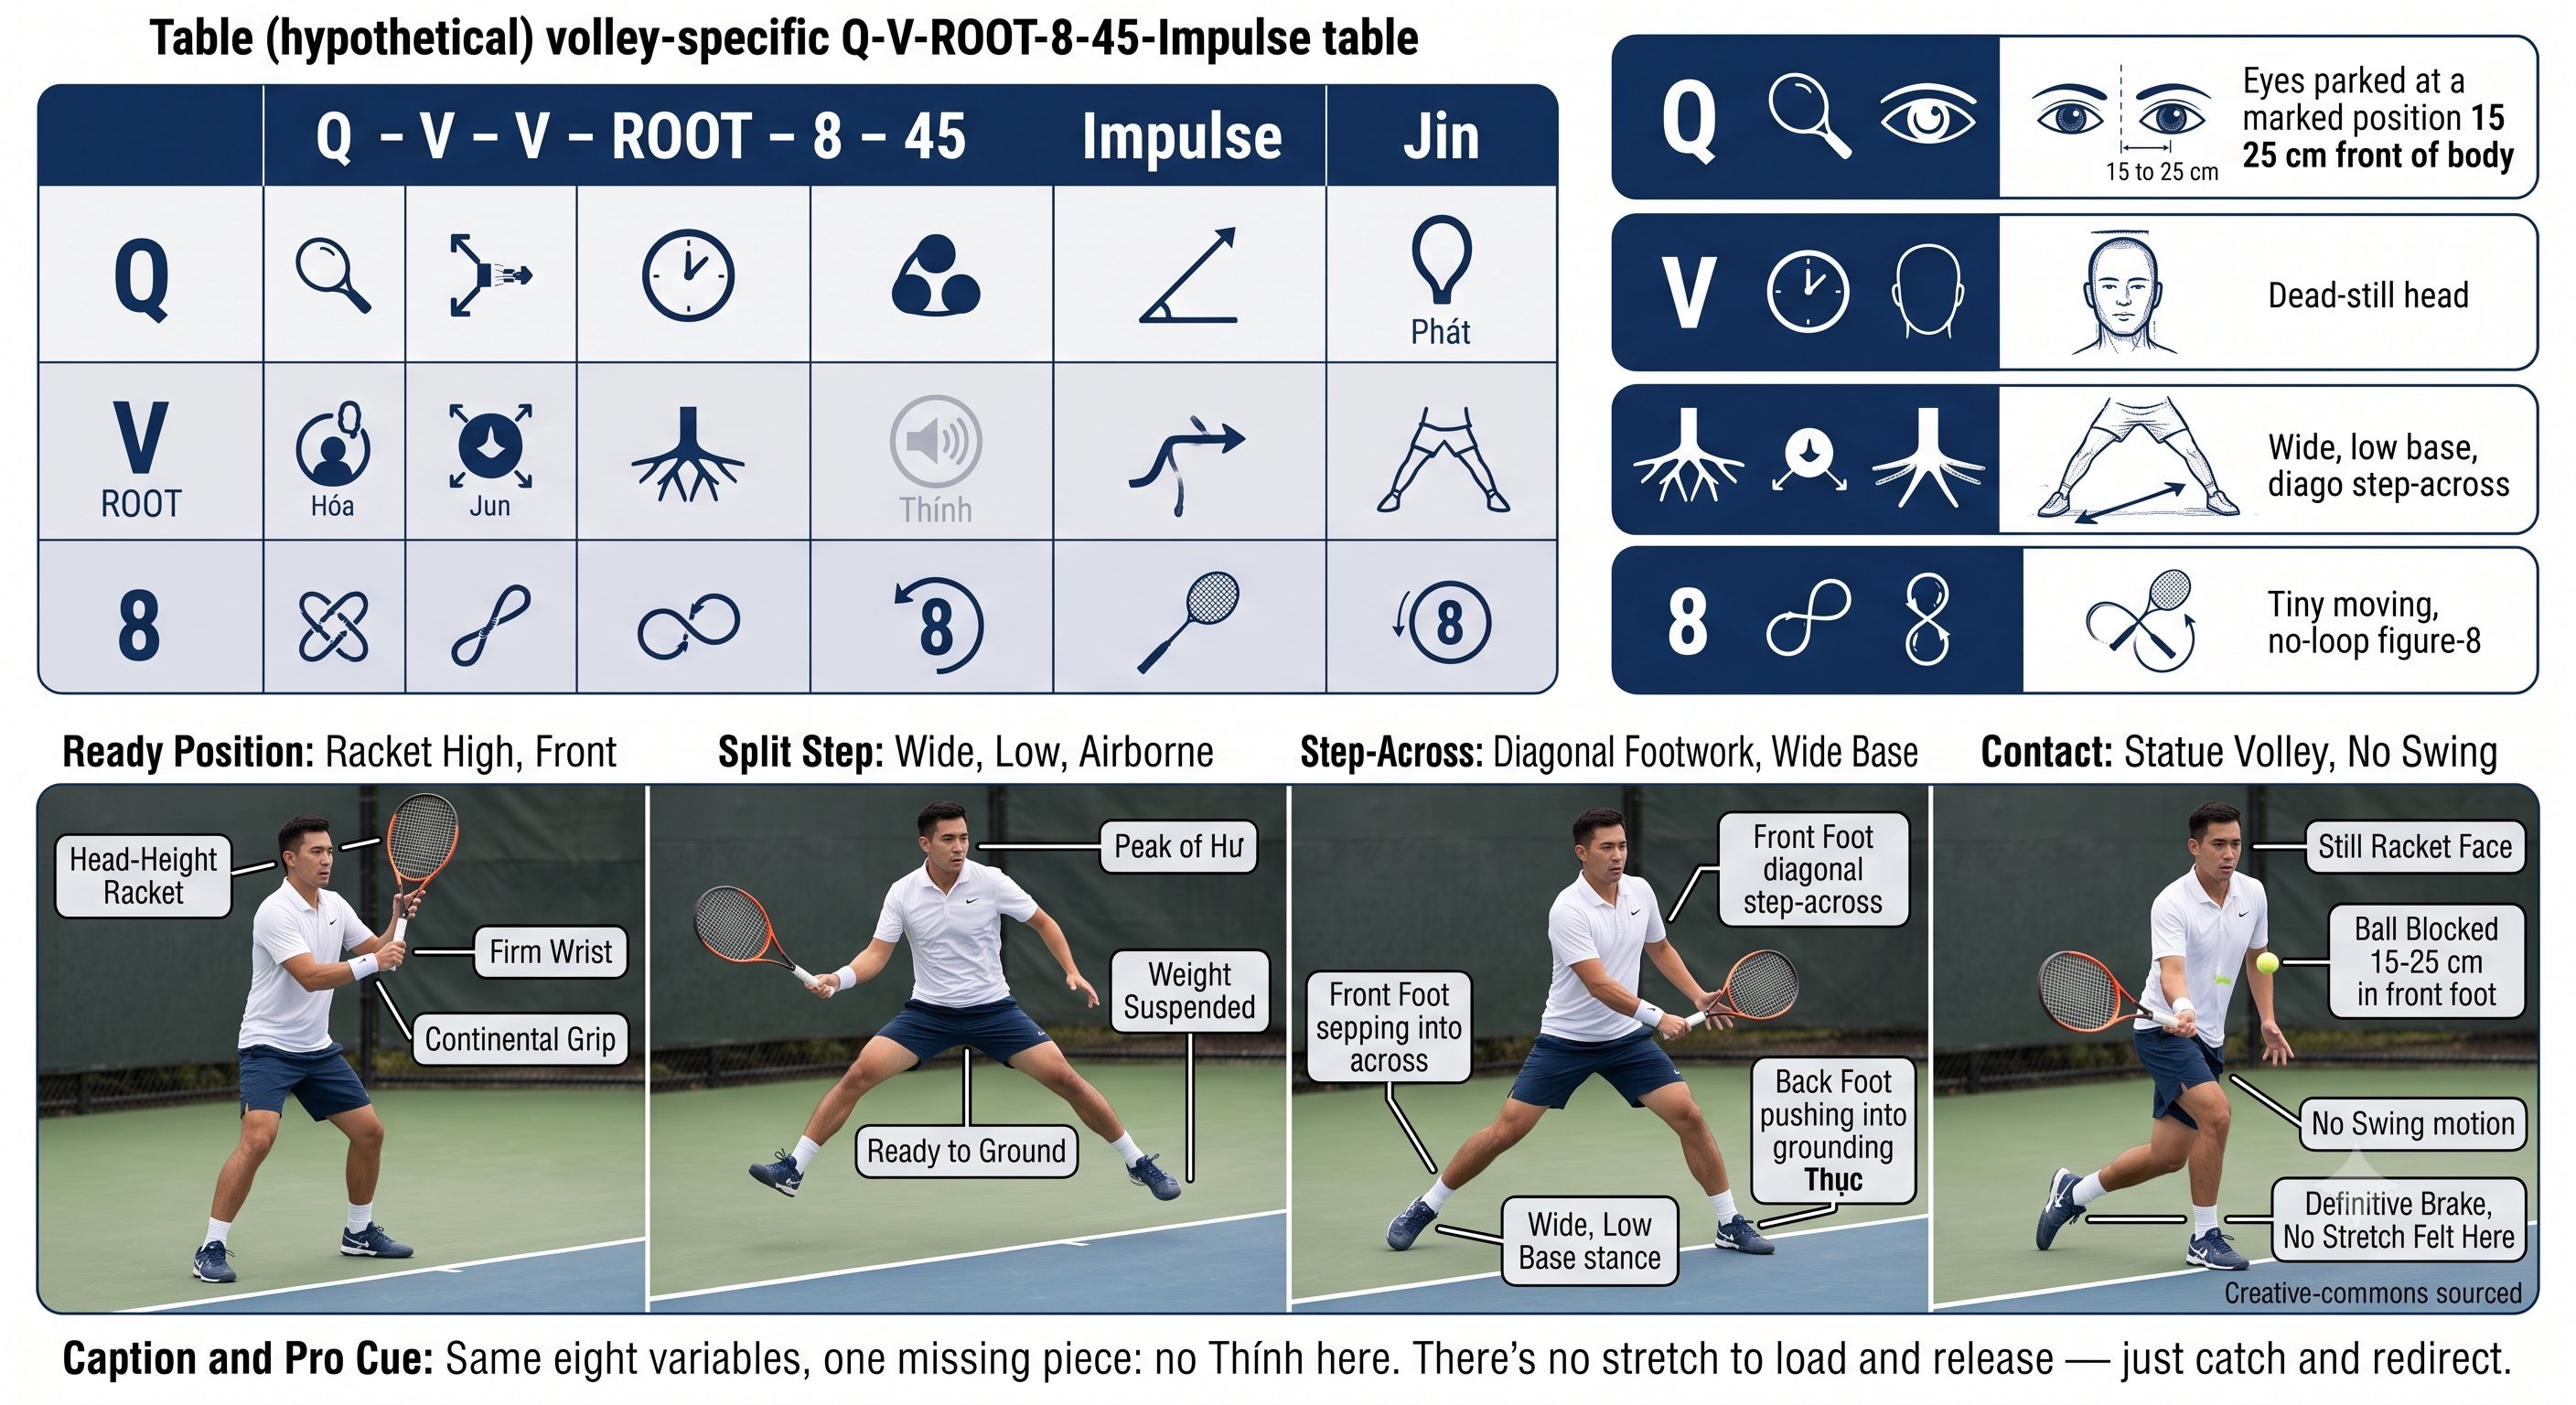
Volley & Overhead — Figure 3
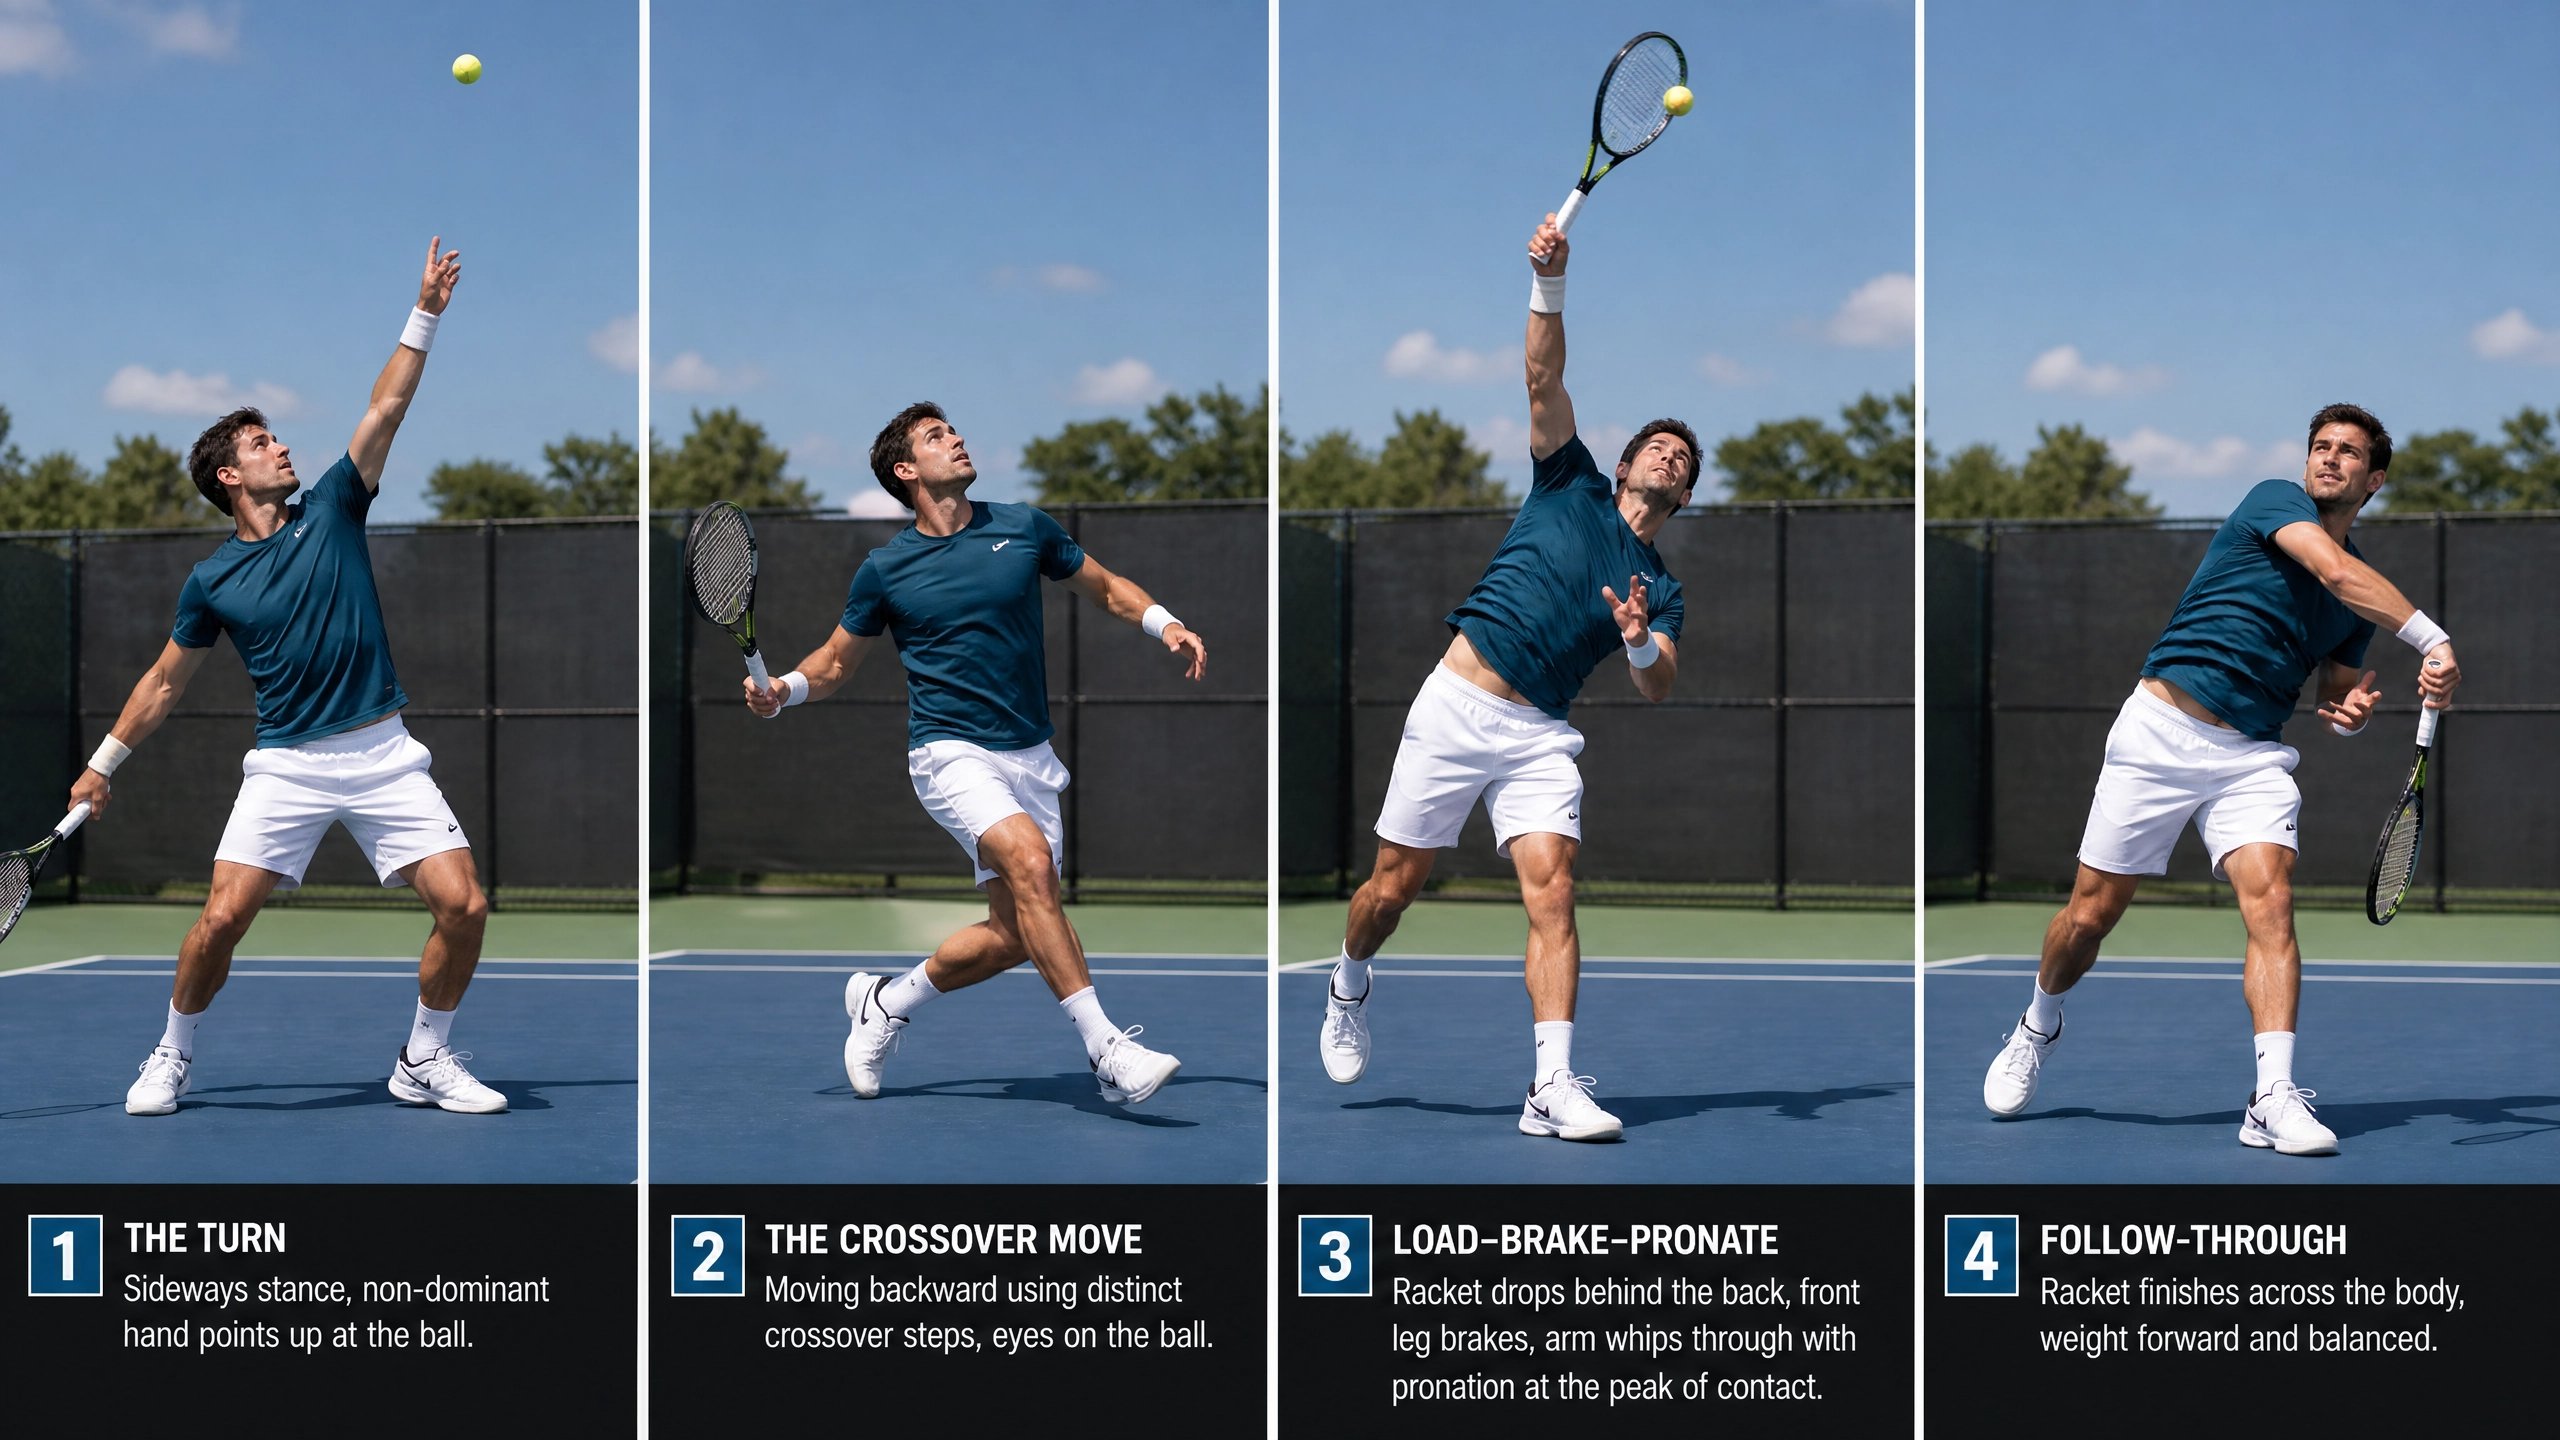
Volley & Overhead — Figure 4
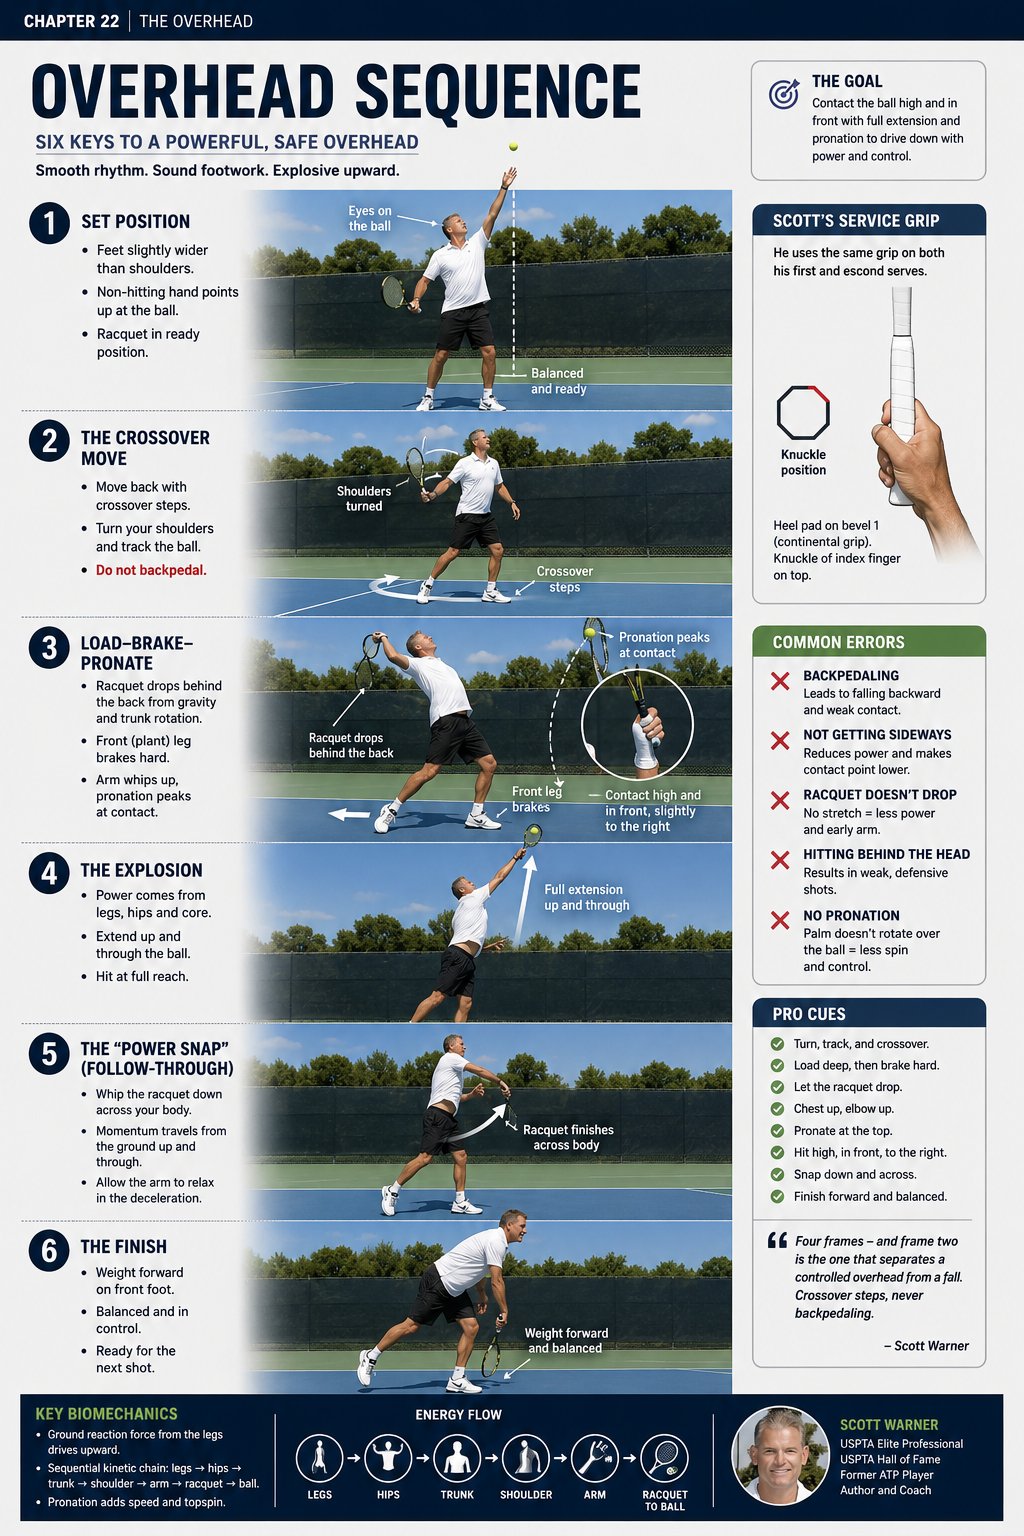
Volley & Overhead — Figure 5
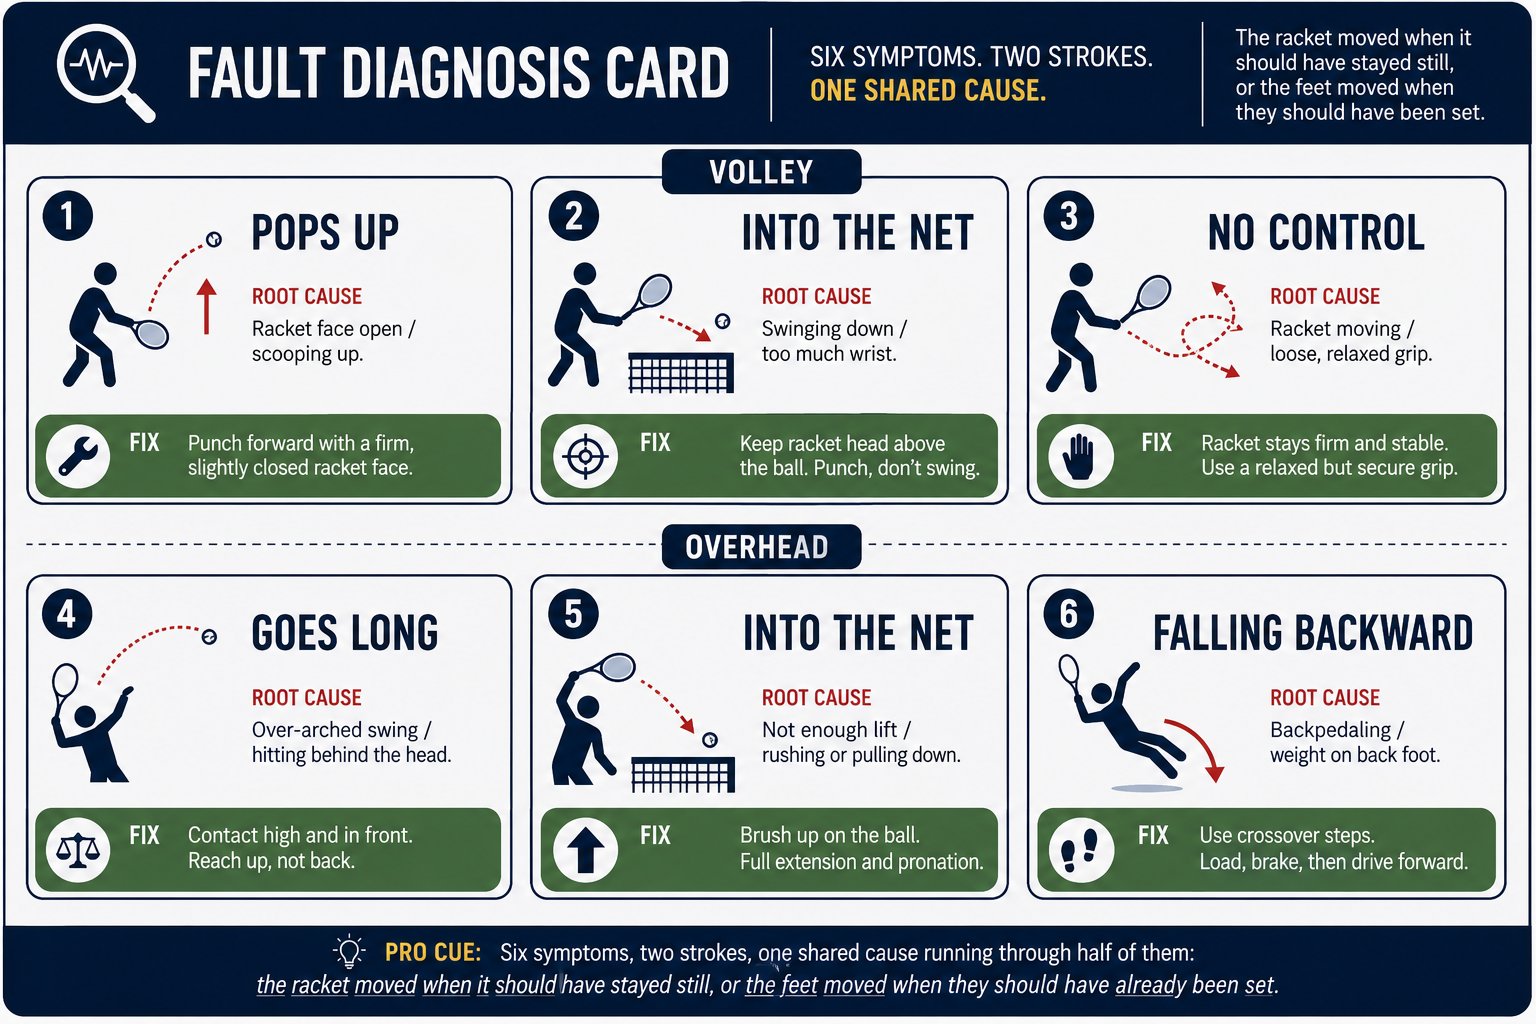
Volley & Overhead — Figure 6
Chapter 25: Slice, Drop Shot & Lob 5 figures
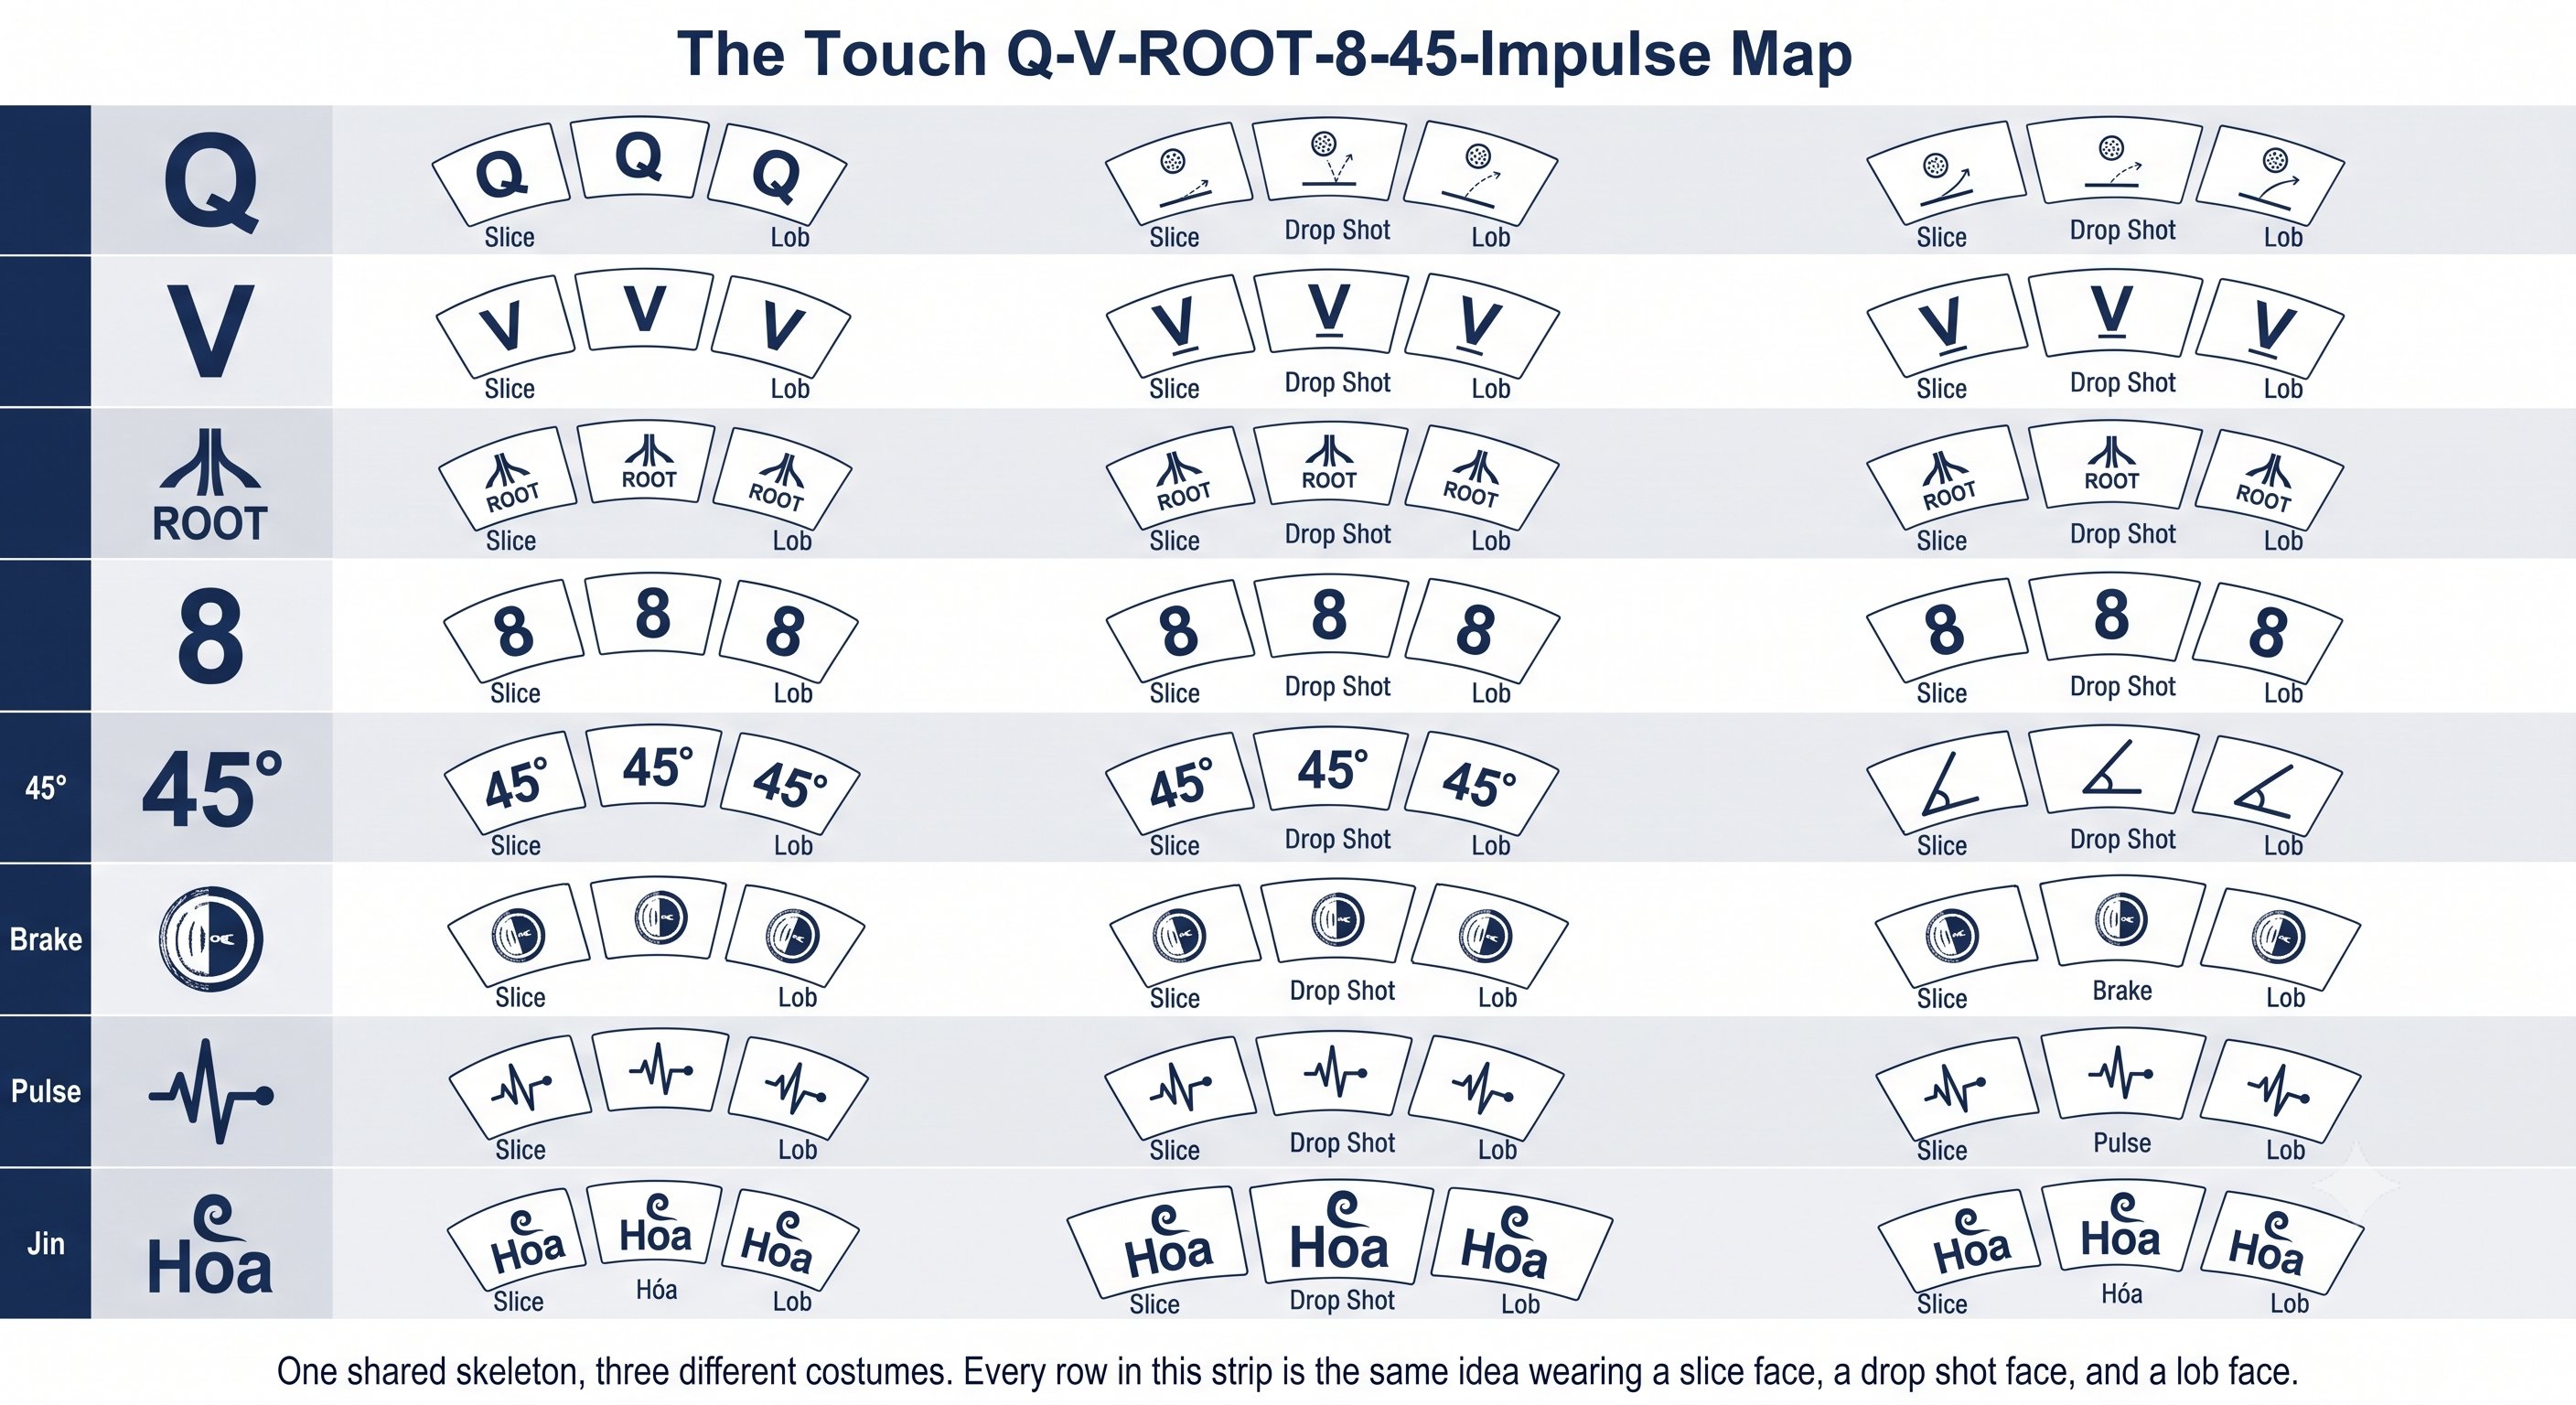
Slice, Drop Shot & Lob — Figure 1
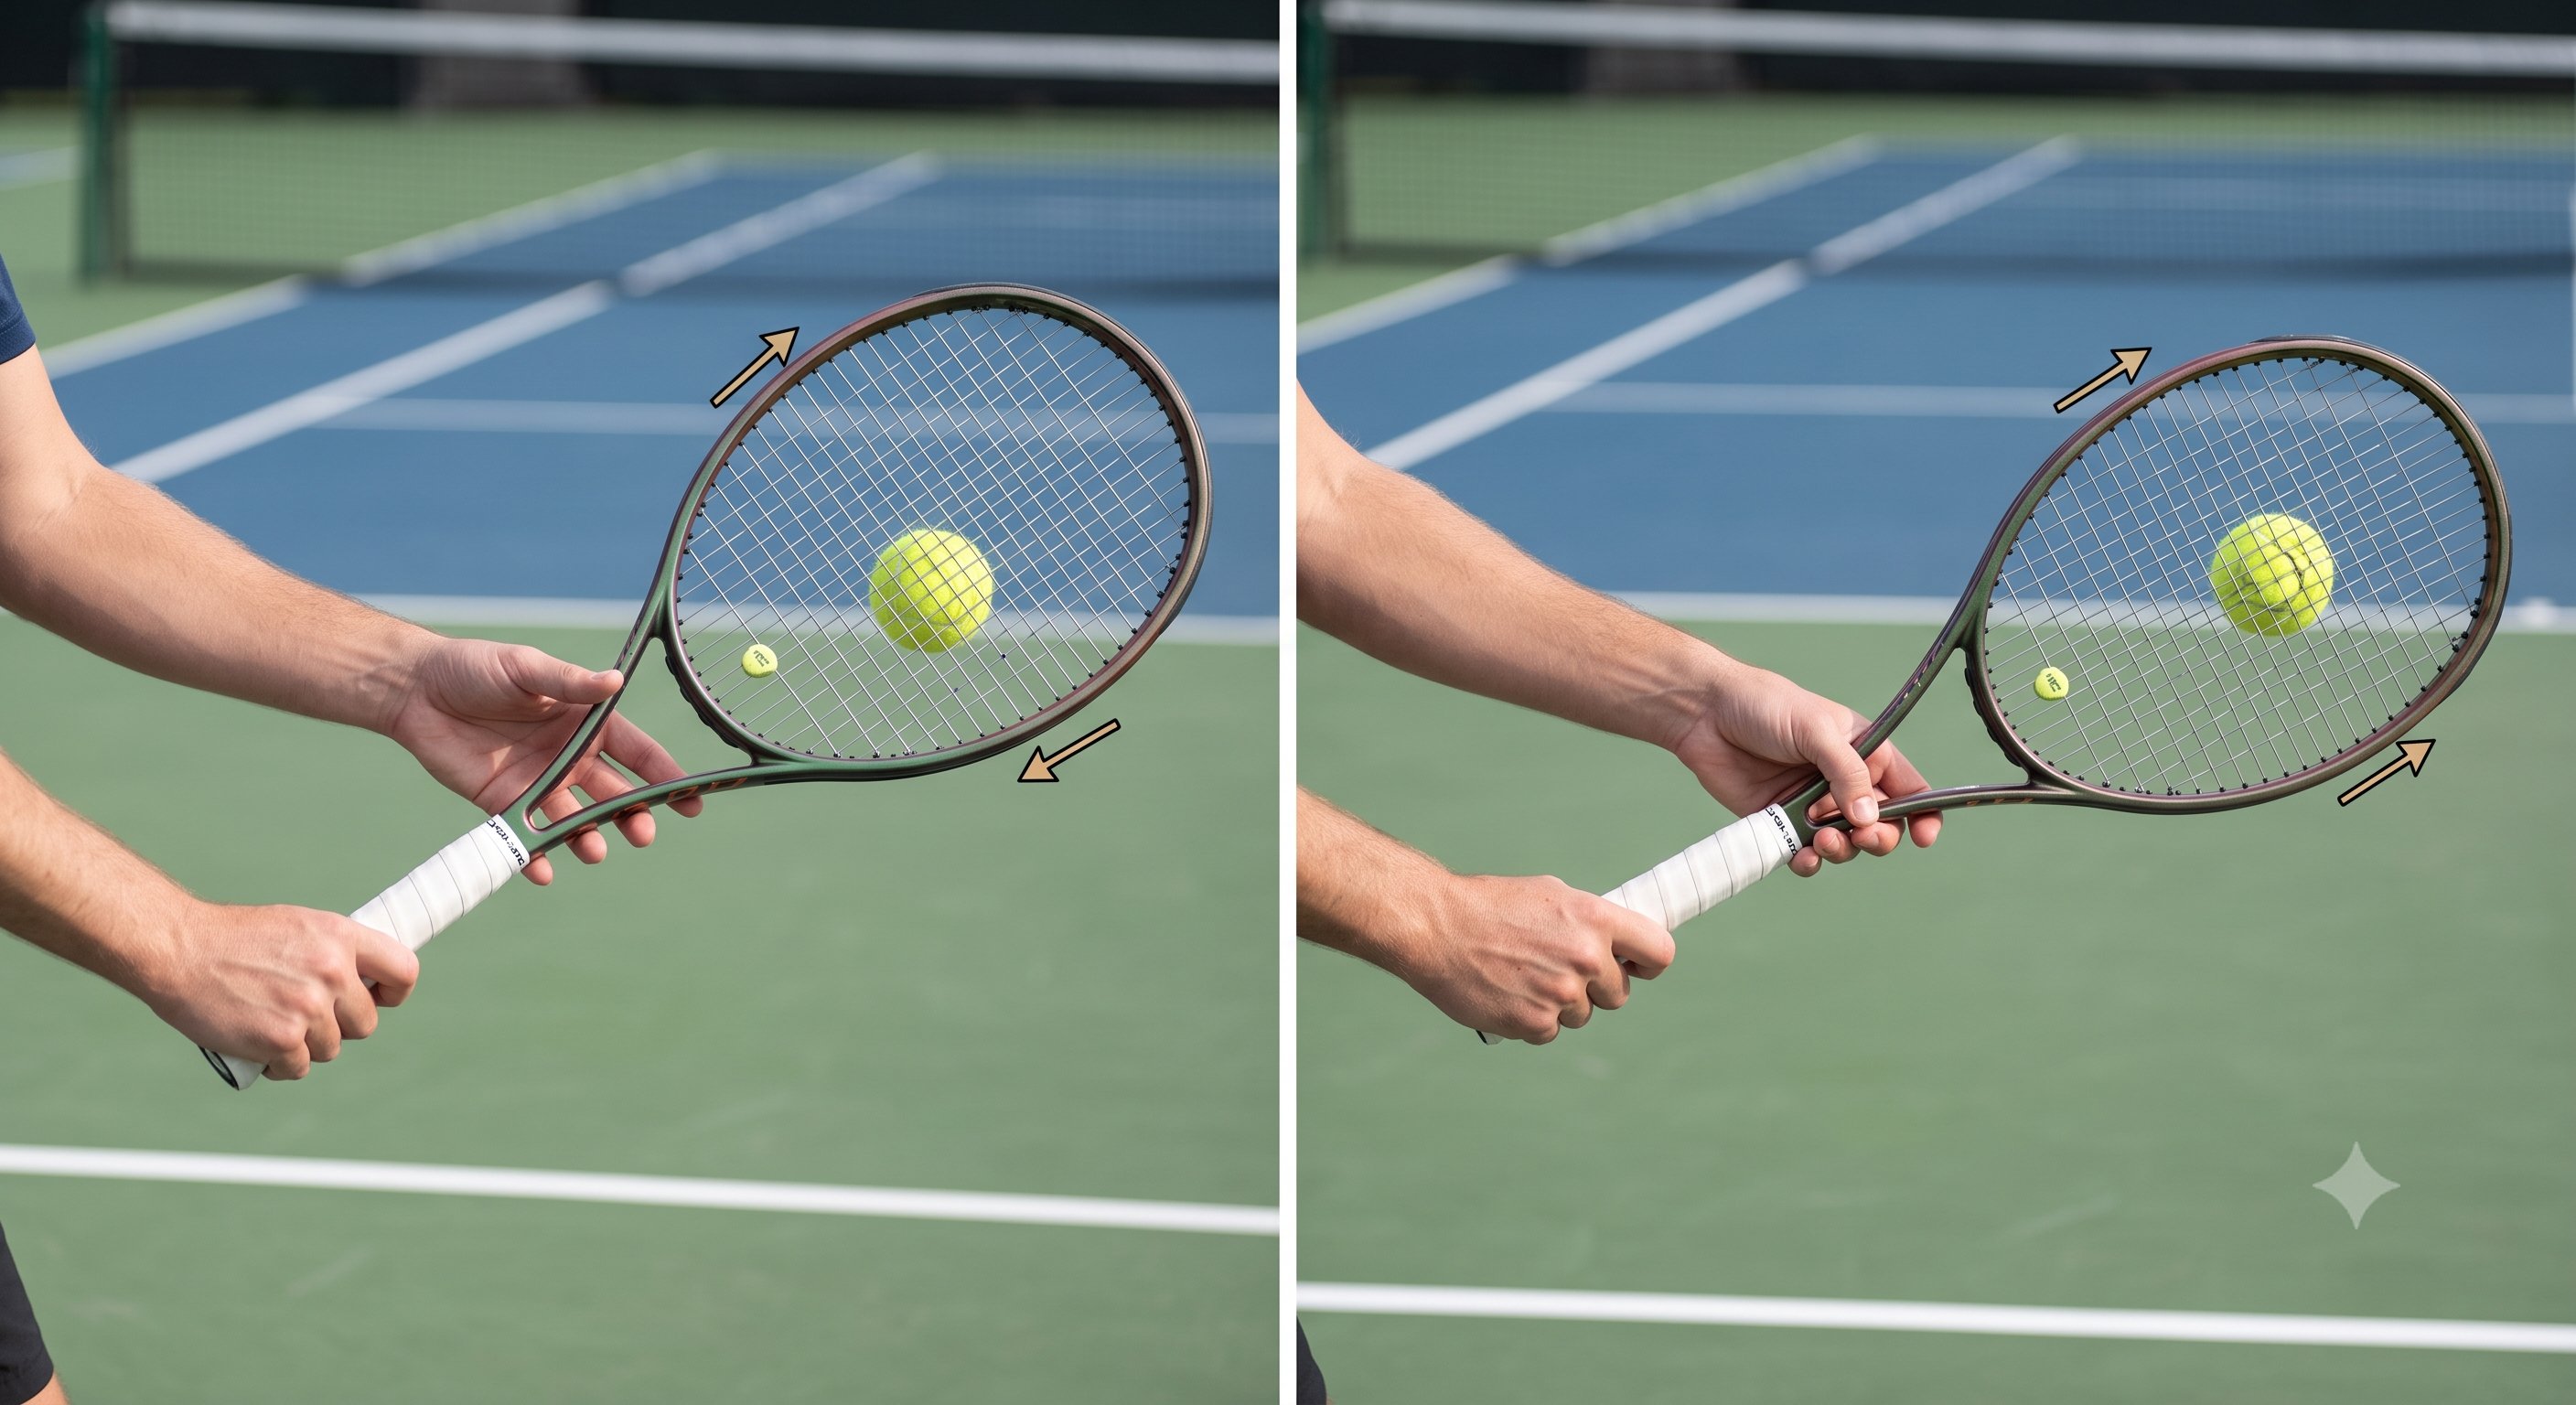
Slice, Drop Shot & Lob — Figure 2
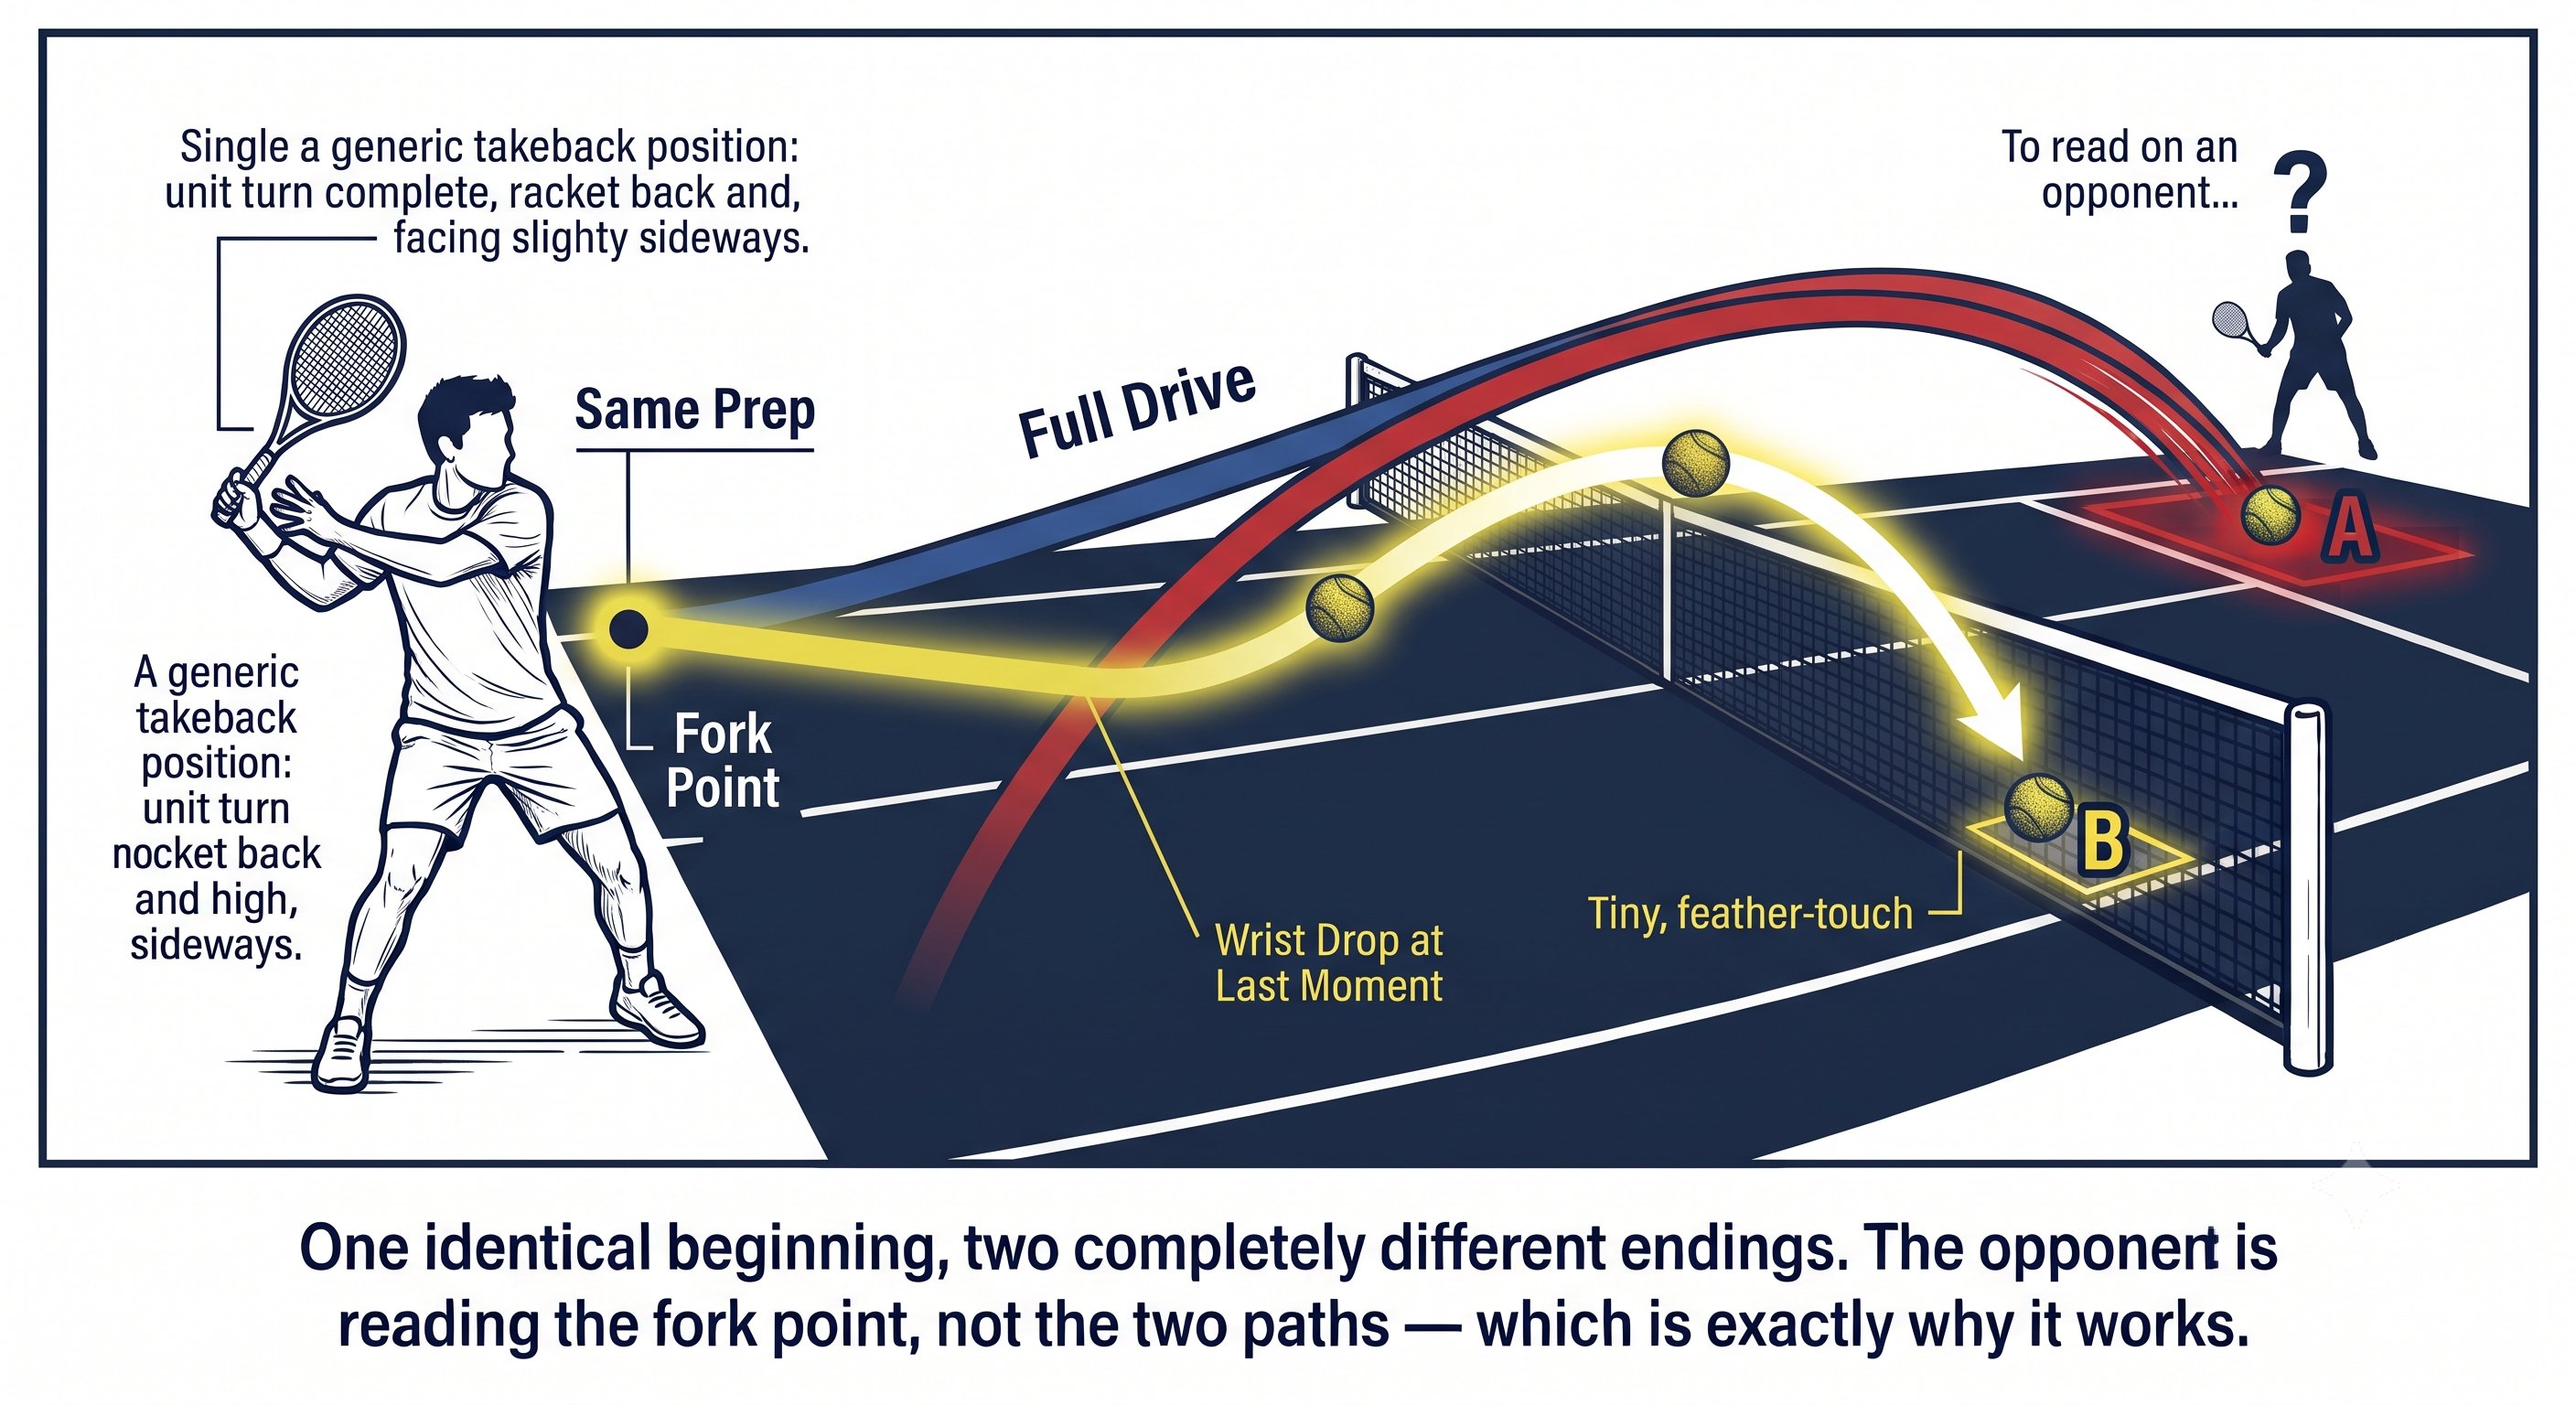
Slice, Drop Shot & Lob — Figure 3
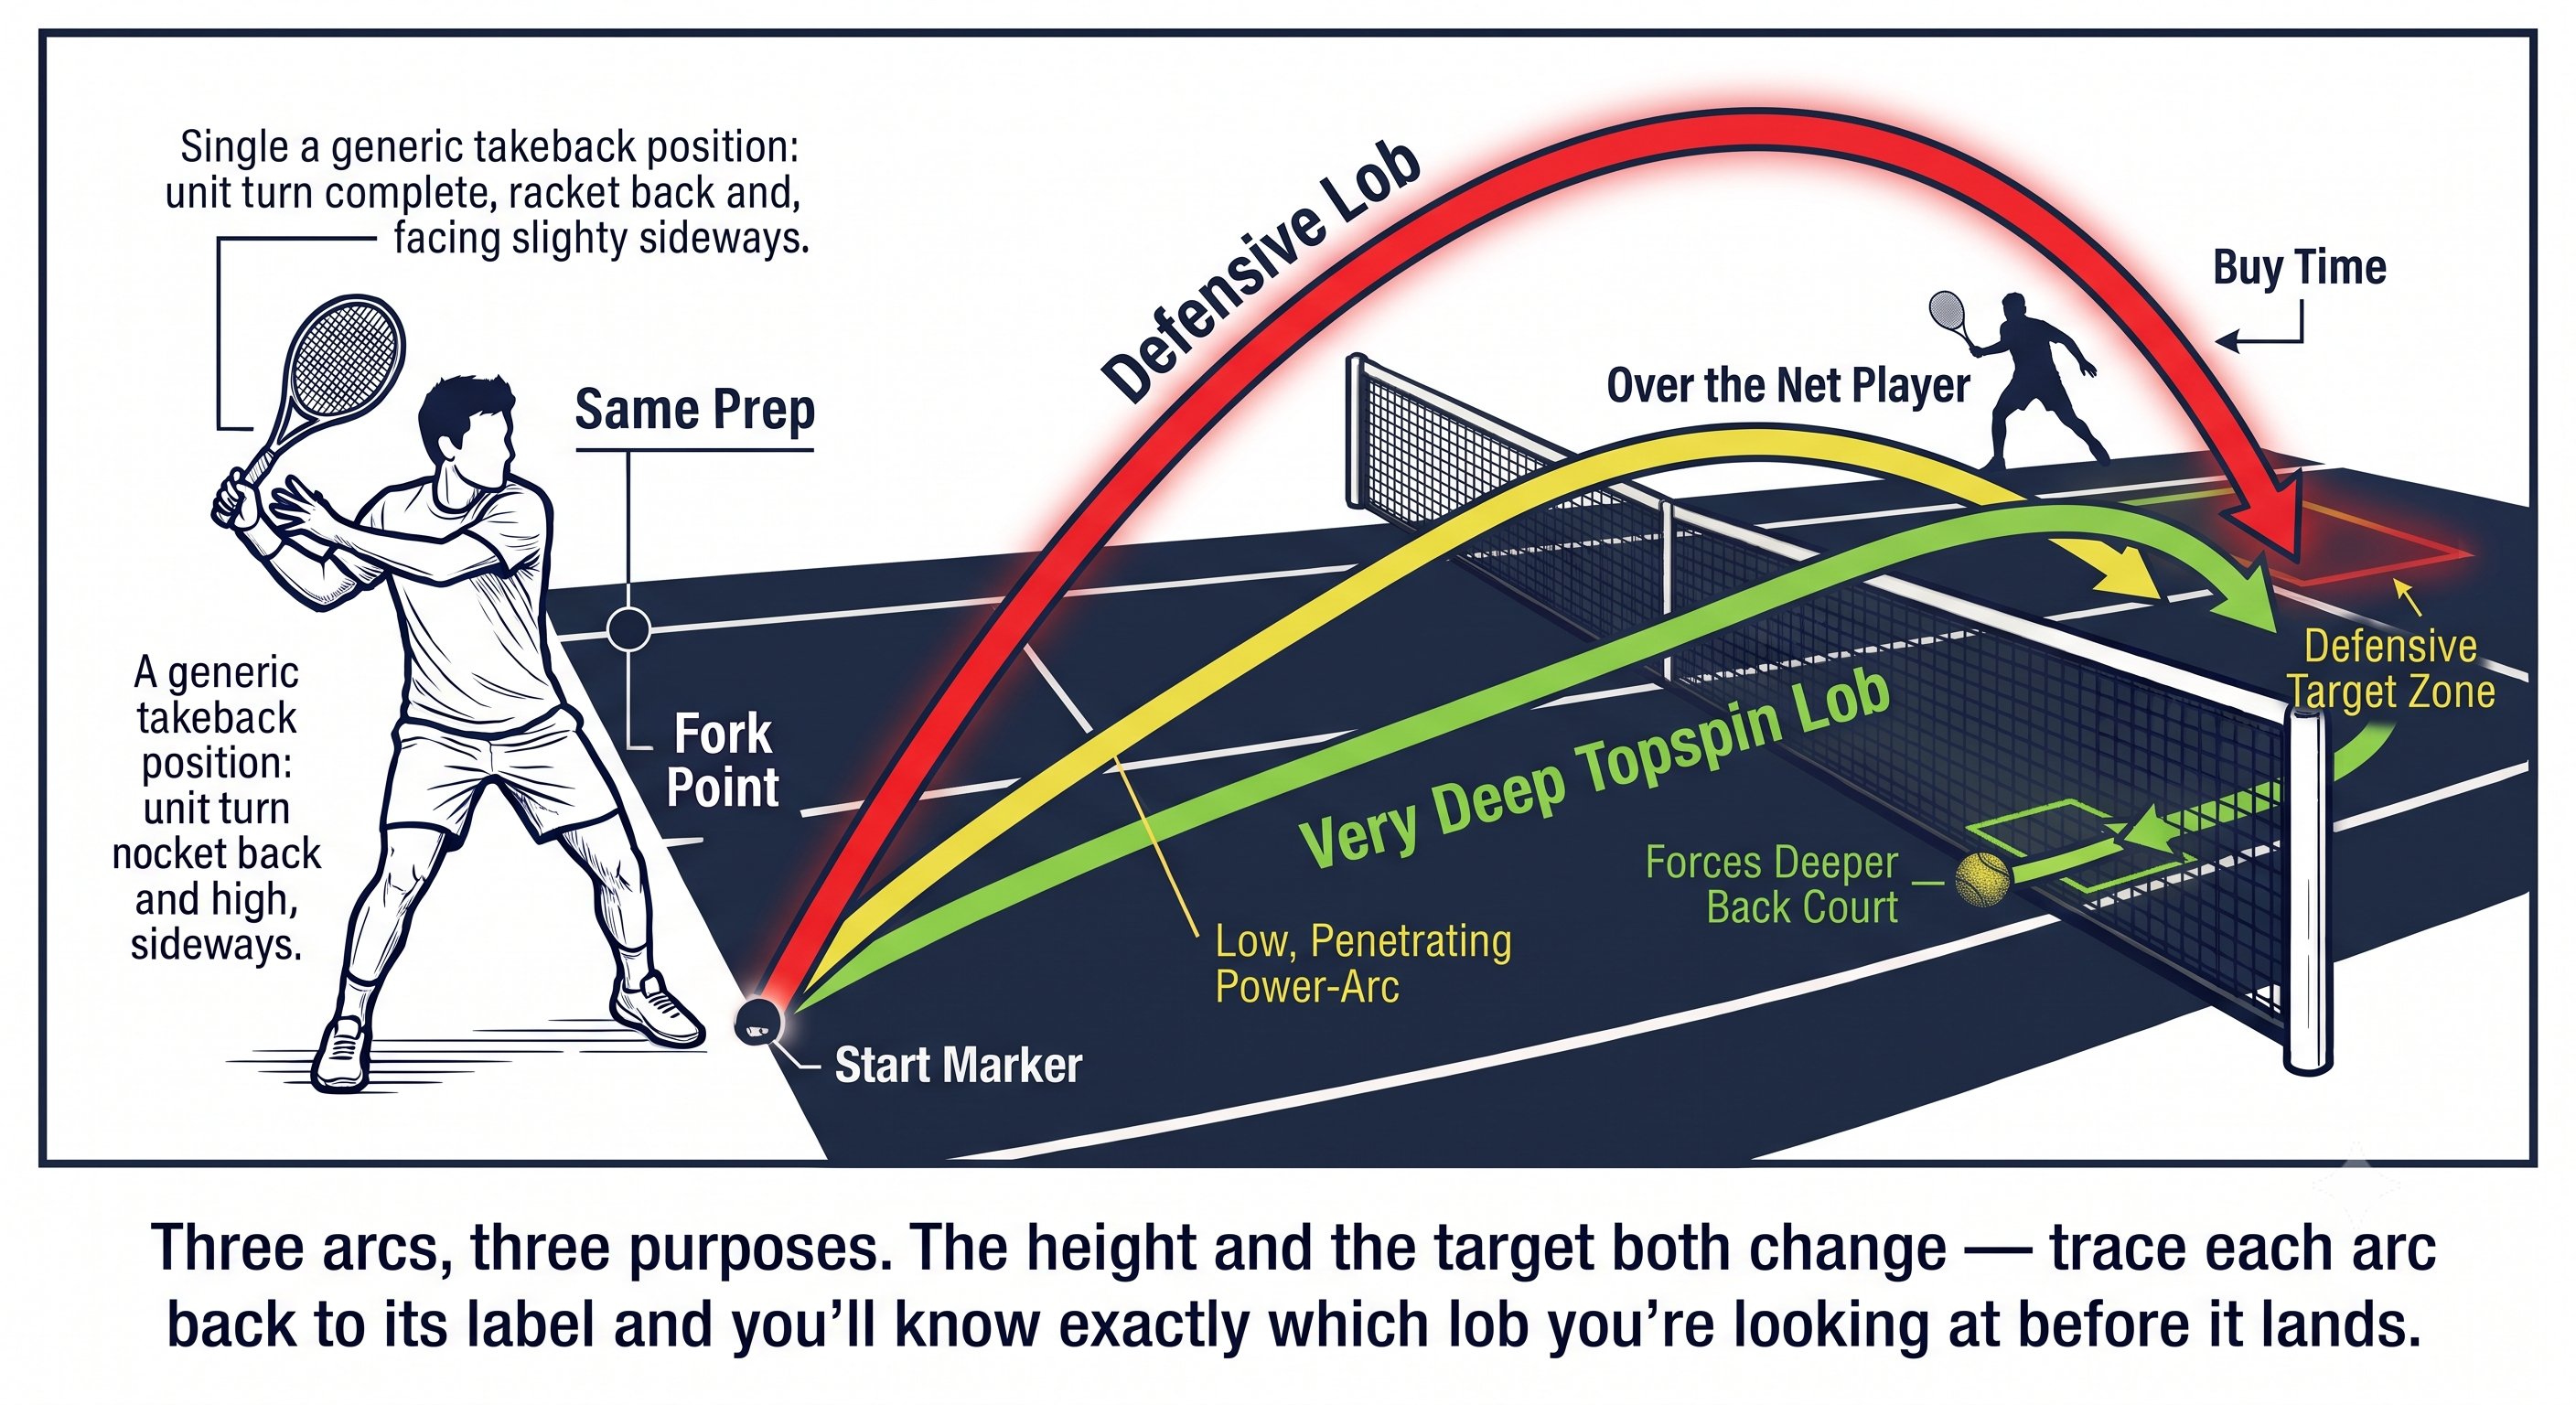
Slice, Drop Shot & Lob — Figure 4
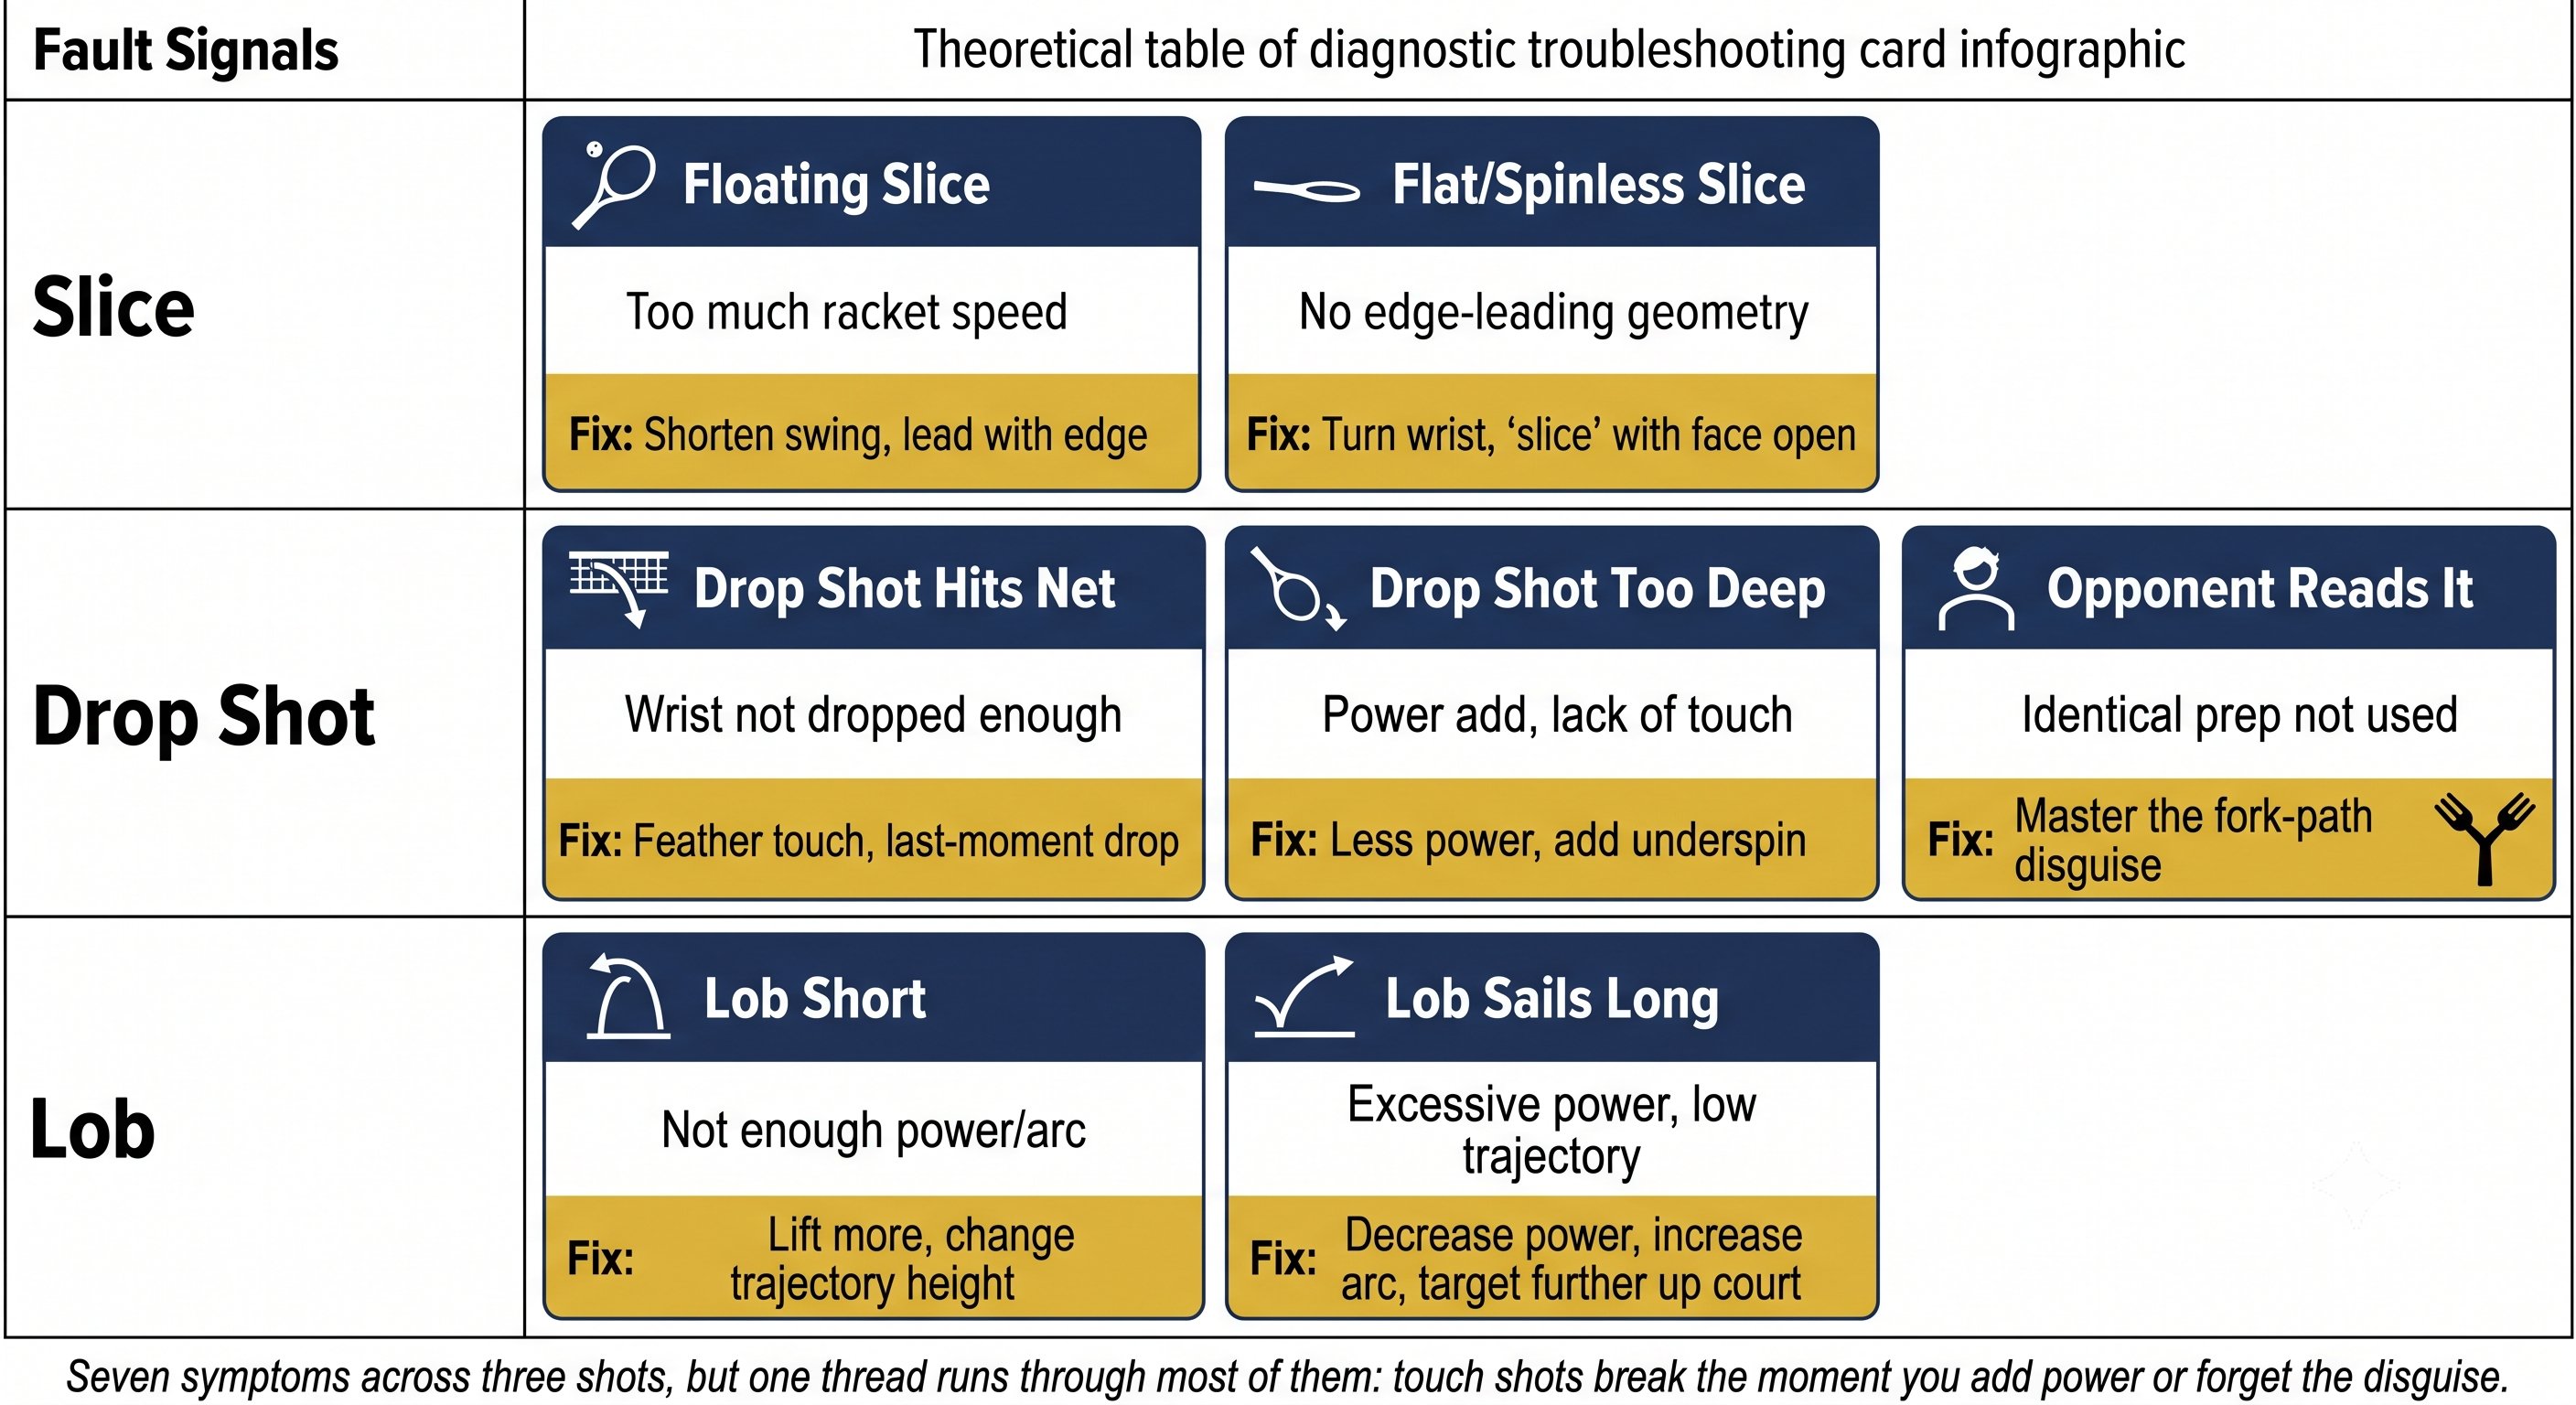
Slice, Drop Shot & Lob — Figure 5
🦶 Footwork · Bước chân ↑ back to topics
Hu-Thuc Footwork, stance types, split step, ready position. Bước chân Hu-Thức, các loại stance, split step, tư thế sẵn sàng.
Chapter 17: Hu-Thuc Footwork 4 figures
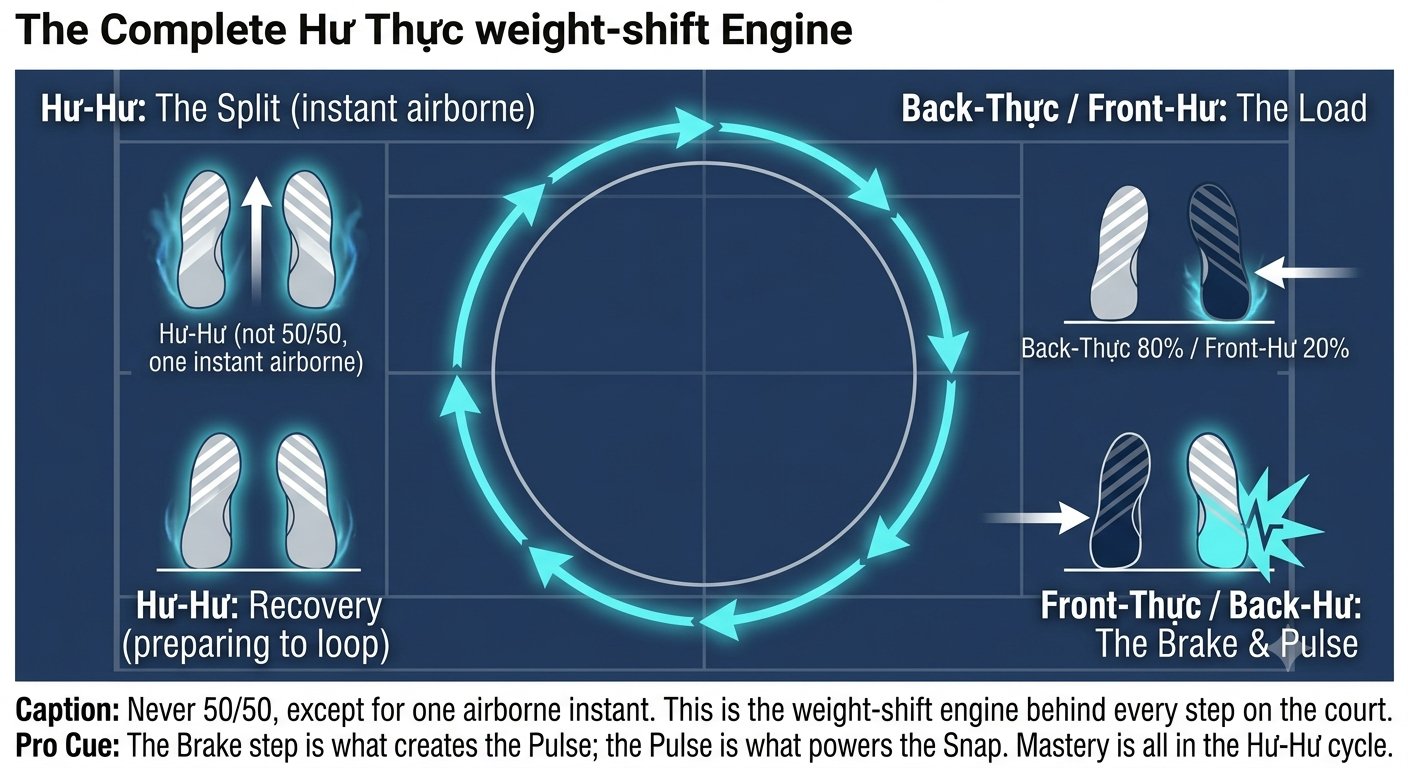
Hu-Thuc Footwork — Figure 1
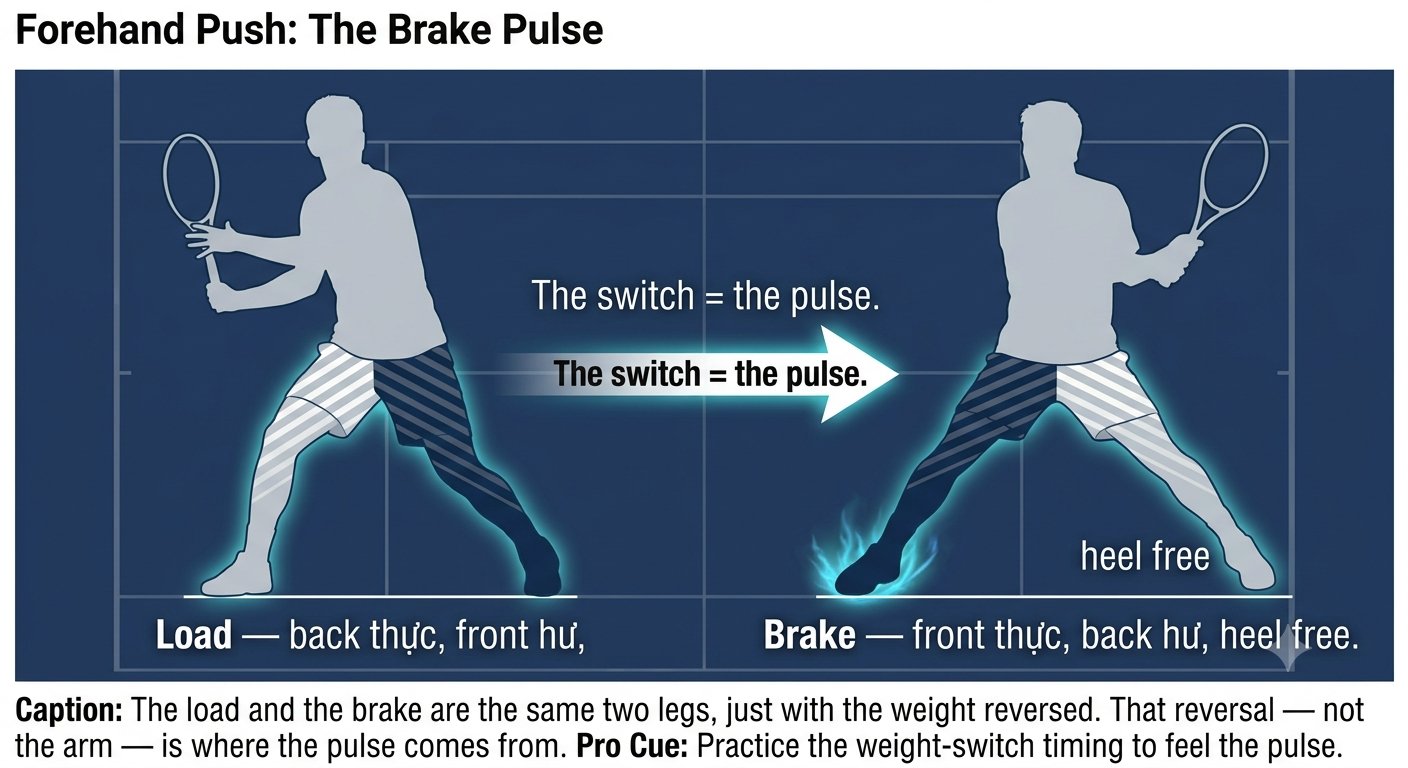
Hu-Thuc Footwork — Figure 2
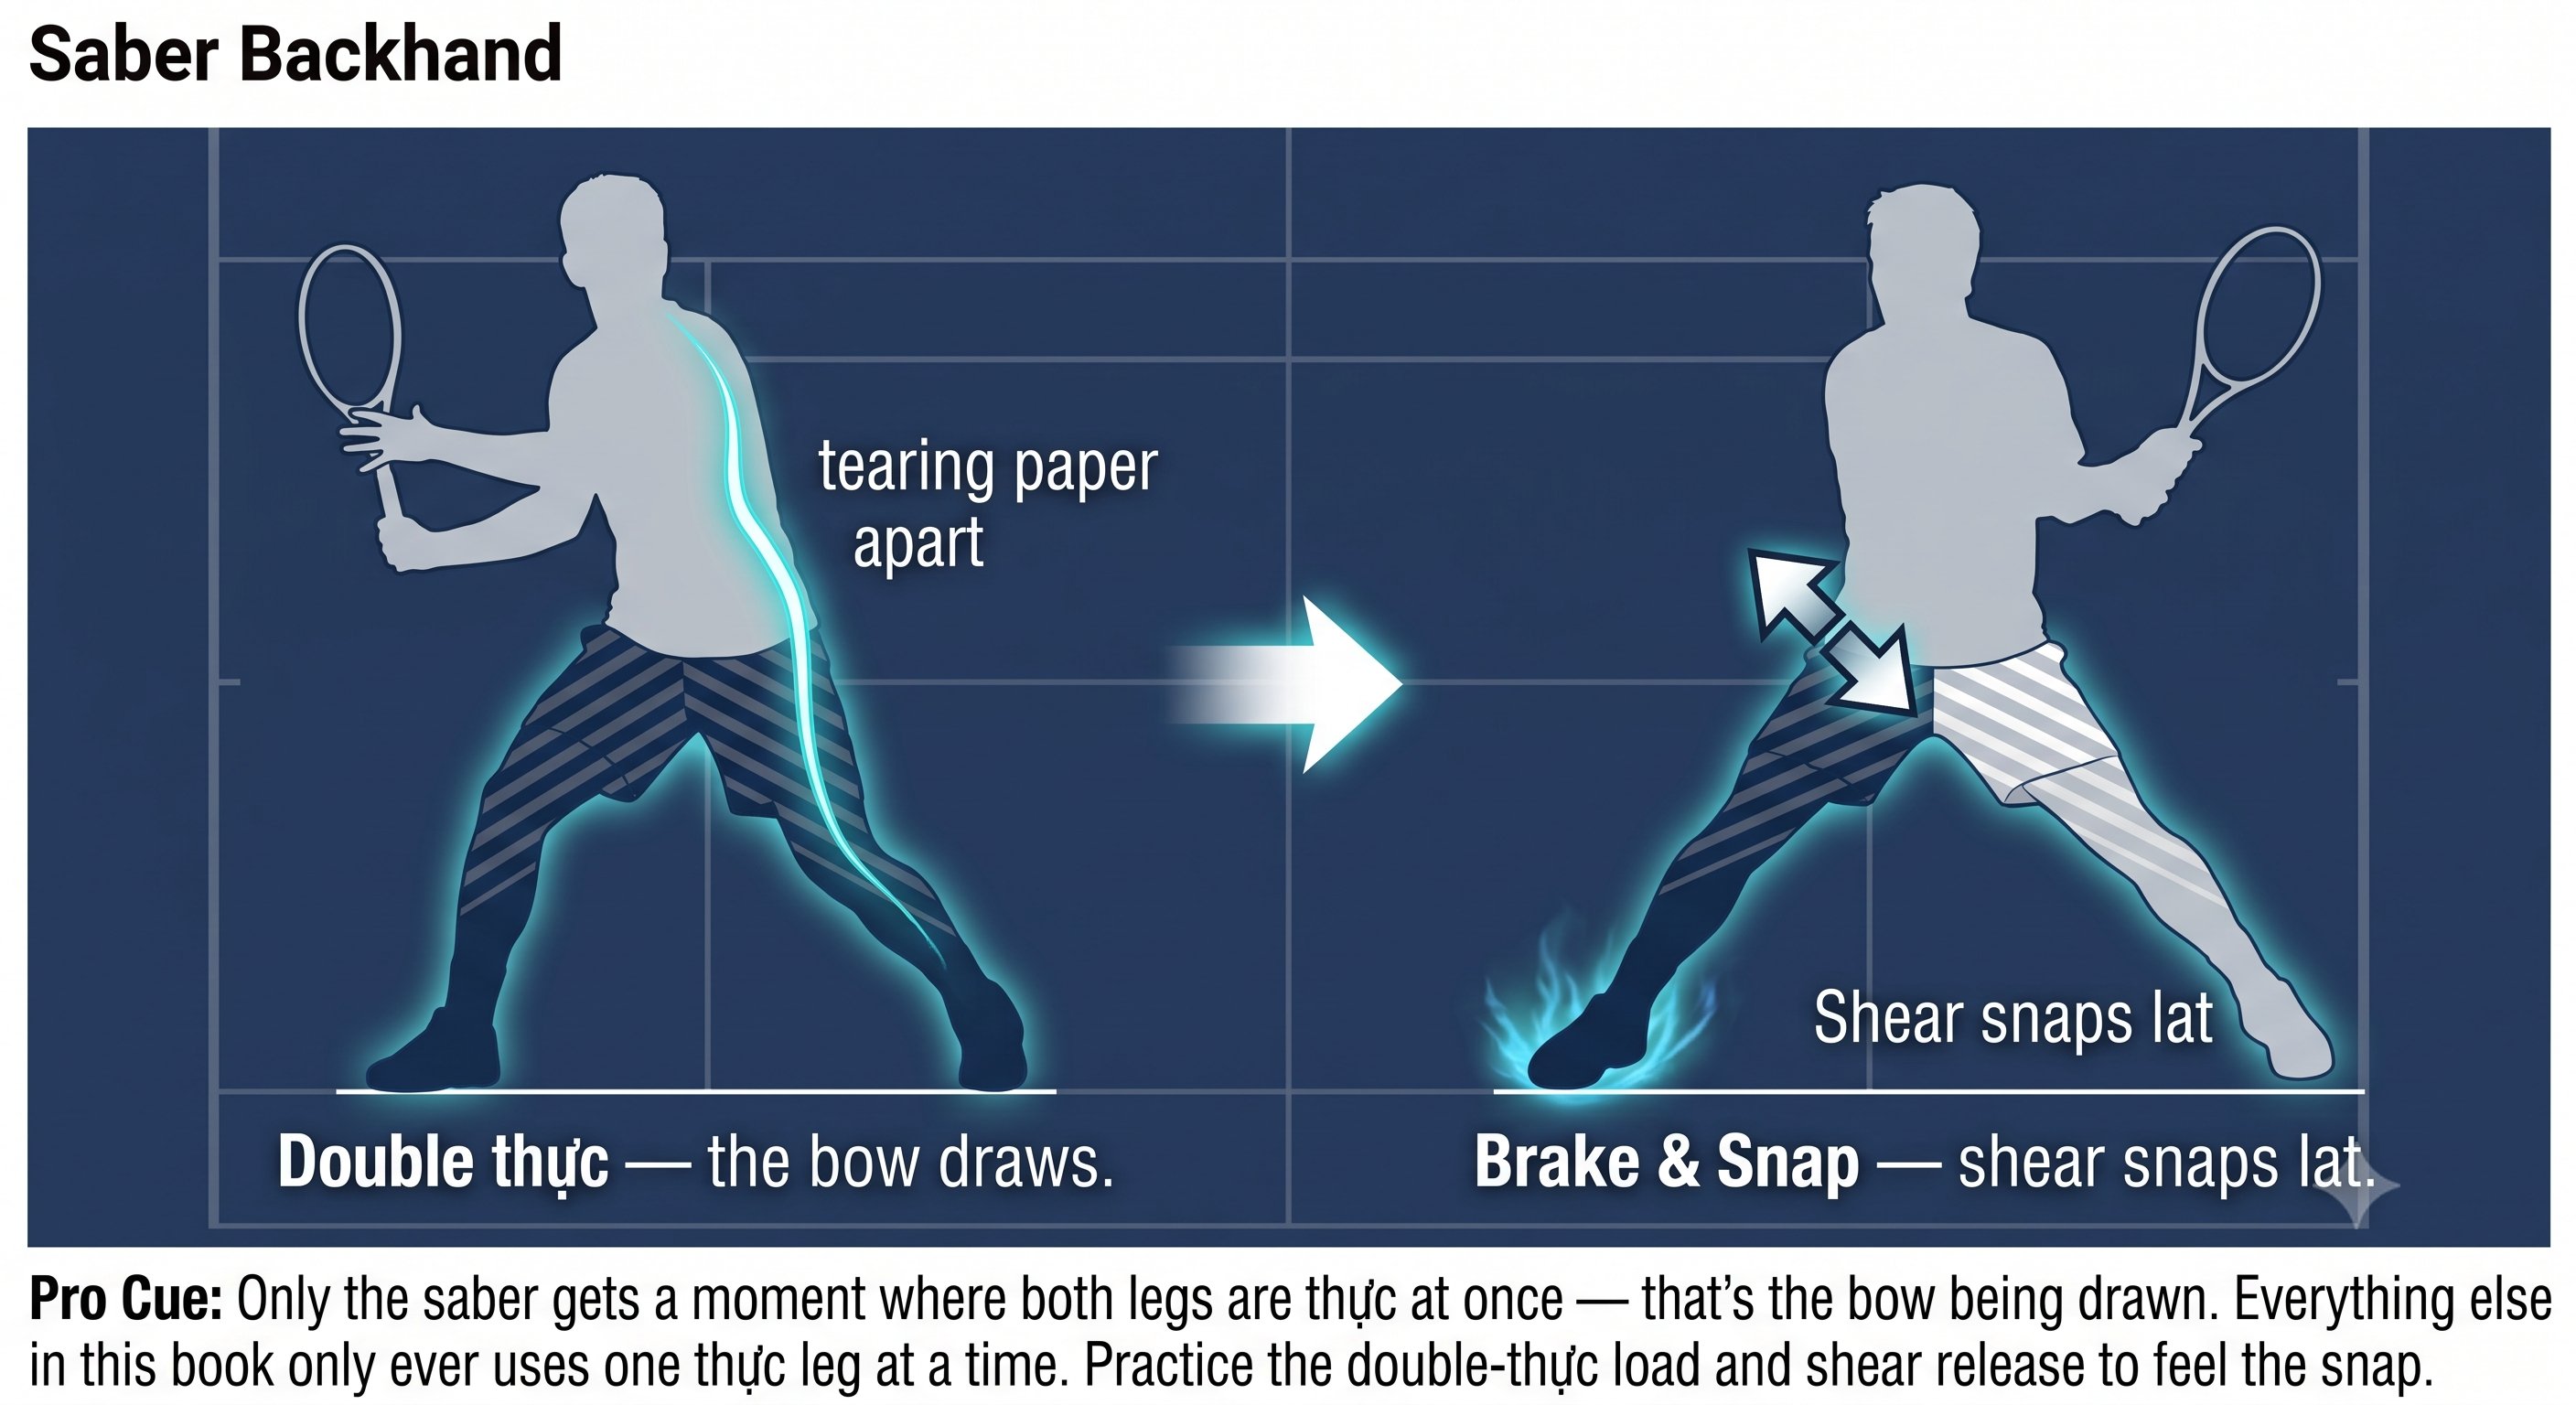
Hu-Thuc Footwork — Figure 3
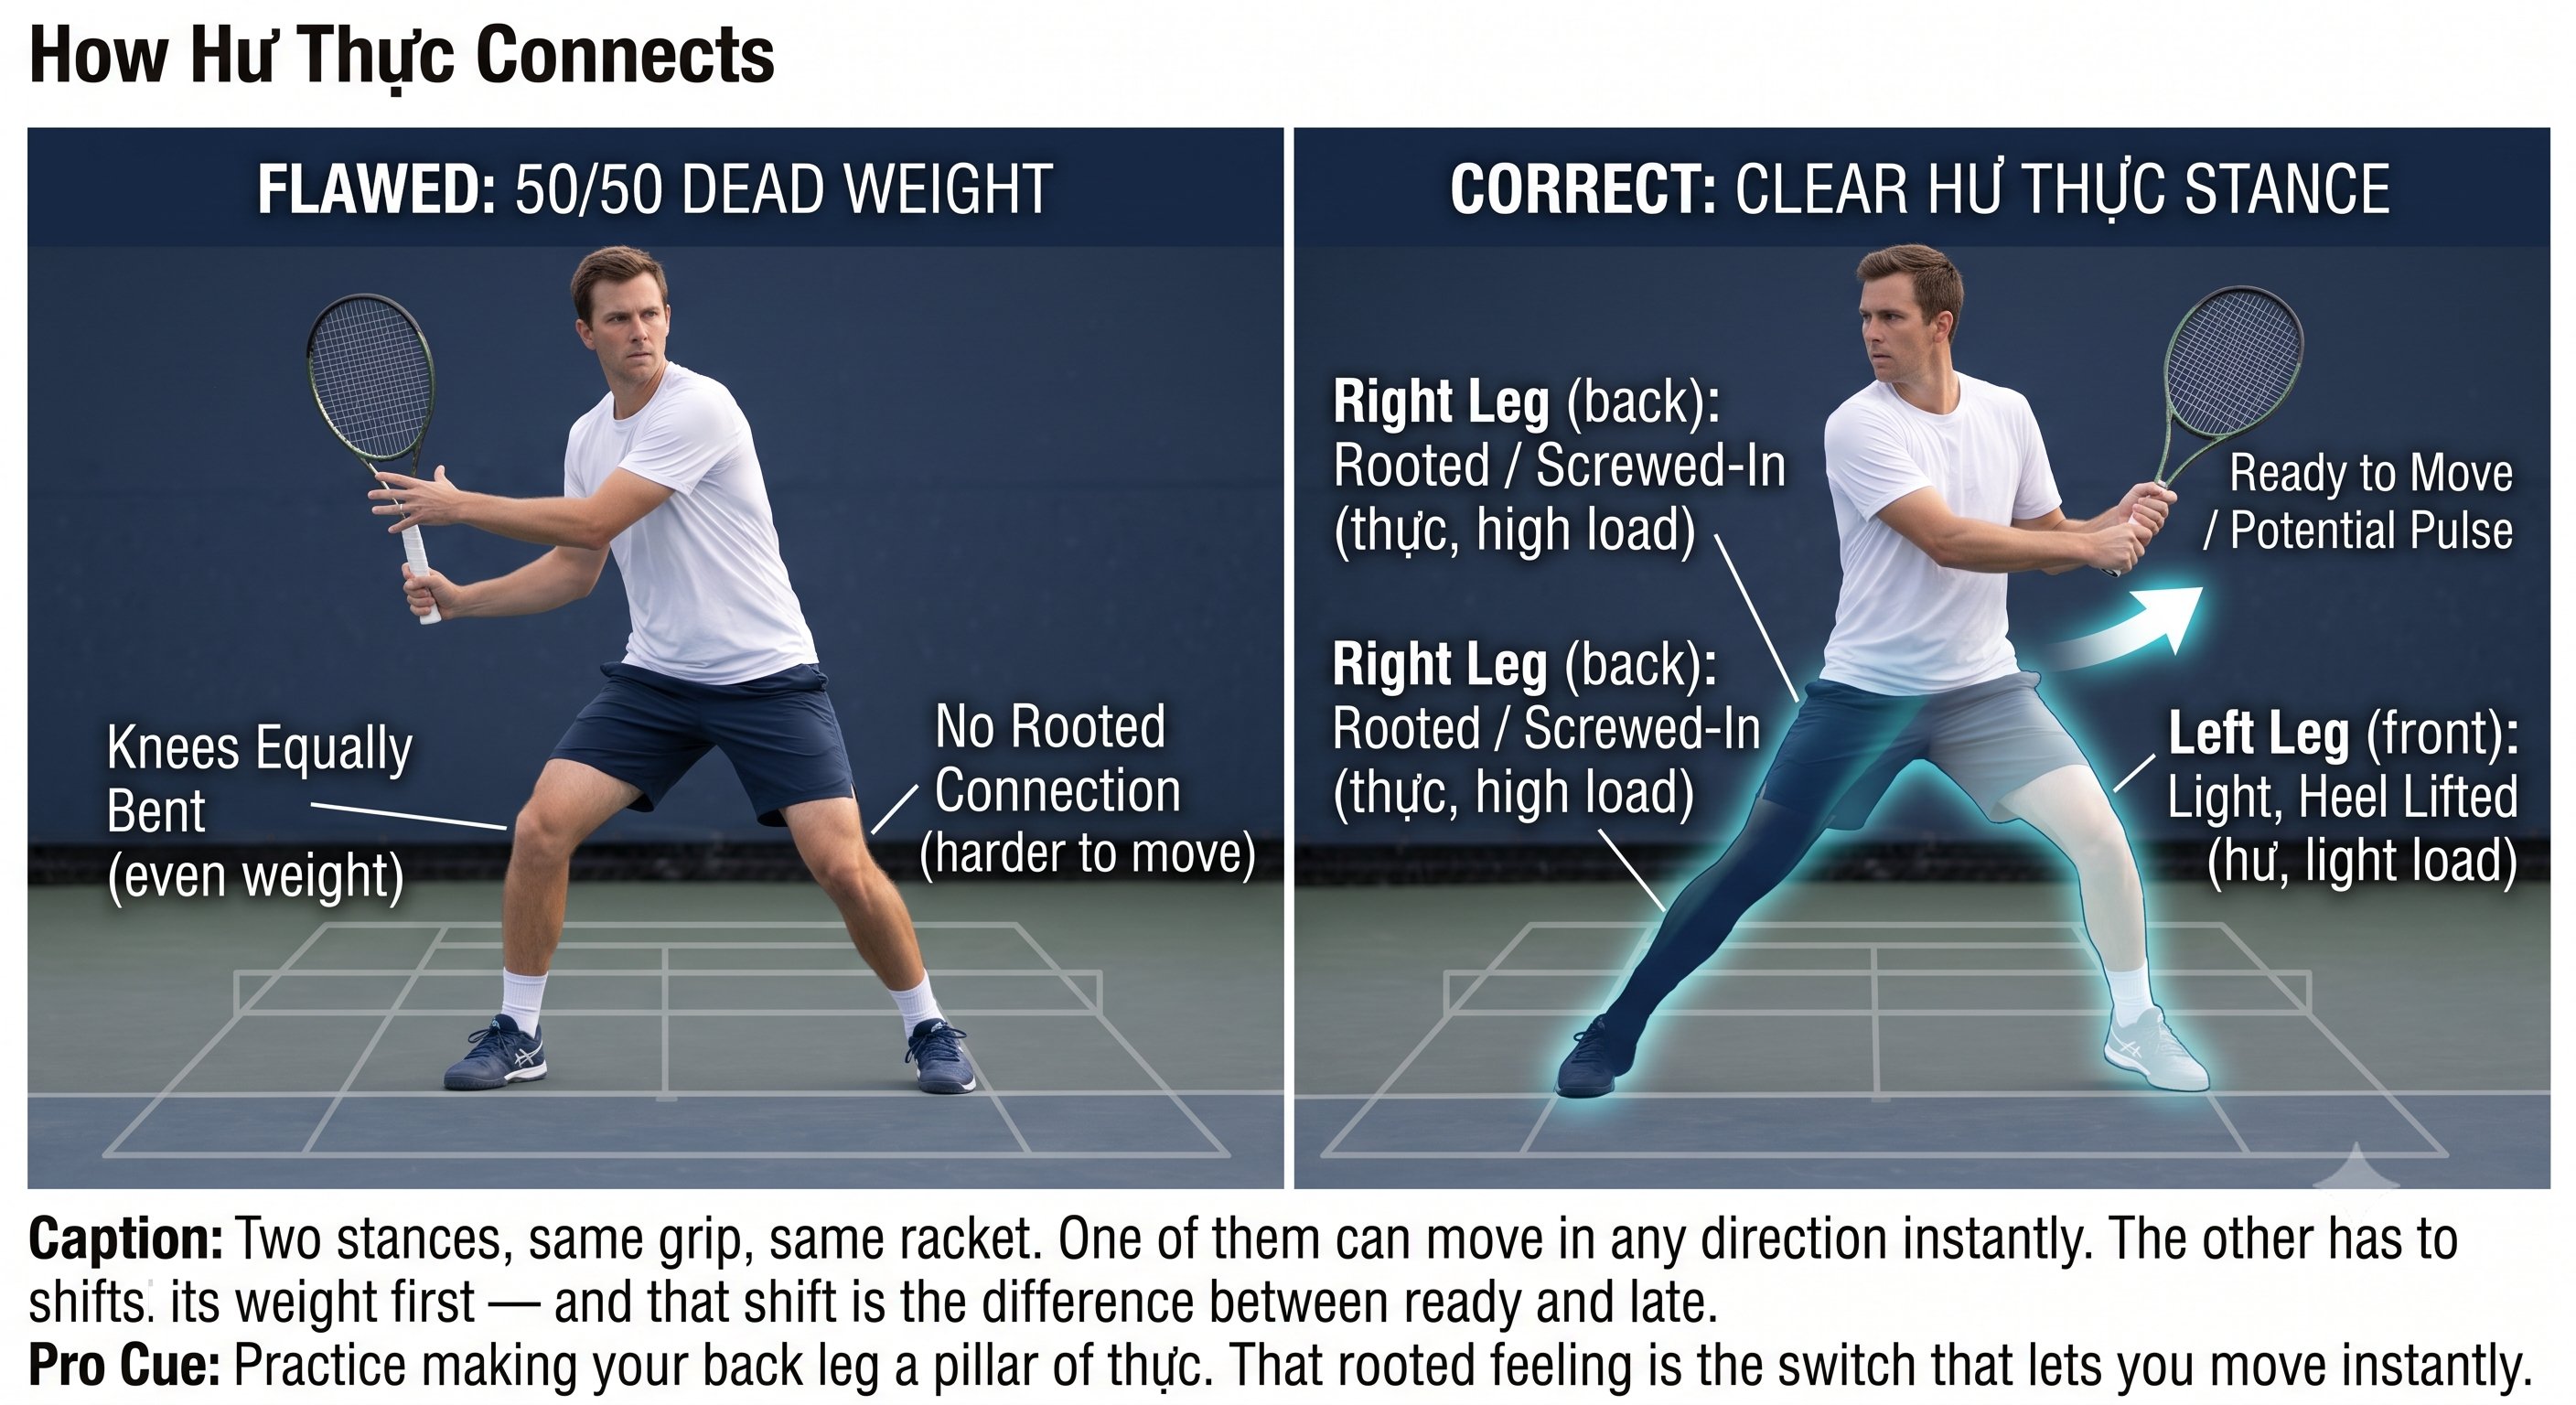
Hu-Thuc Footwork — Figure 4
🤚 Grip · Cách cầm vợt ↑ back to topics
Rooting, wrist integrity, contact-palm control, grip types vs shot. Rooting, toàn vẹn cổ tay, palm control, grip theo cú đánh.
Chapter 18: Rooting 5 figures
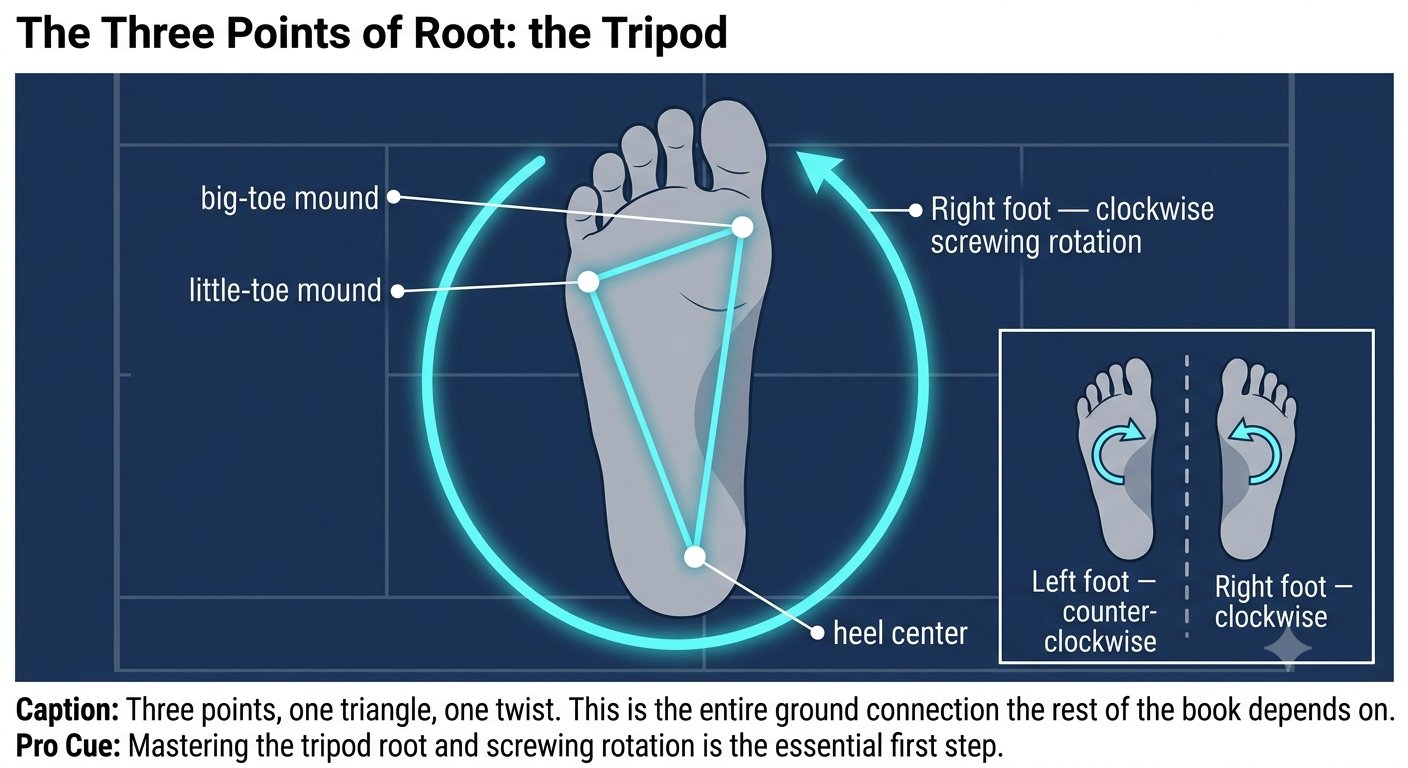
Rooting — Figure 1
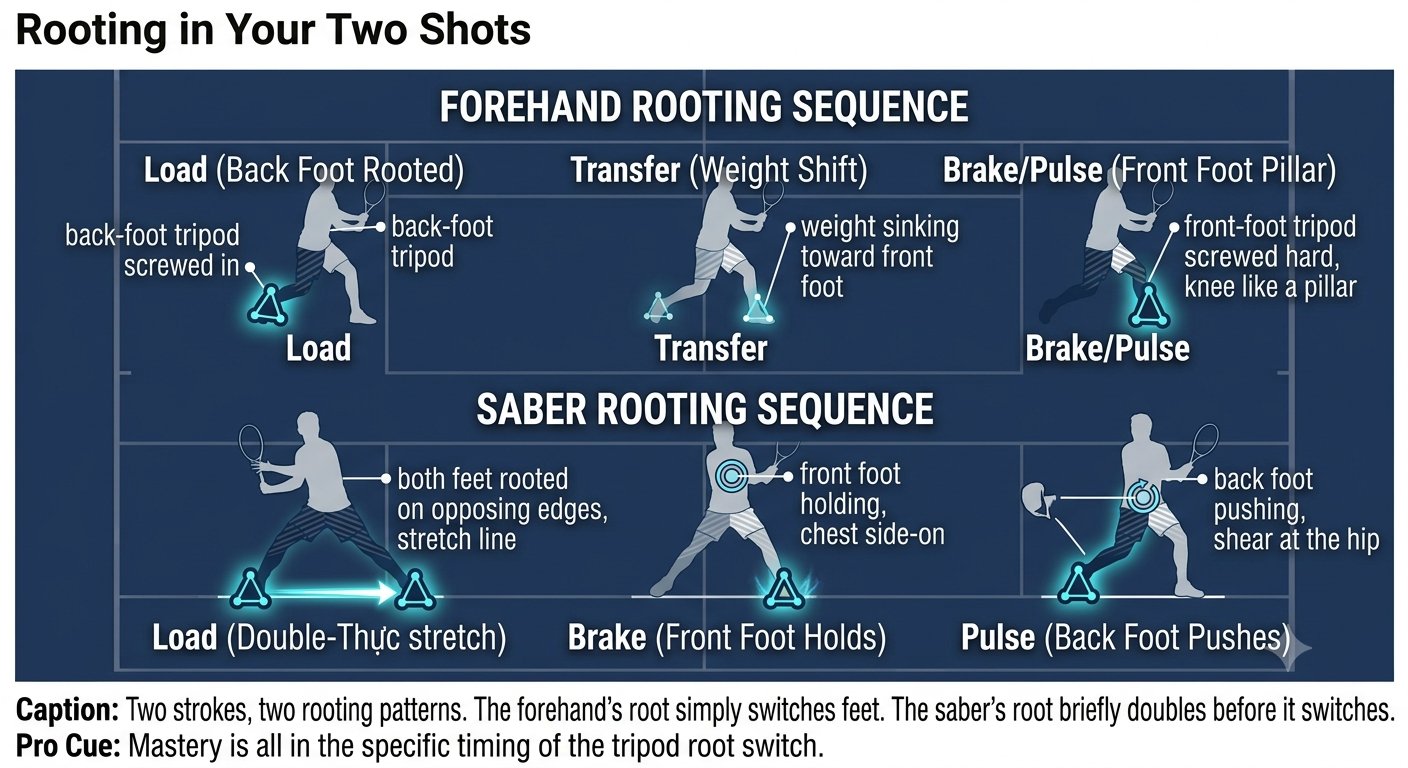
Rooting — Figure 2
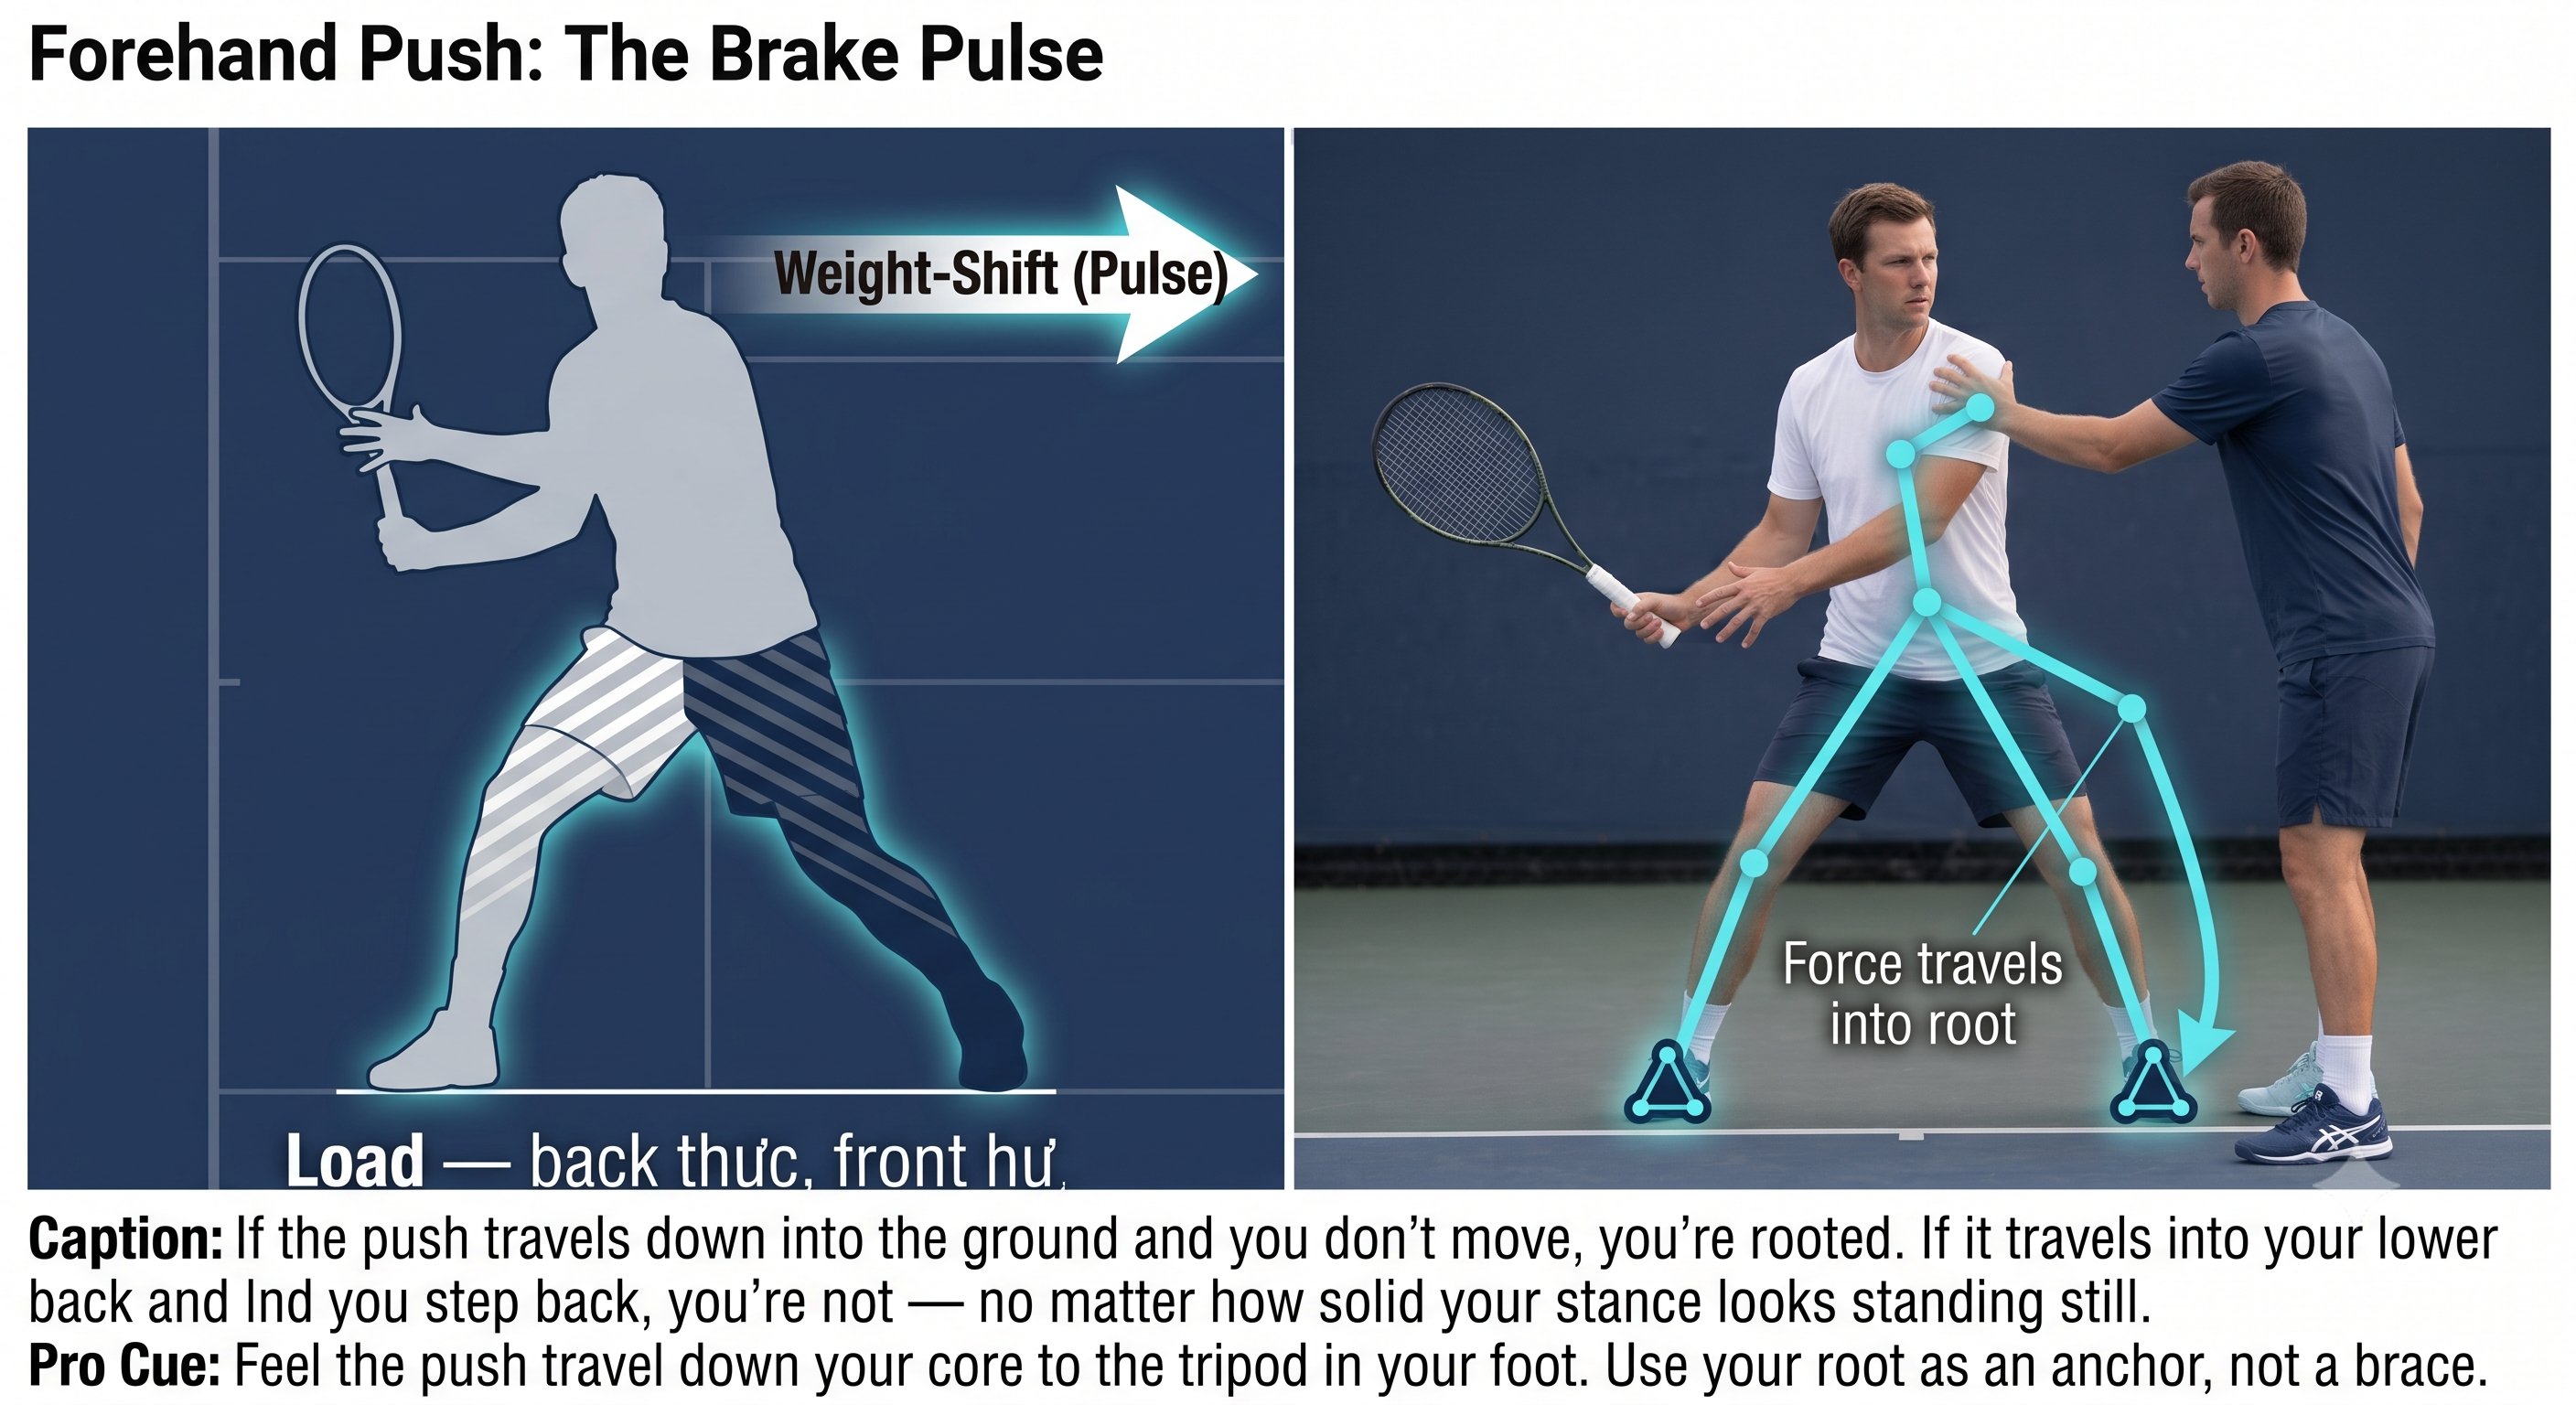
Rooting — Figure 3
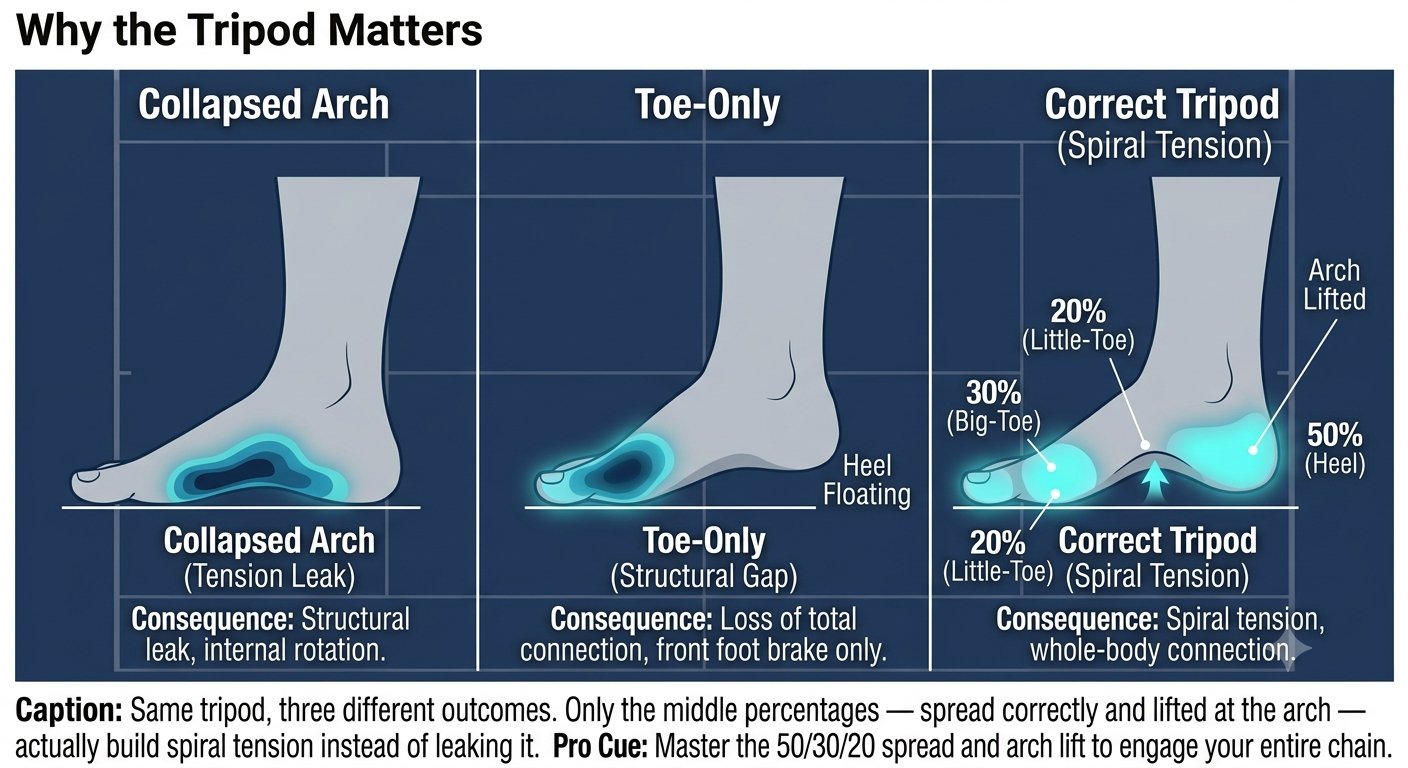
Rooting — Figure 4
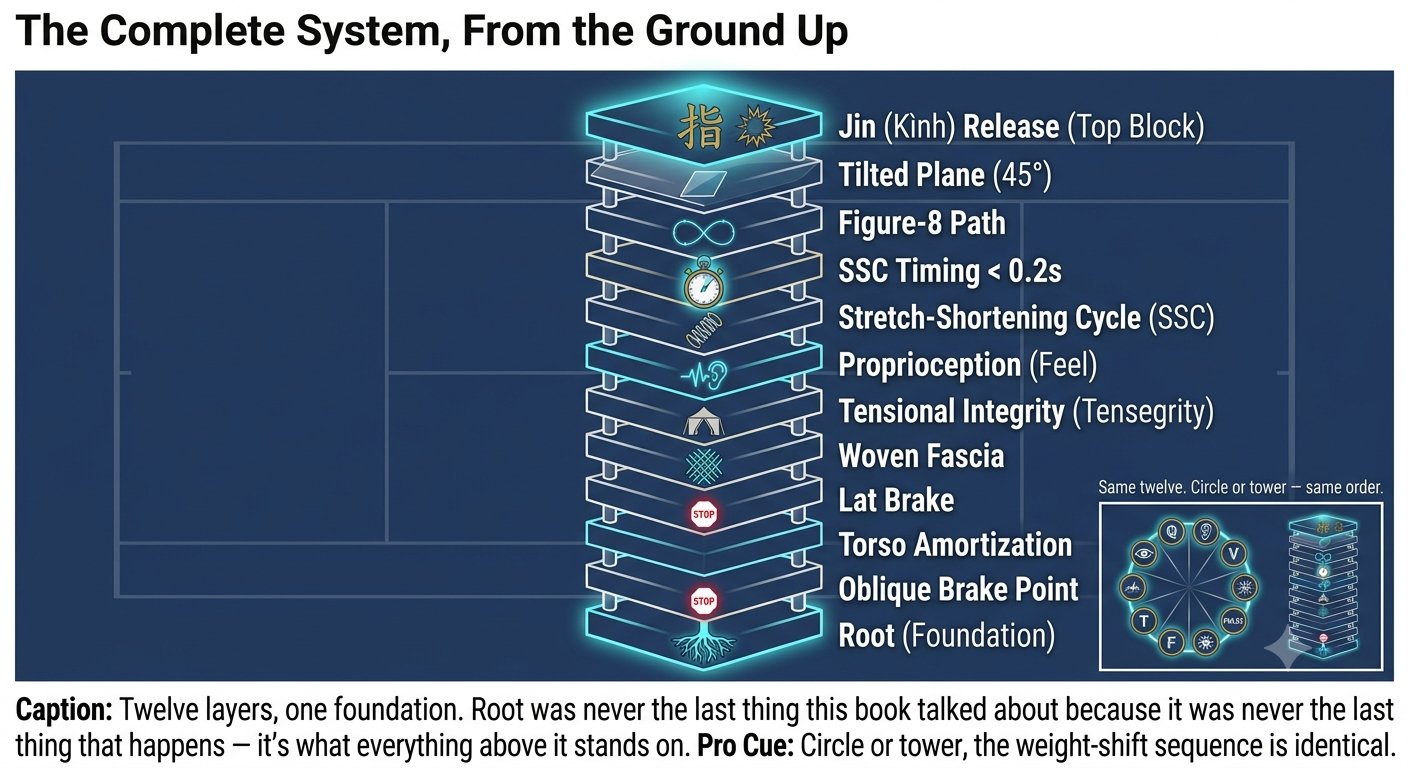
Rooting — Figure 5
🧬 Biomechanics · Cơ sinh học ↑ back to topics
CORE chain — Quiet Eye, VOR, Fascia, Tensegrity, SSC, Figure-8, 45°, Brake, Jin. Chuỗi CORE — Quiet Eye, VOR, Cân cơ, Tensegrity, SSC, Figure-8, 45°, Braking, Jin.
Chapter 8: Quiet Eye 5 figures
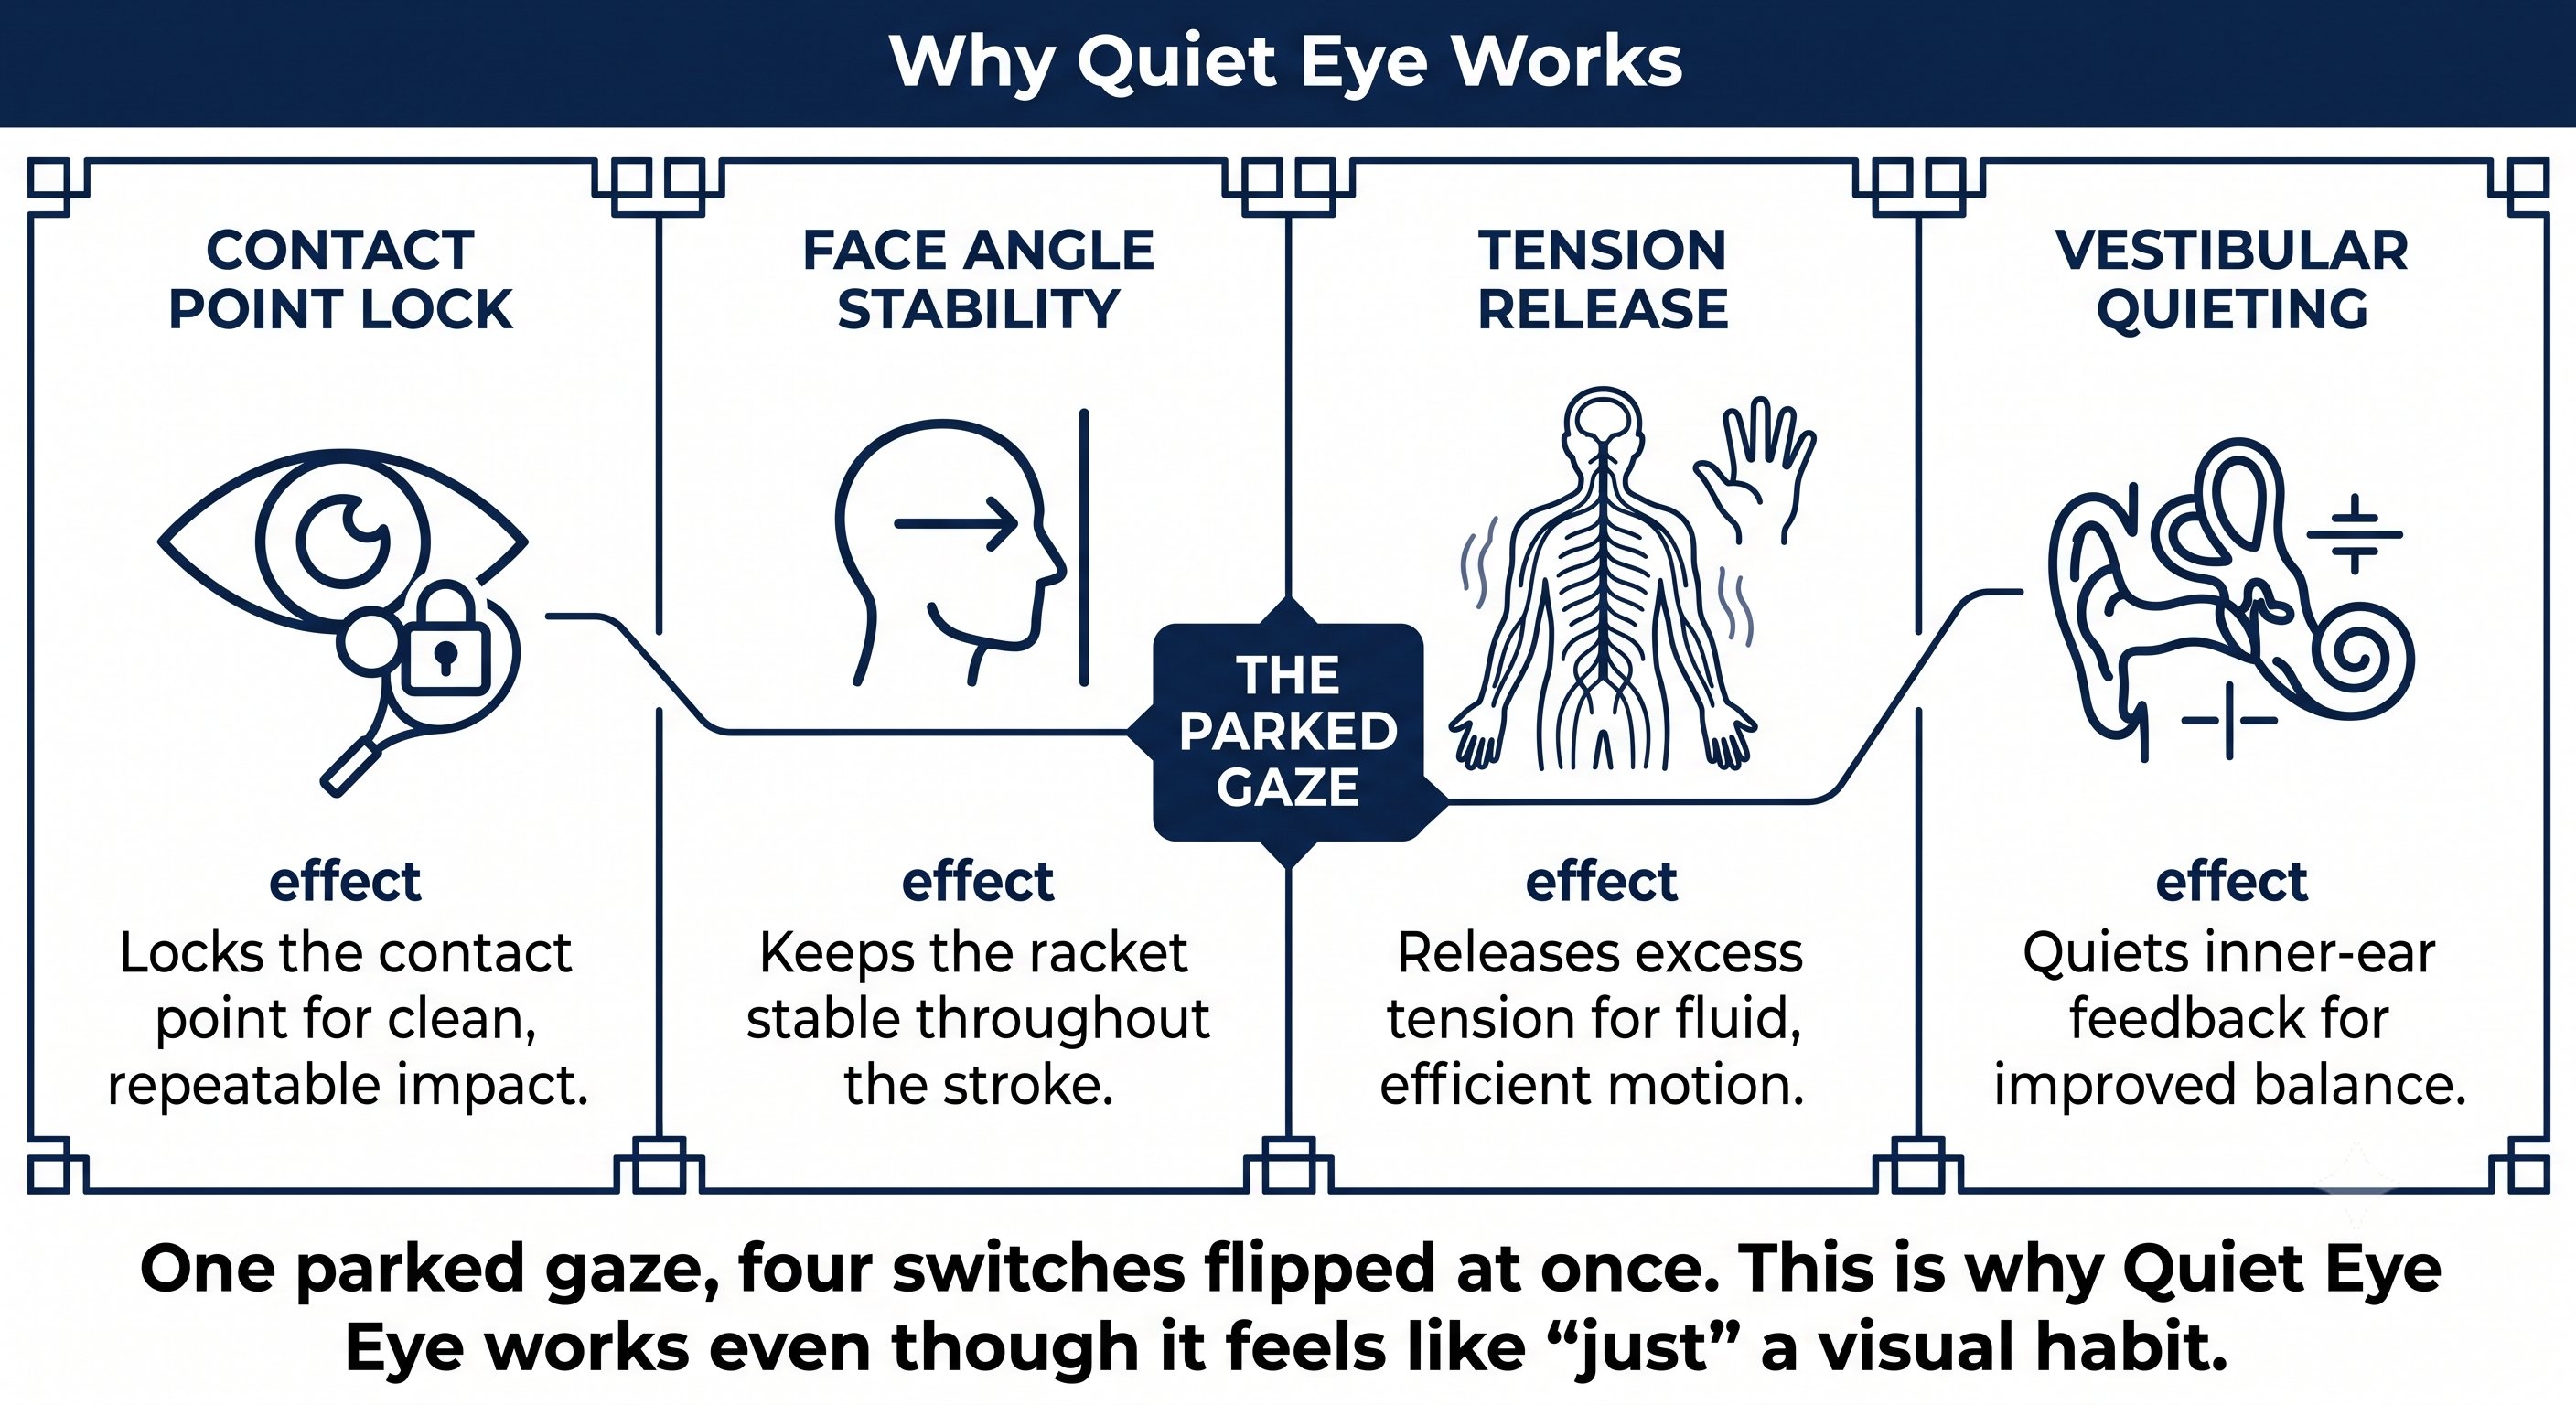
Quiet Eye — Figure 1
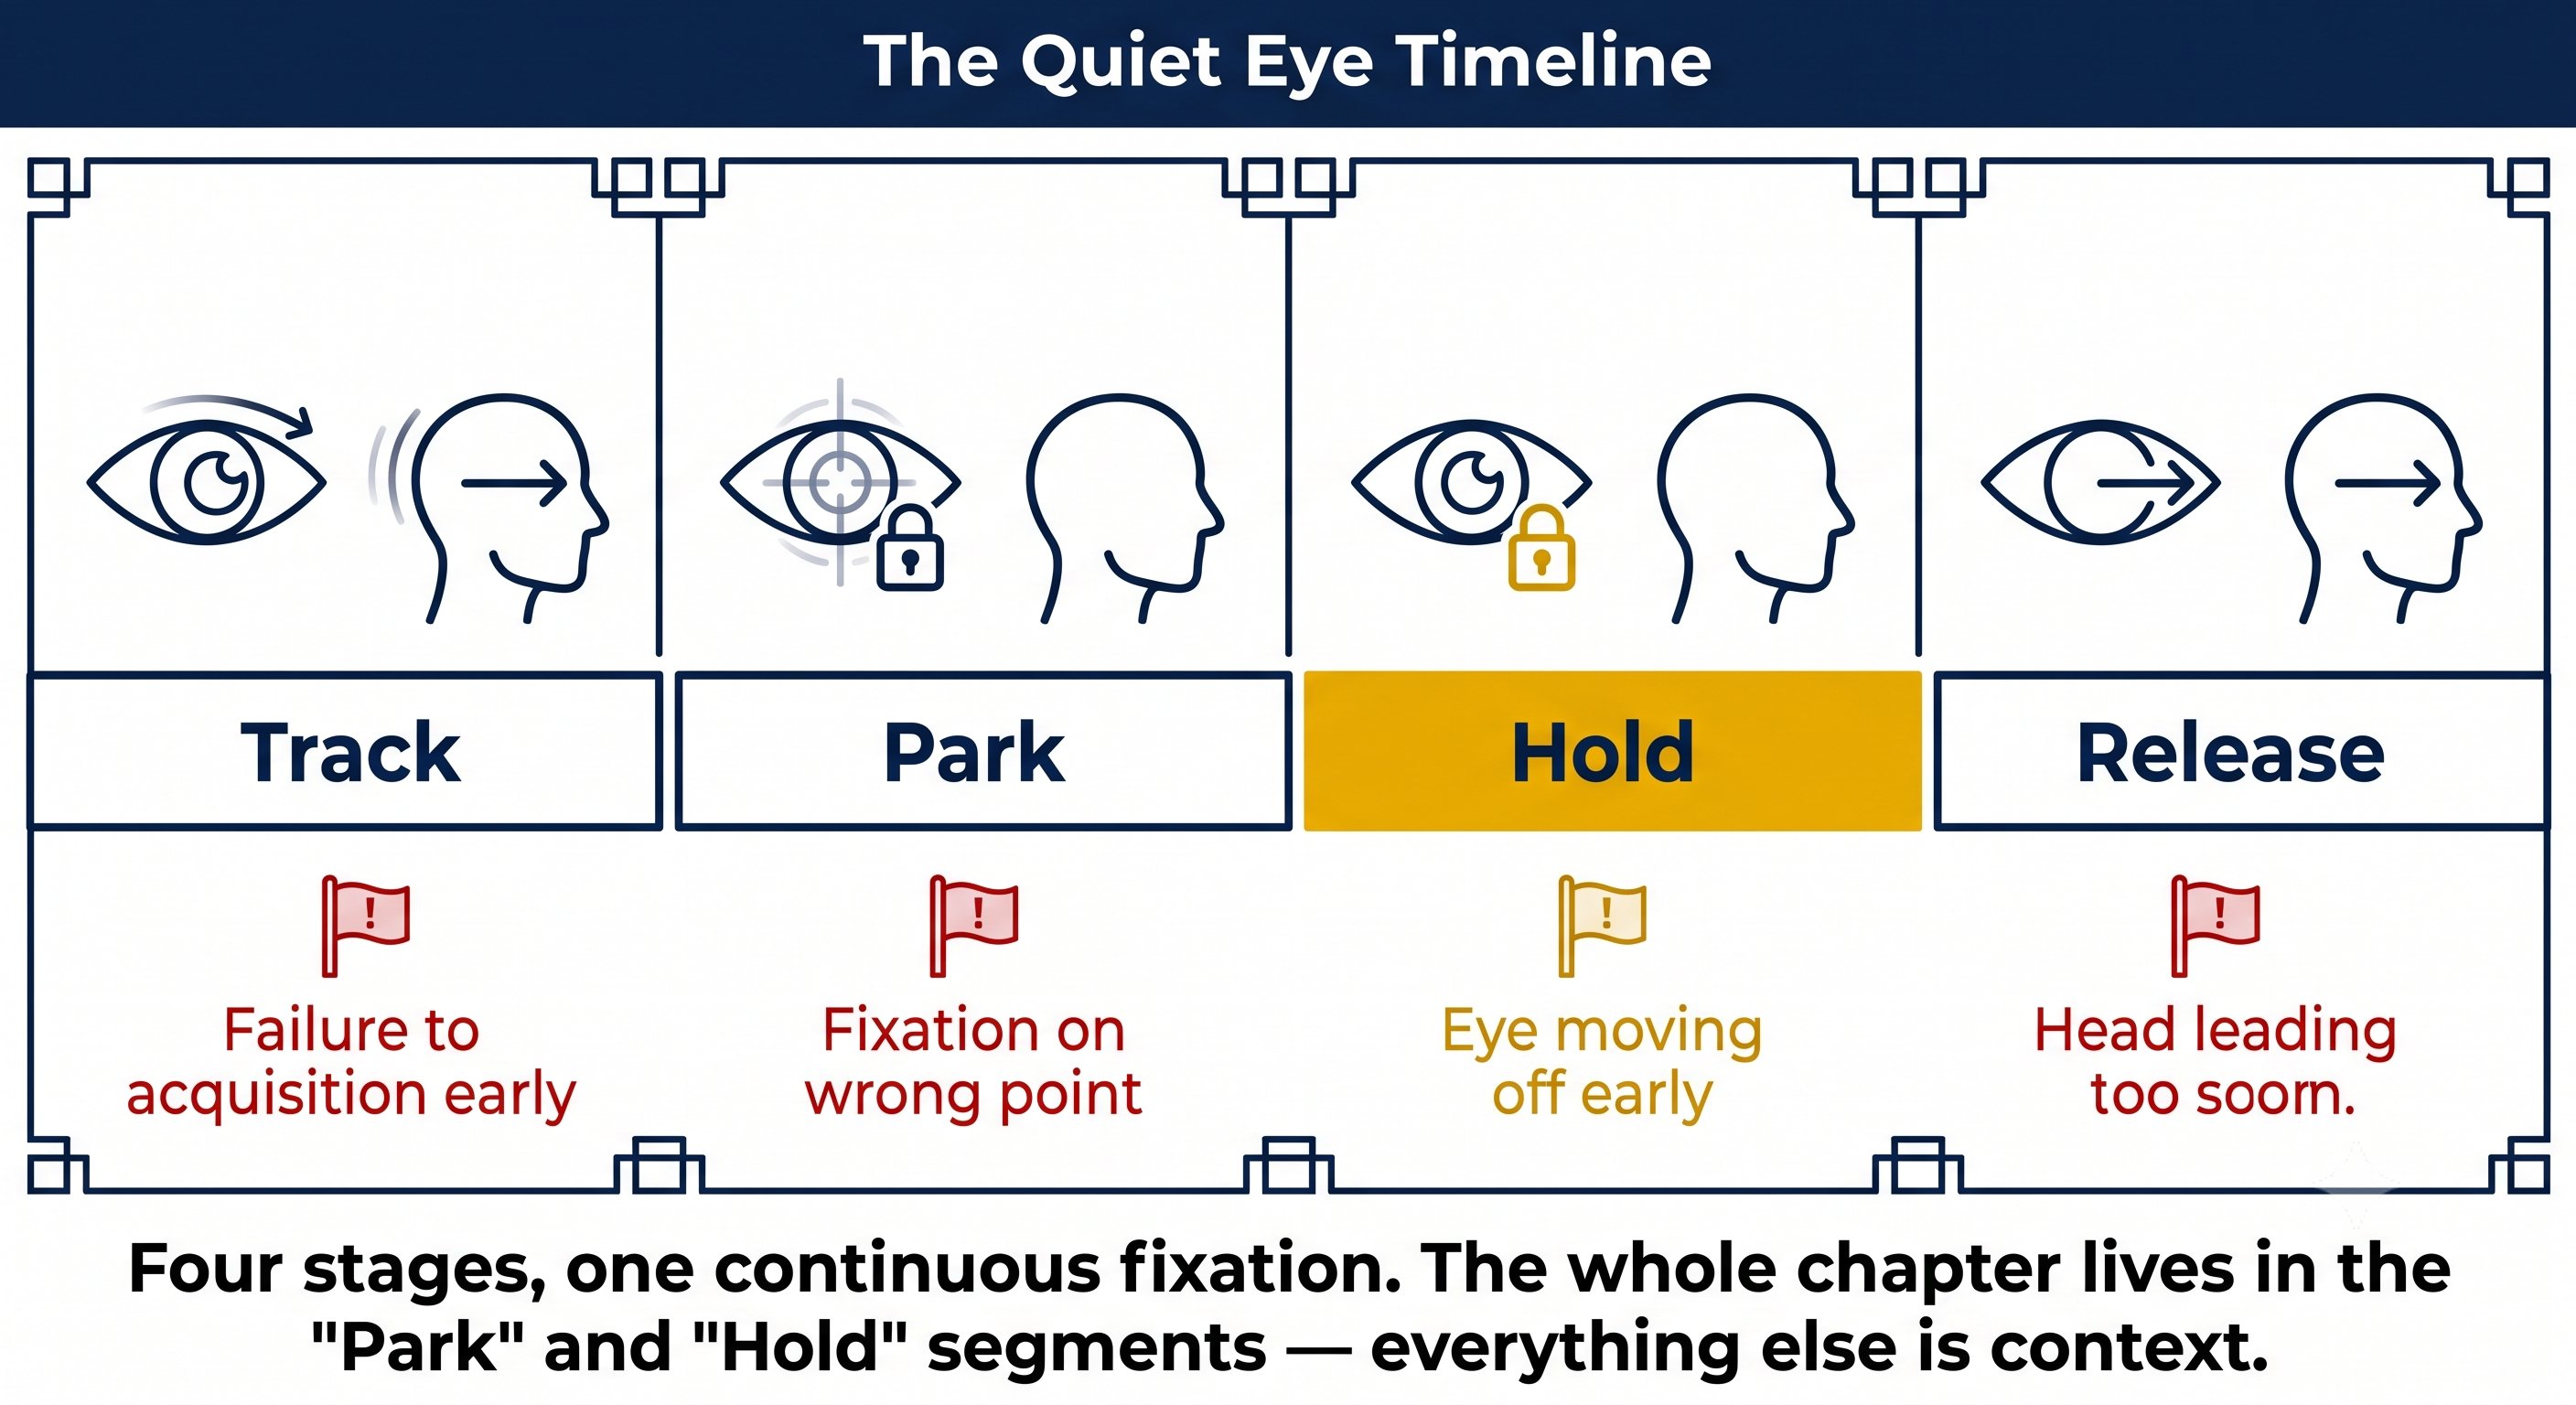
Quiet Eye — Figure 2
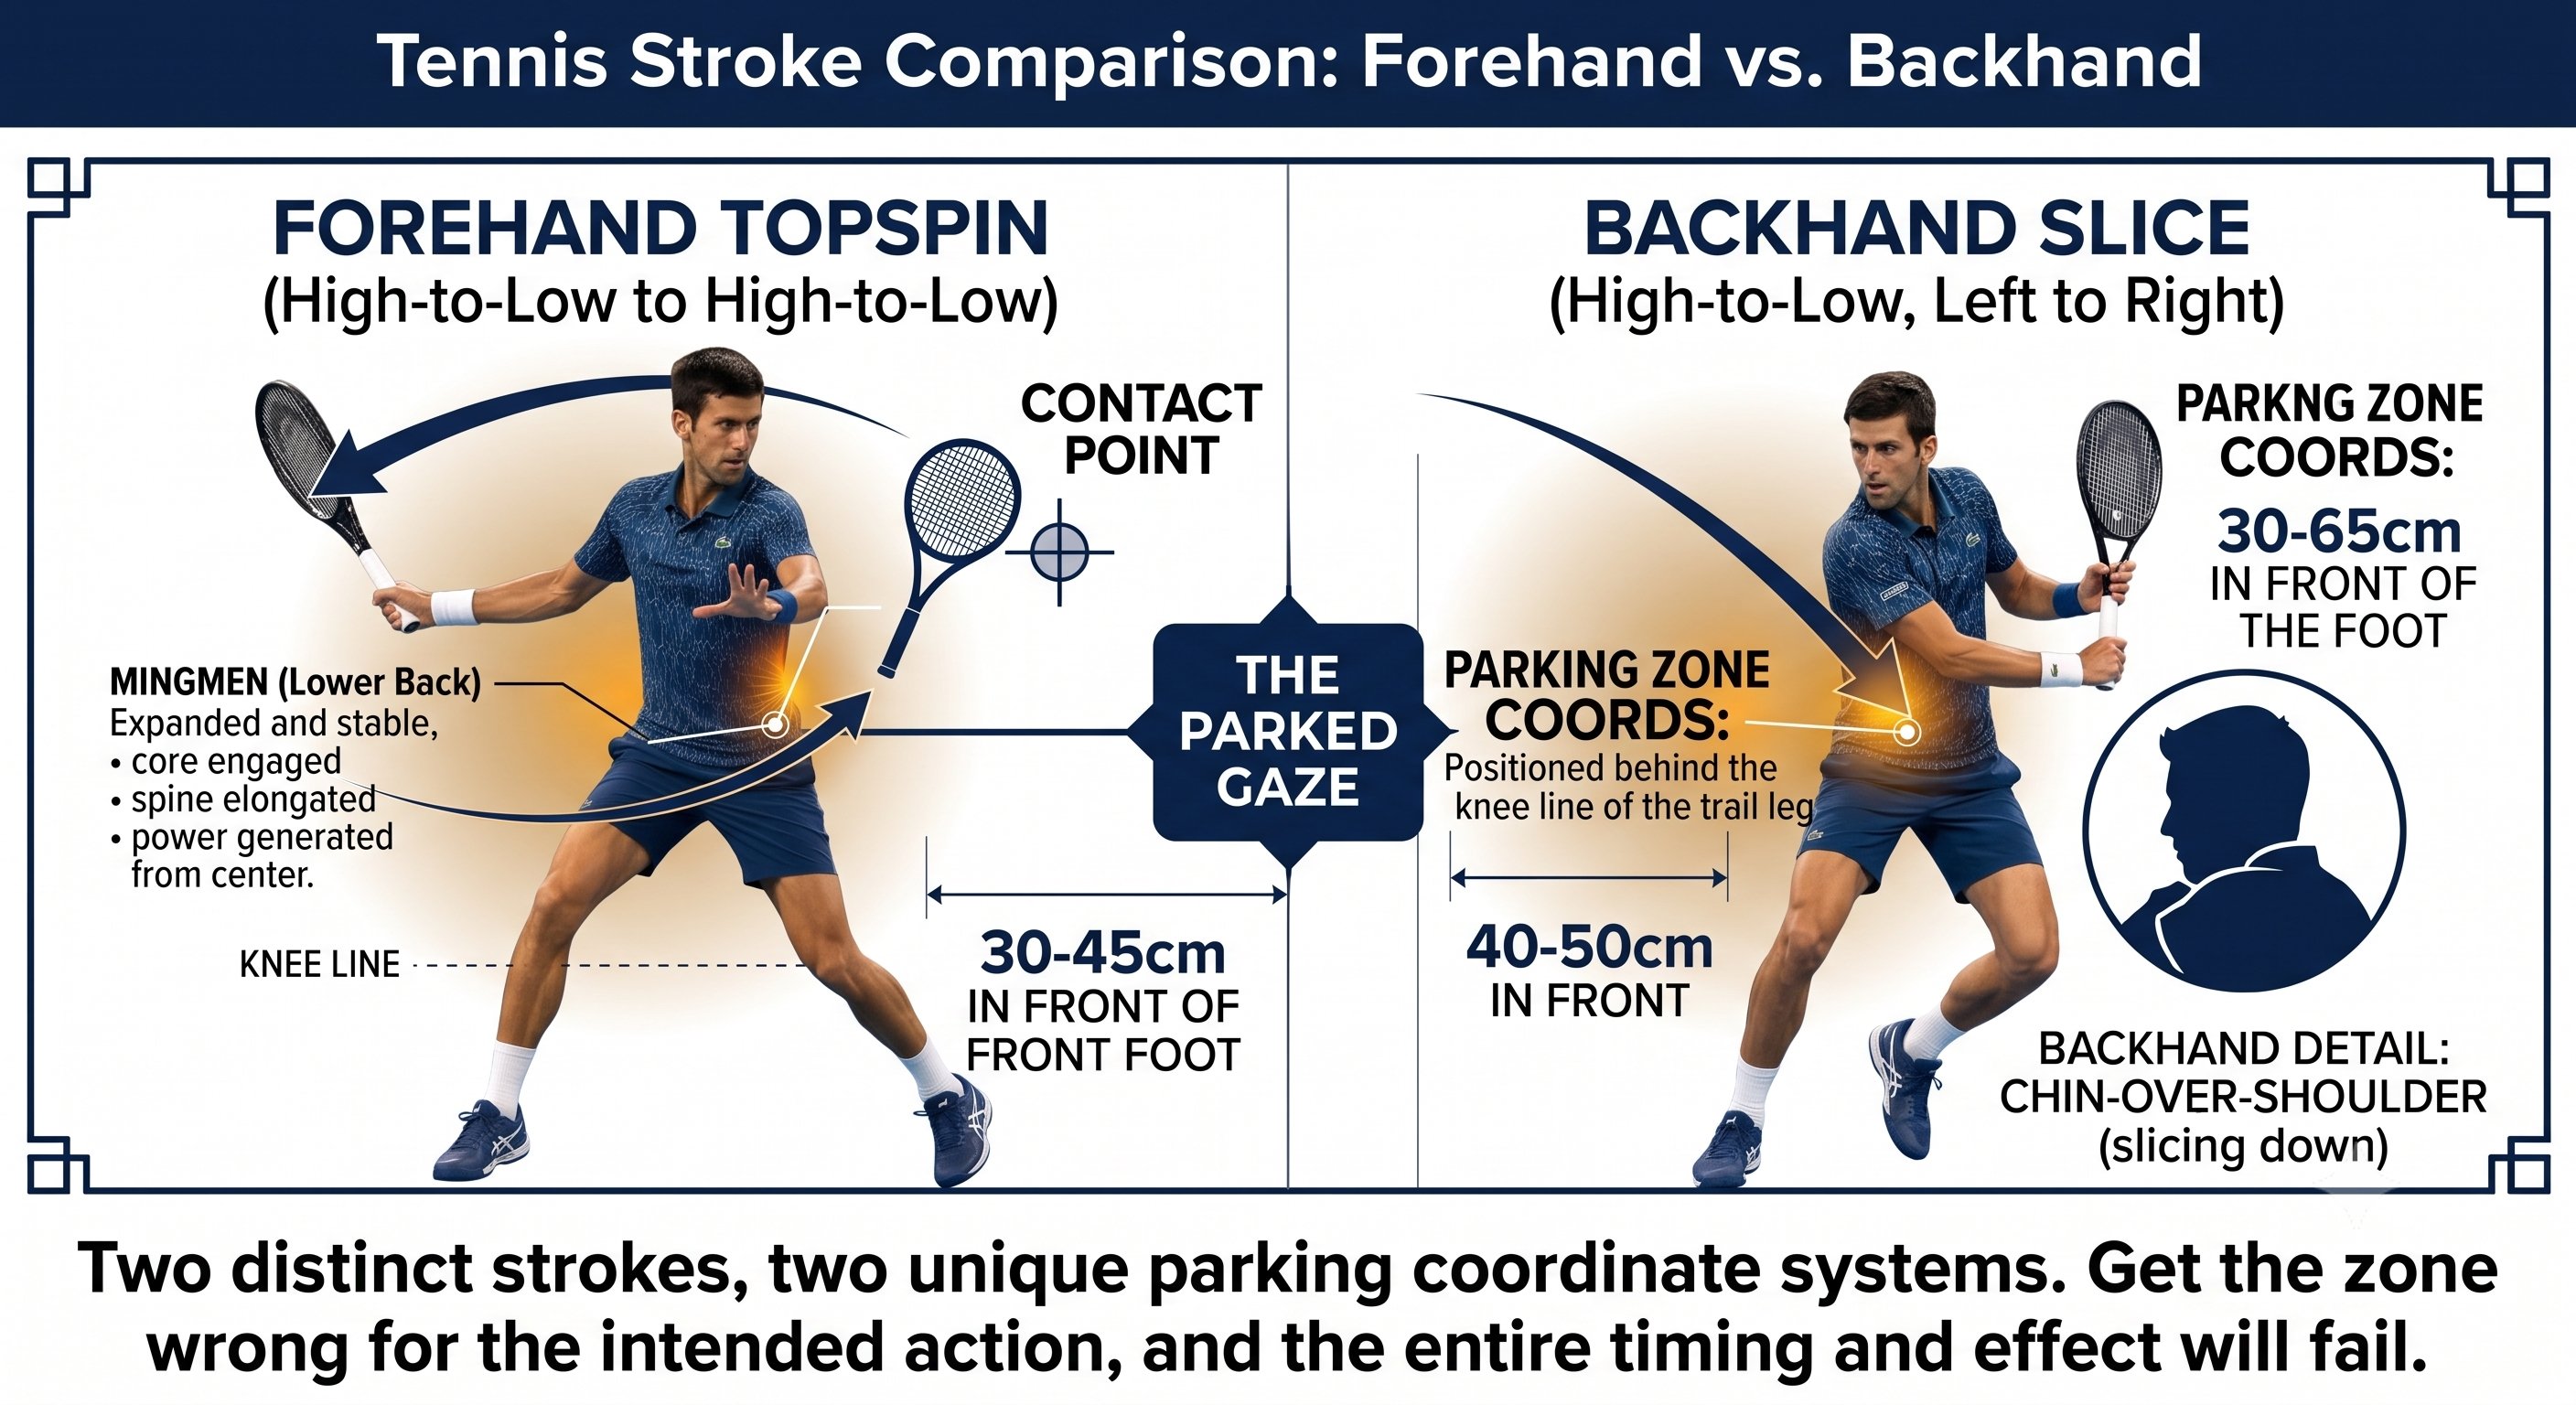
Quiet Eye — Figure 3
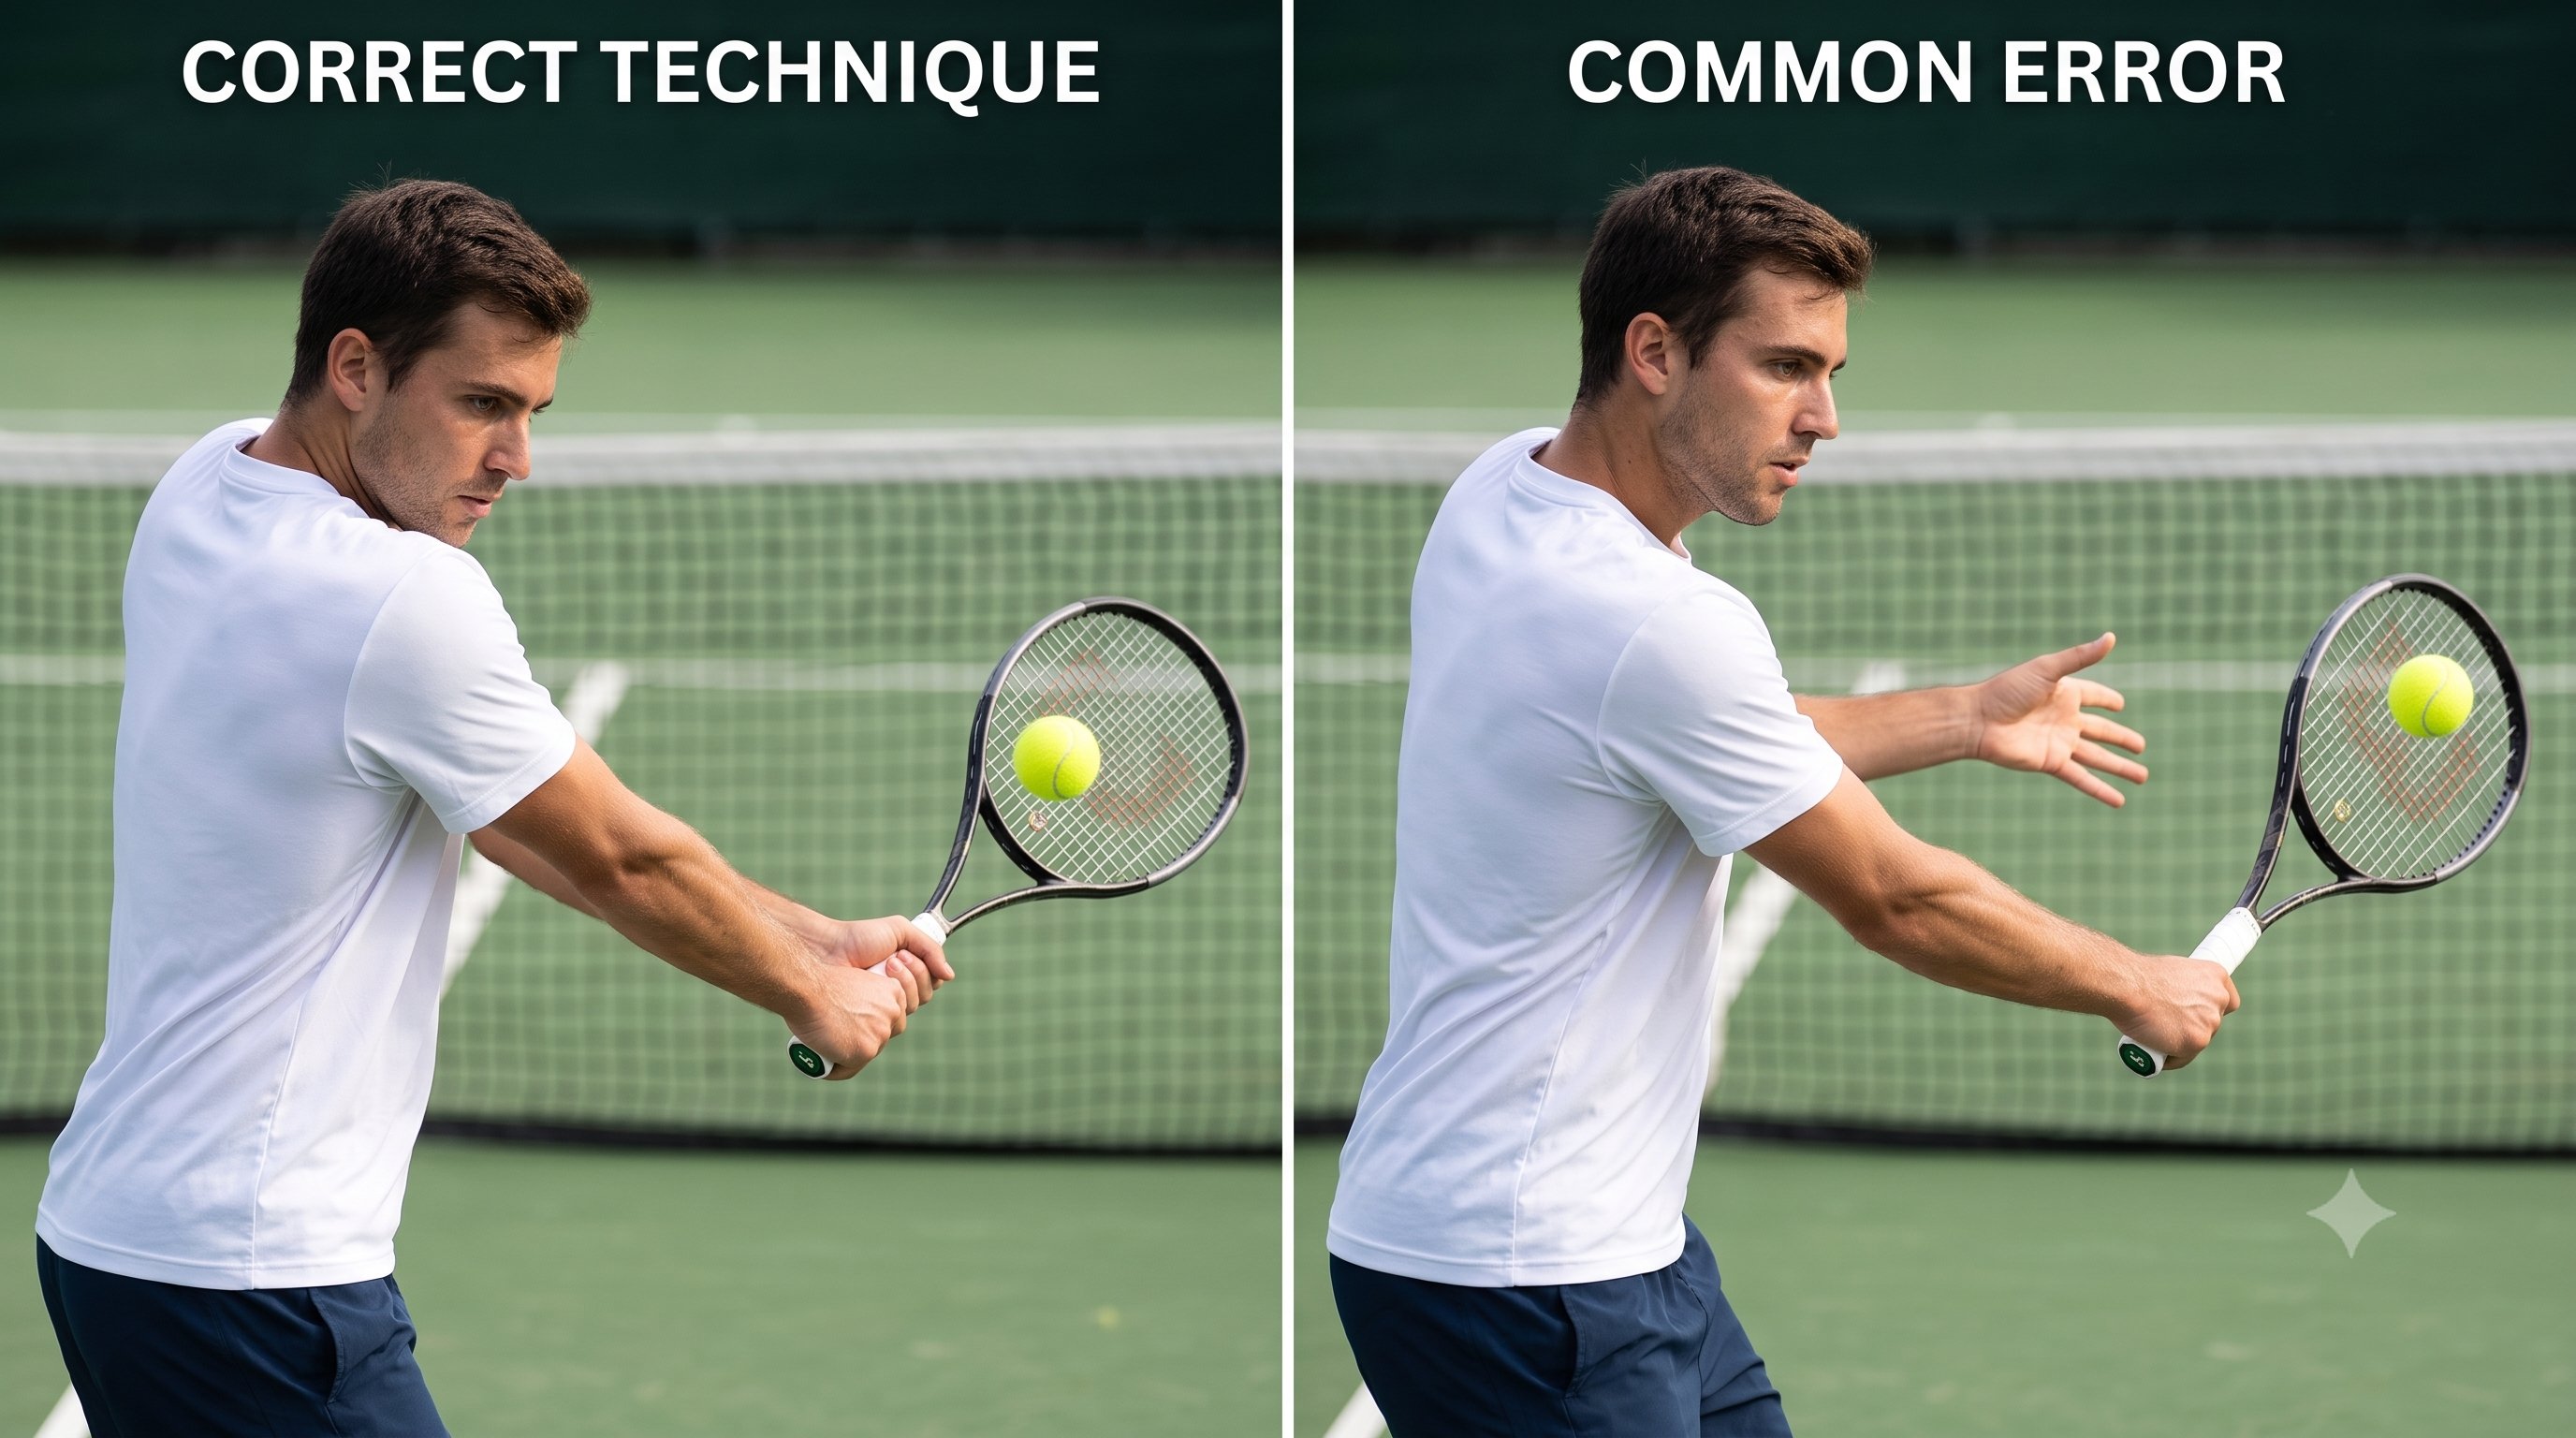
Quiet Eye — Figure 4
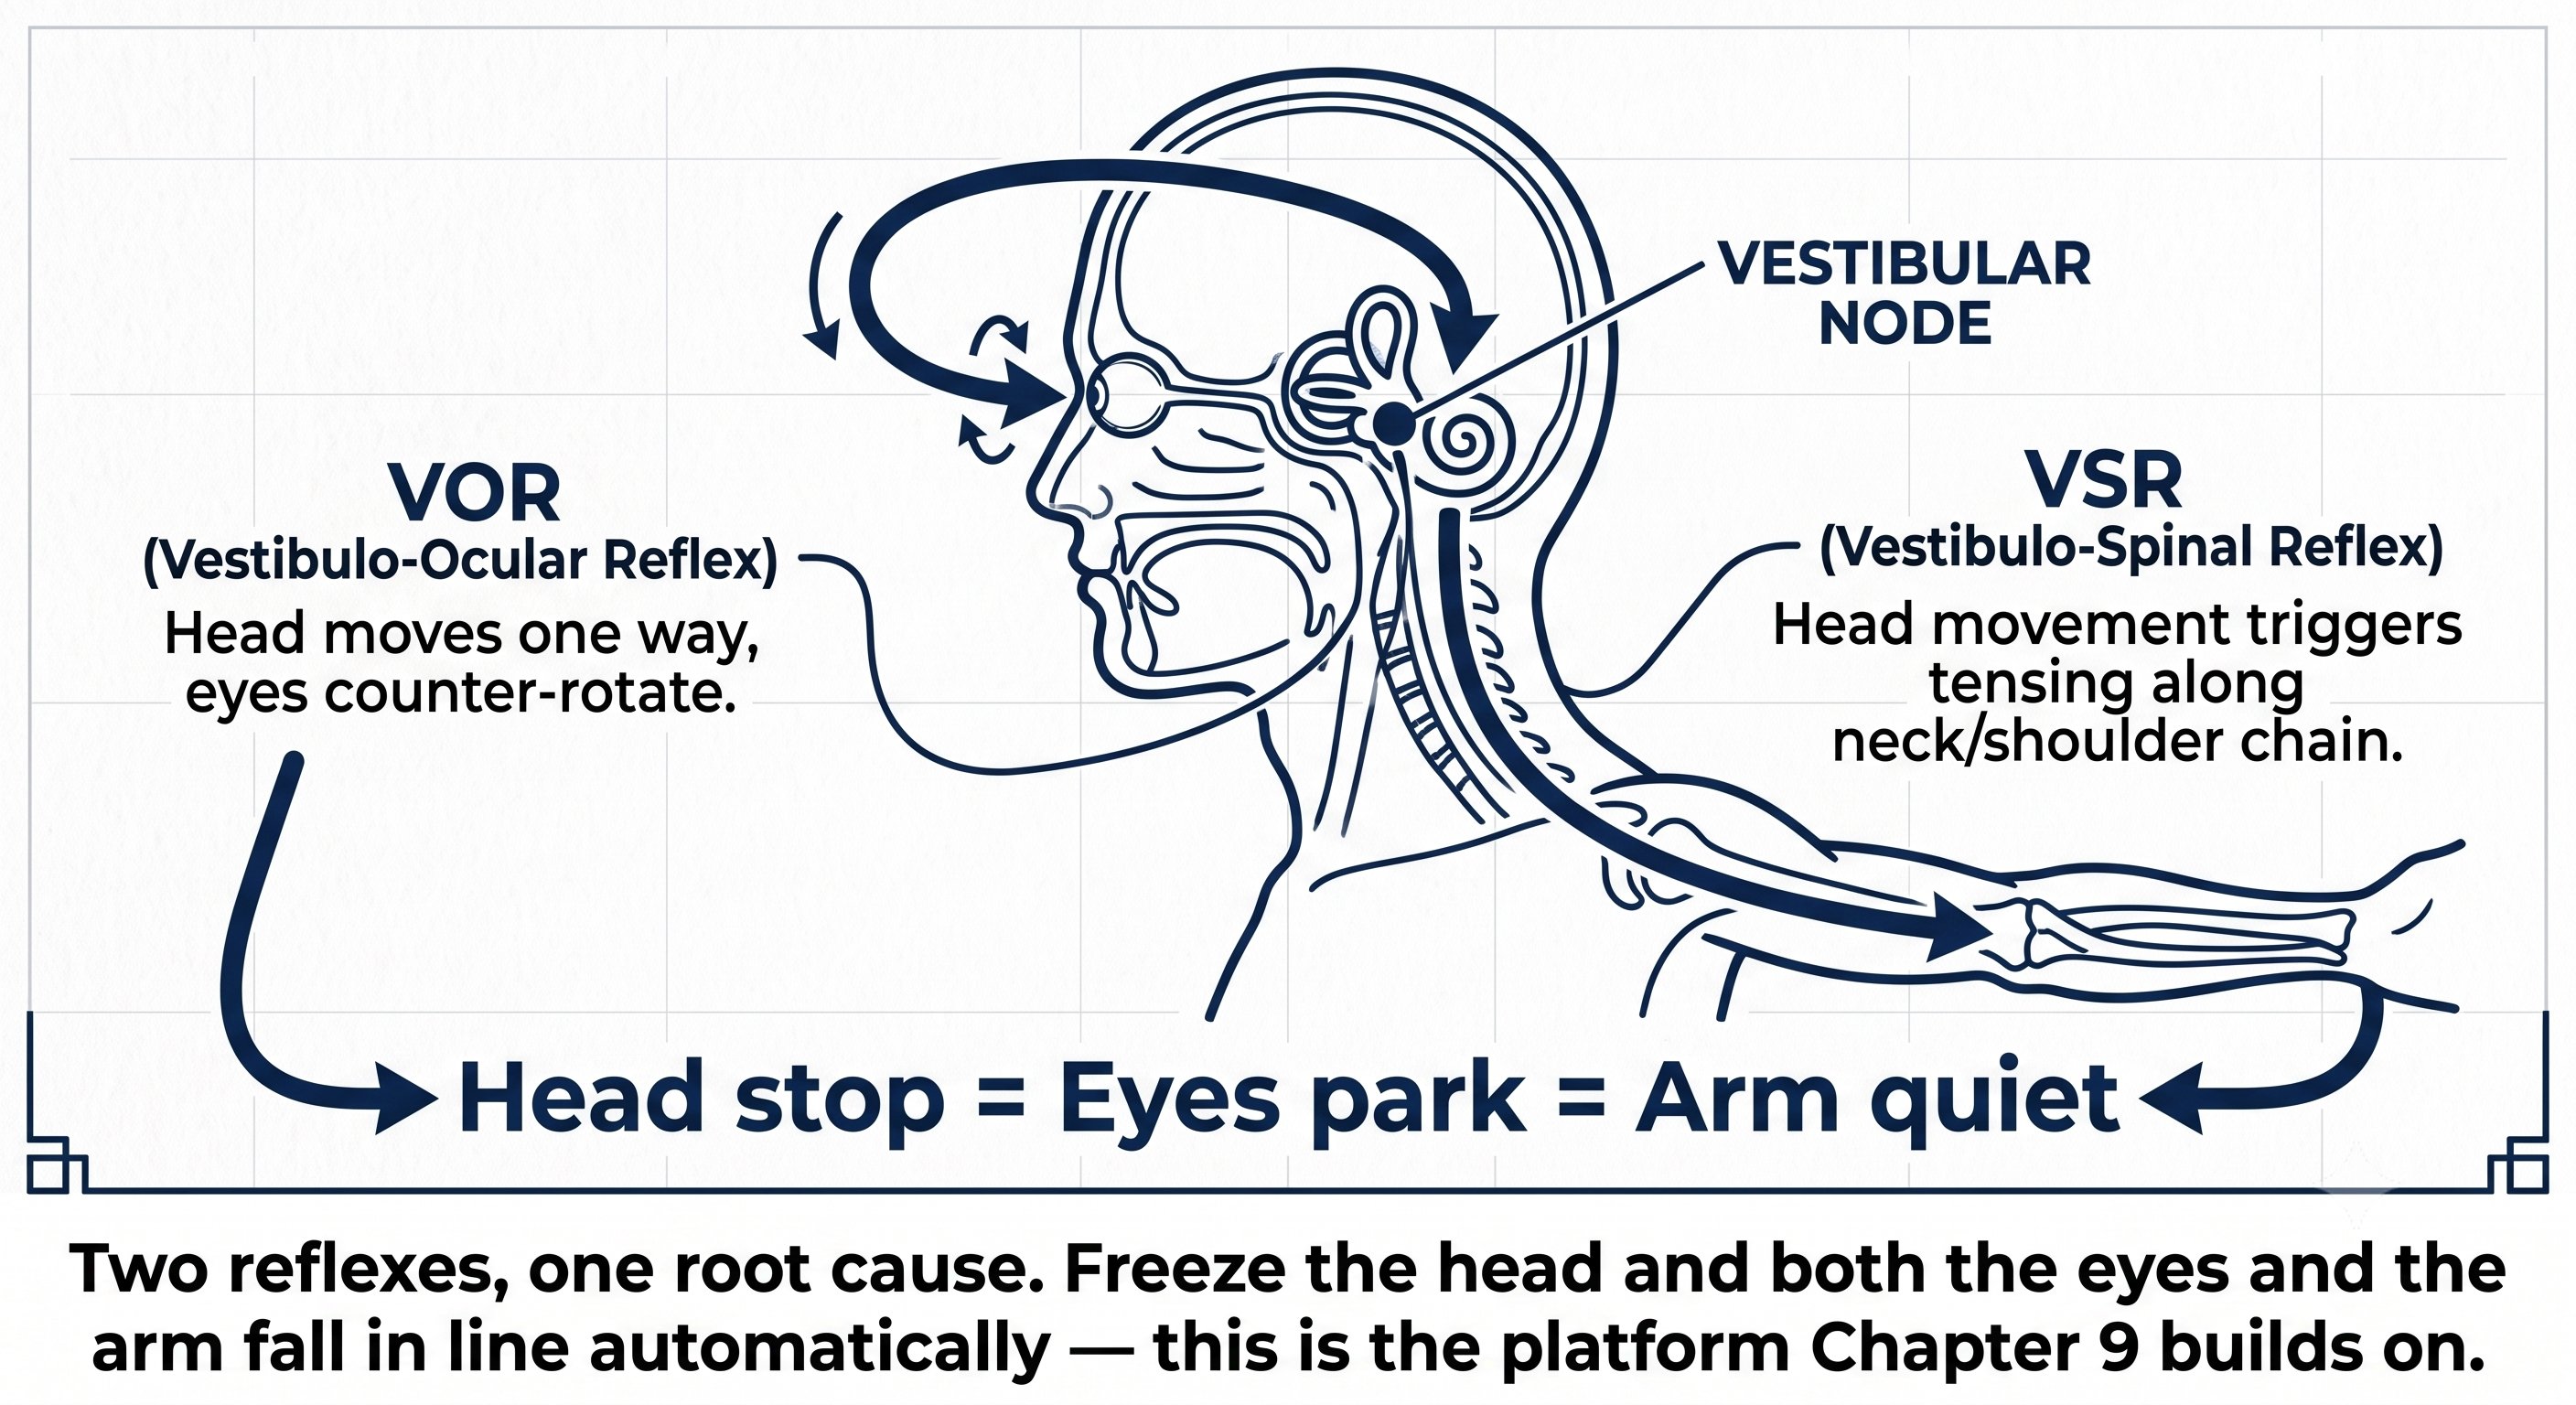
Quiet Eye — Figure 5
Chapter 9: Vestibular Stability & VOR 5 figures
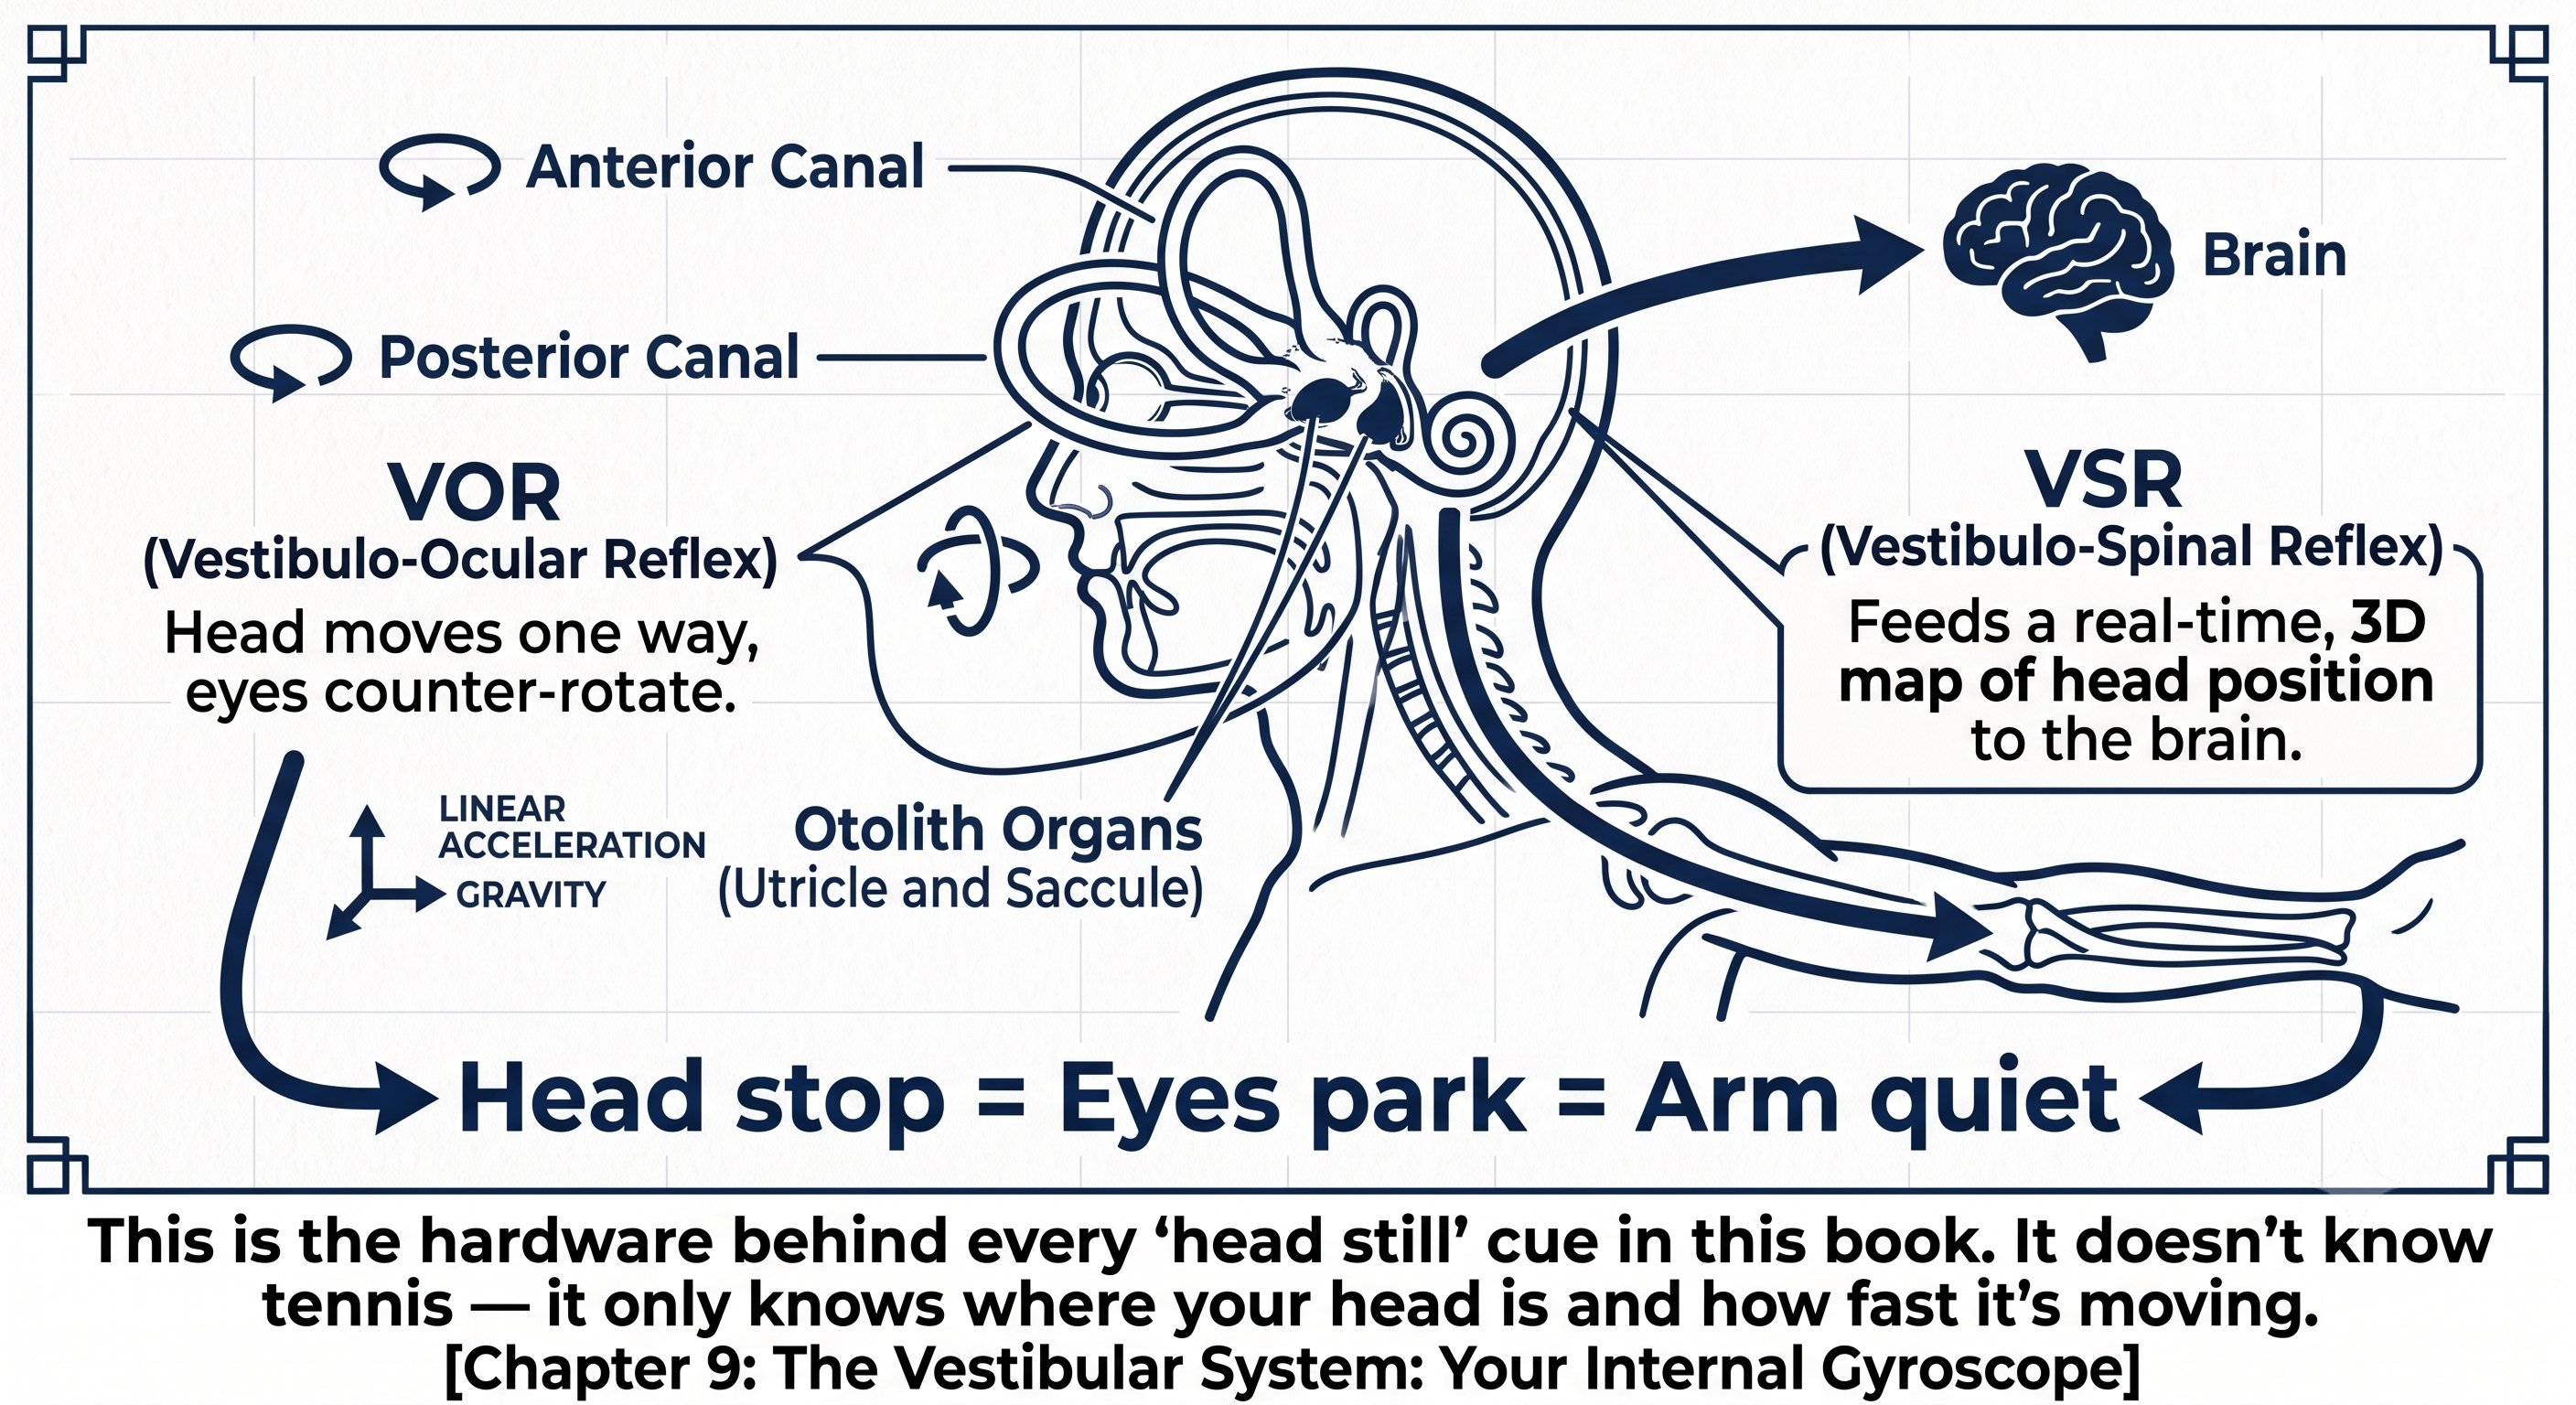
Vestibular Stability & VOR — Figure 1
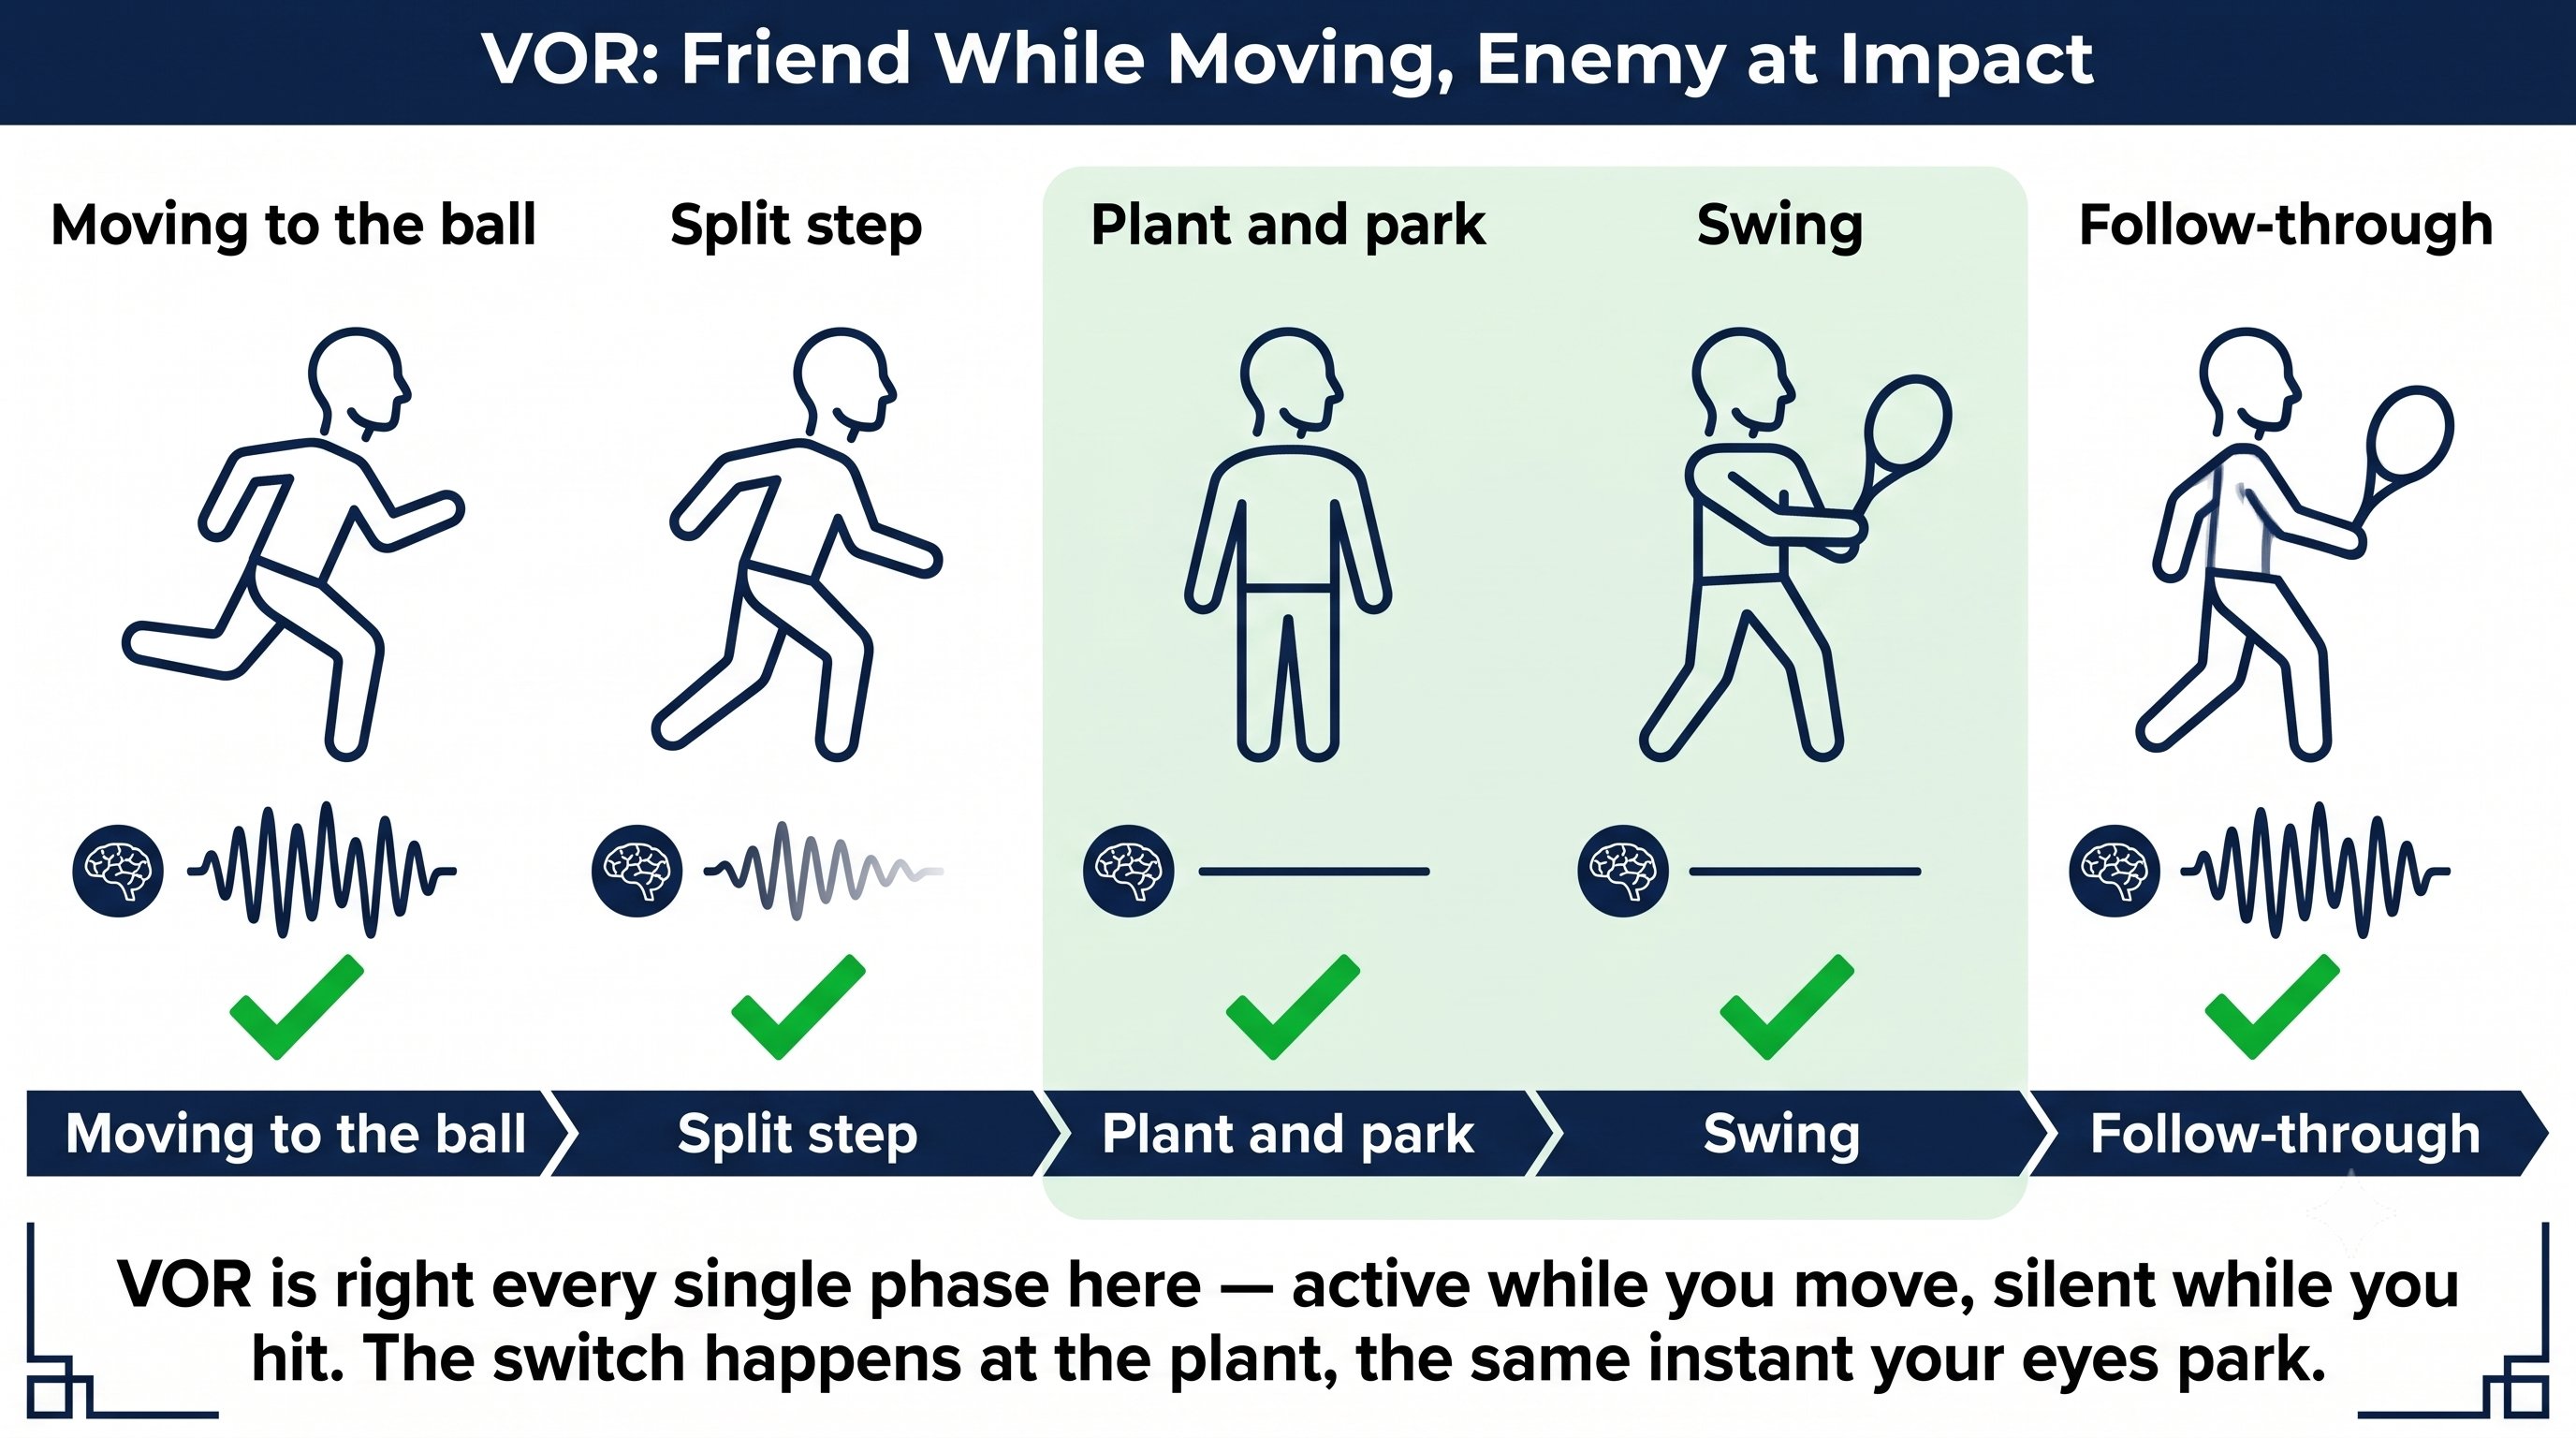
Vestibular Stability & VOR — Figure 2
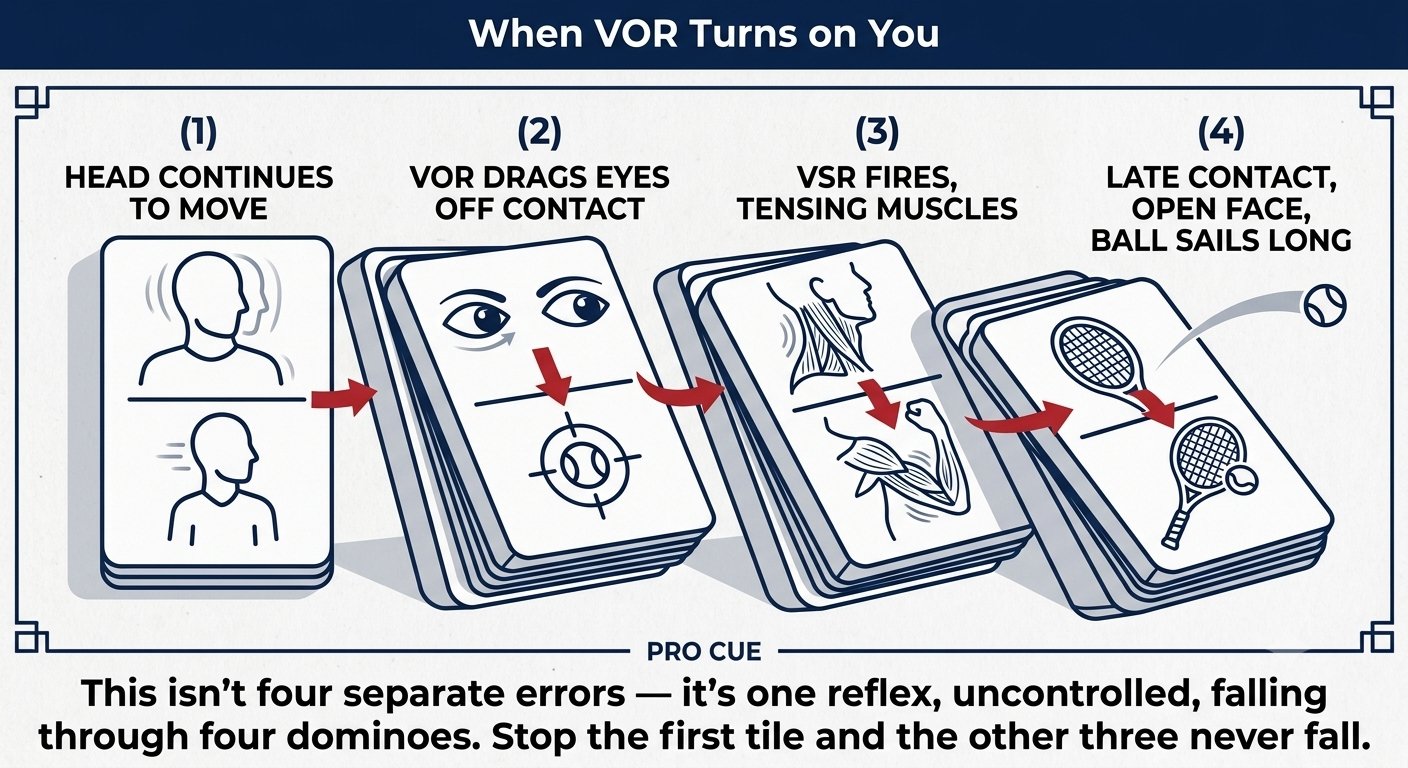
Vestibular Stability & VOR — Figure 3
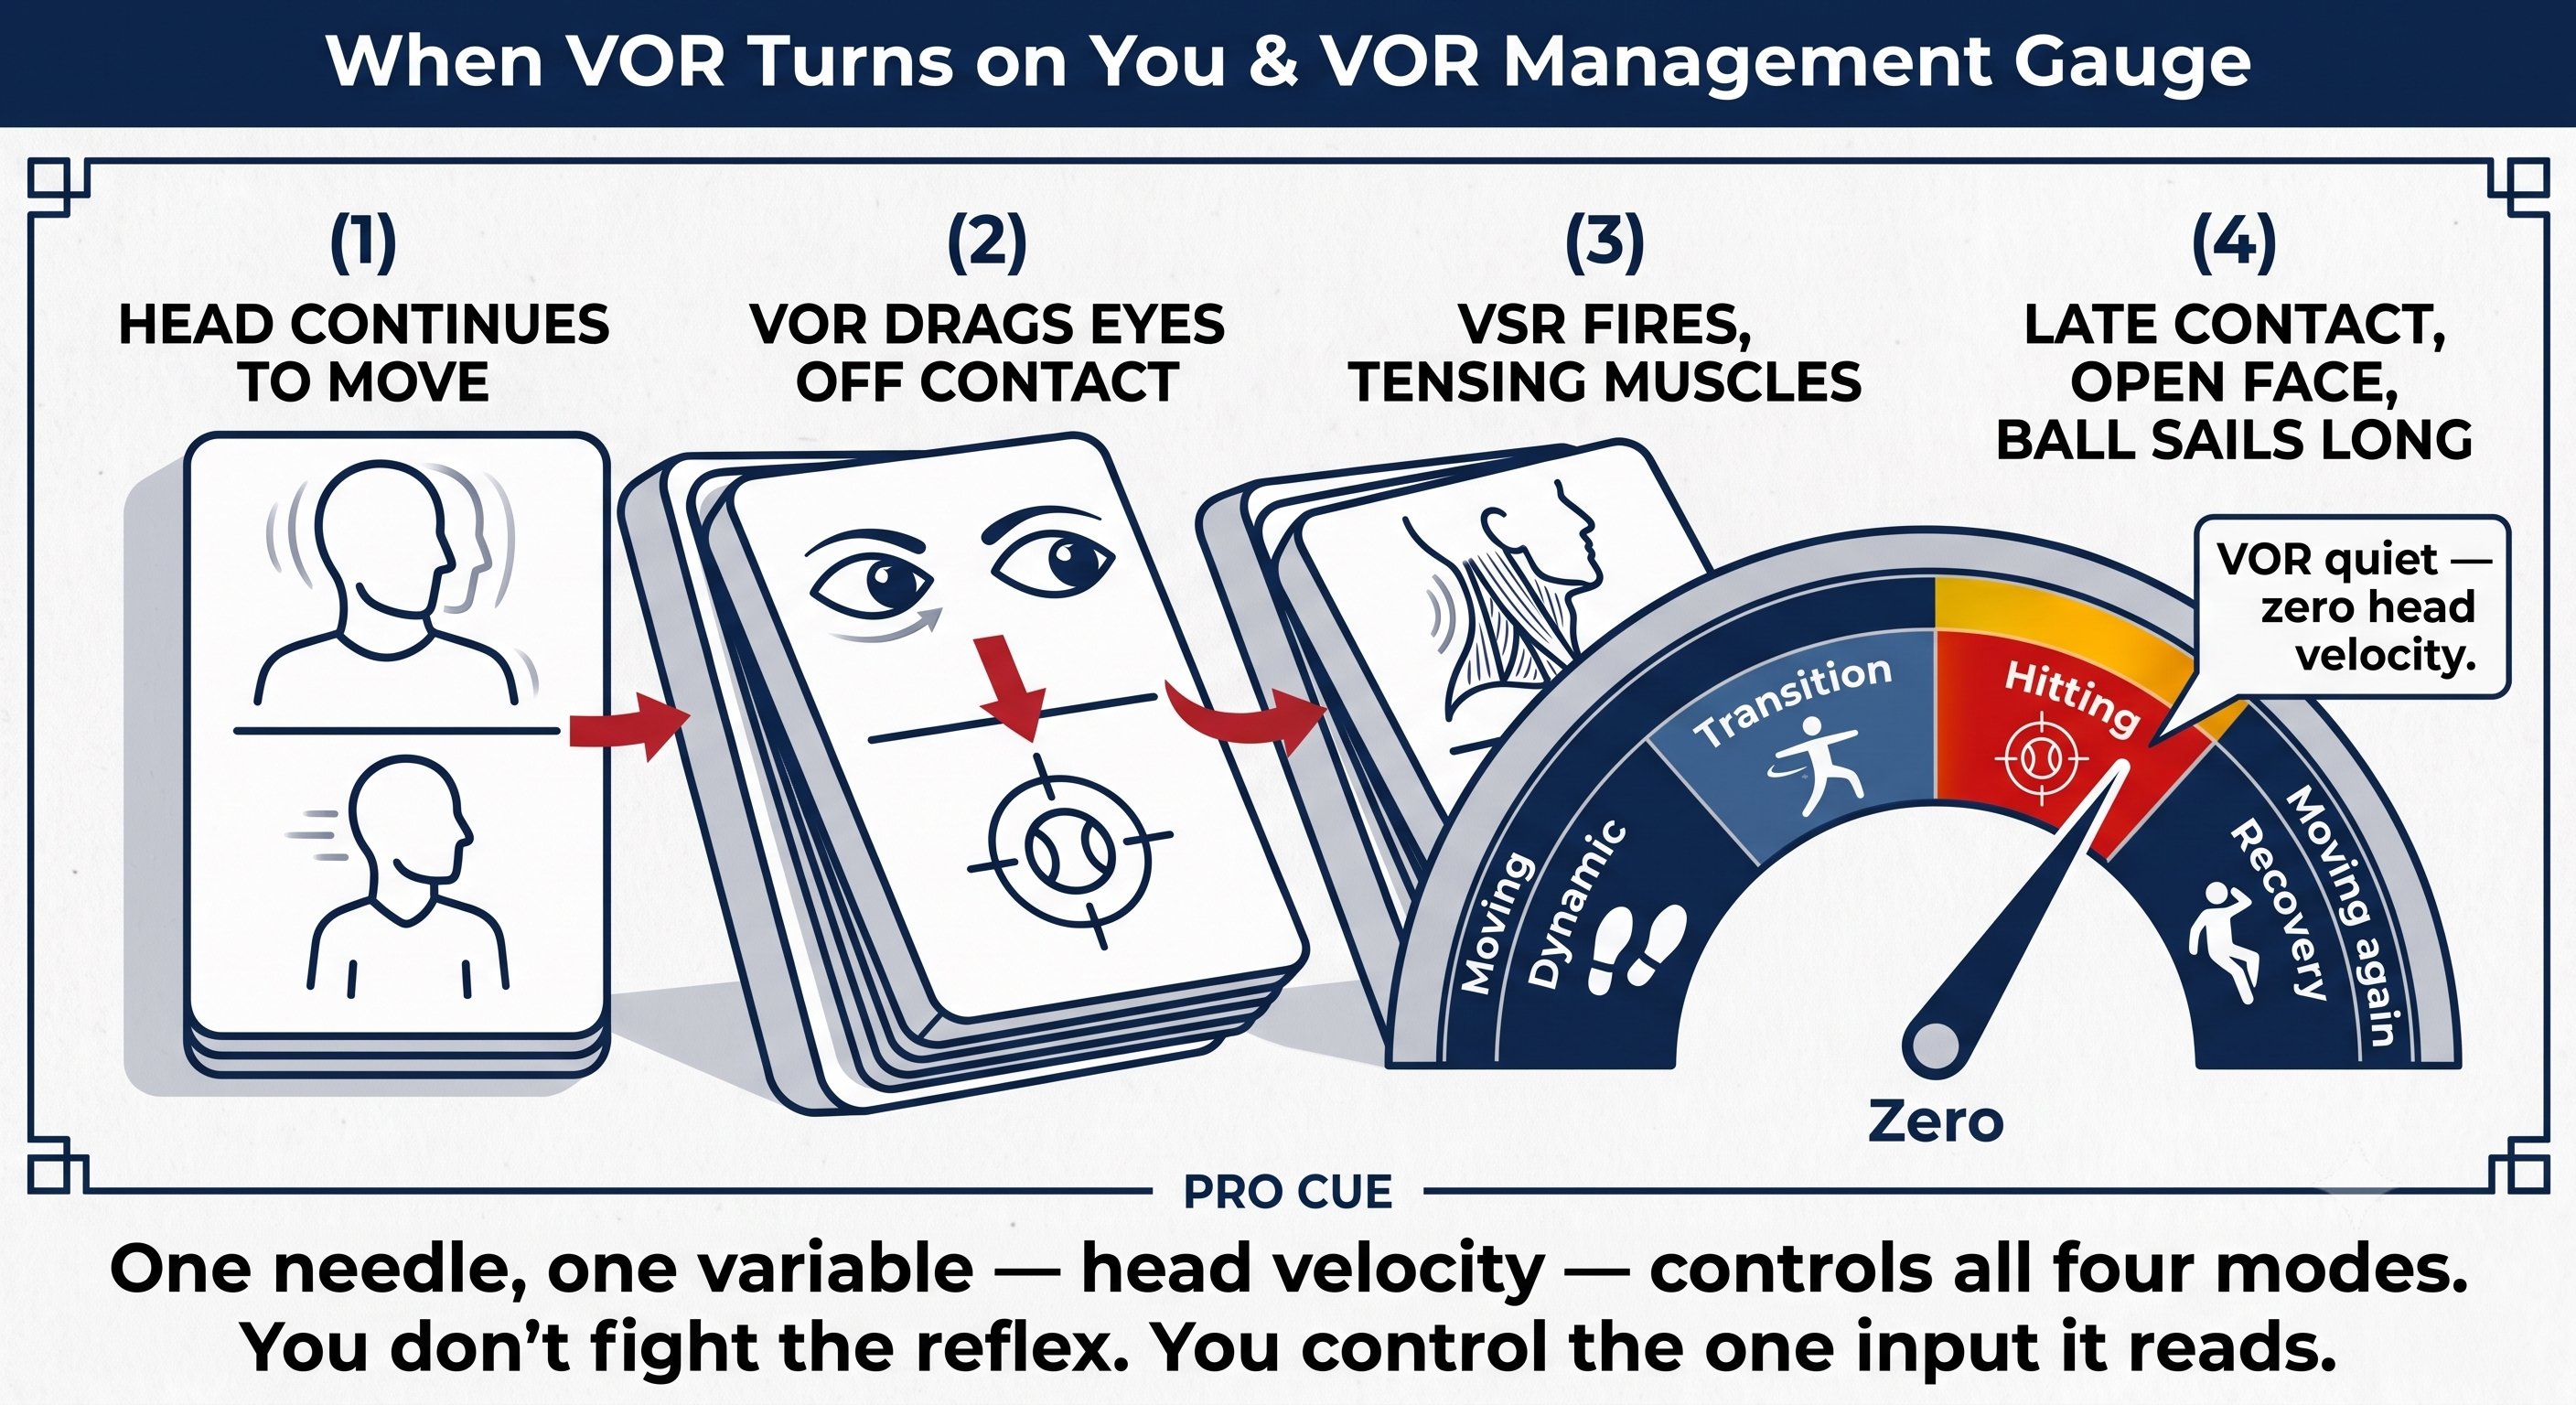
Vestibular Stability & VOR — Figure 4
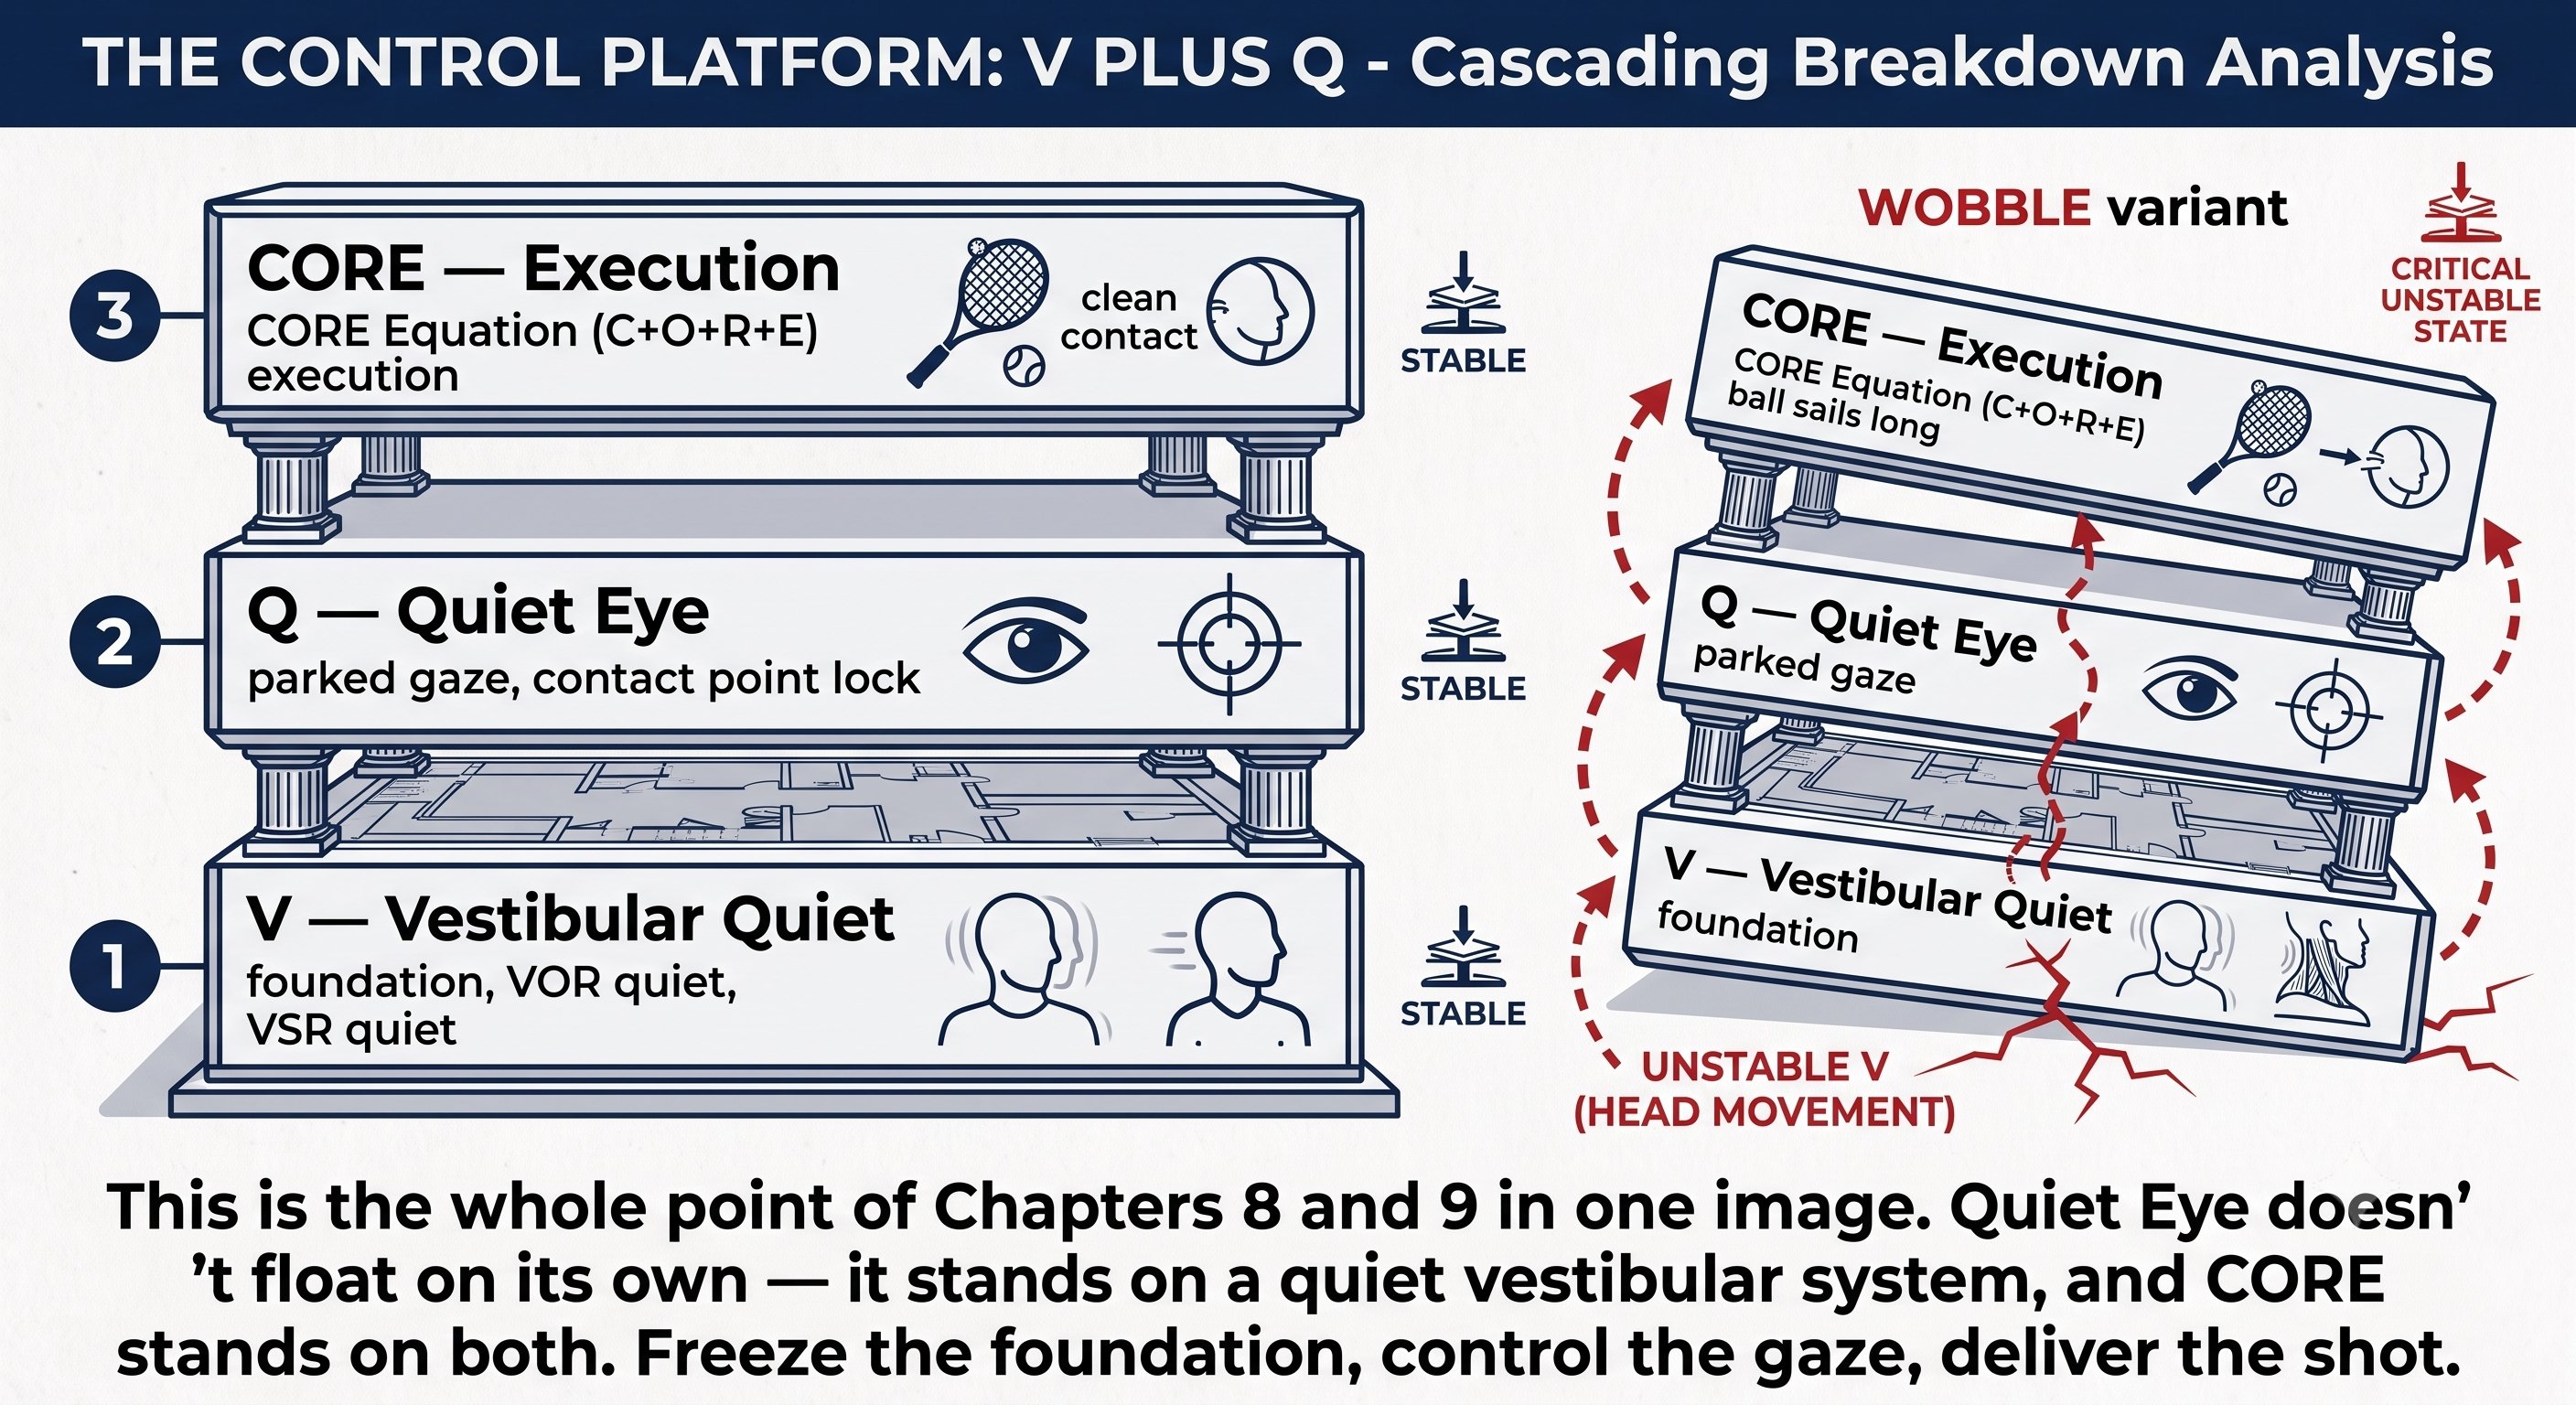
Vestibular Stability & VOR — Figure 5
Chapter 10: Fascia & Proprioception 5 figures
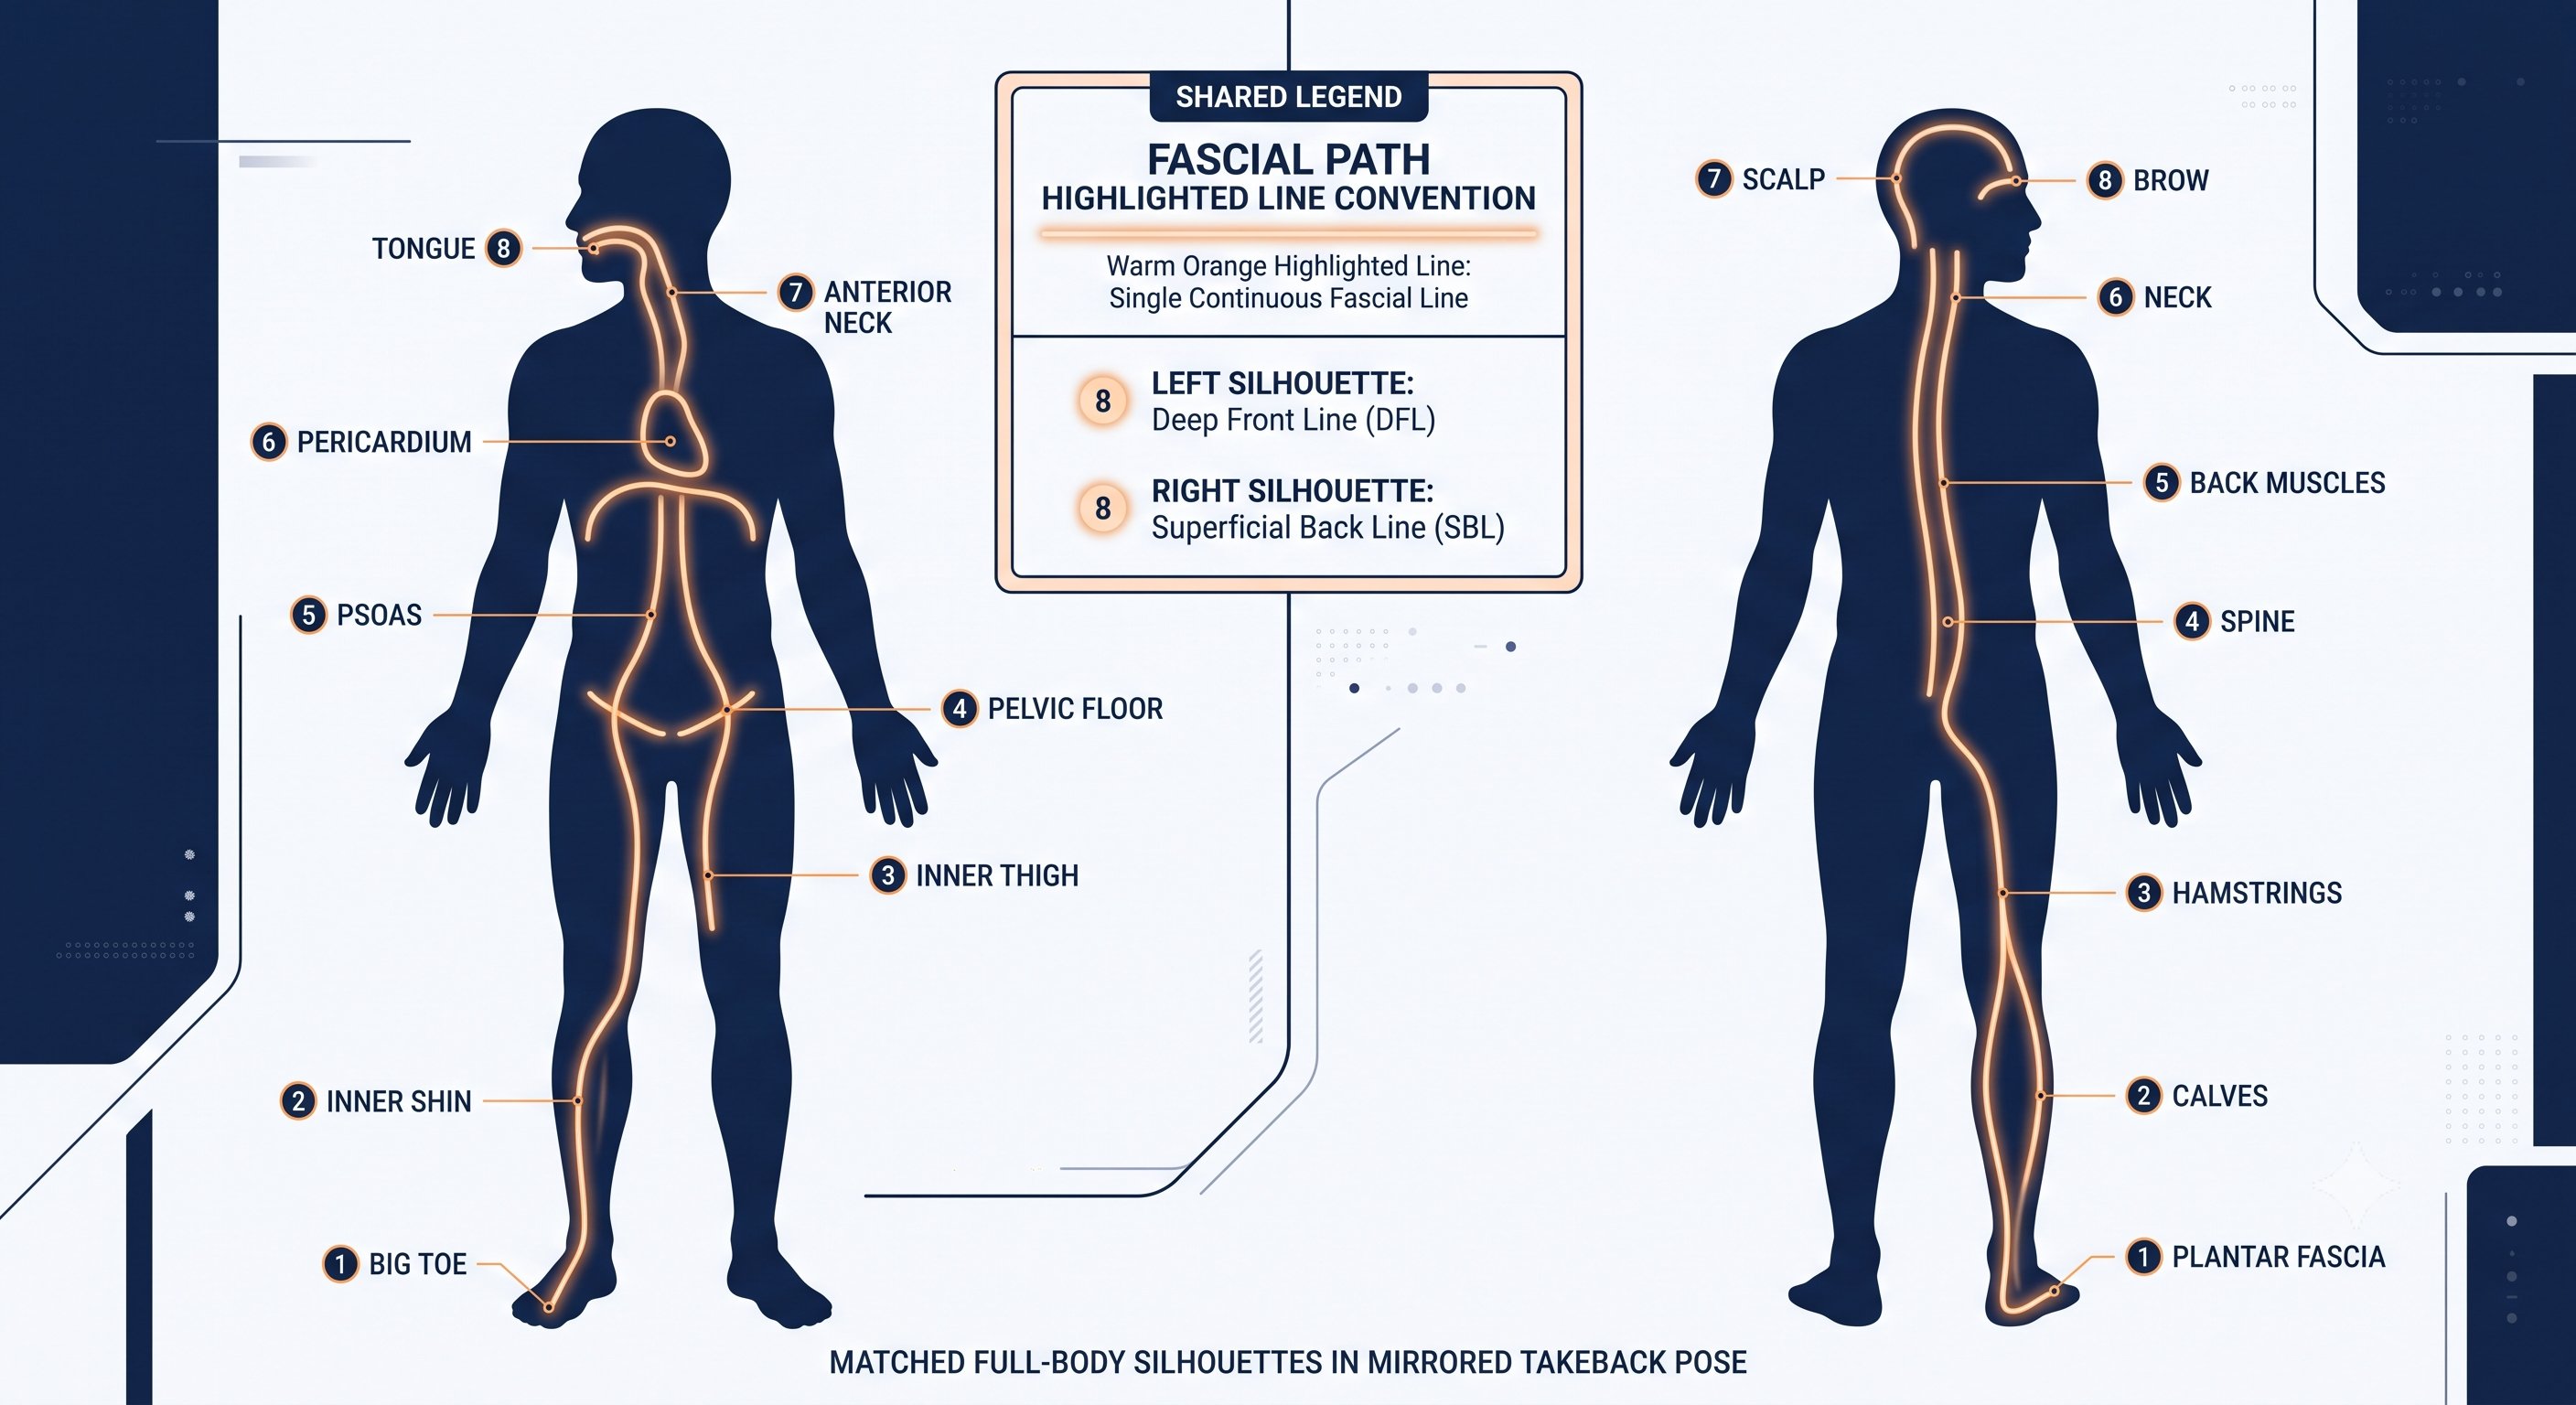
Fascia & Proprioception — Figure 1
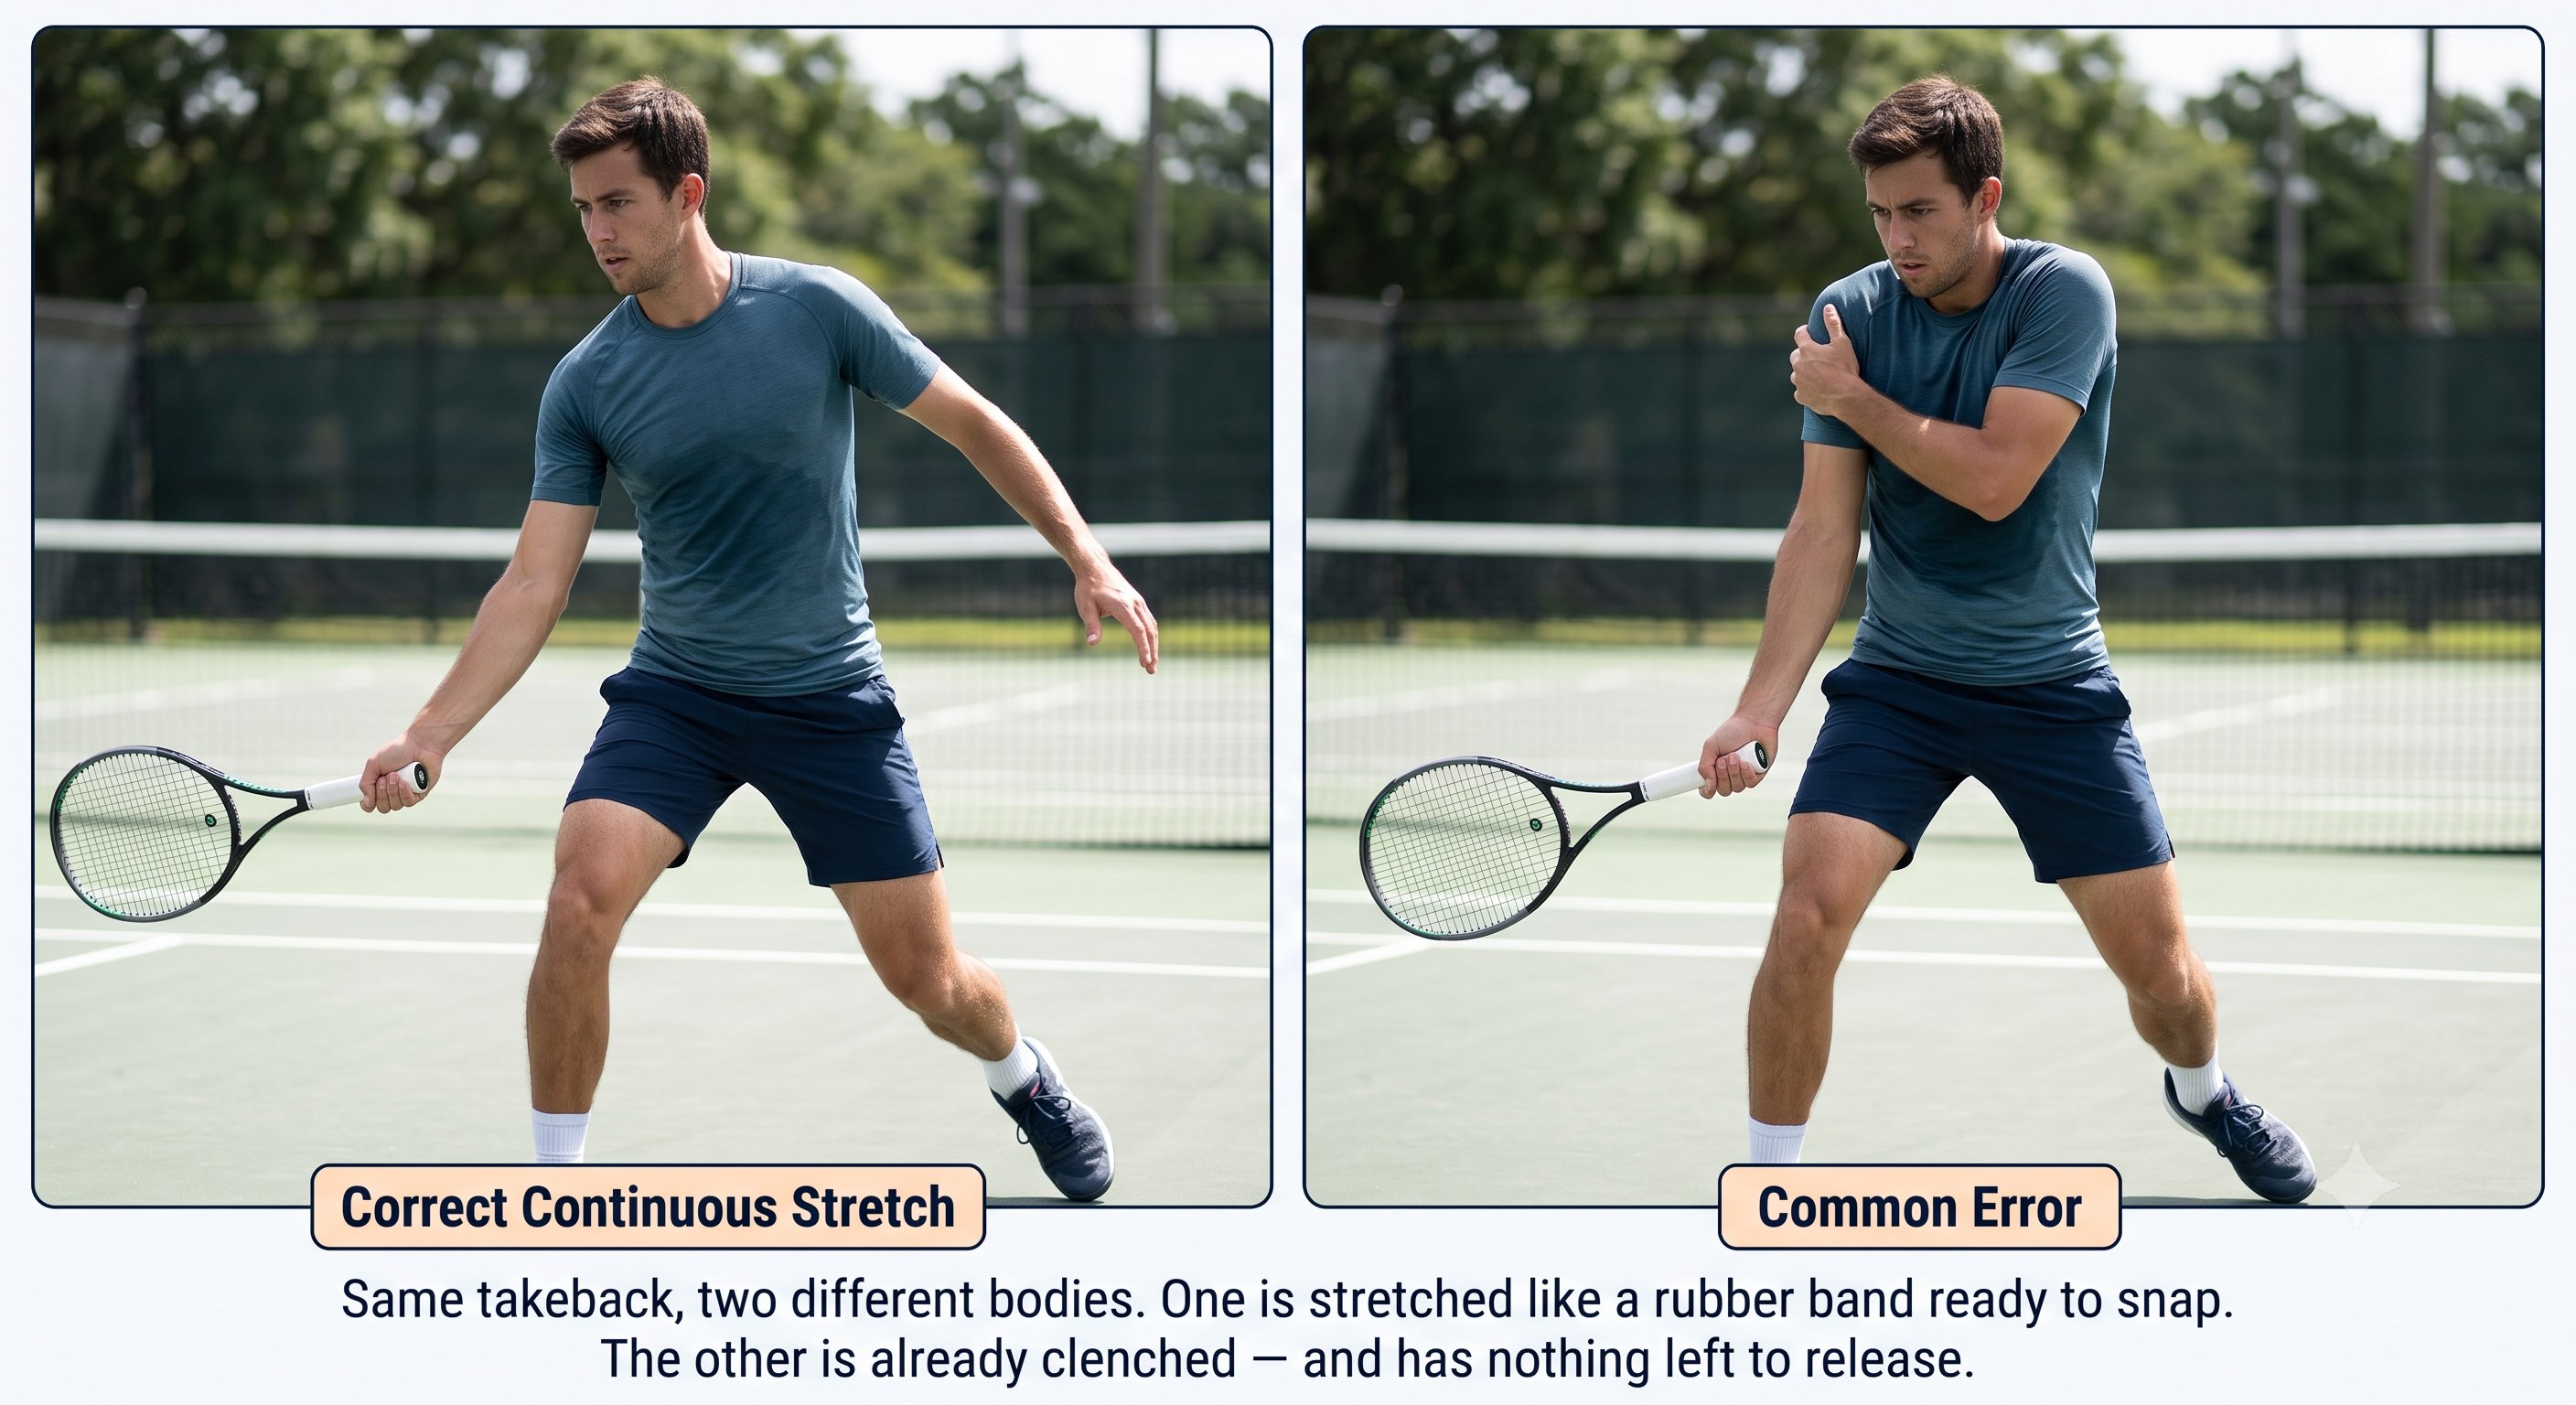
Fascia & Proprioception — Figure 2
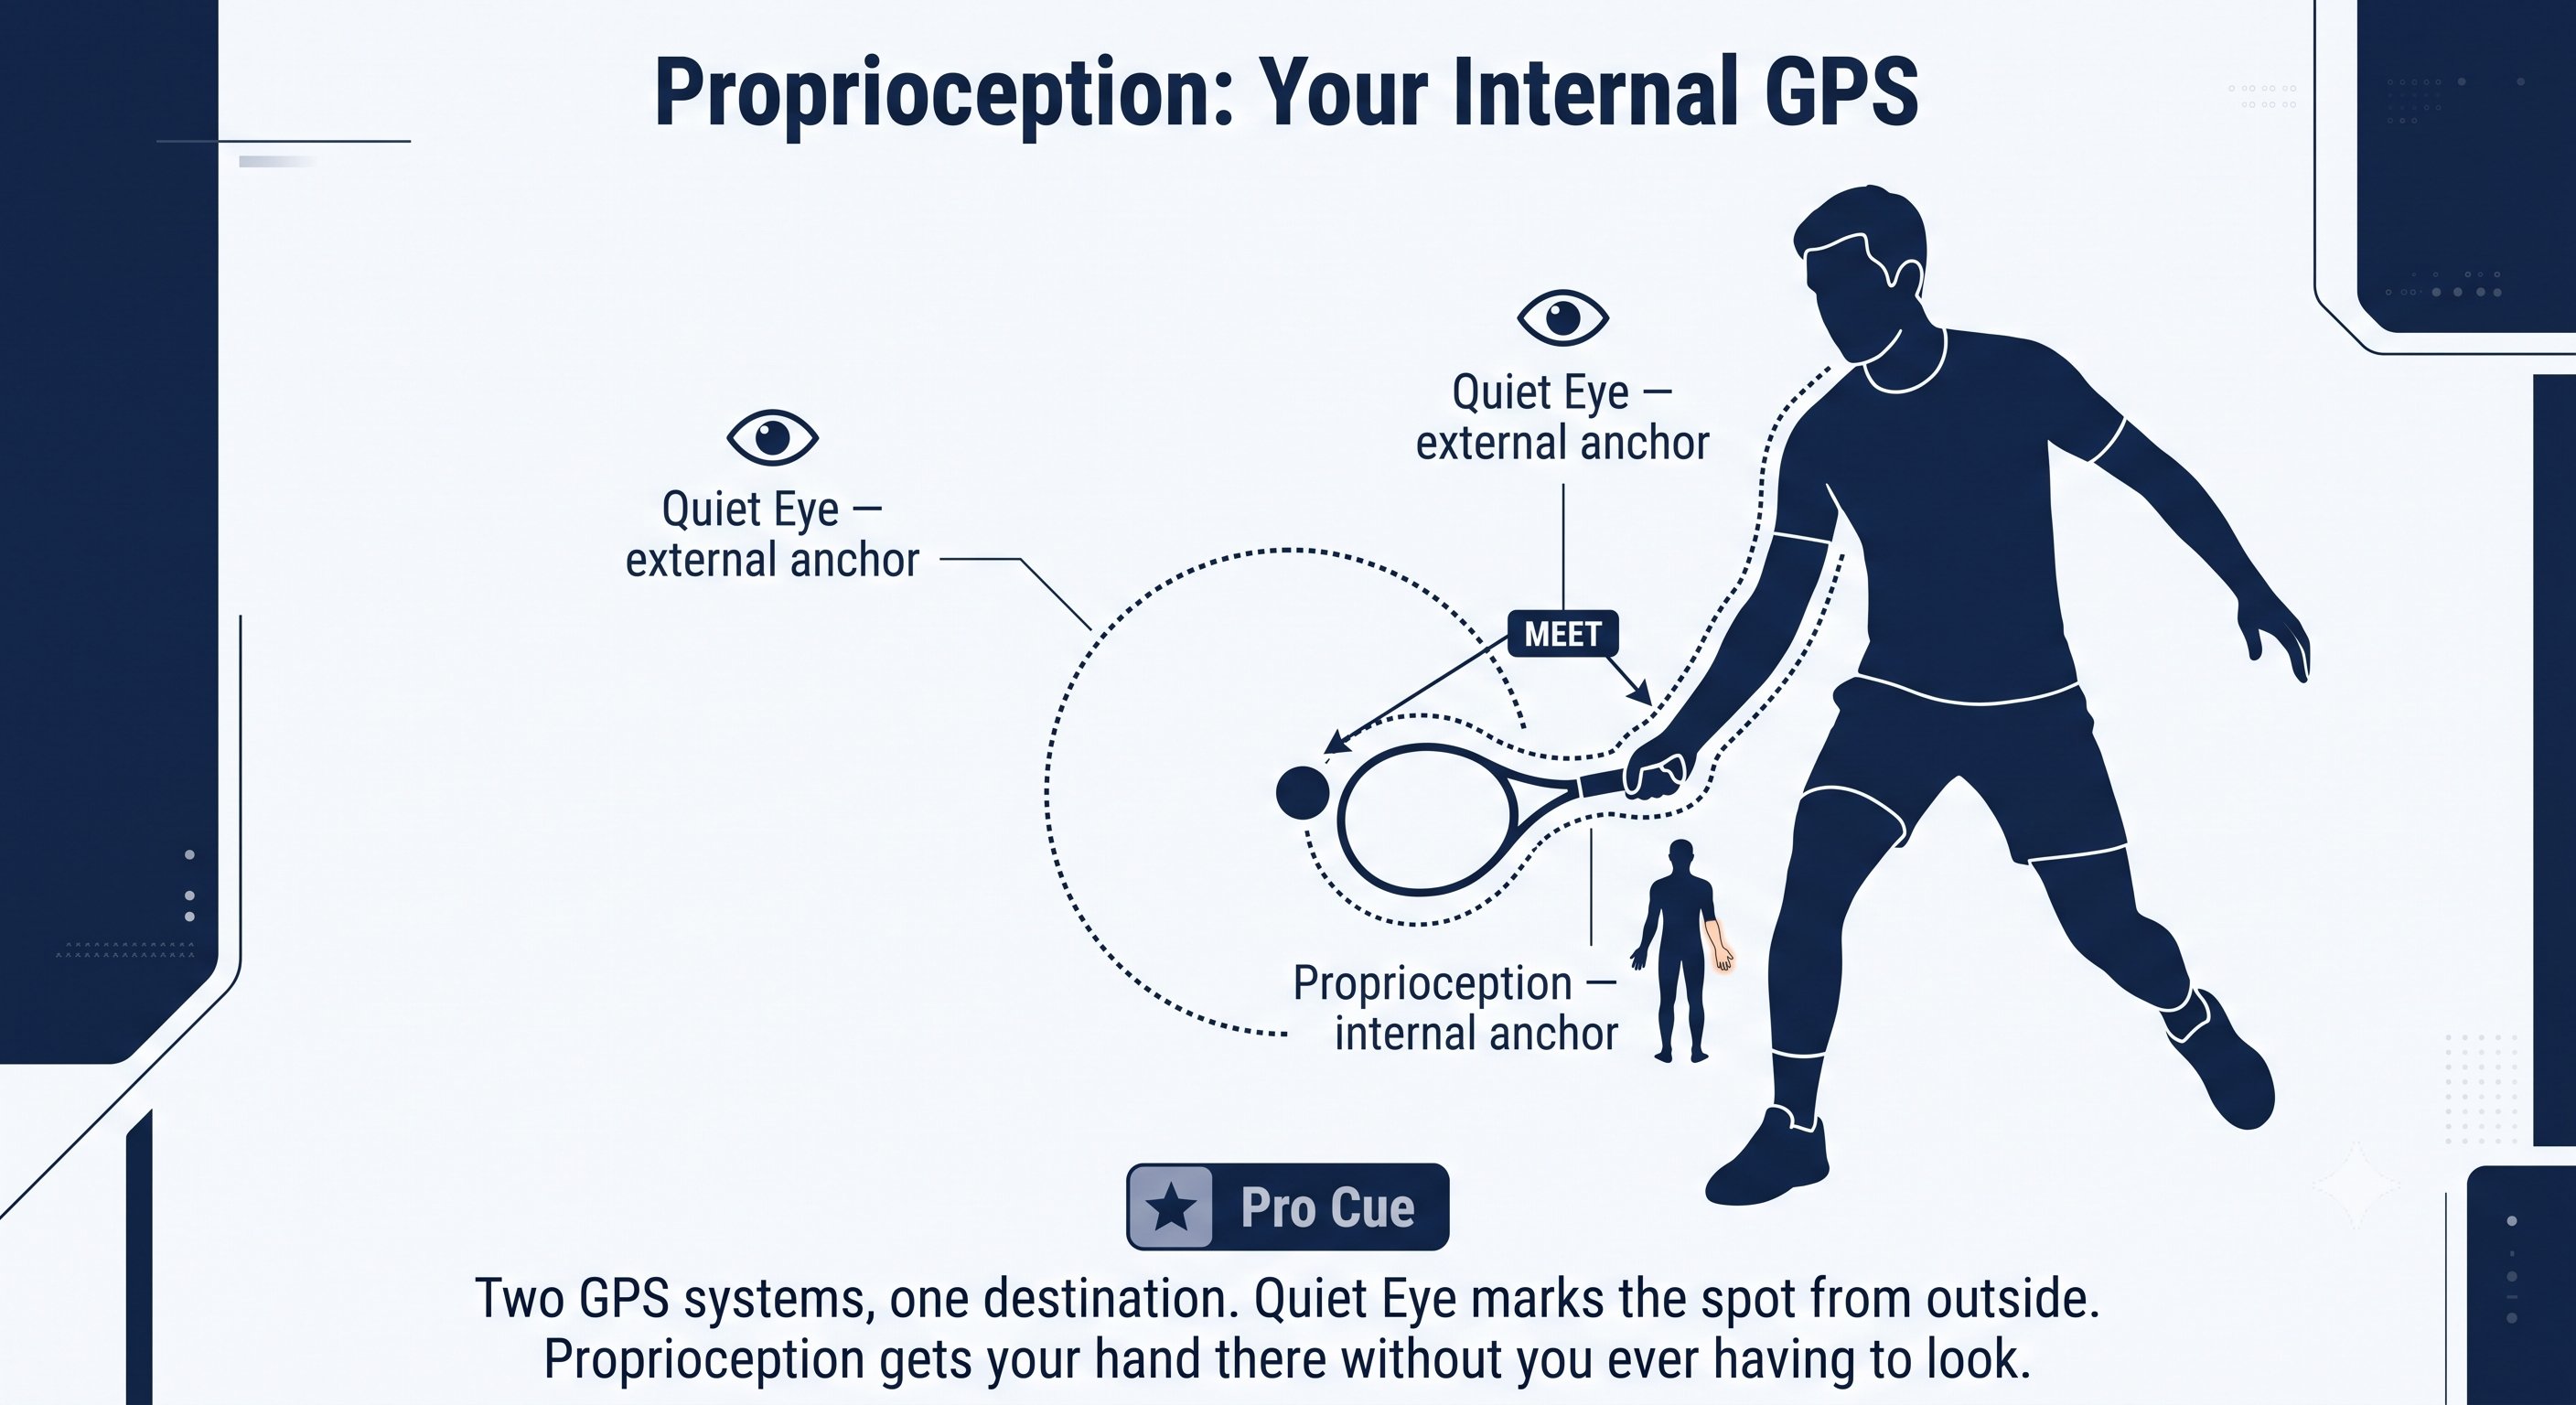
Fascia & Proprioception — Figure 3
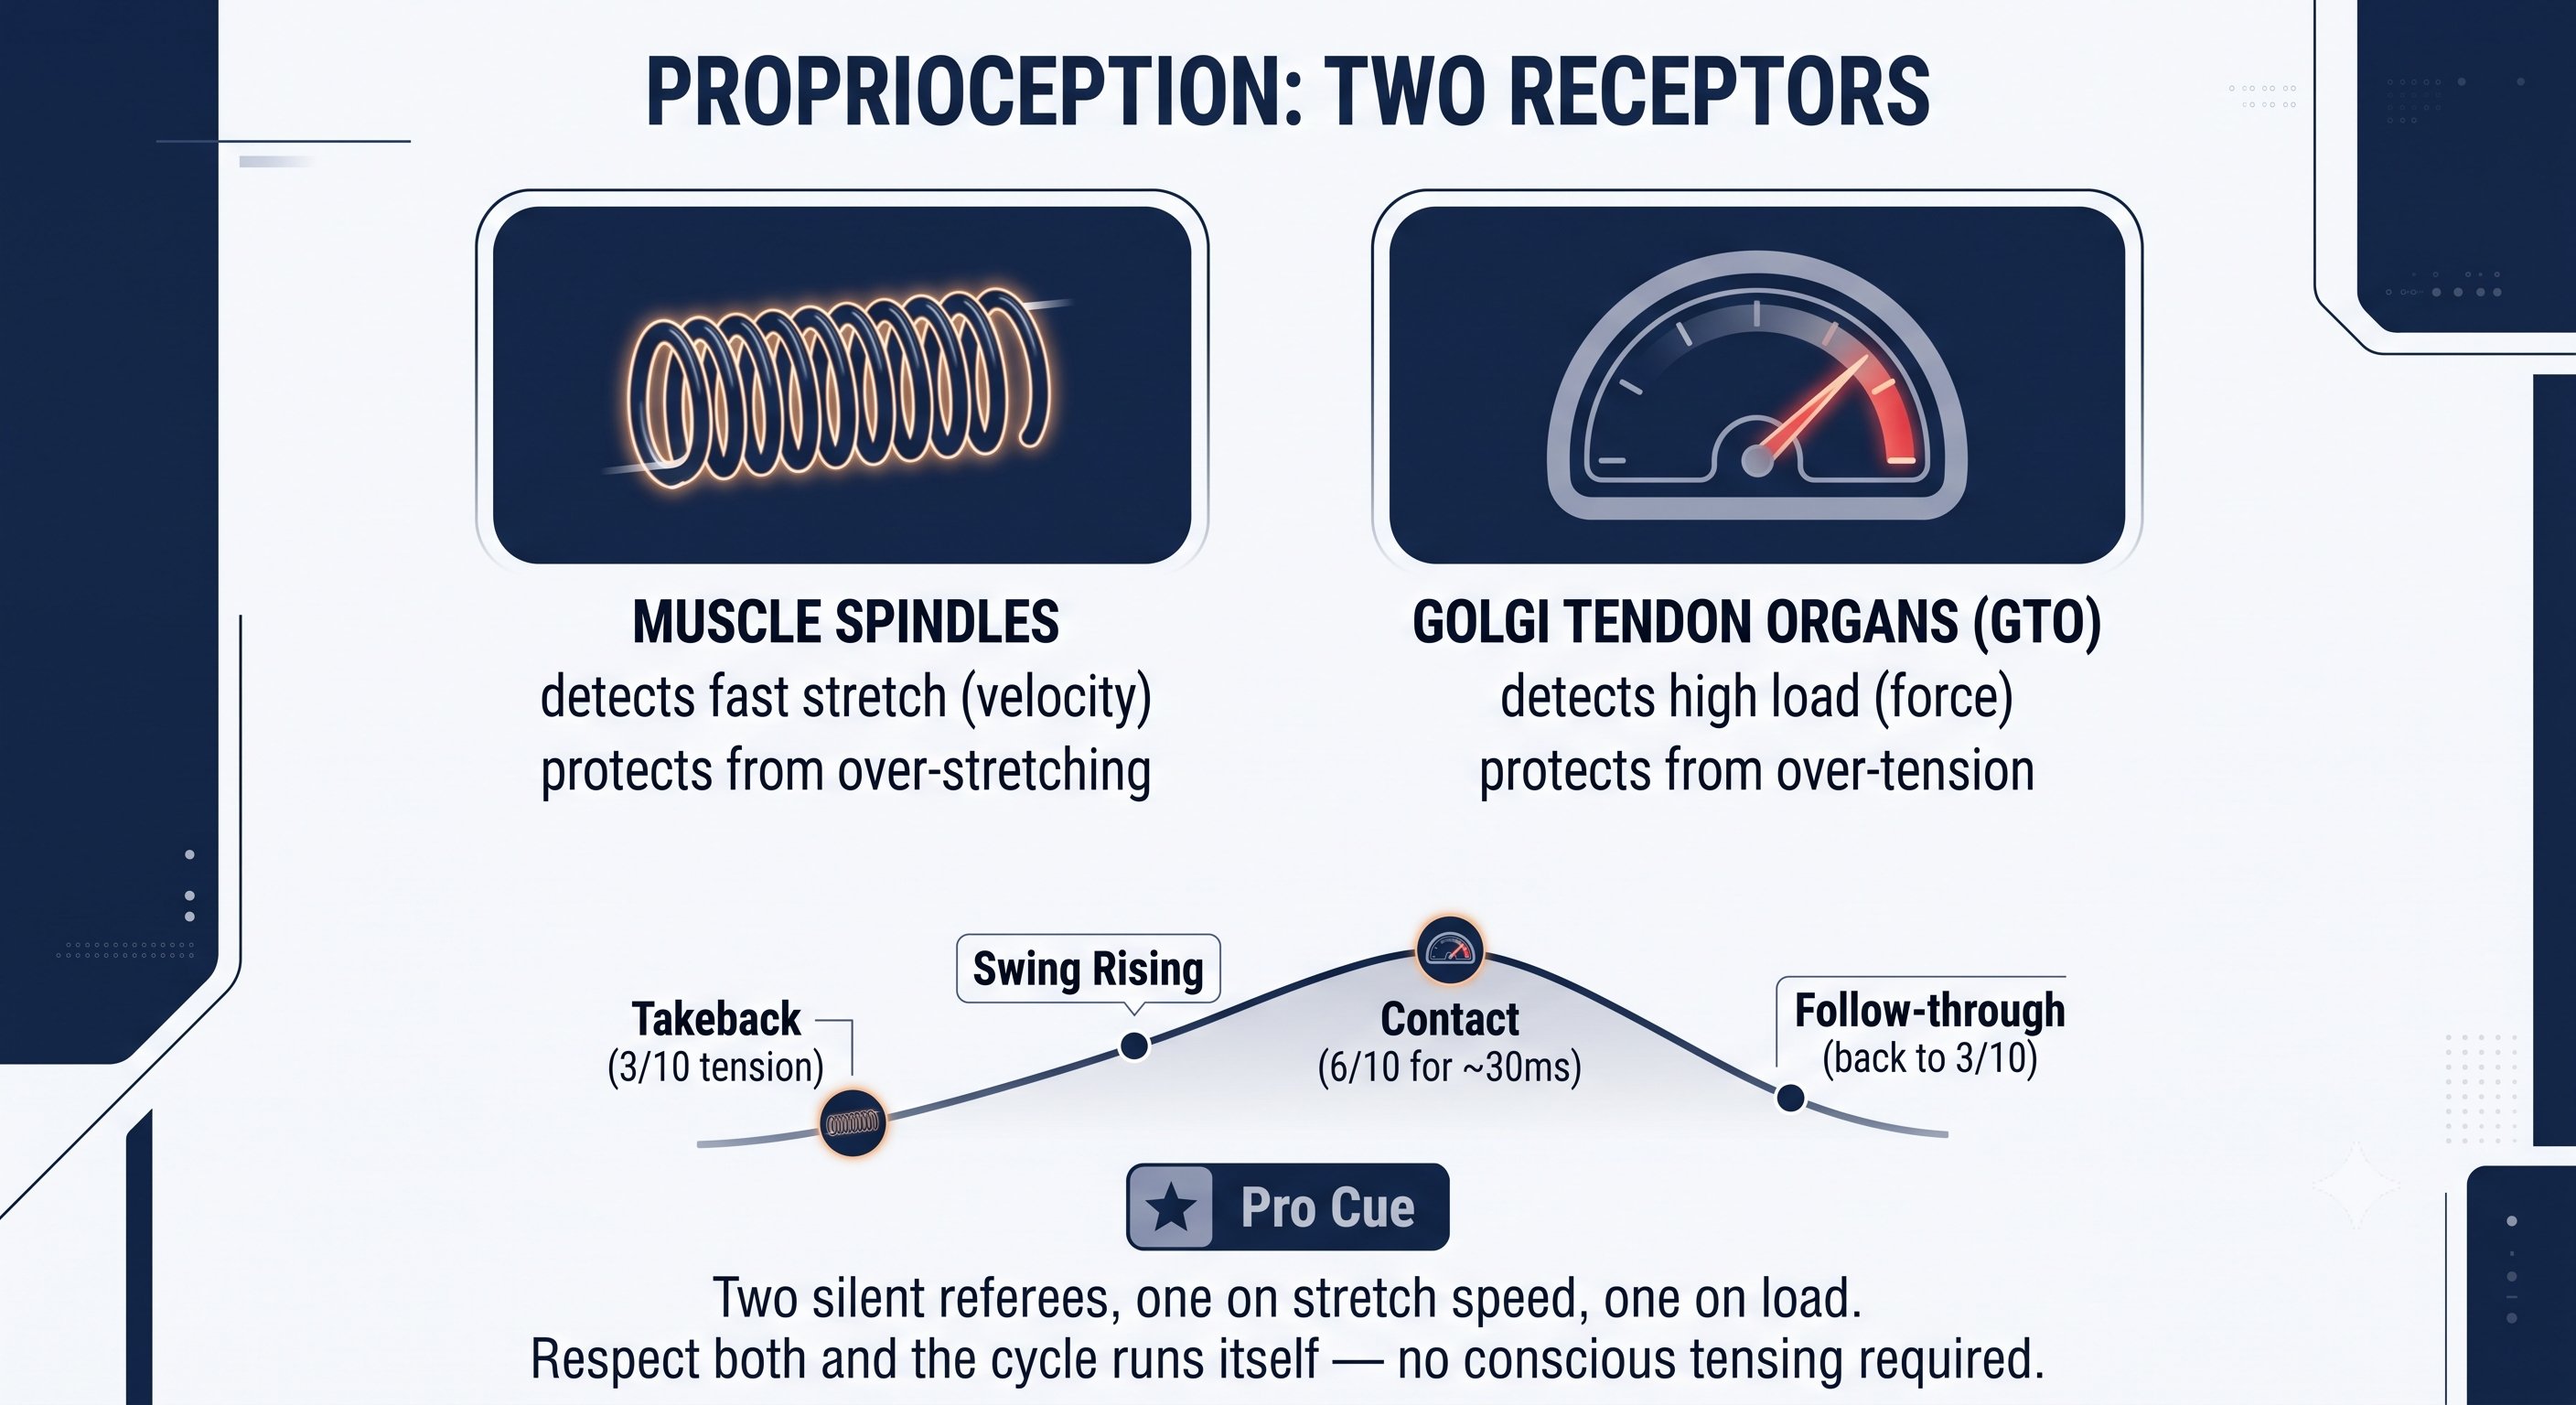
Fascia & Proprioception — Figure 4
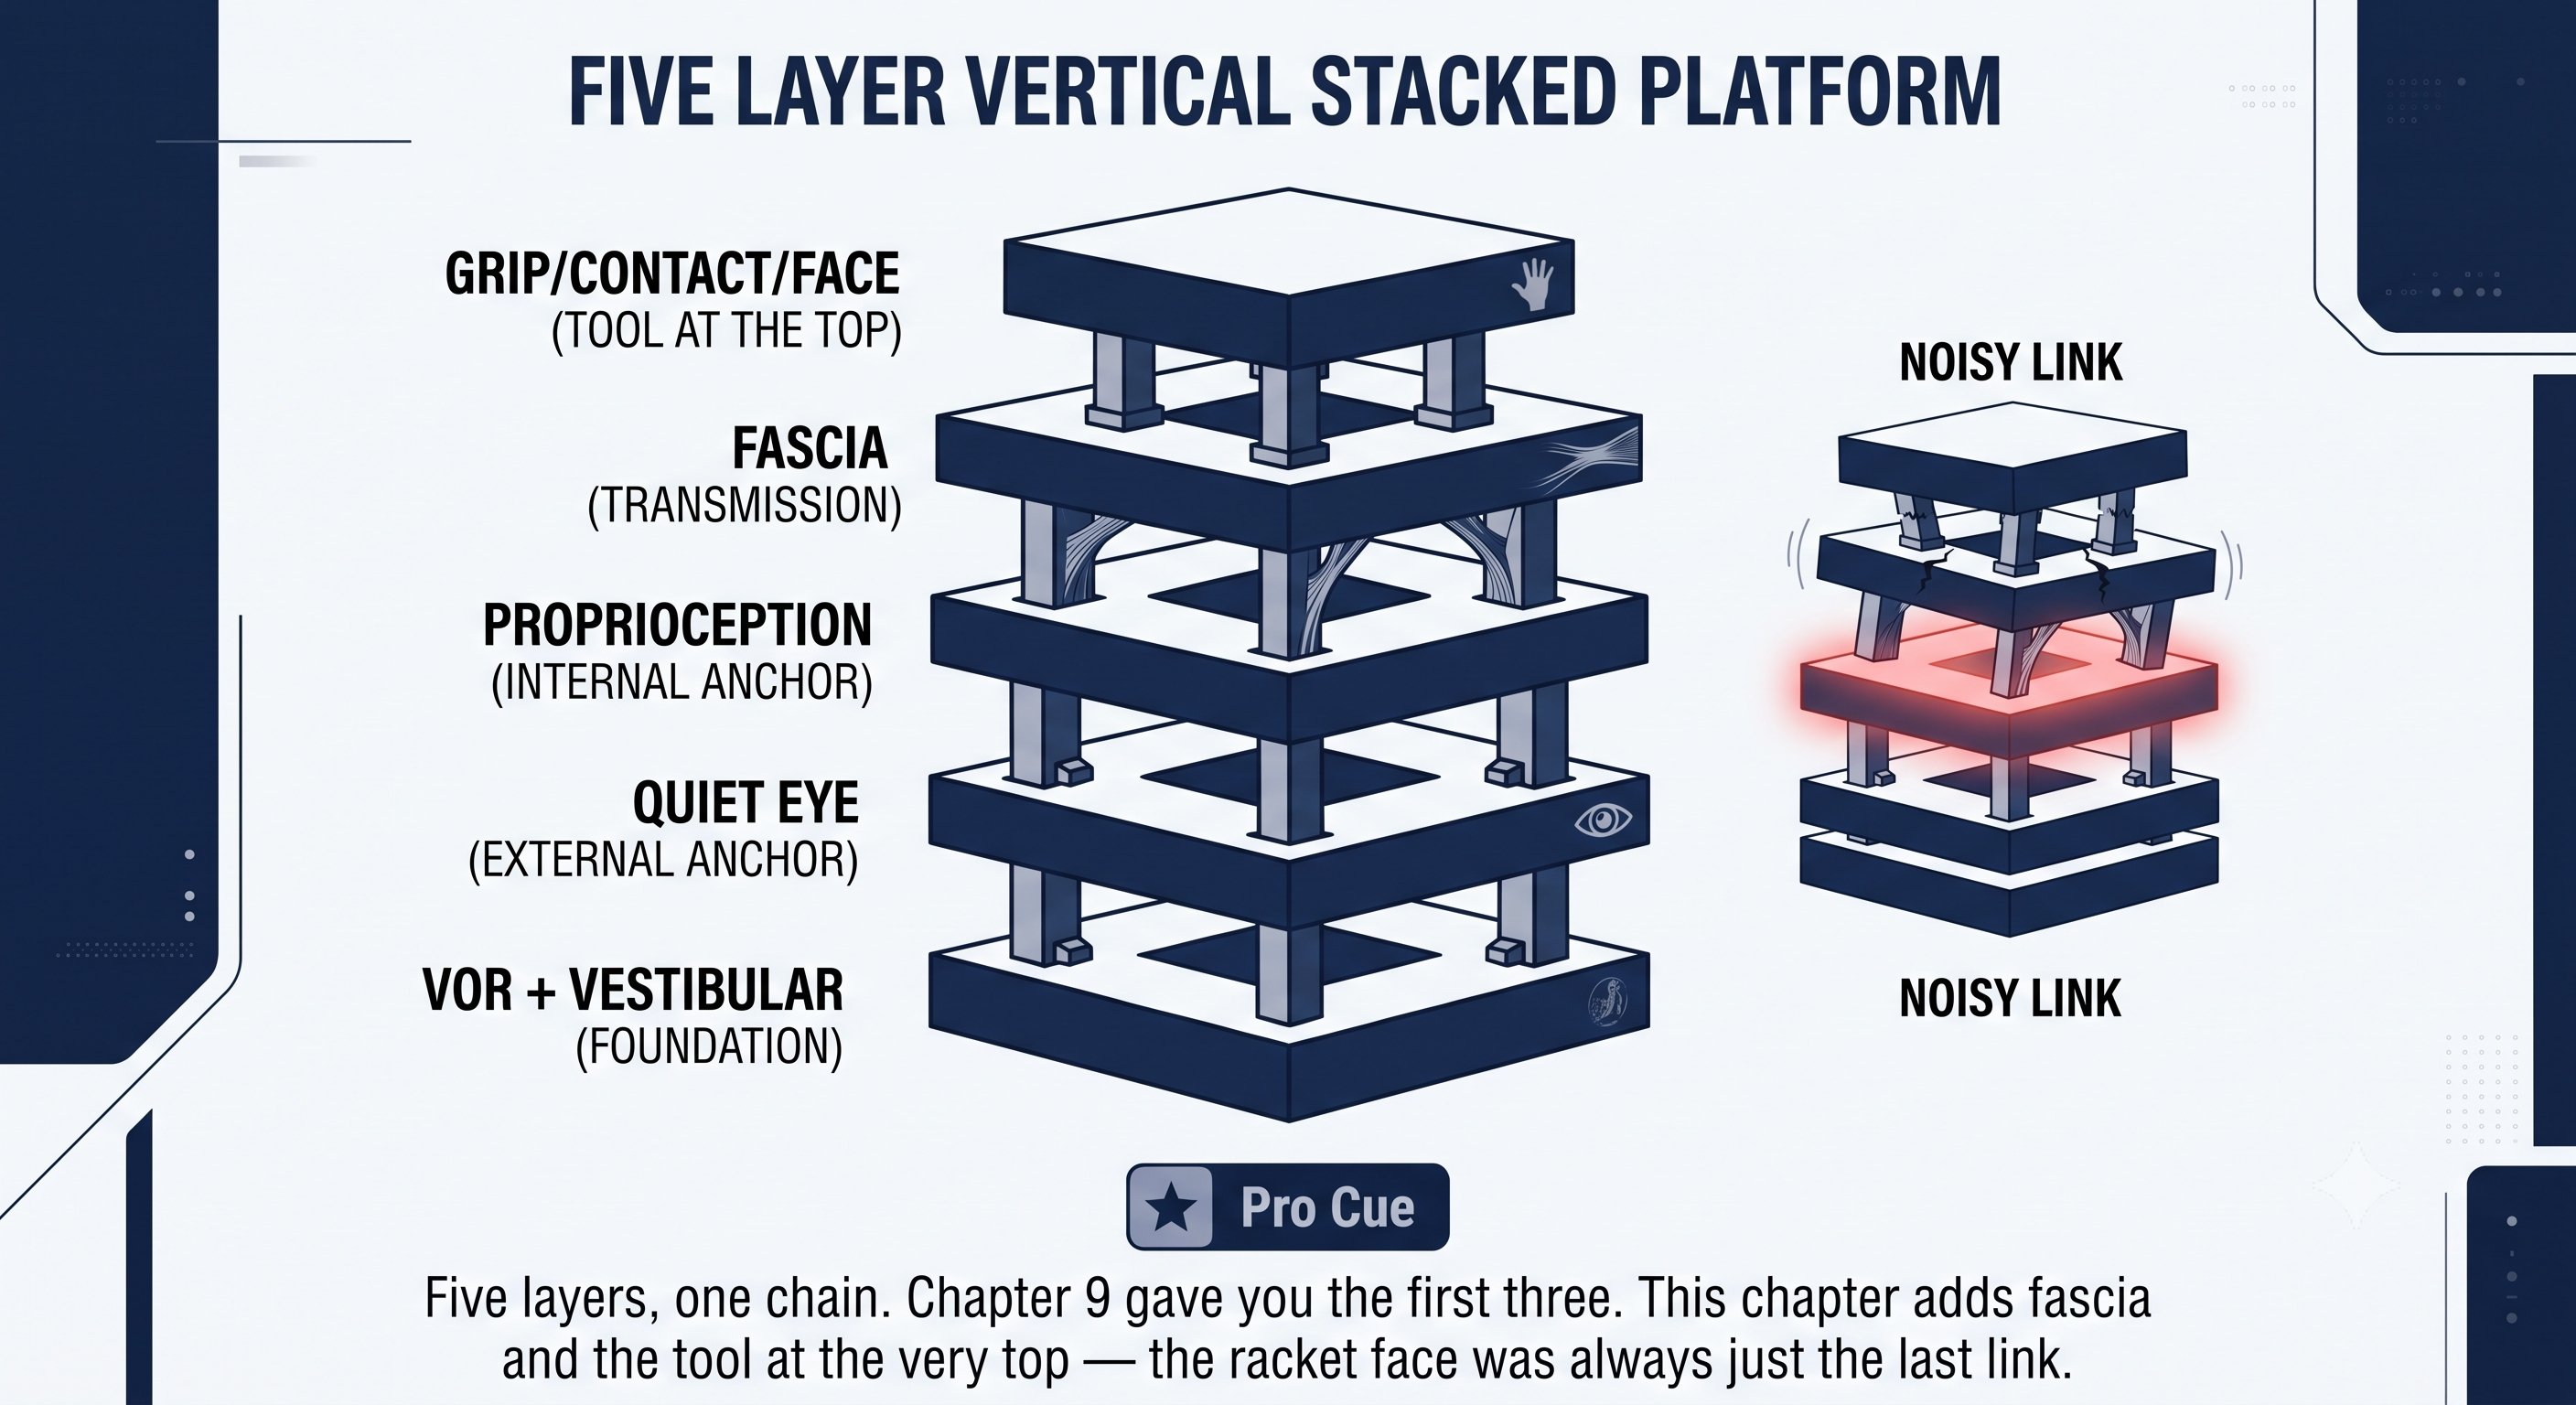
Fascia & Proprioception — Figure 5
Chapter 11: Tensegrity 4 figures
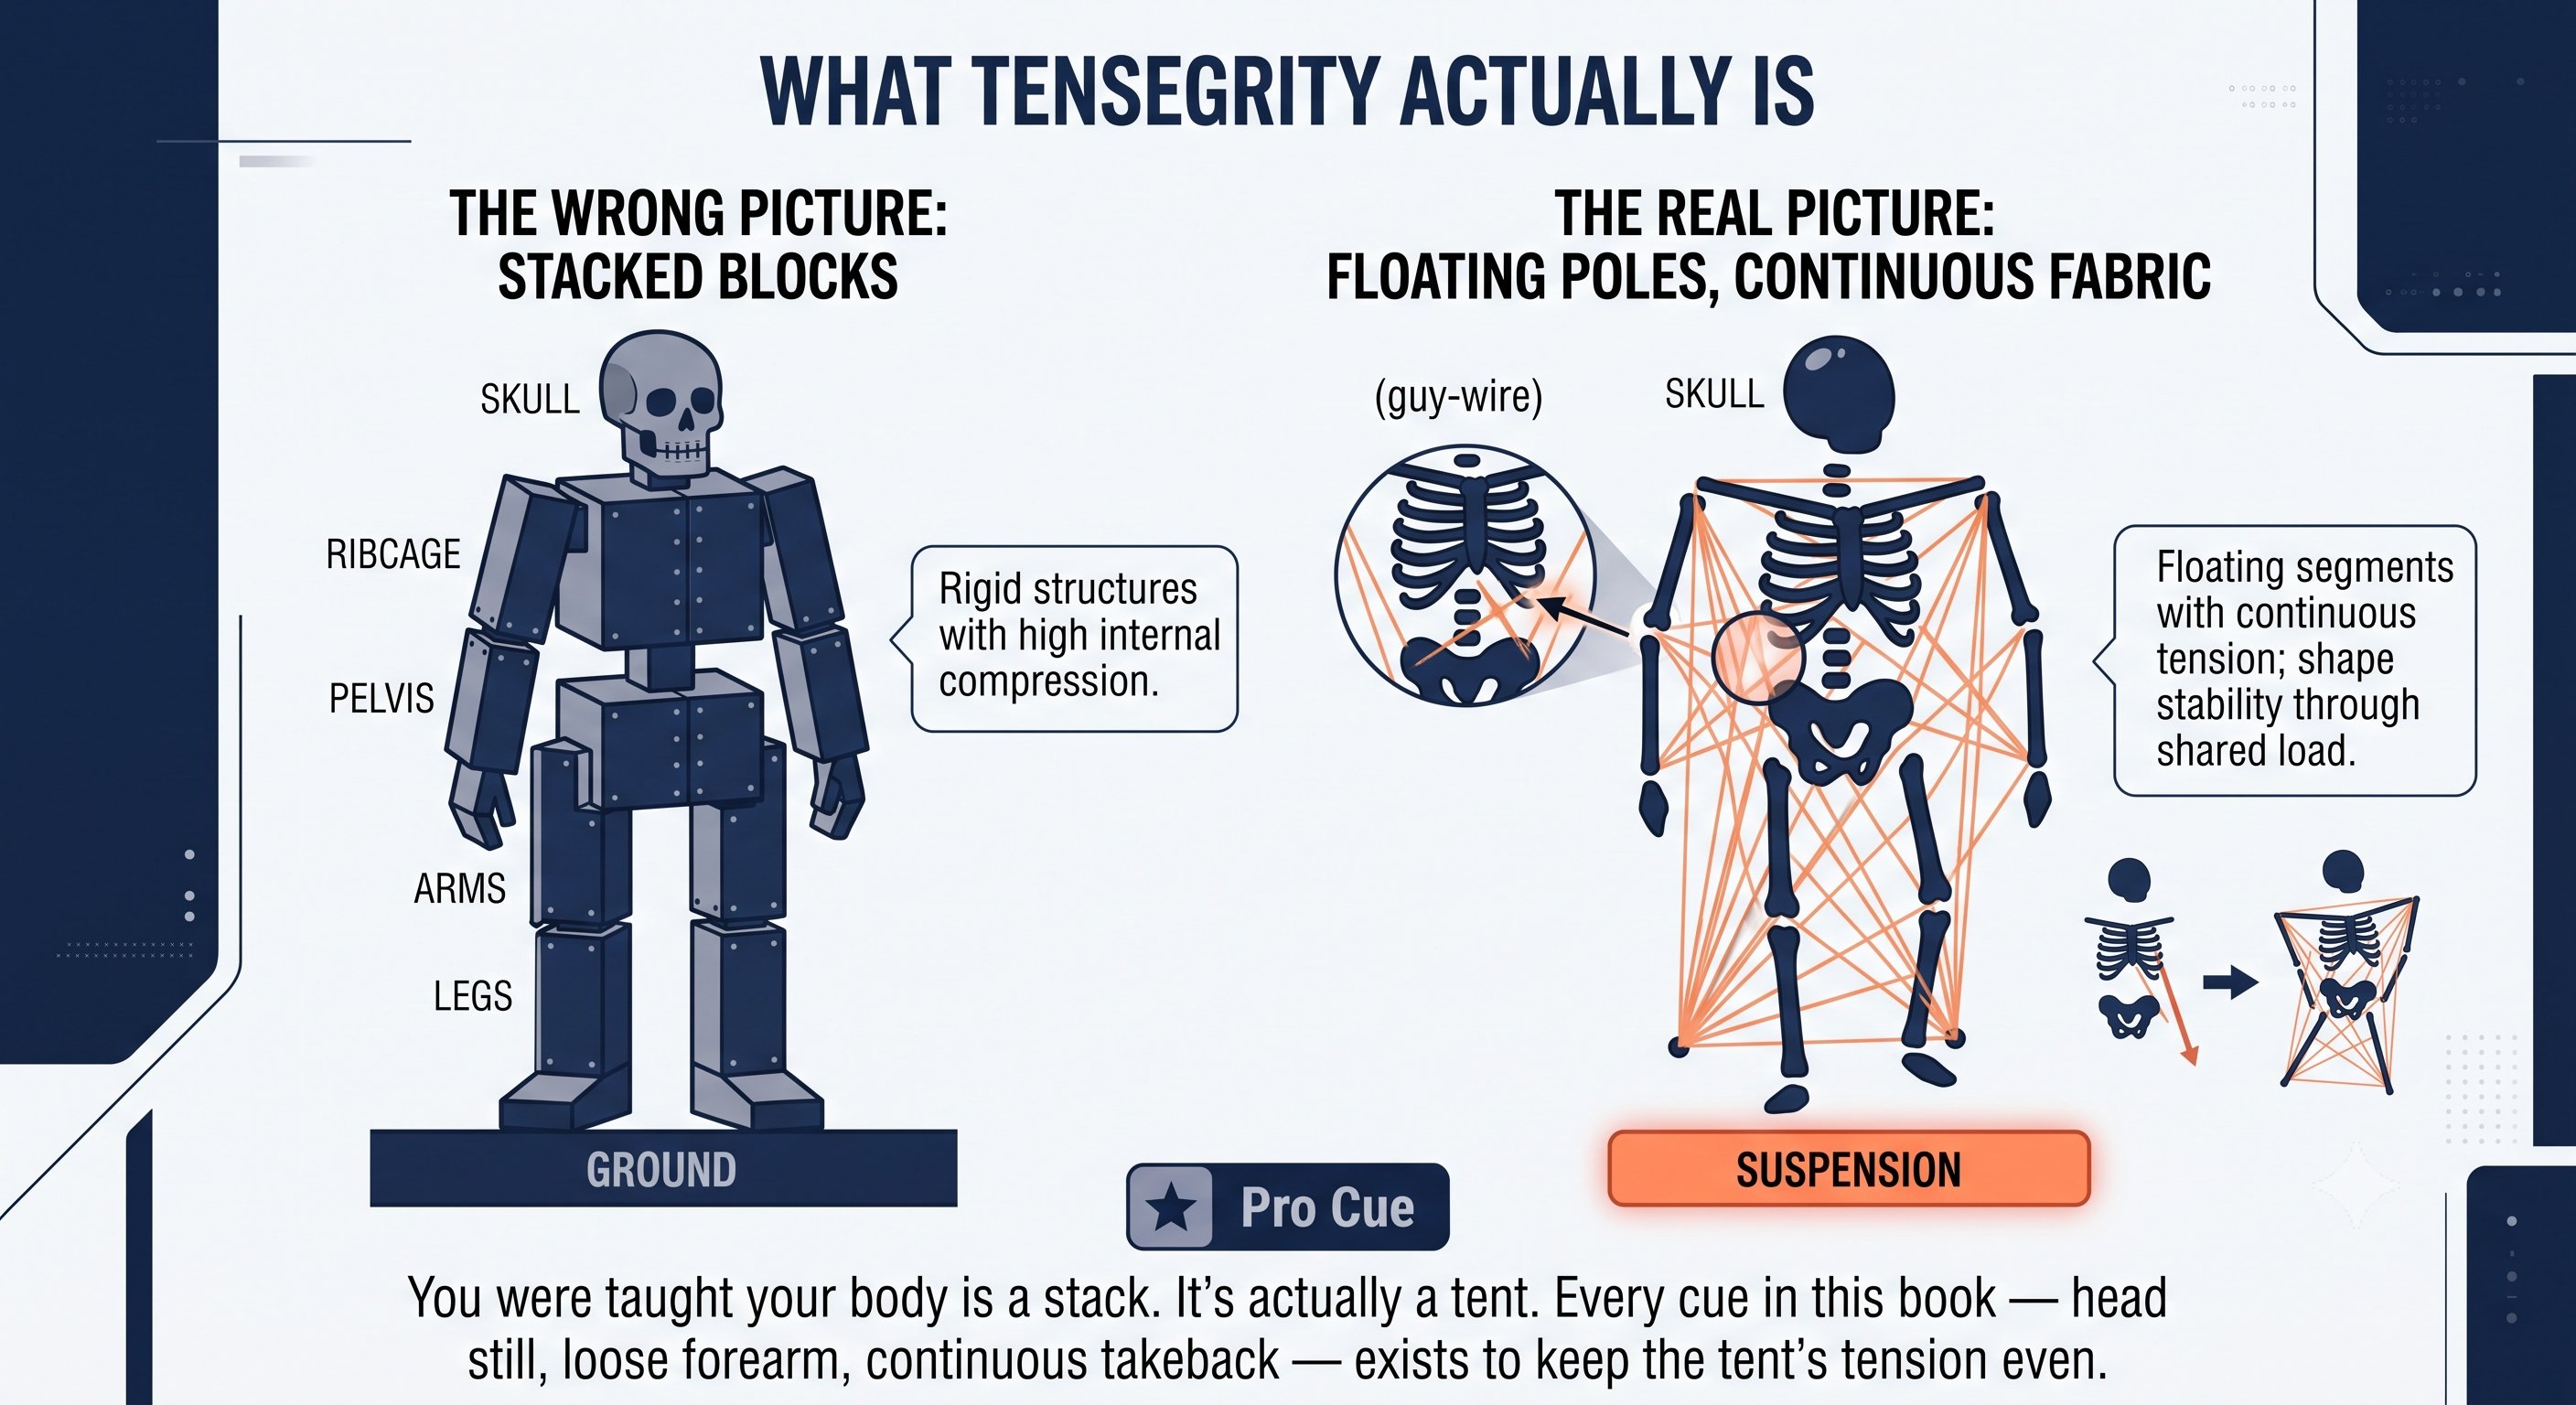
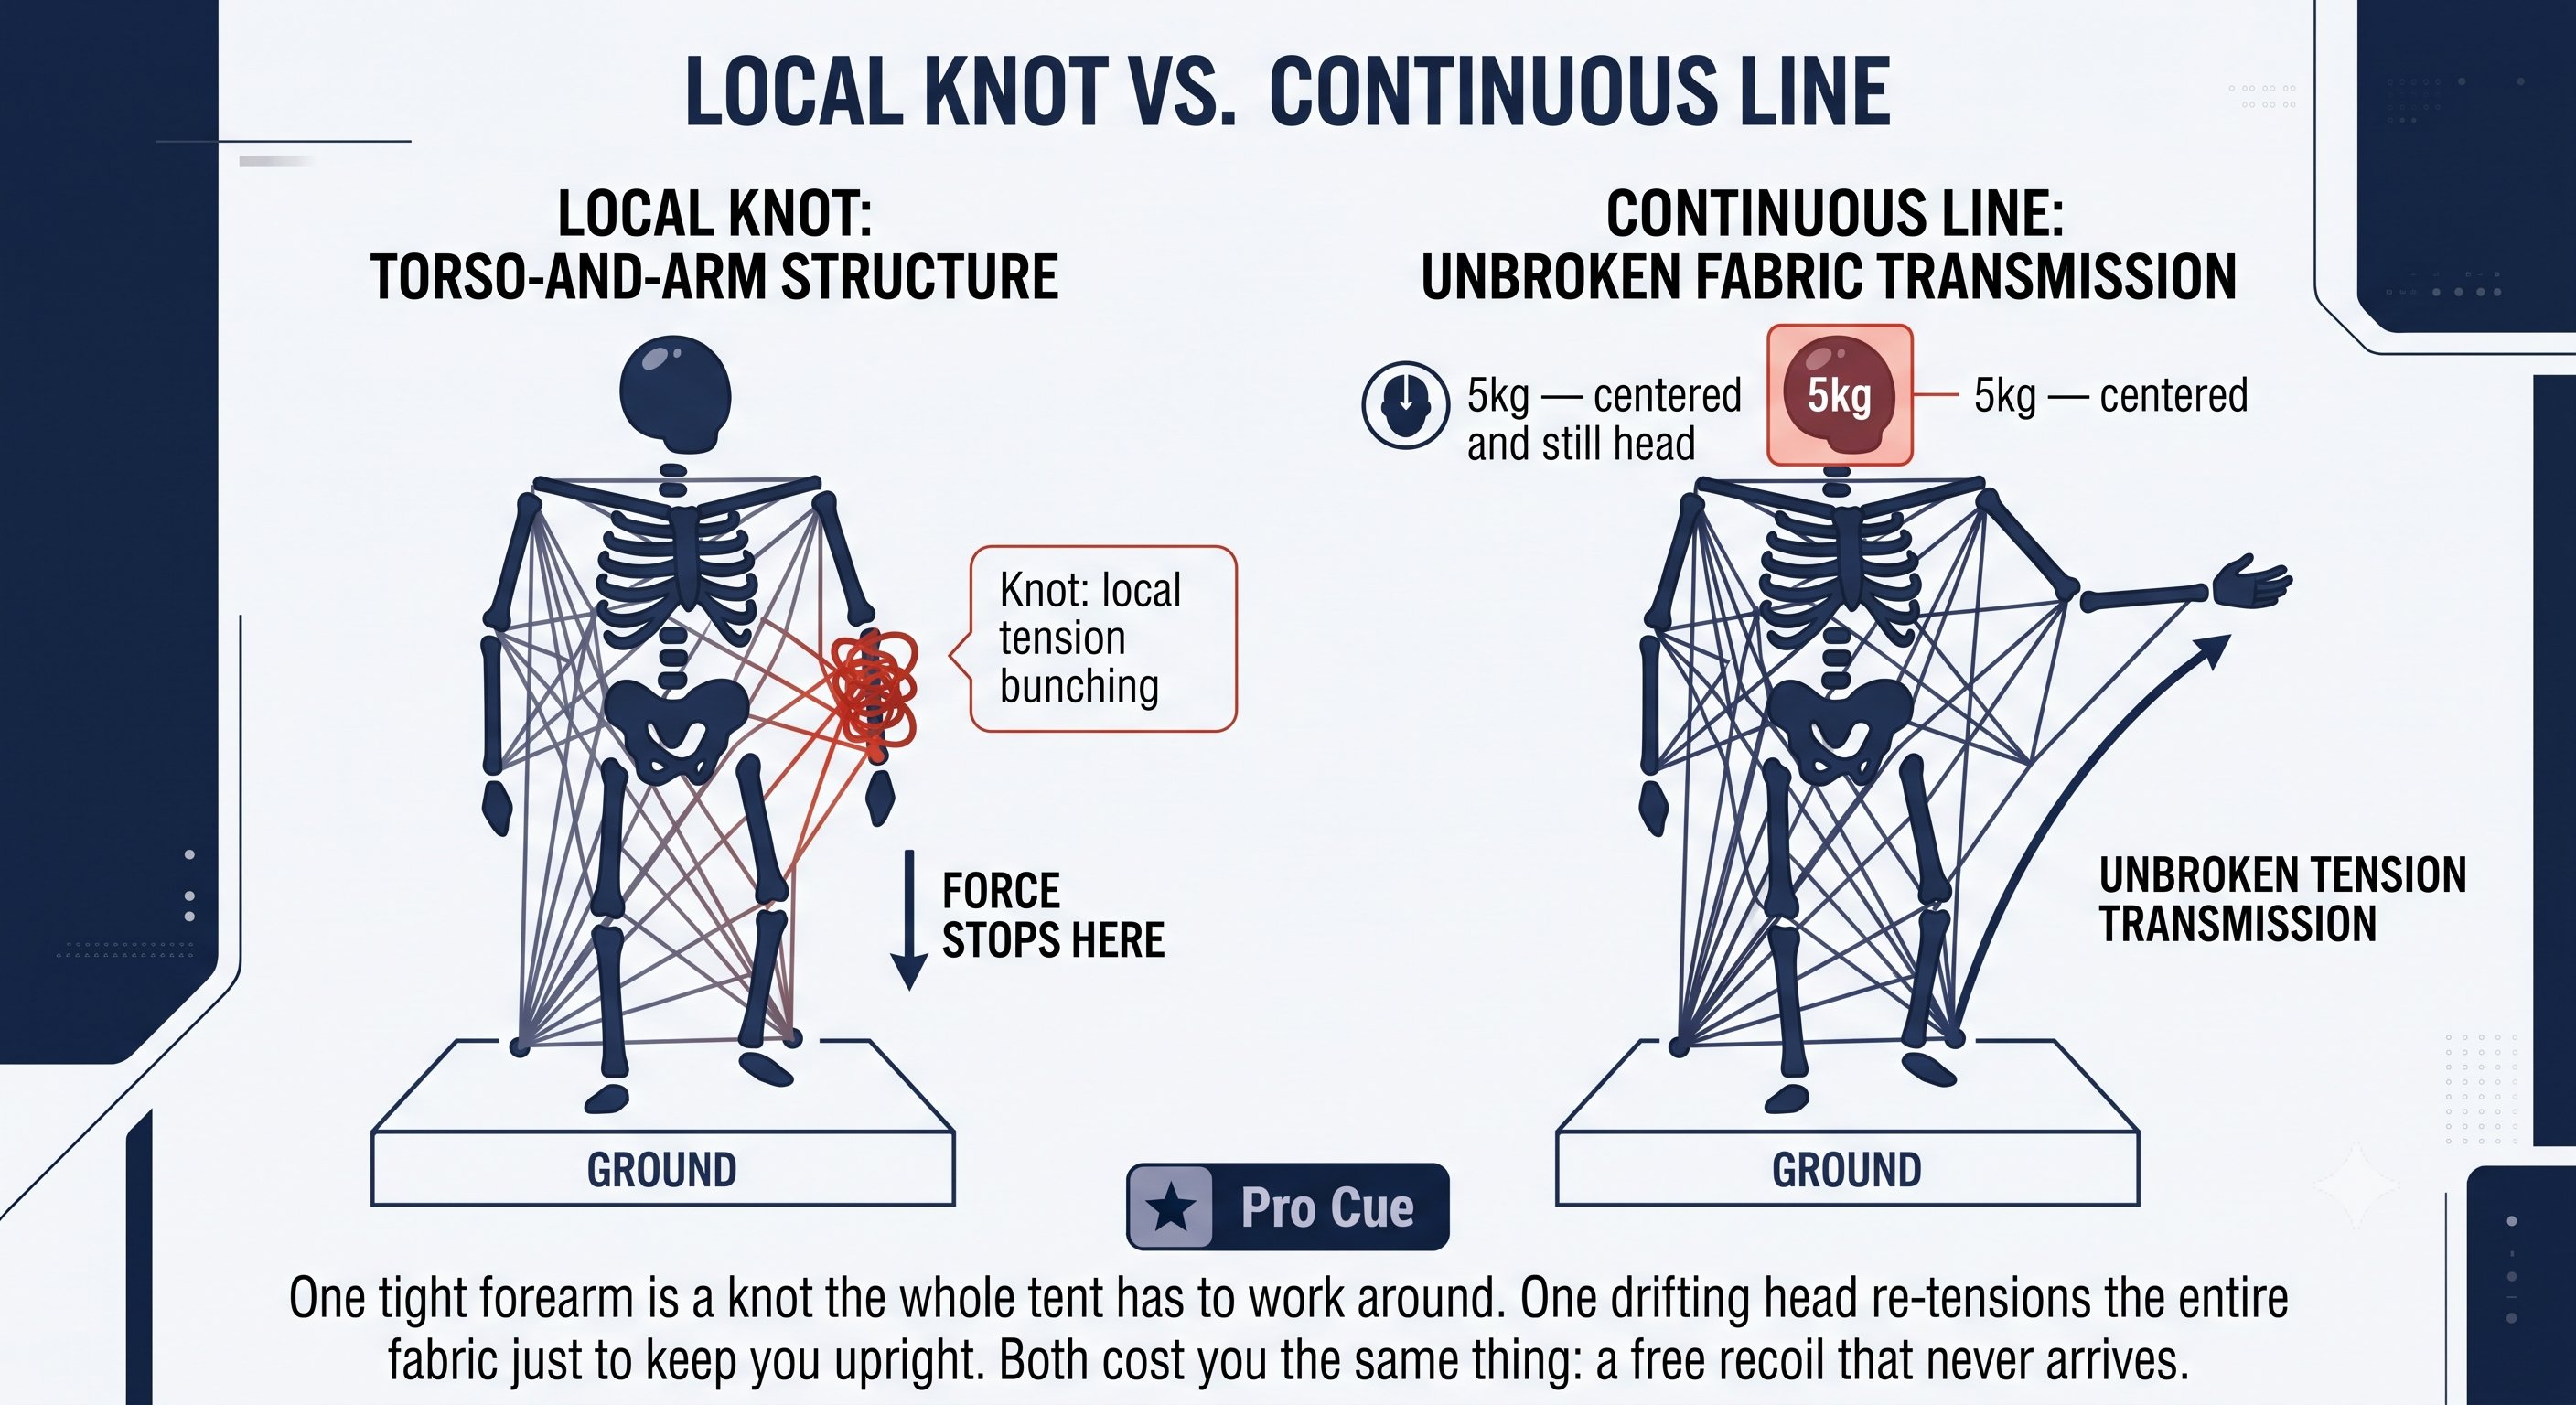
Tensegrity — Figure 1
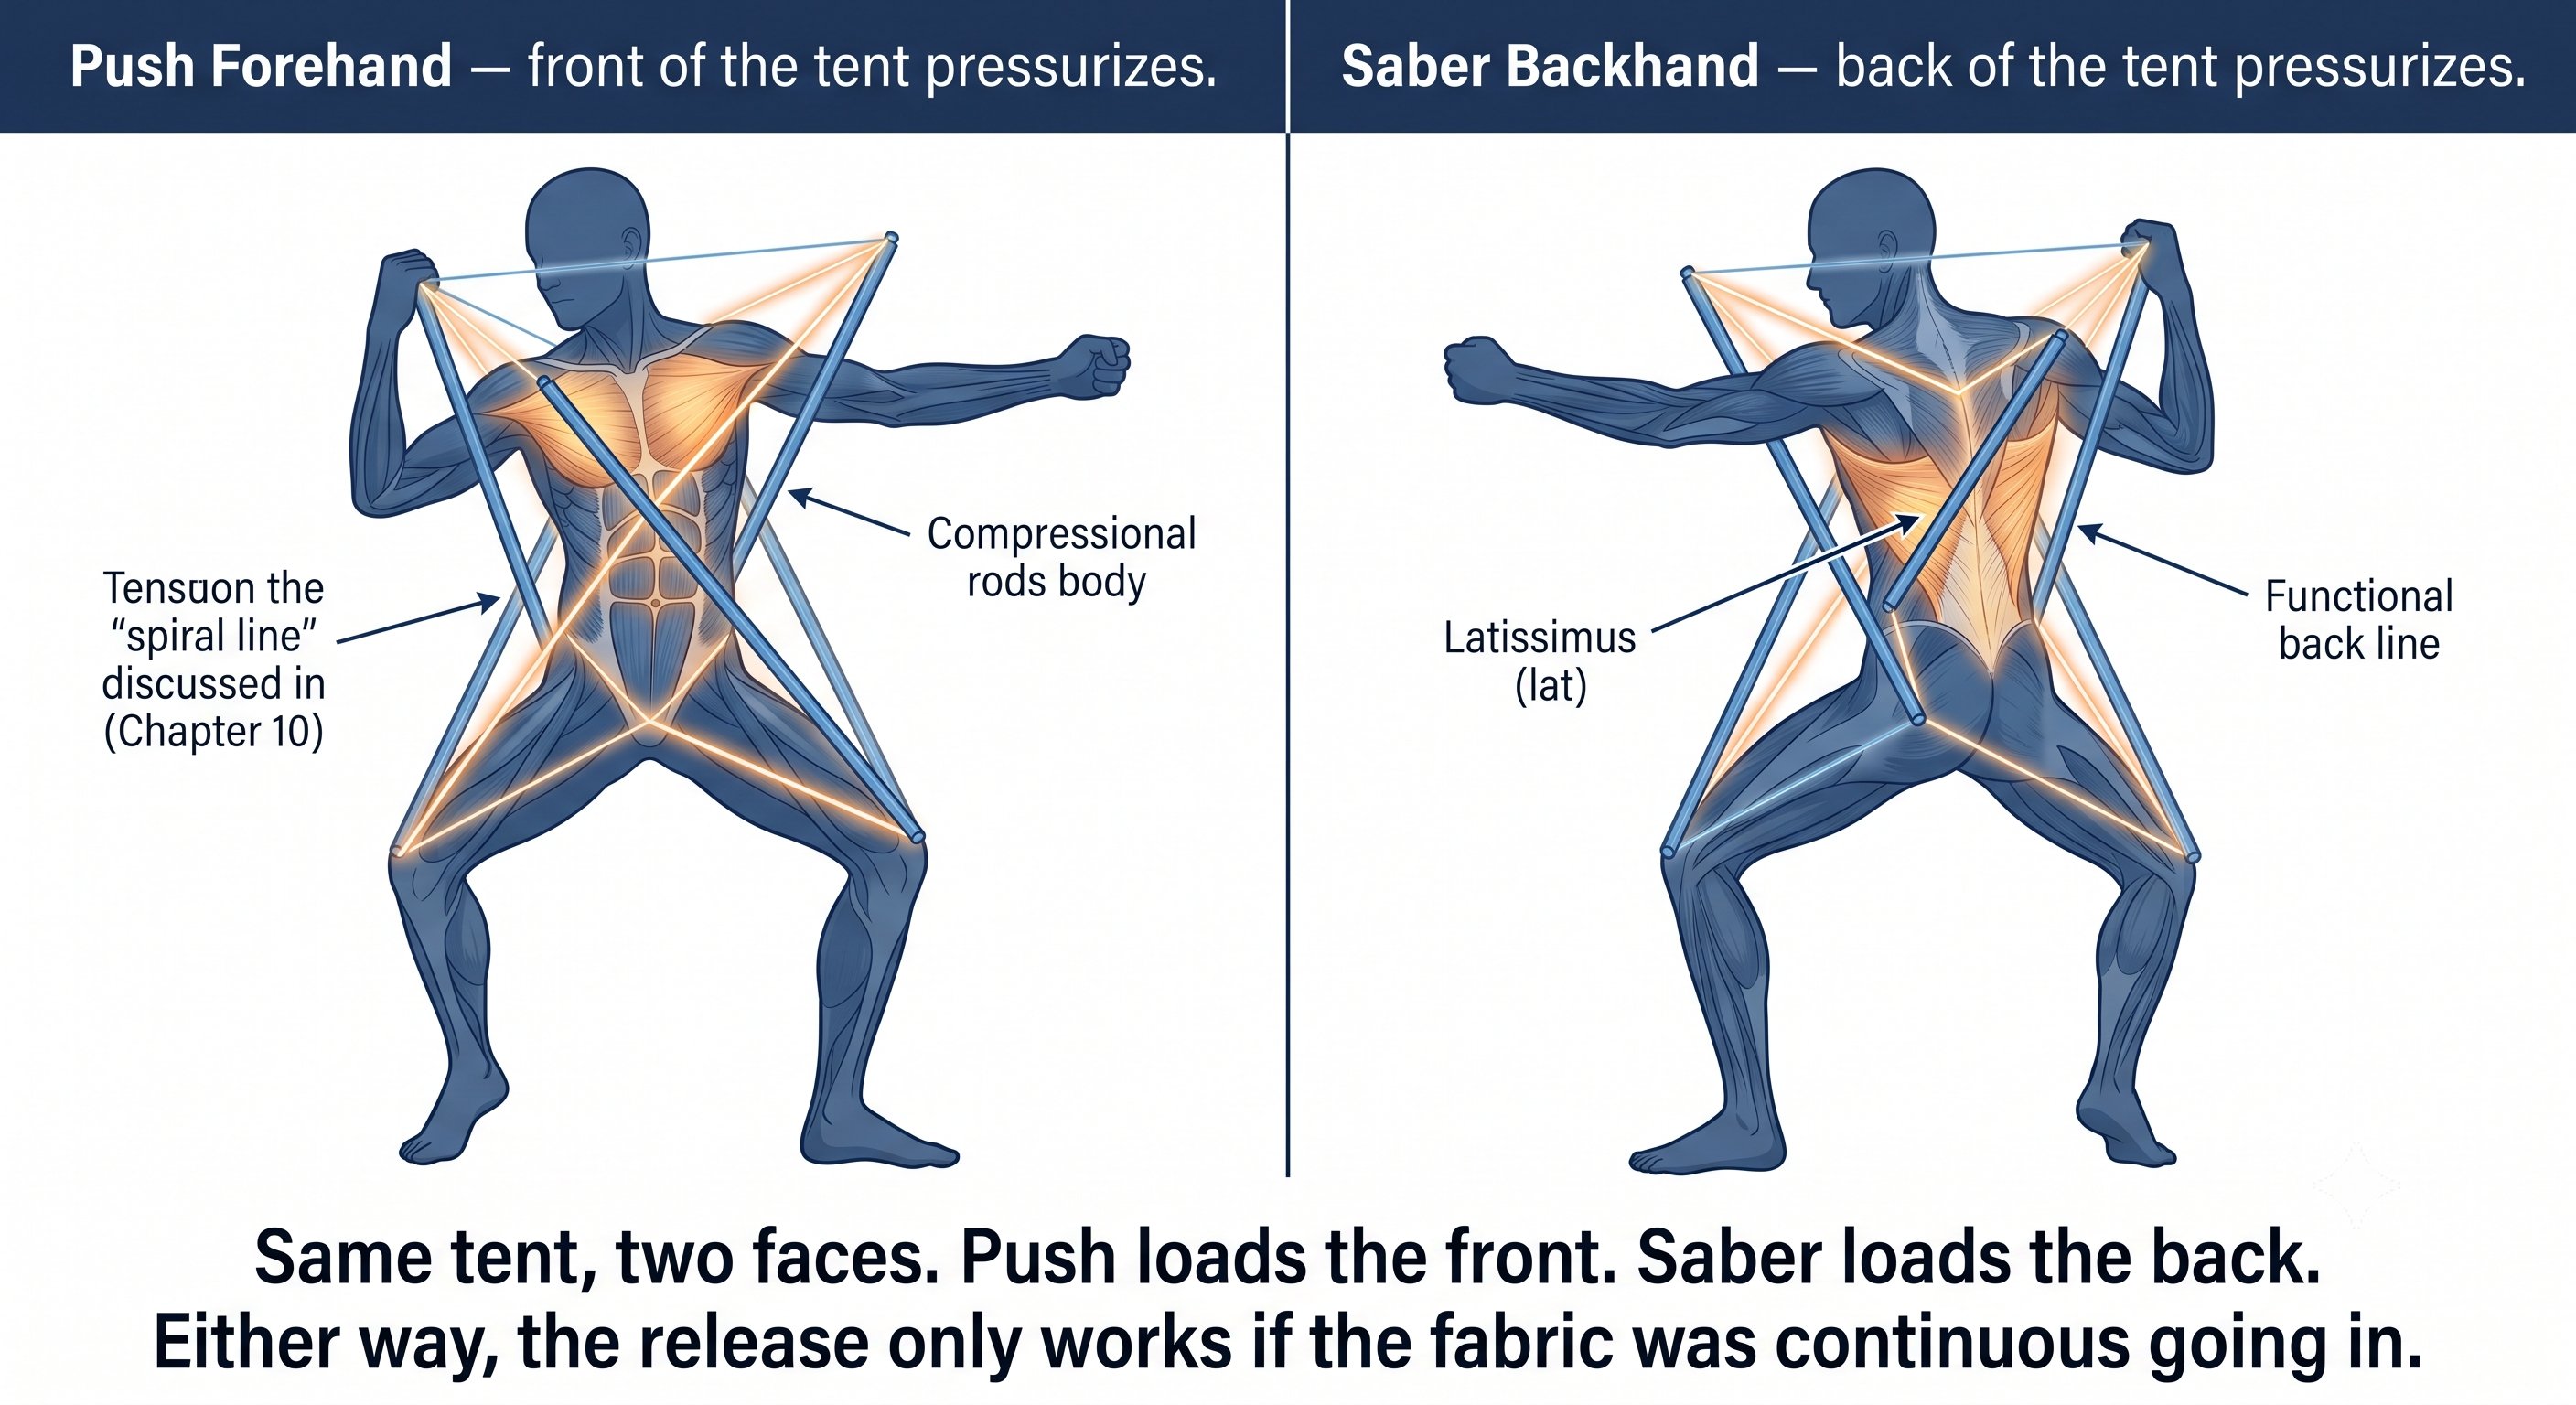
Tensegrity — Figure 2
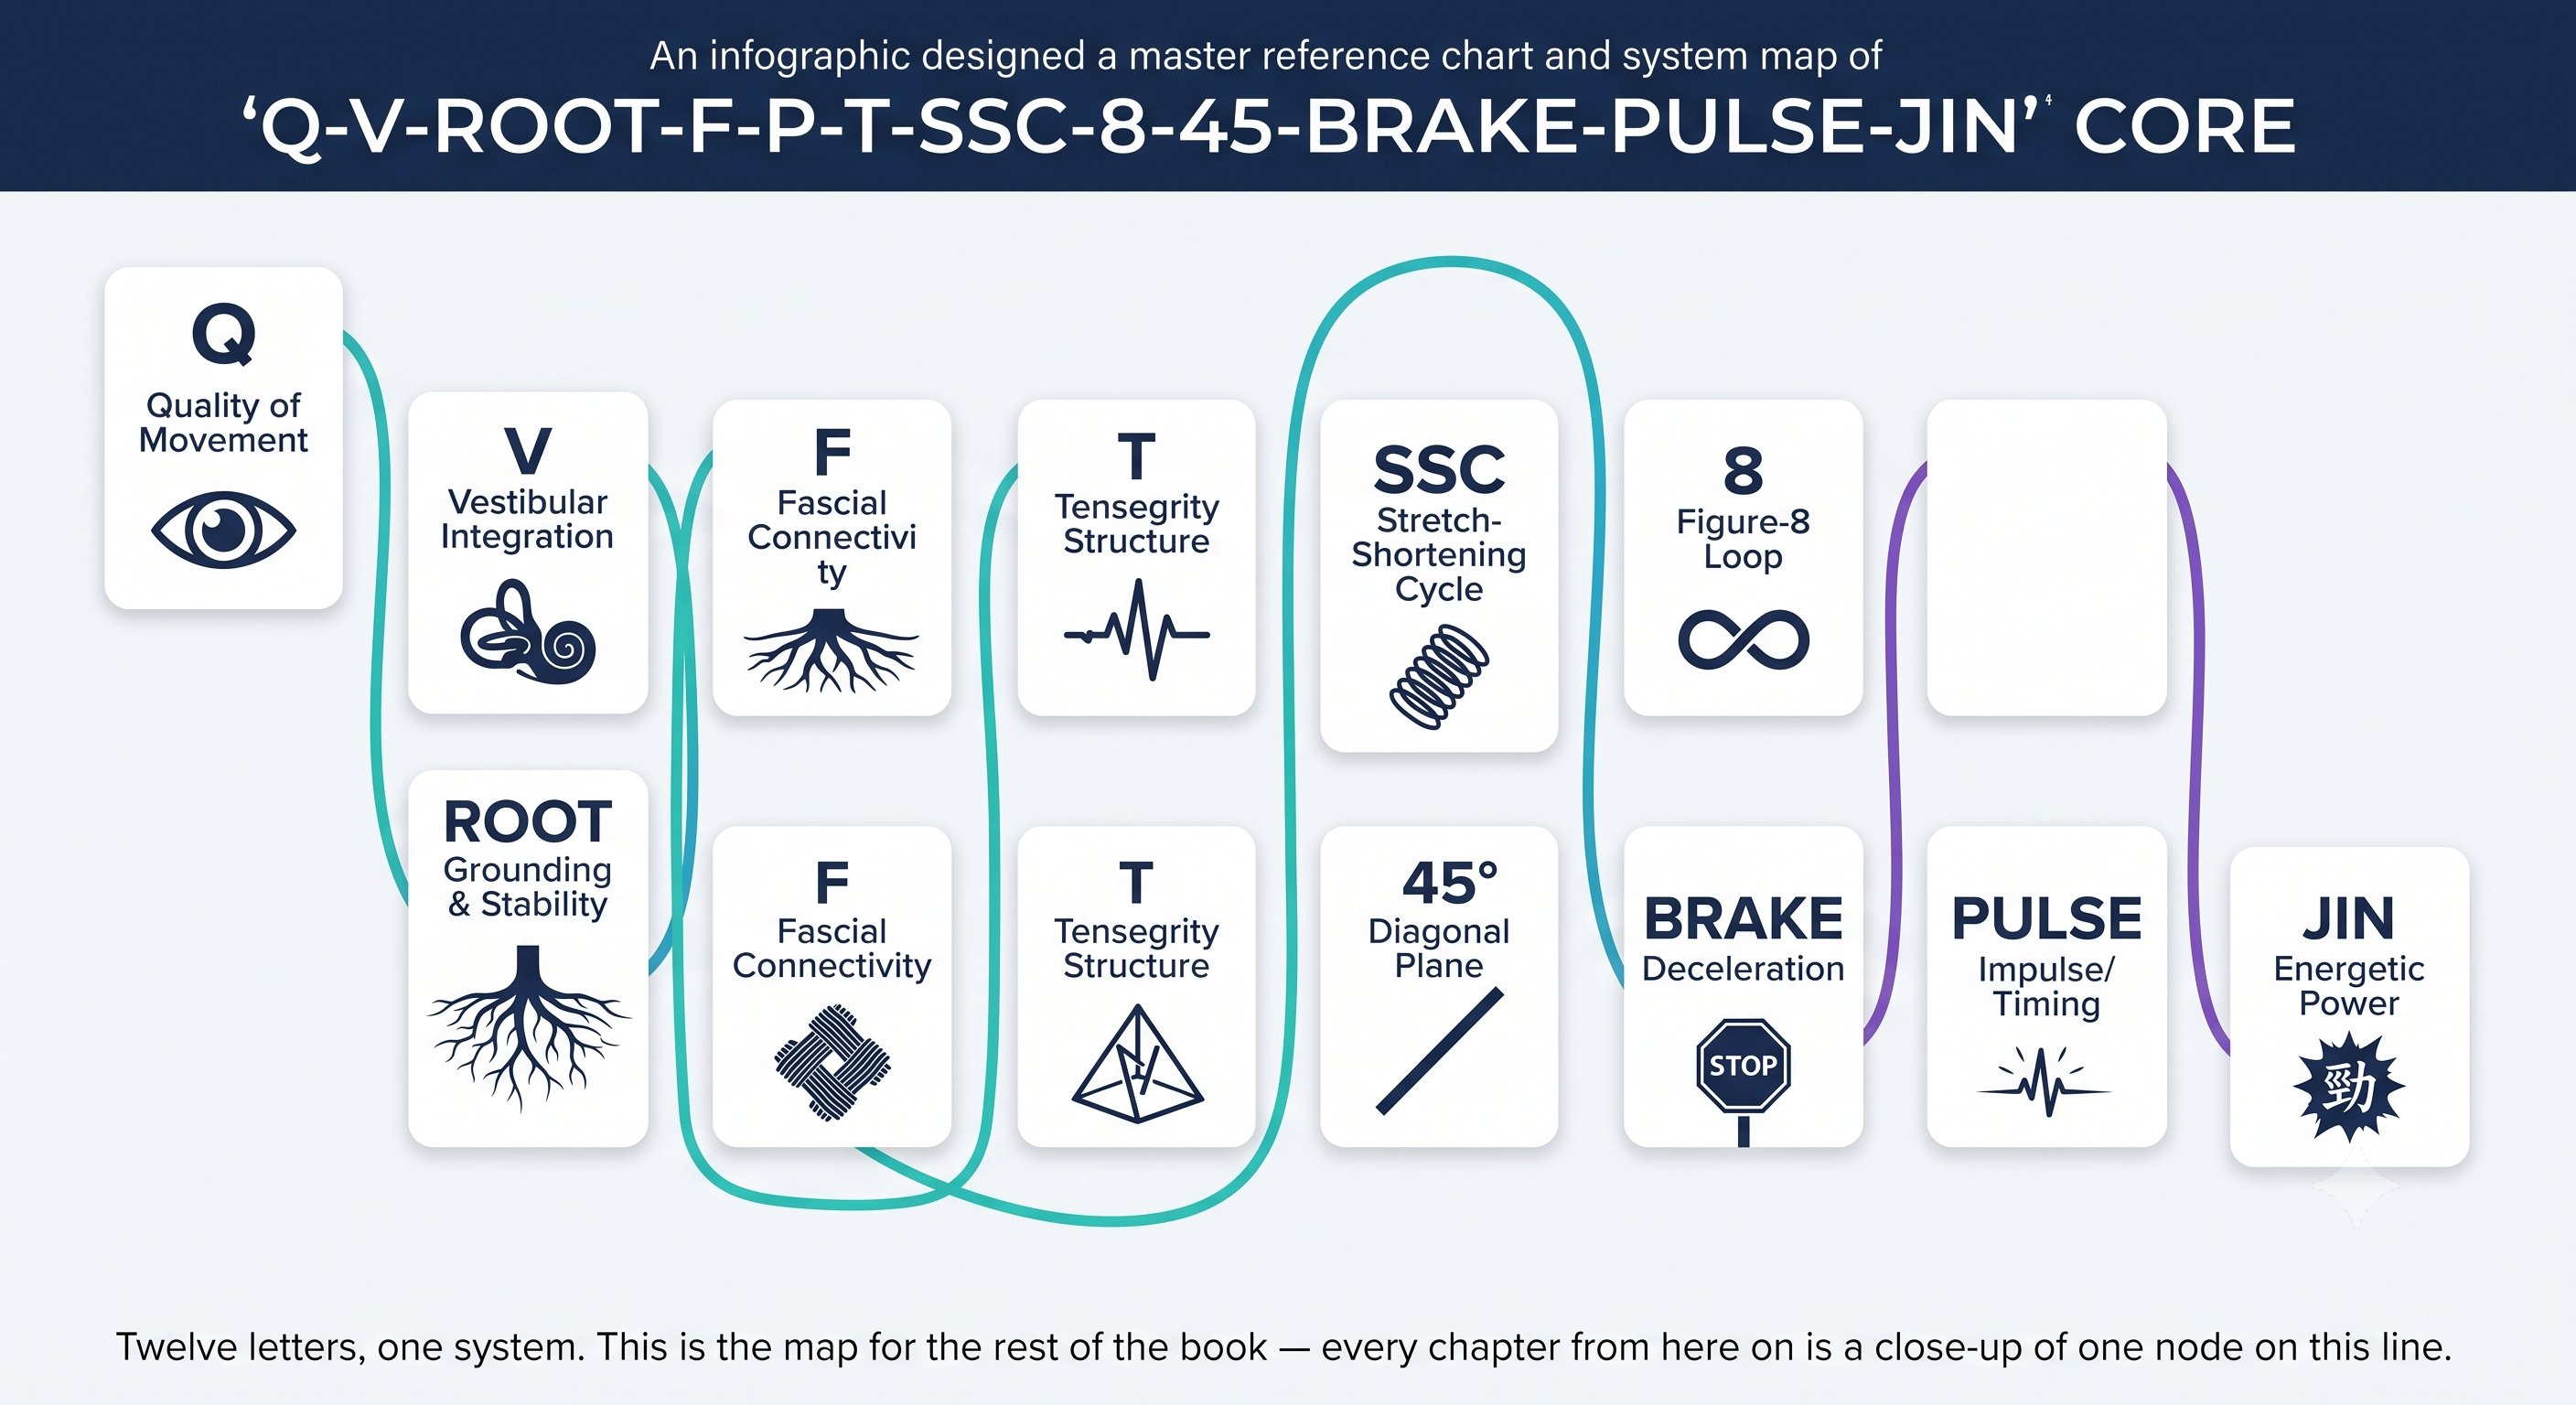
Tensegrity — Figure 3
Tensegrity — Figure 4
Chapter 12: Stretch-Shortening Cycle 4 figures
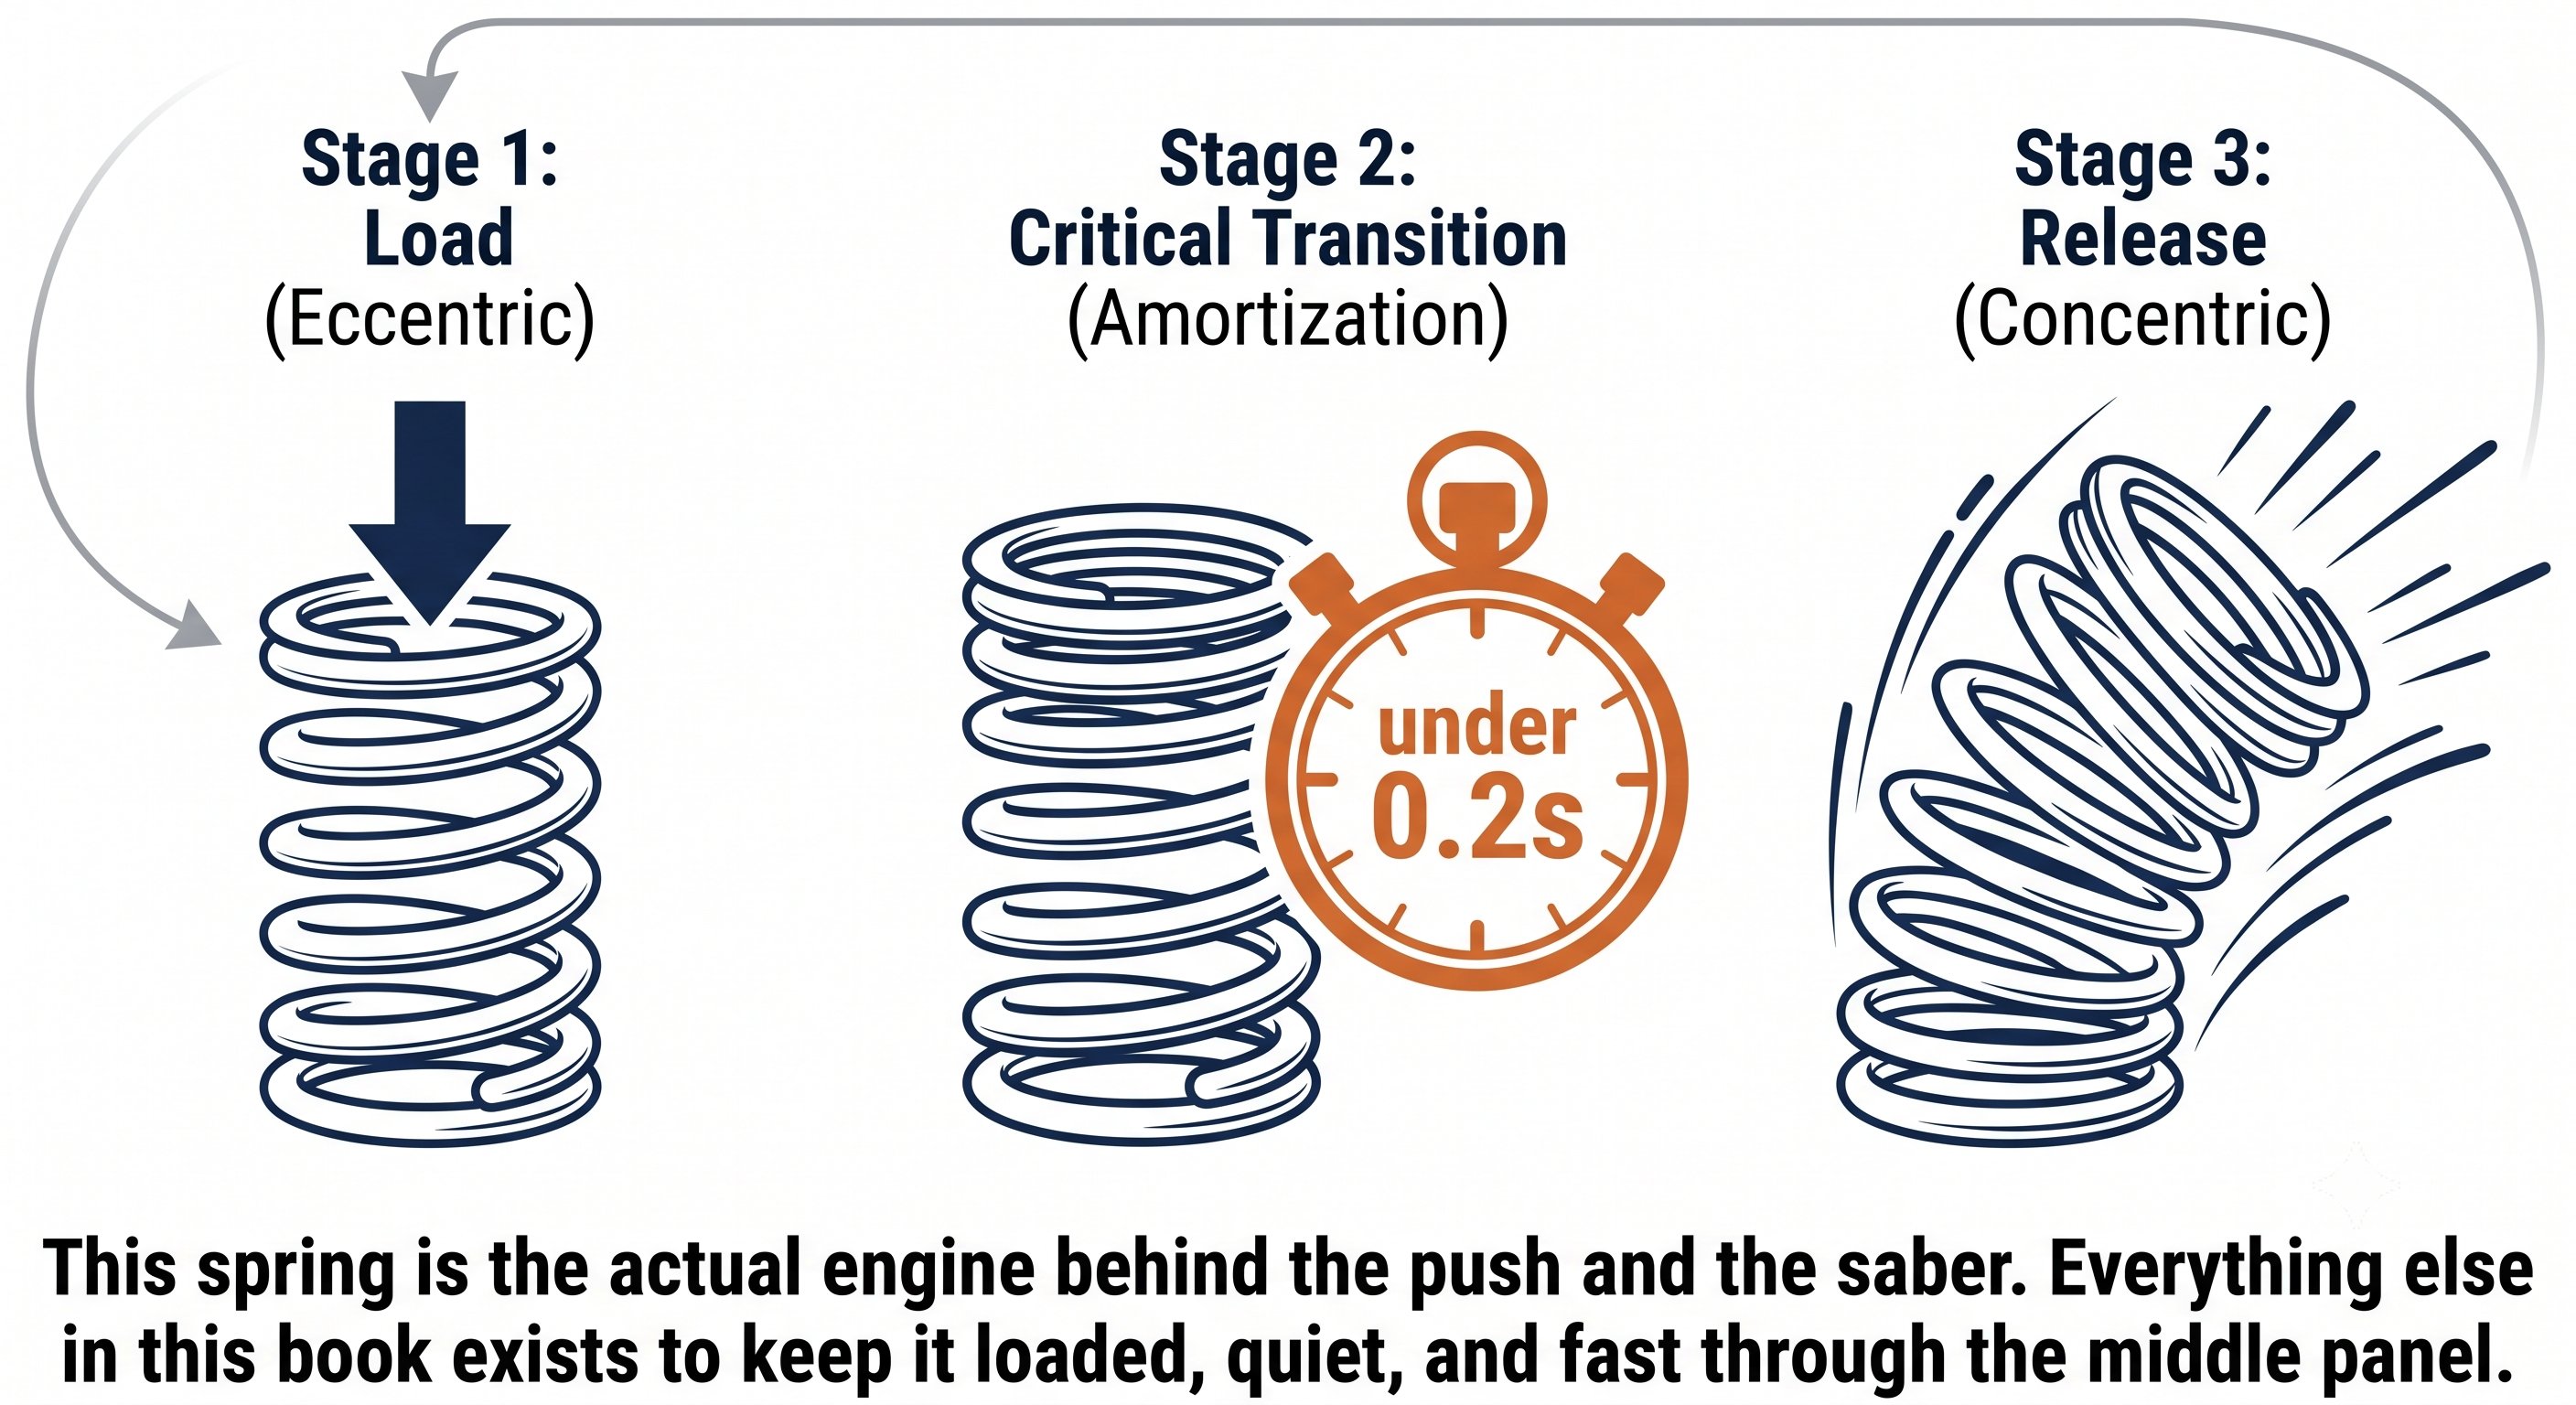
Stretch-Shortening Cycle — Figure 1
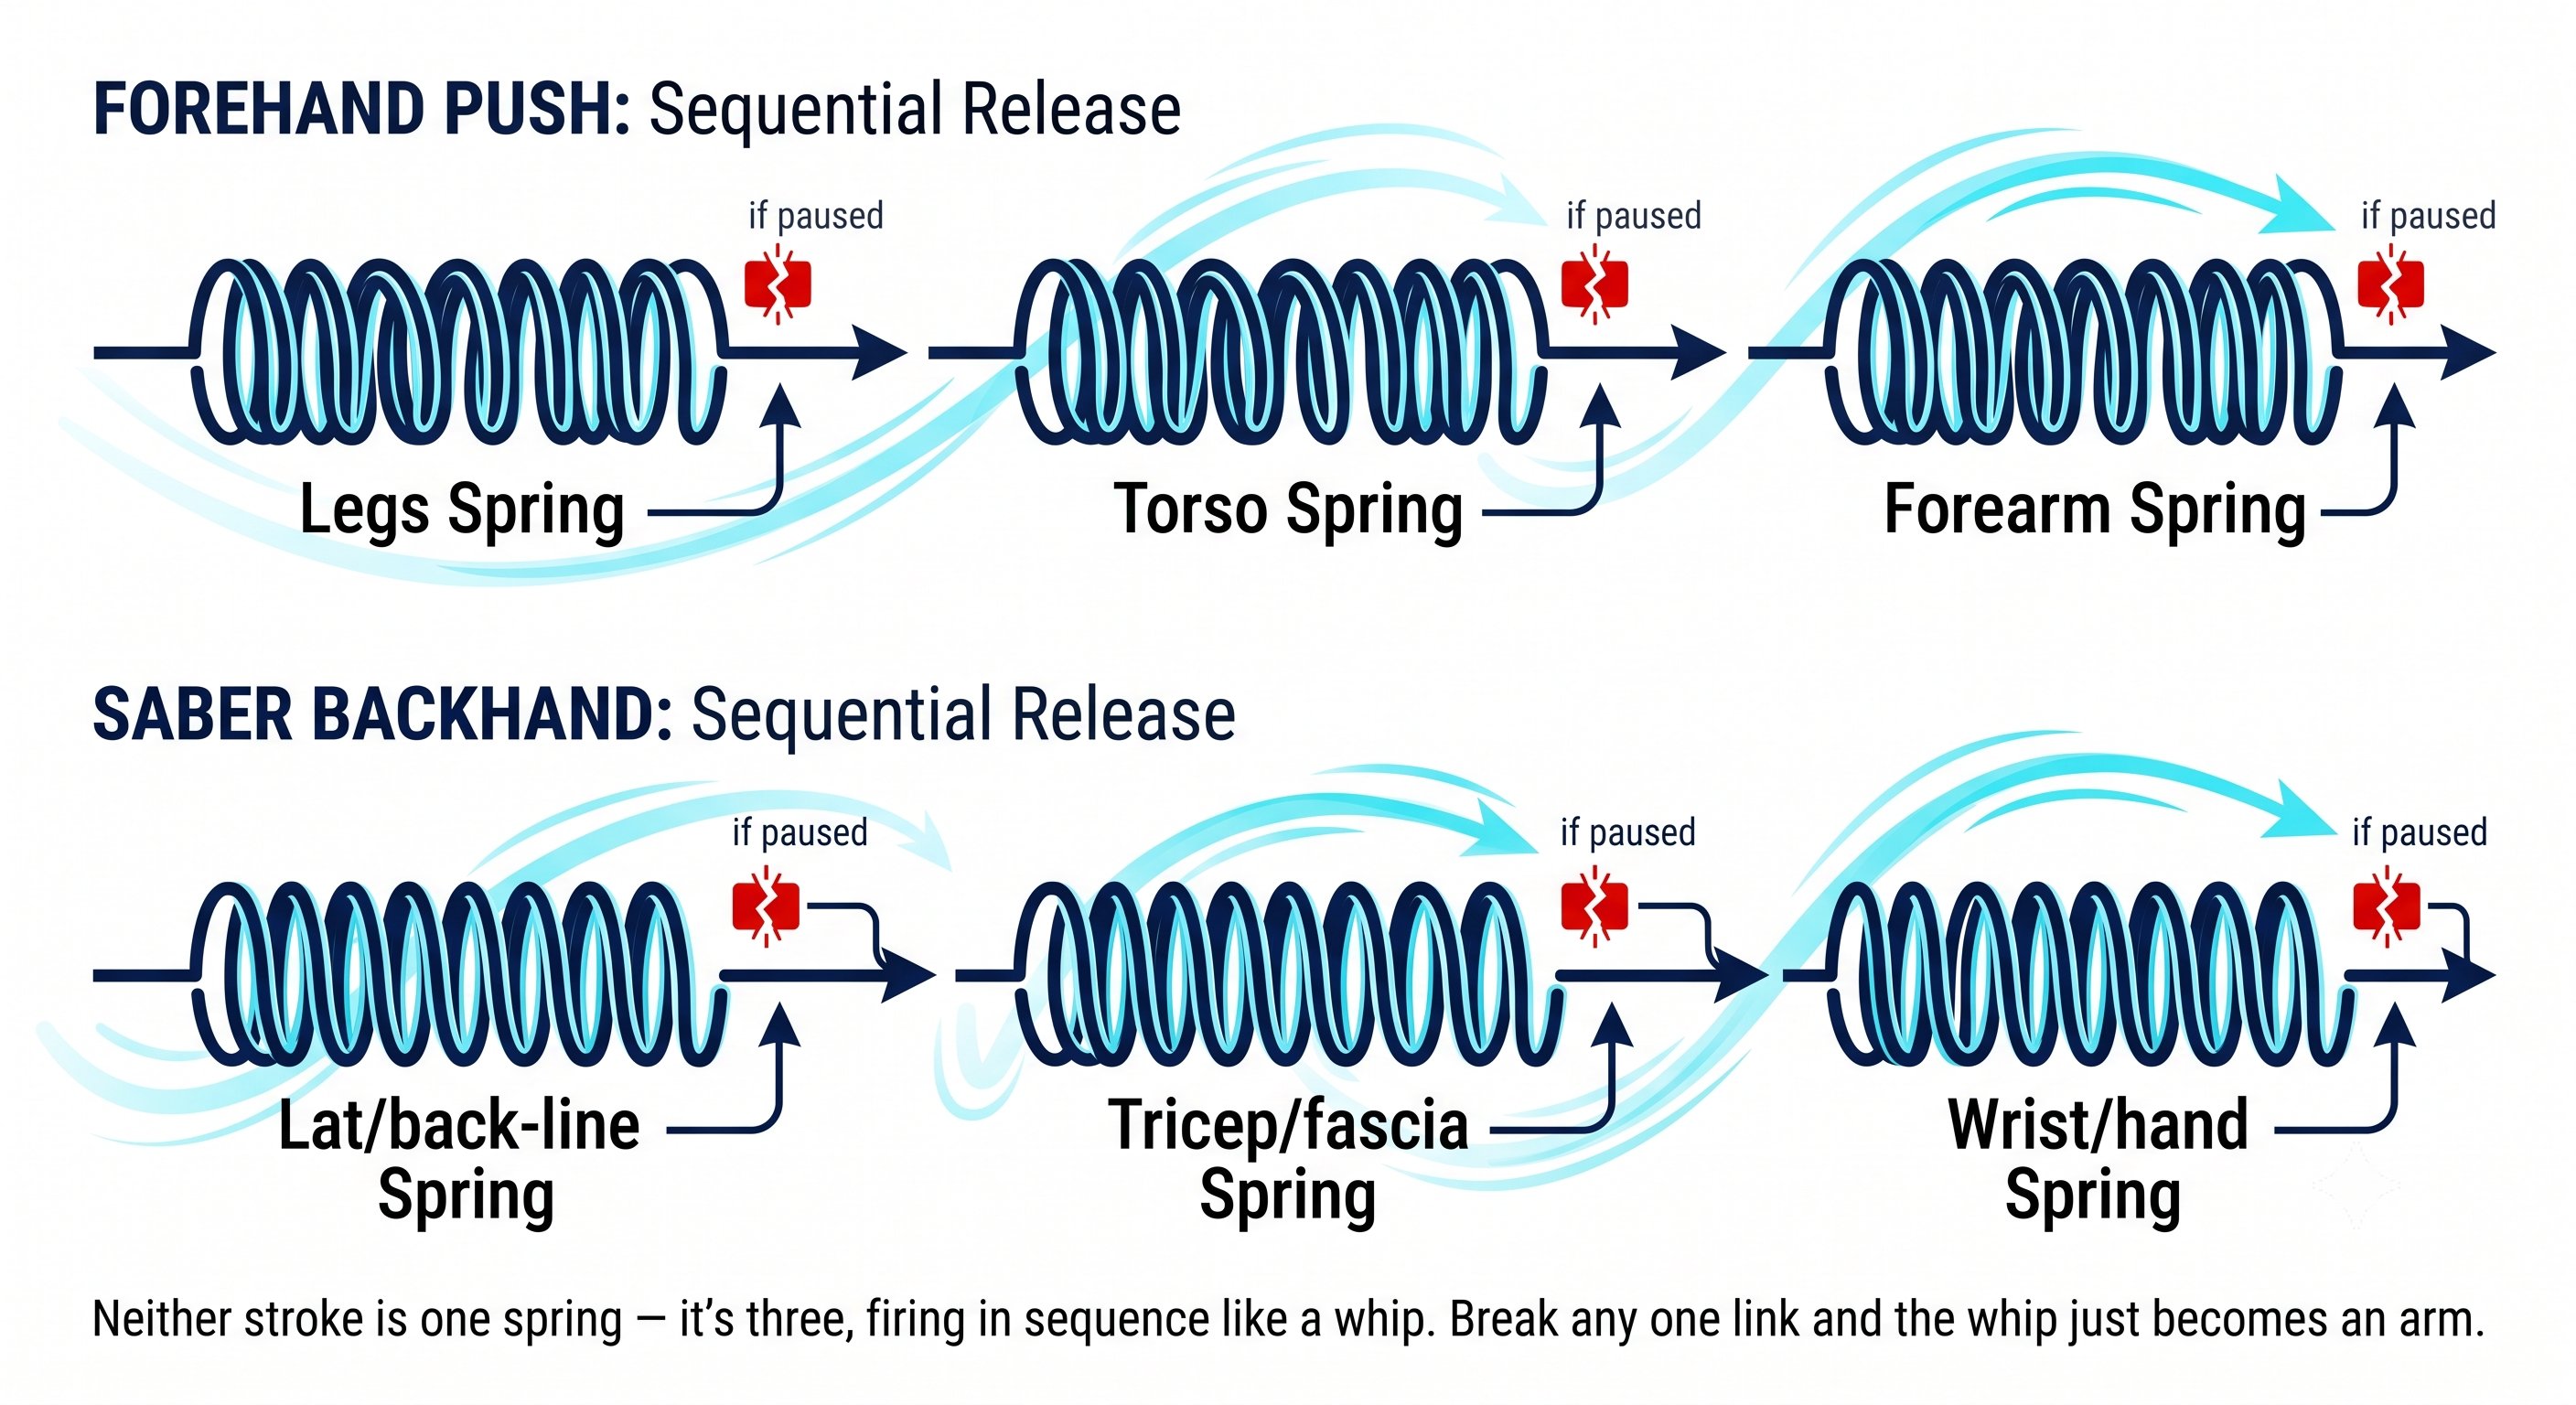
Stretch-Shortening Cycle — Figure 2
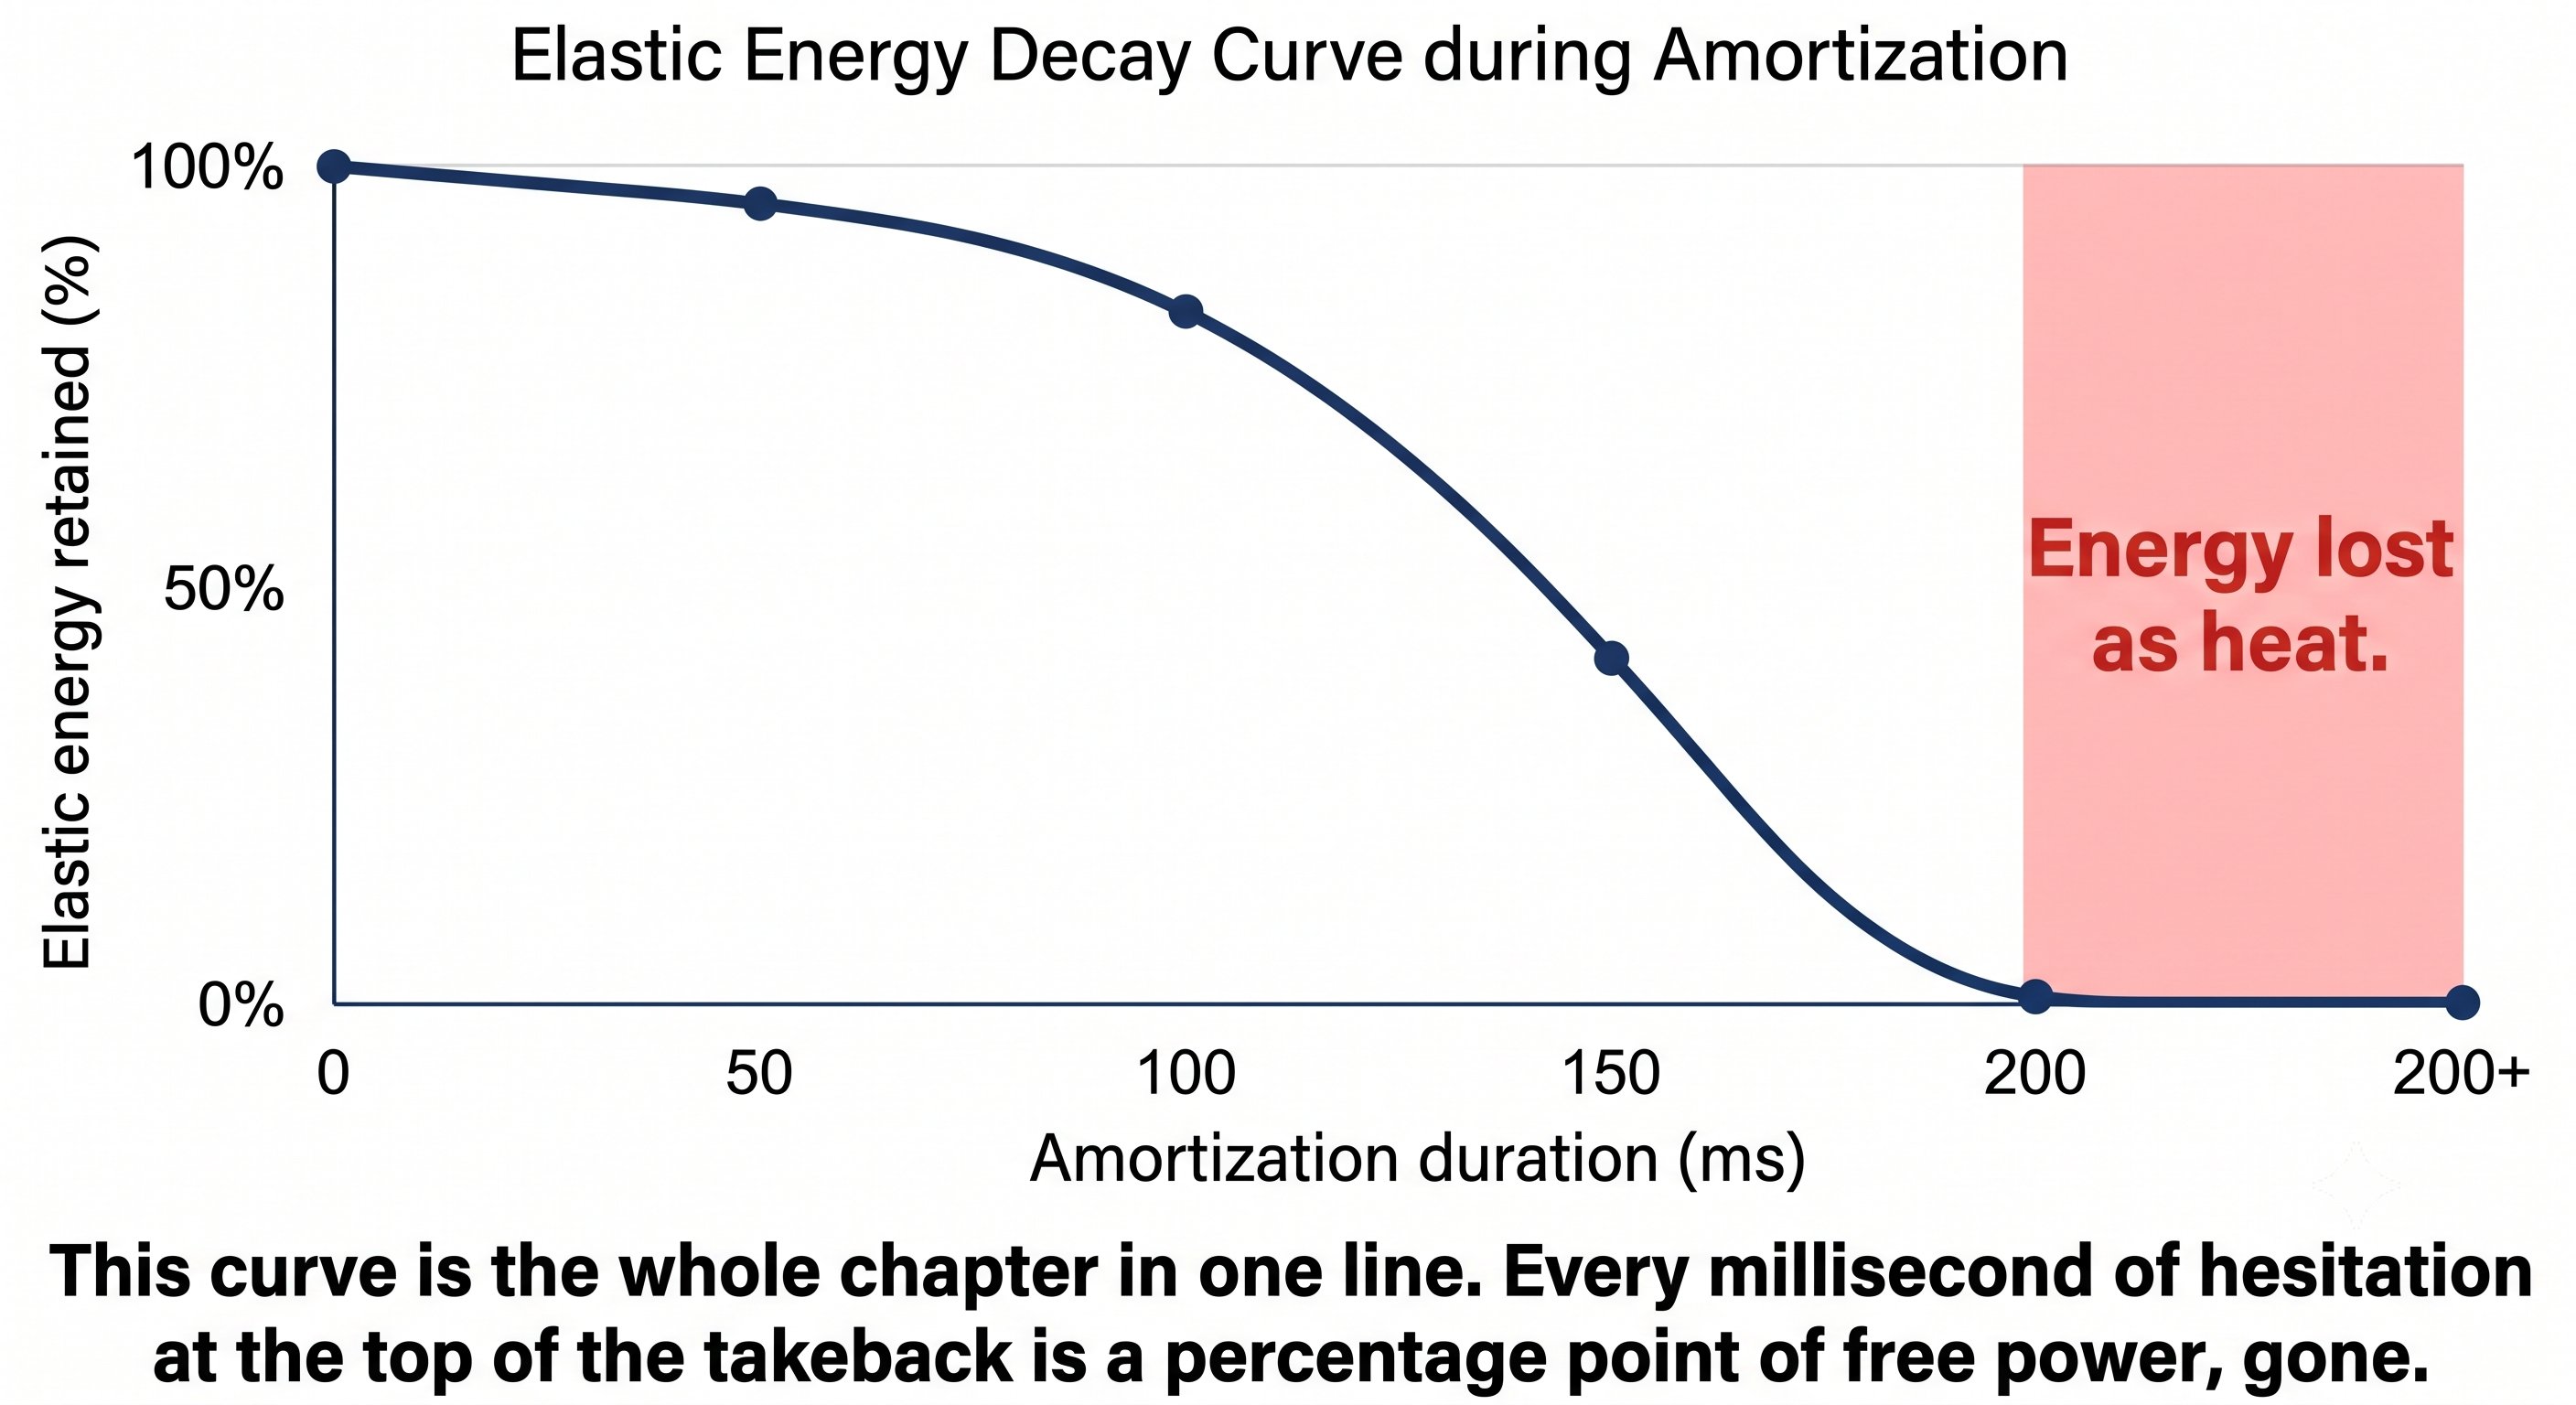
Stretch-Shortening Cycle — Figure 3
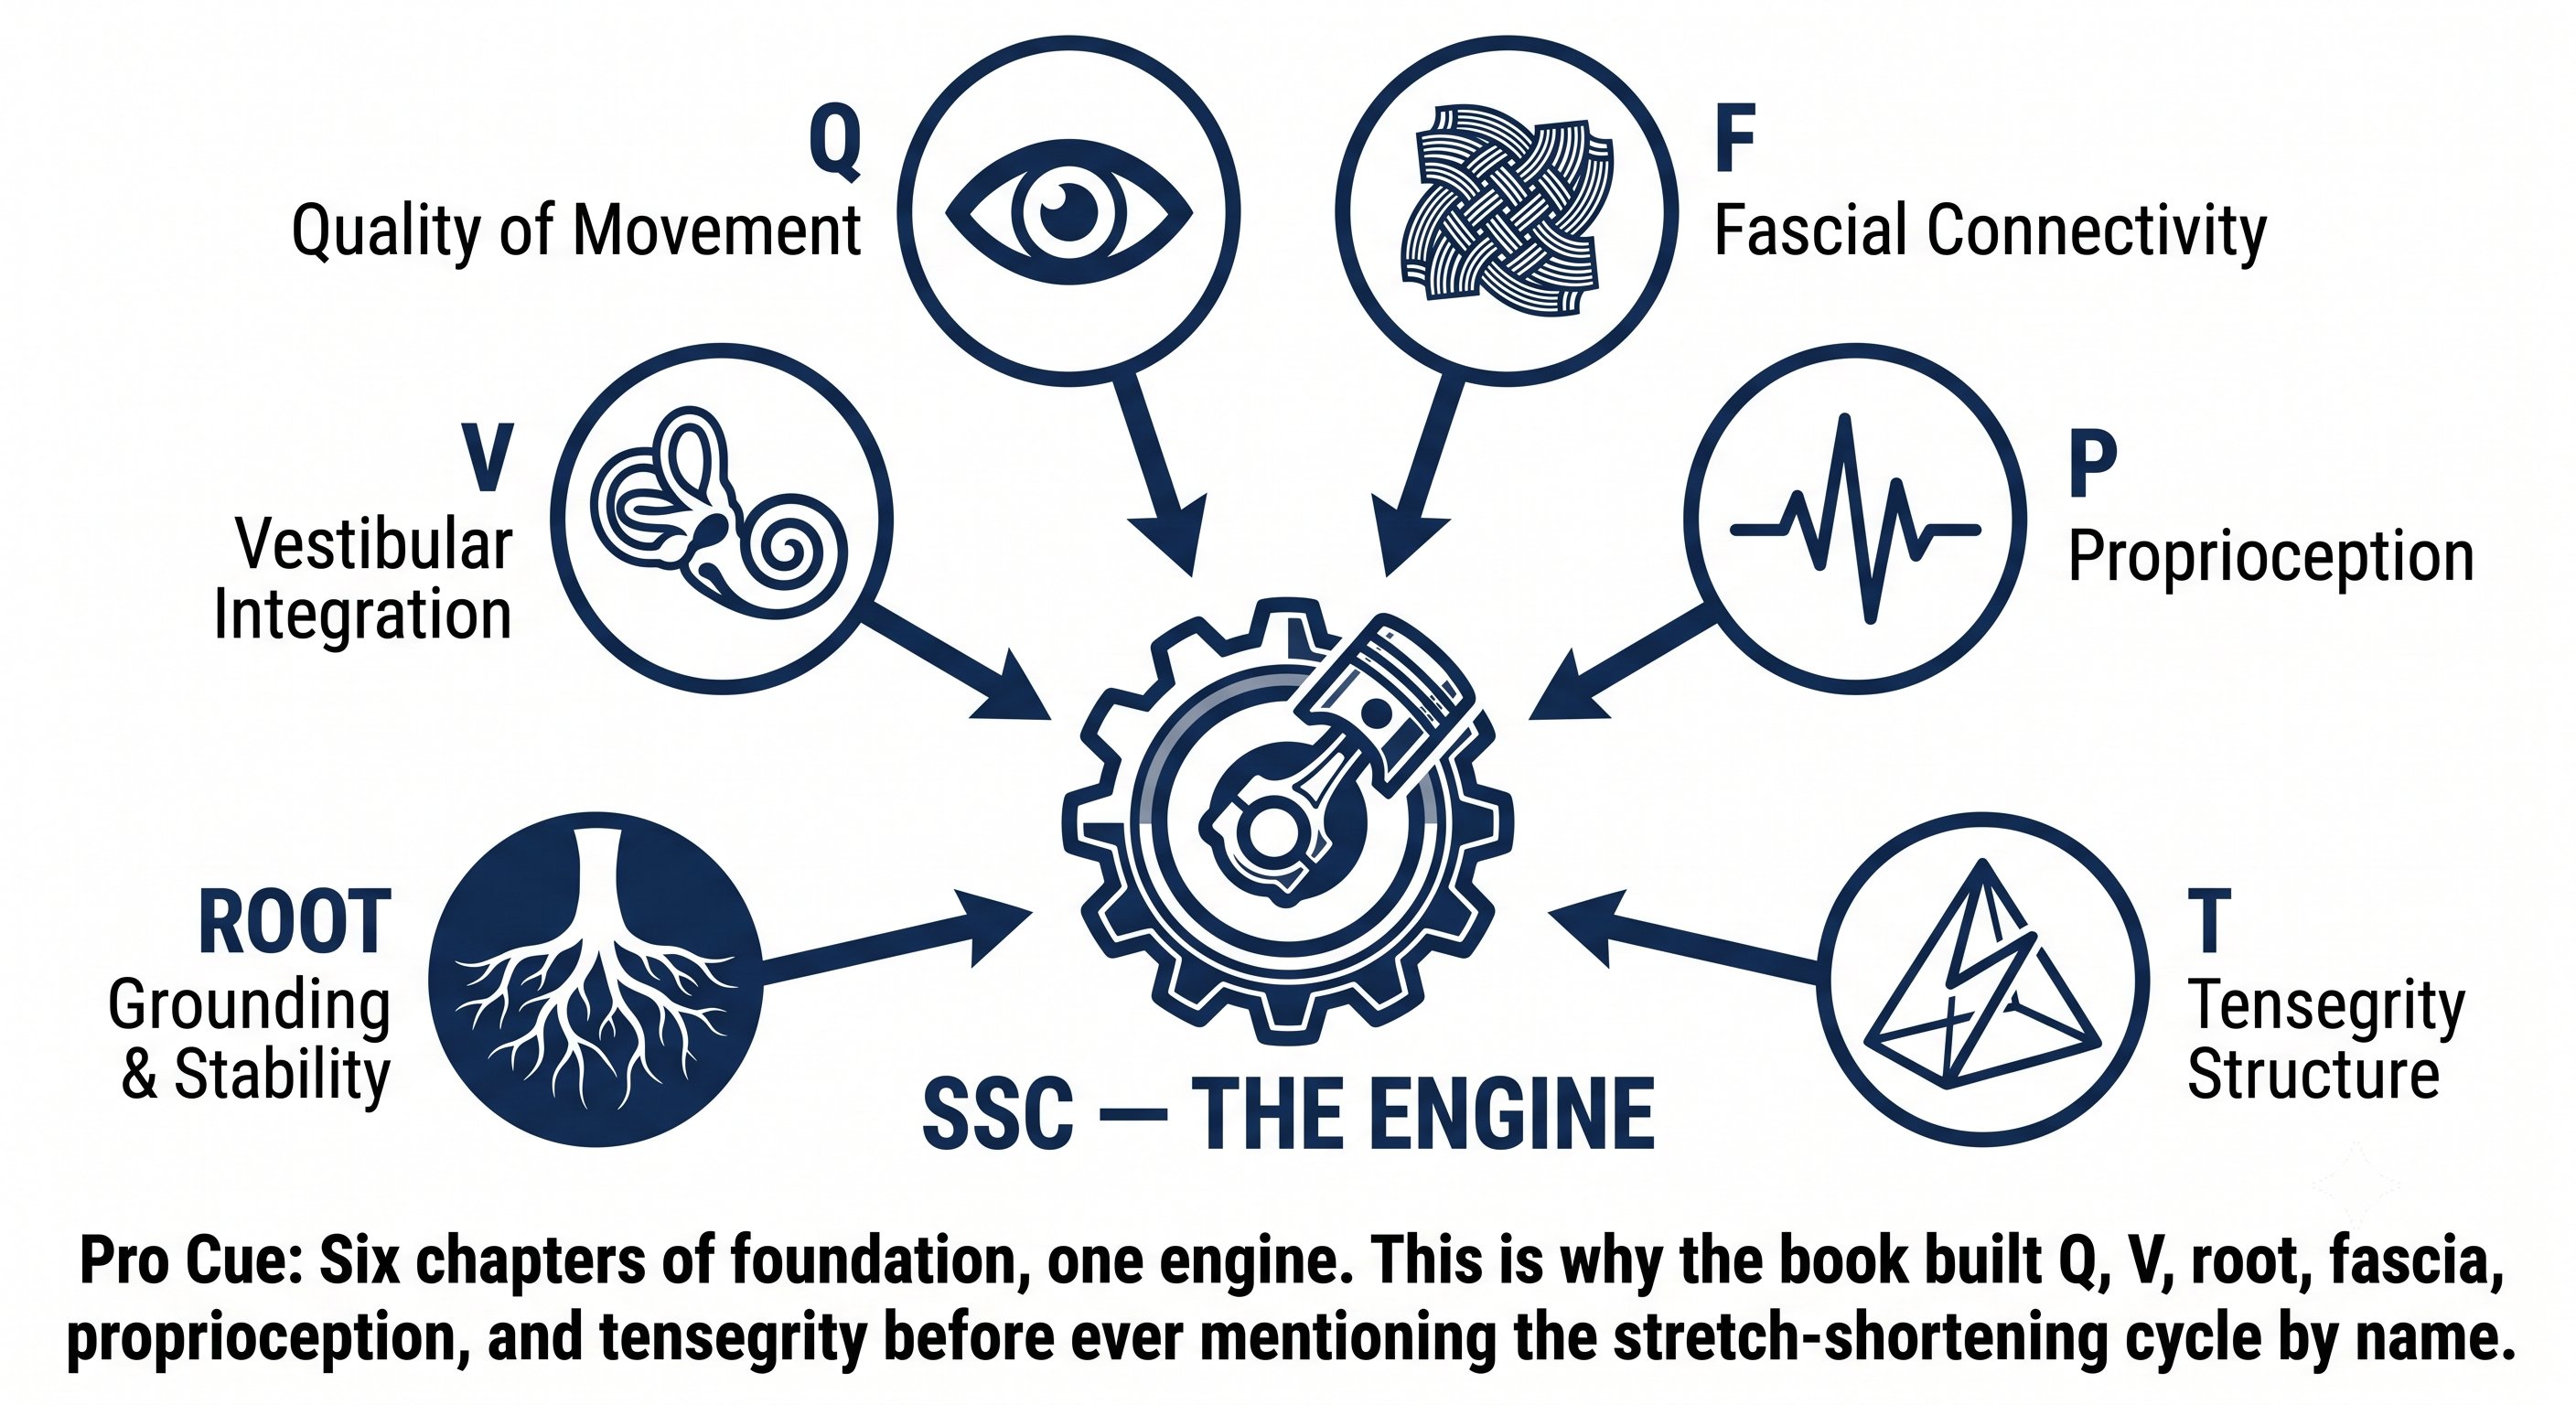
Stretch-Shortening Cycle — Figure 4
Chapter 13: Figure-8 Regulation 5 figures
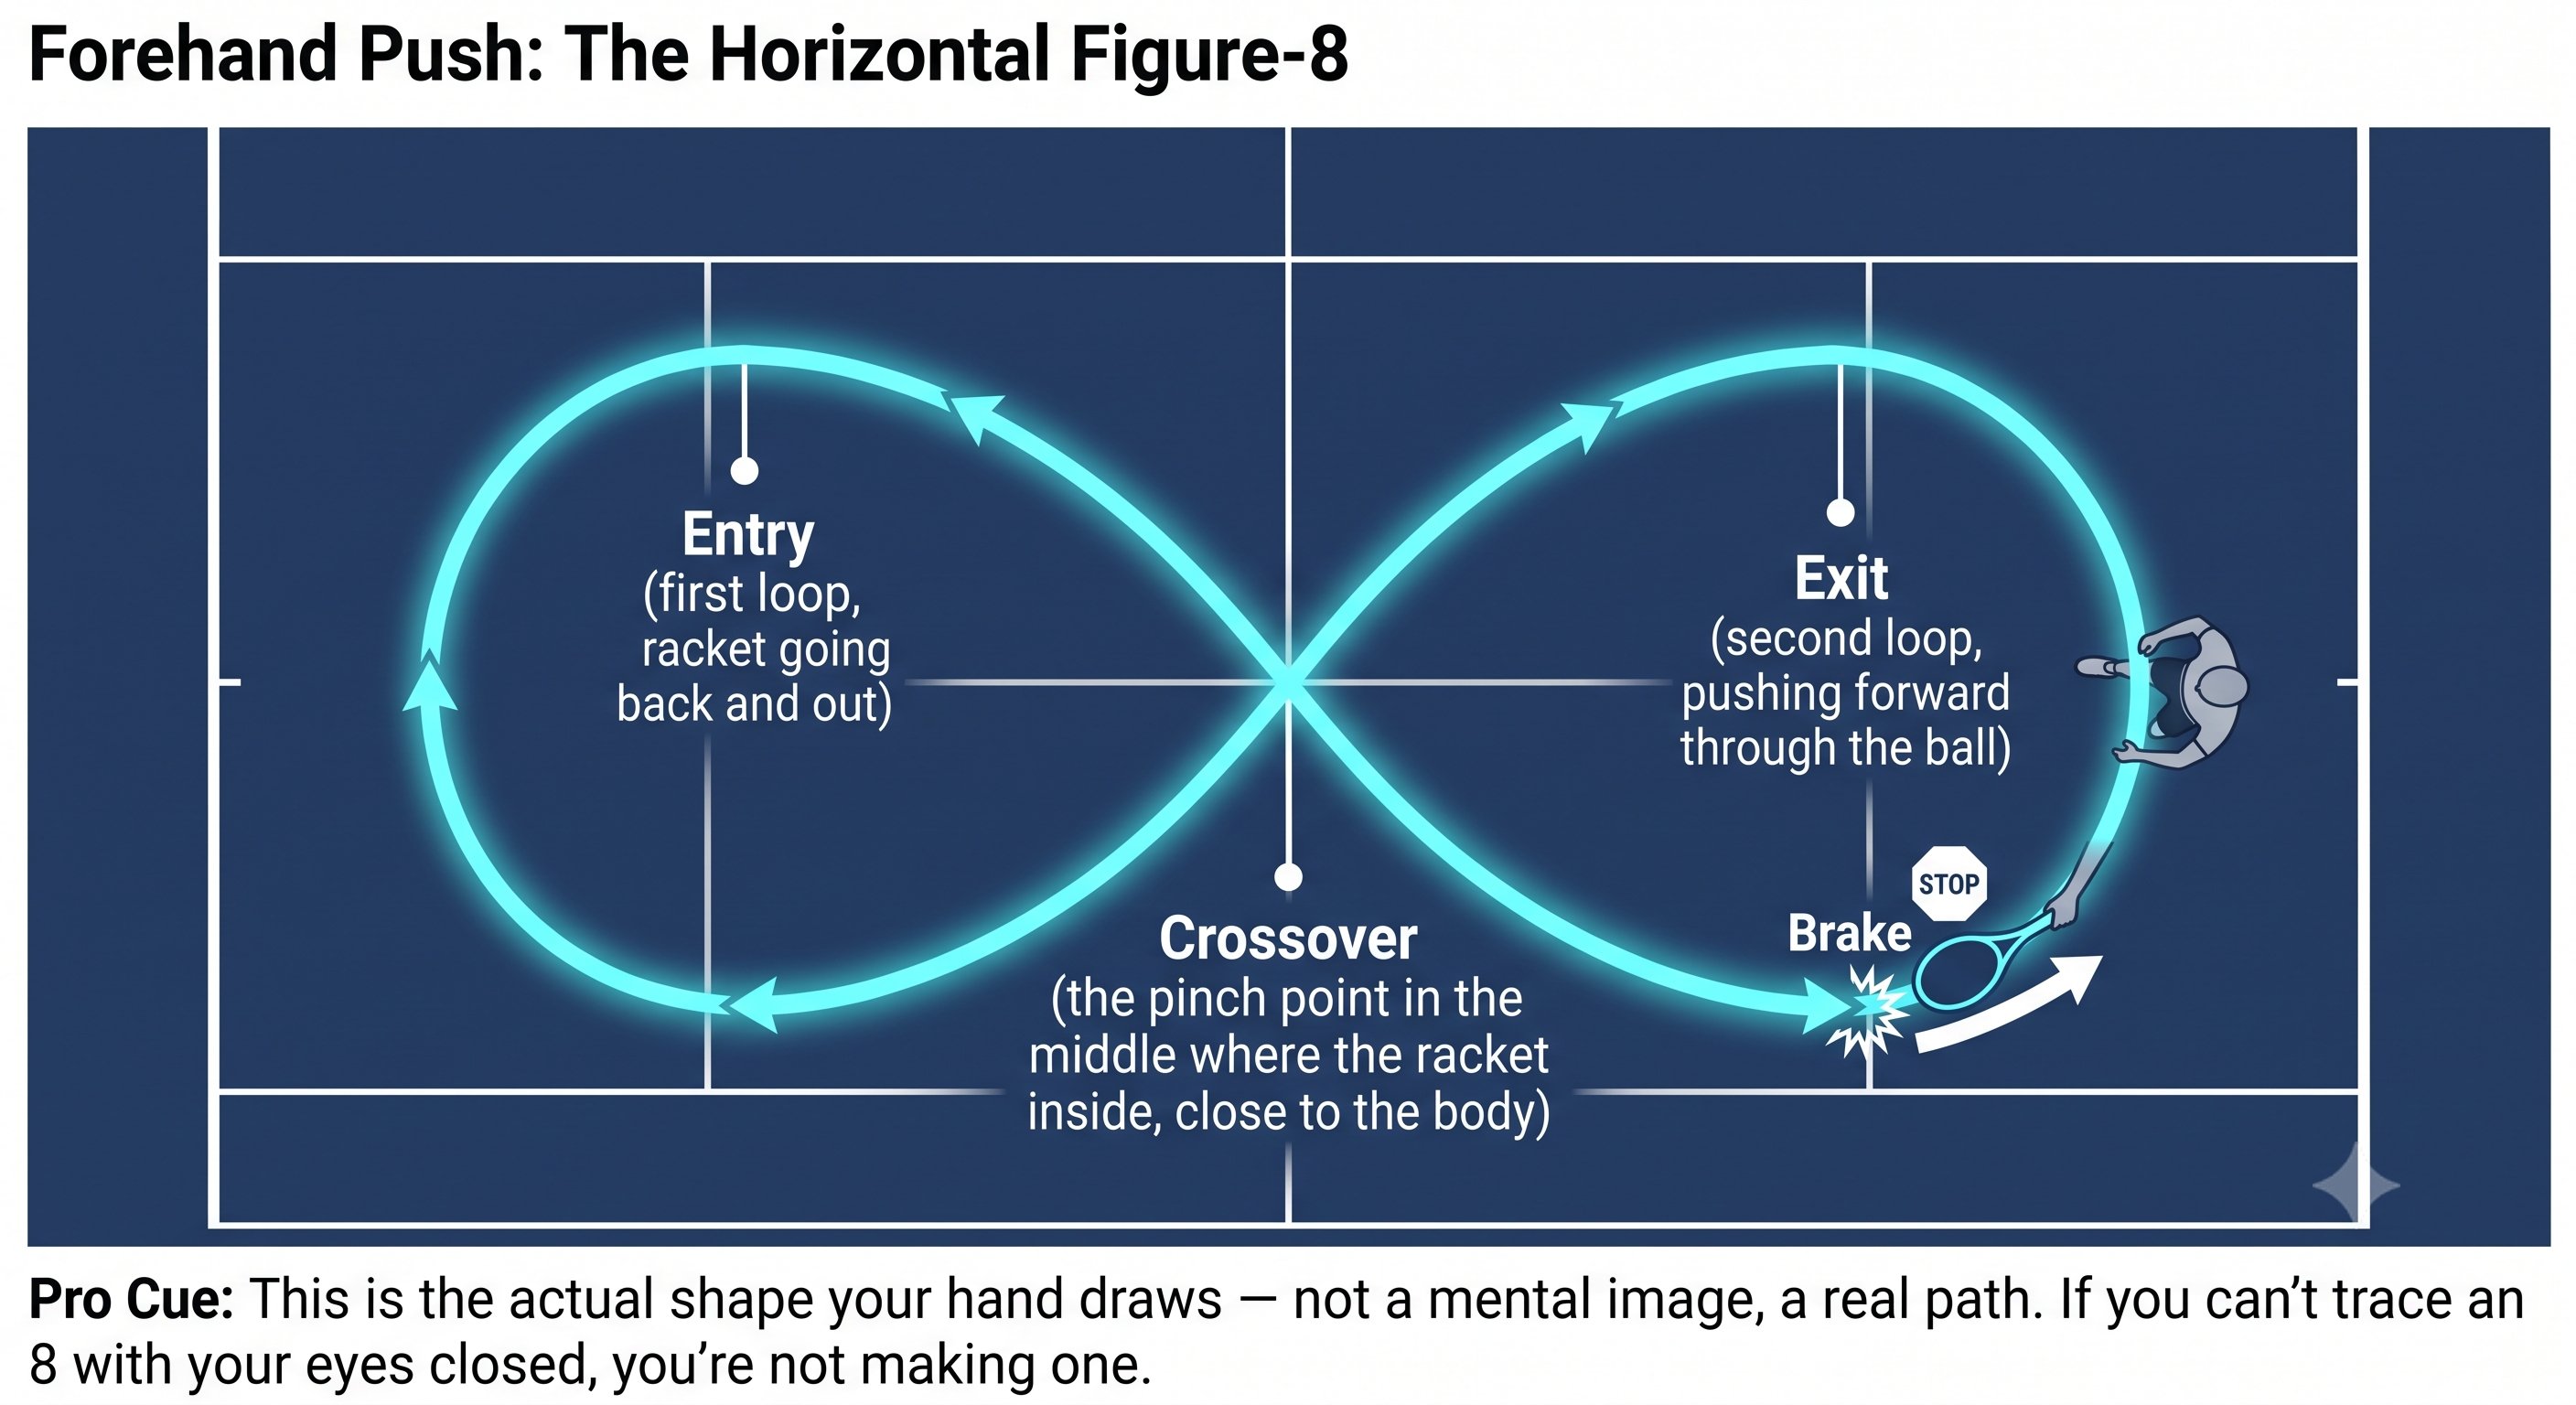
Figure-8 Regulation — Figure 1
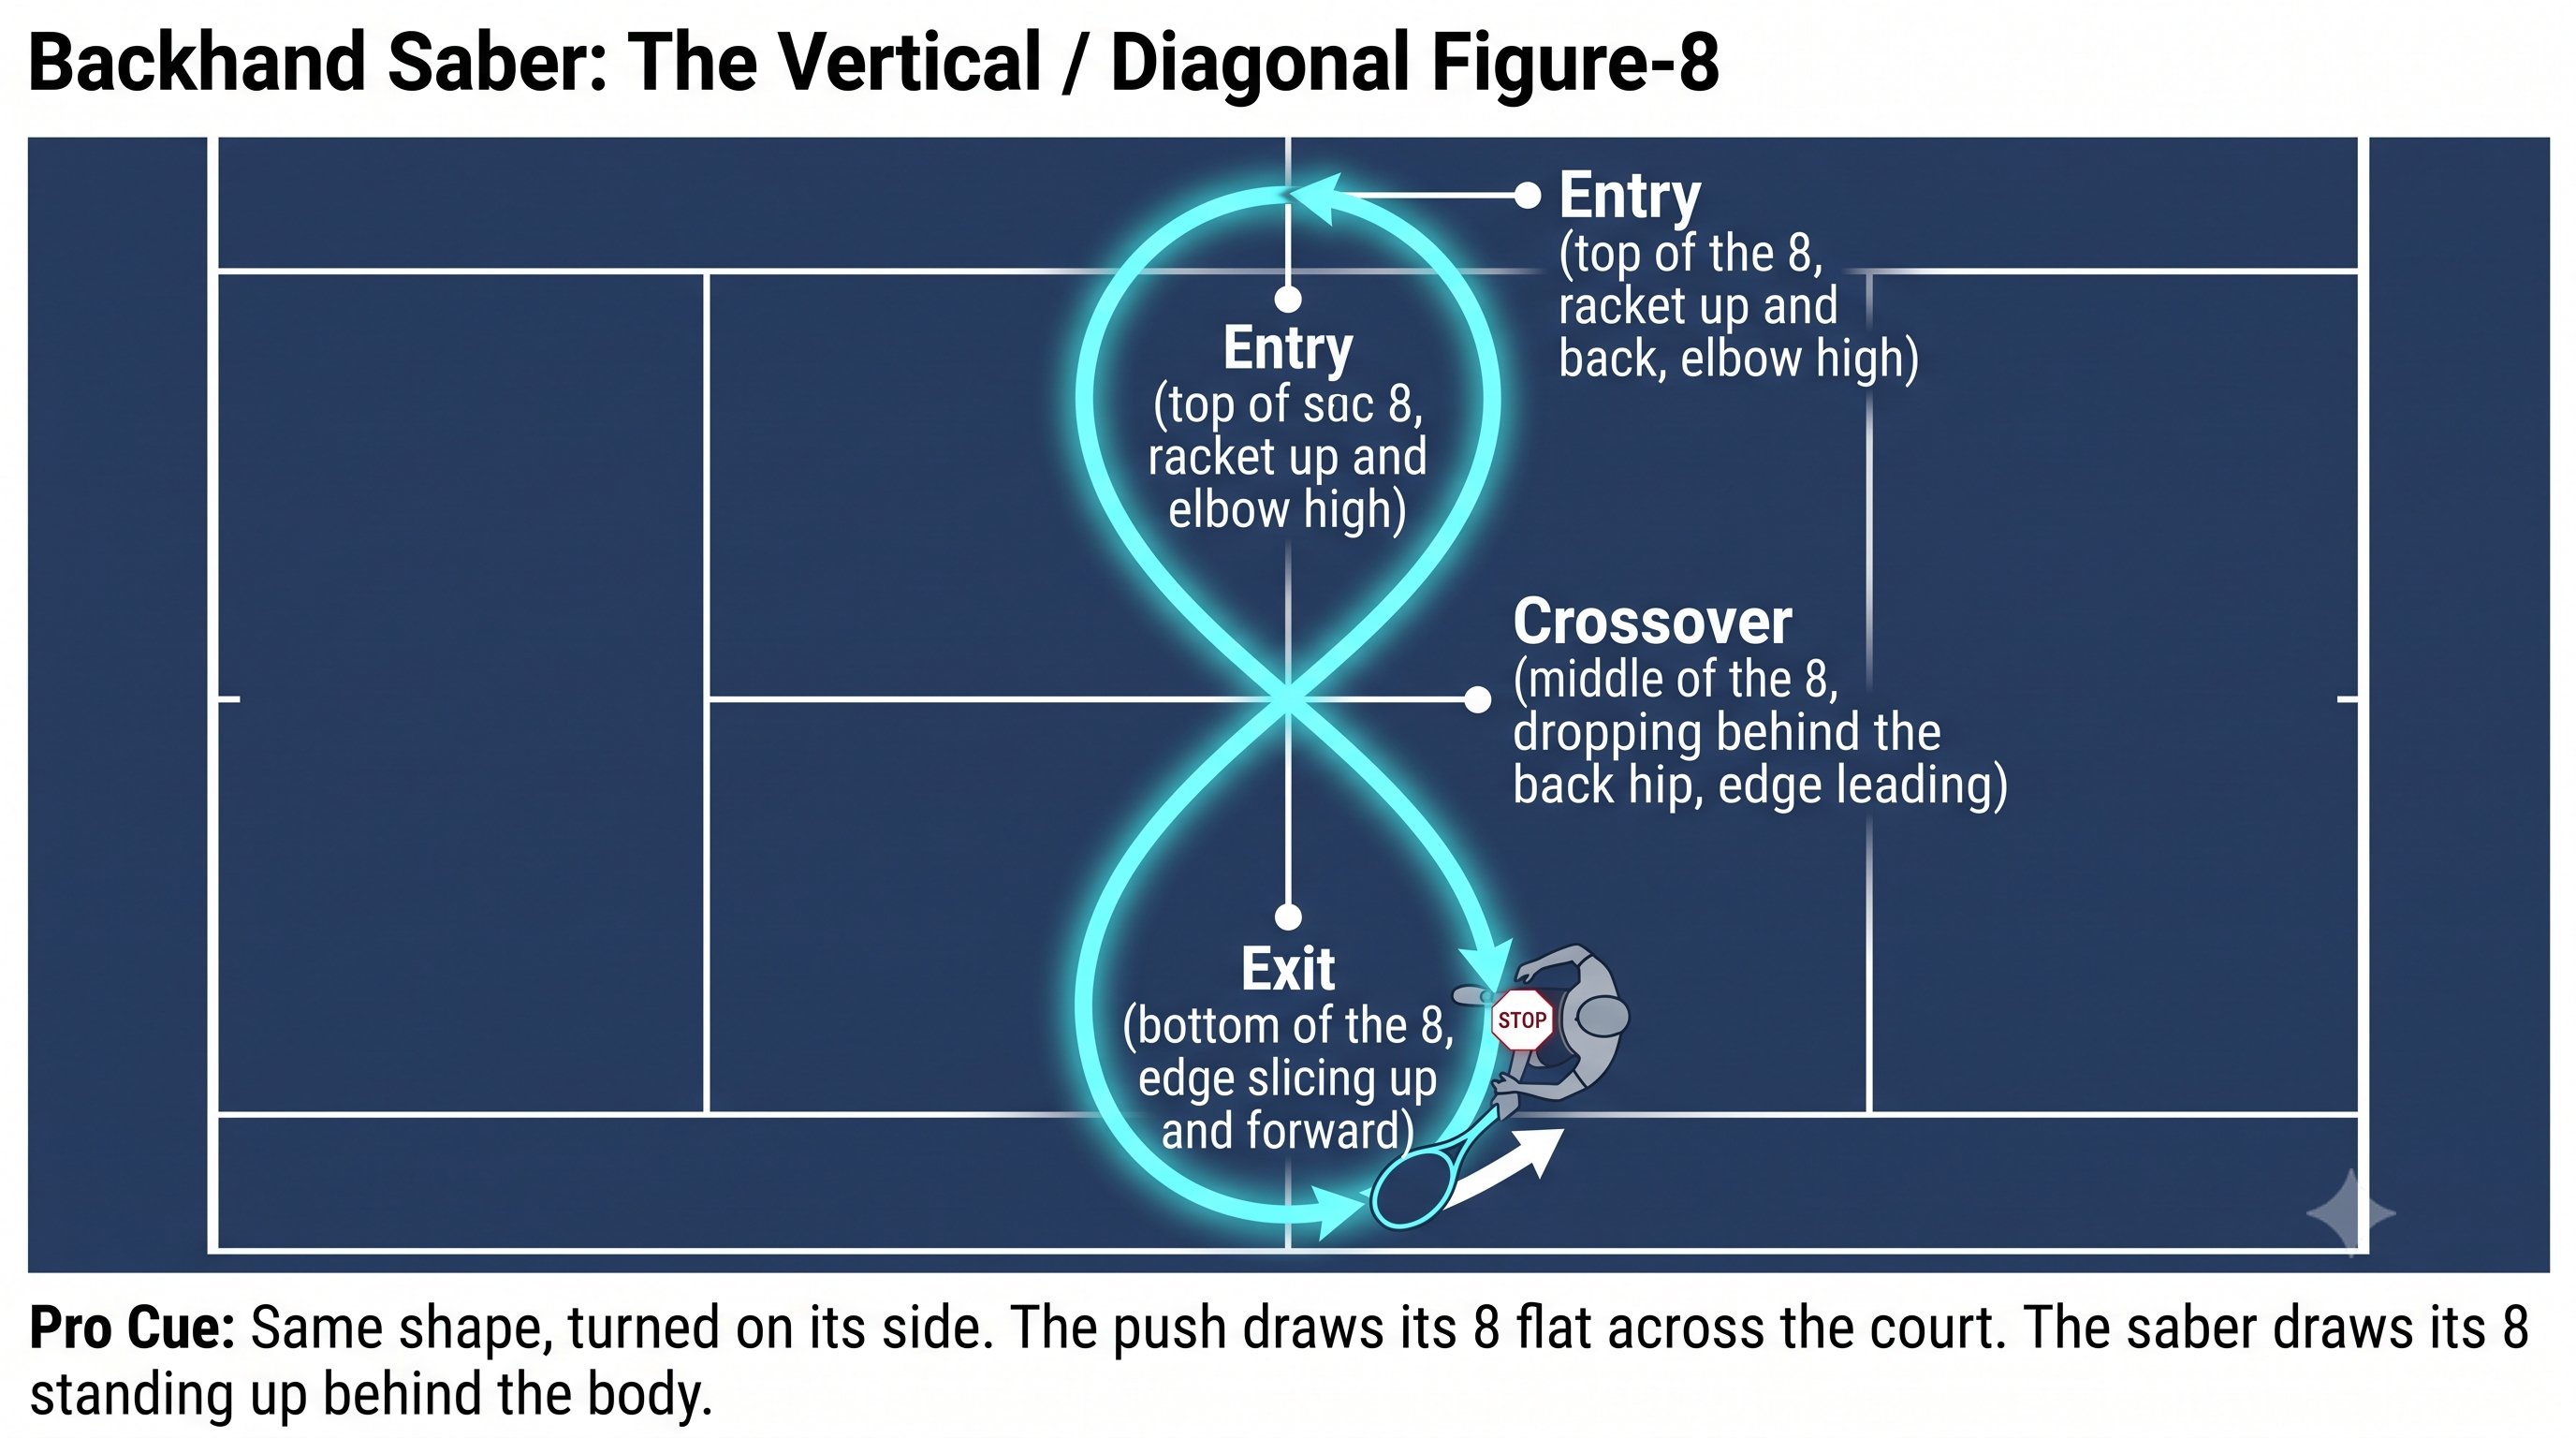
Figure-8 Regulation — Figure 2
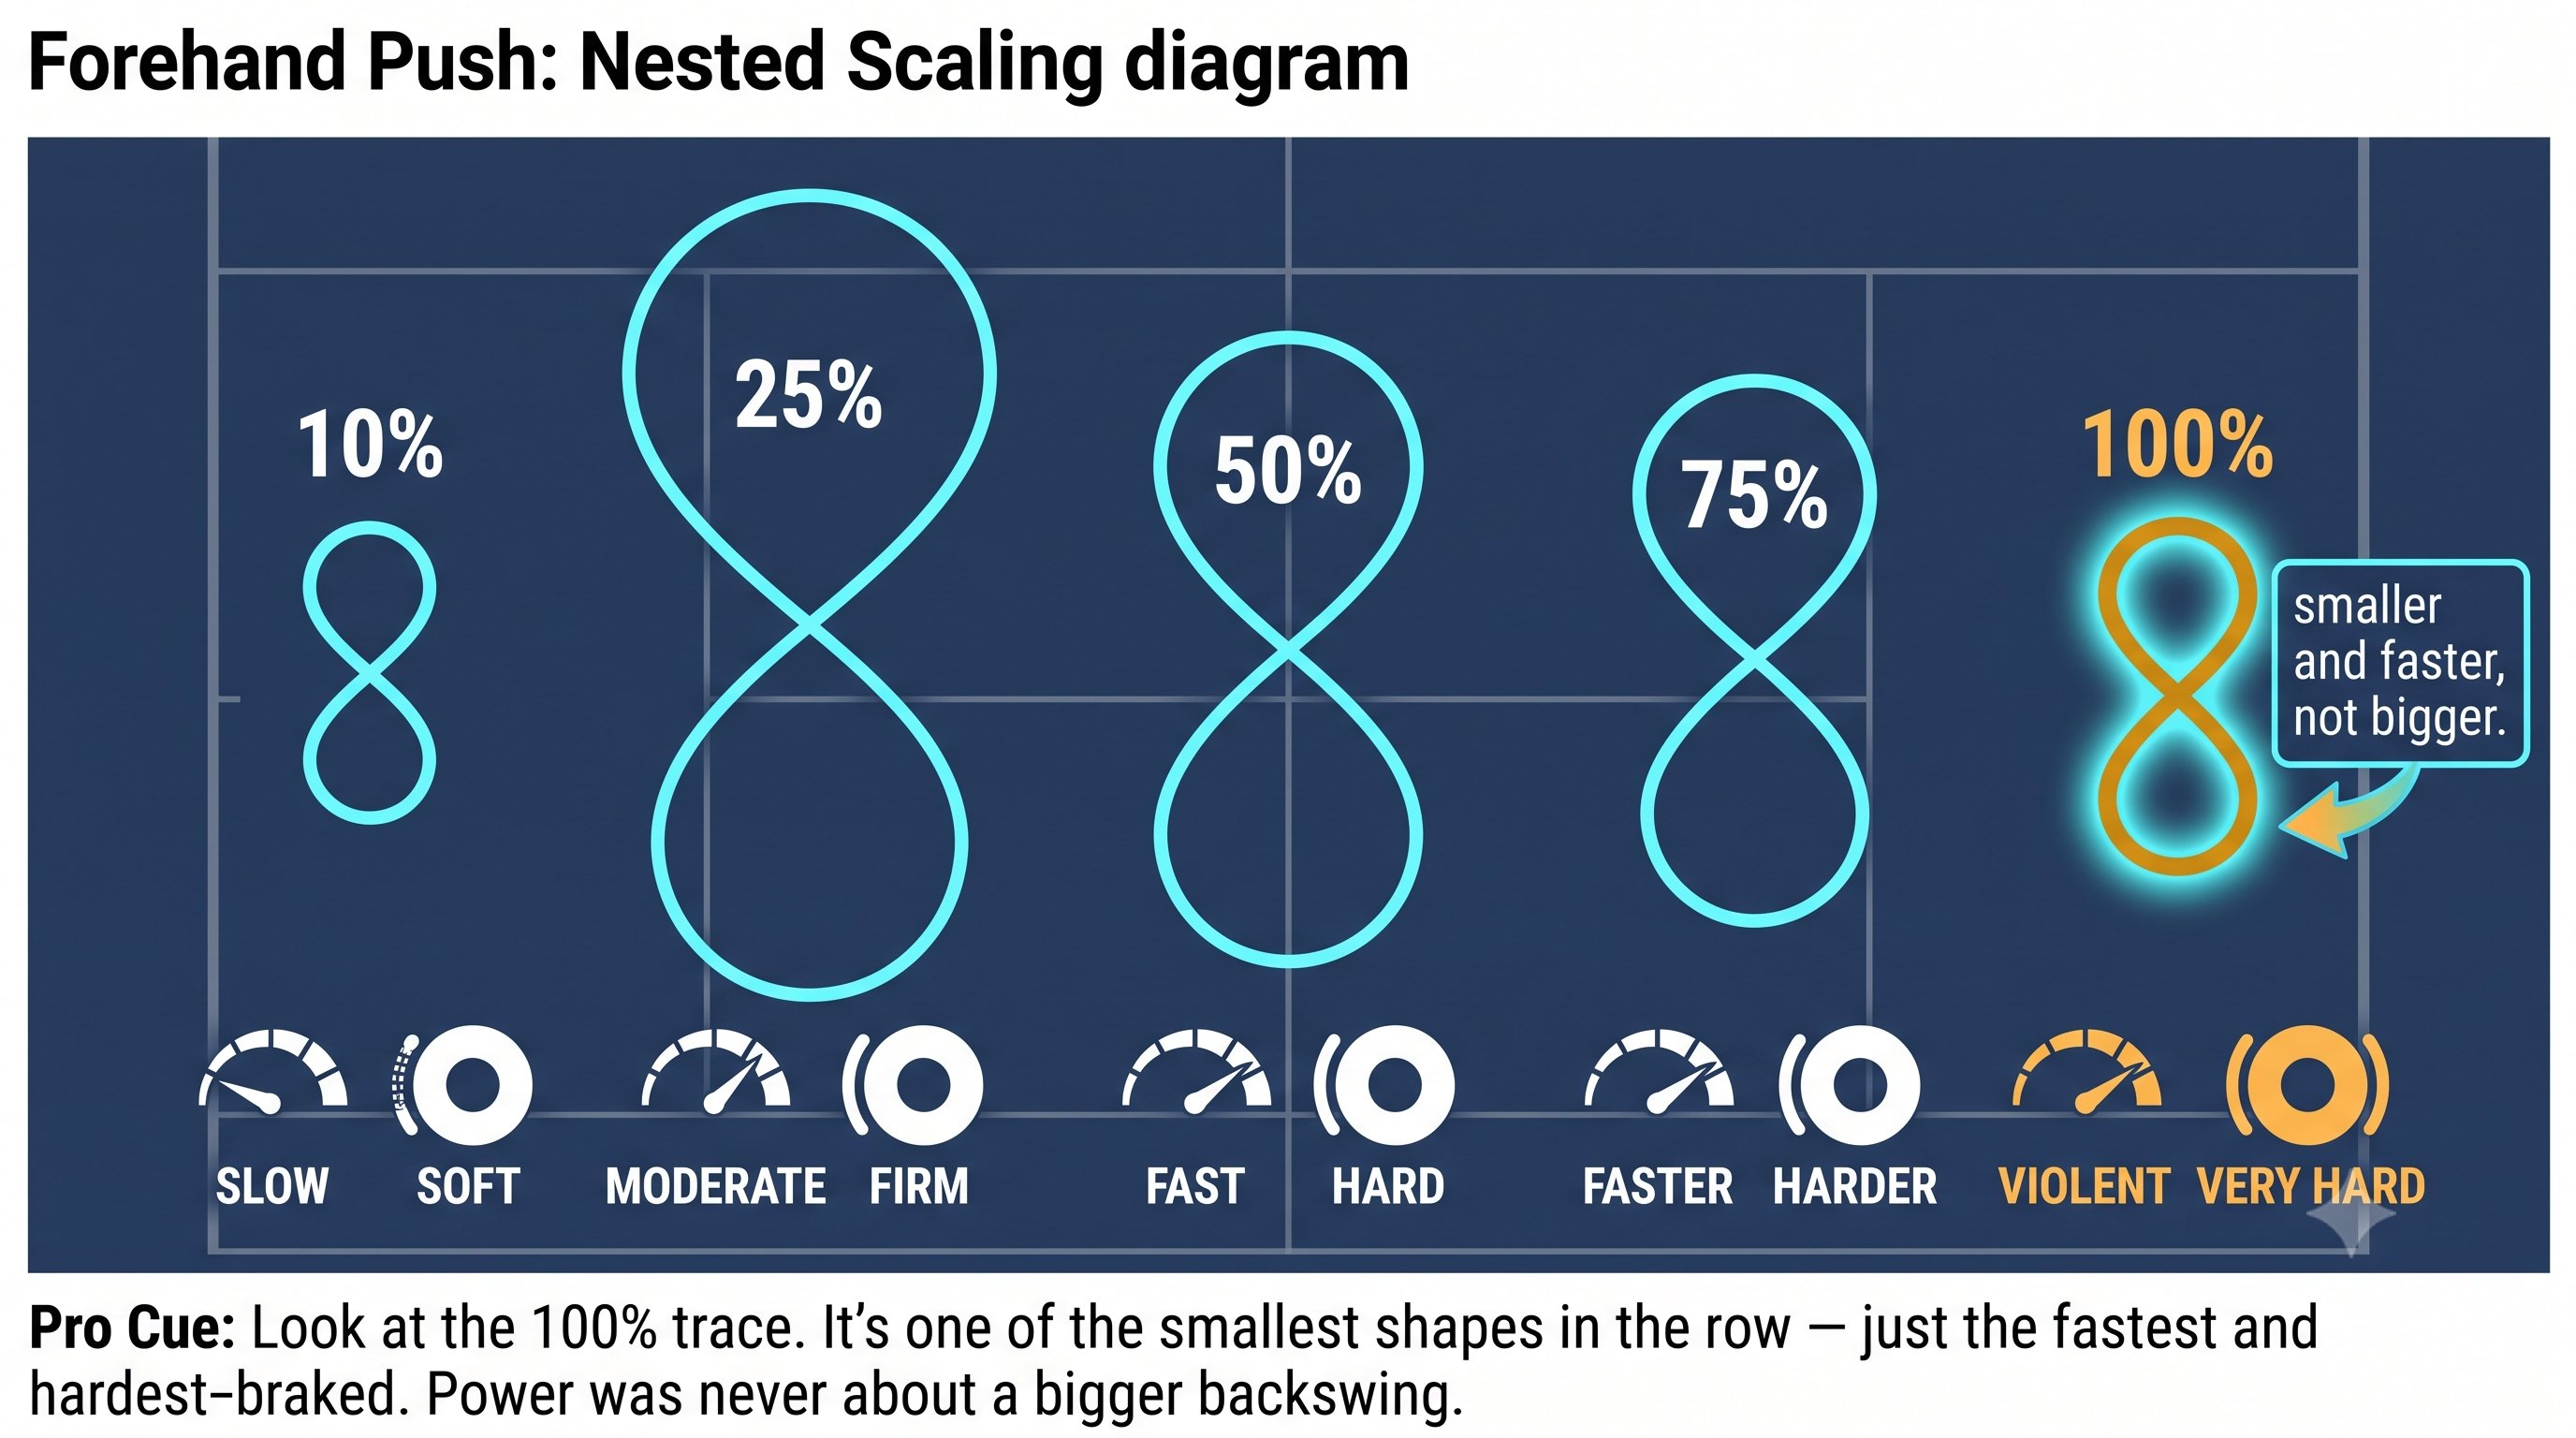
Figure-8 Regulation — Figure 3
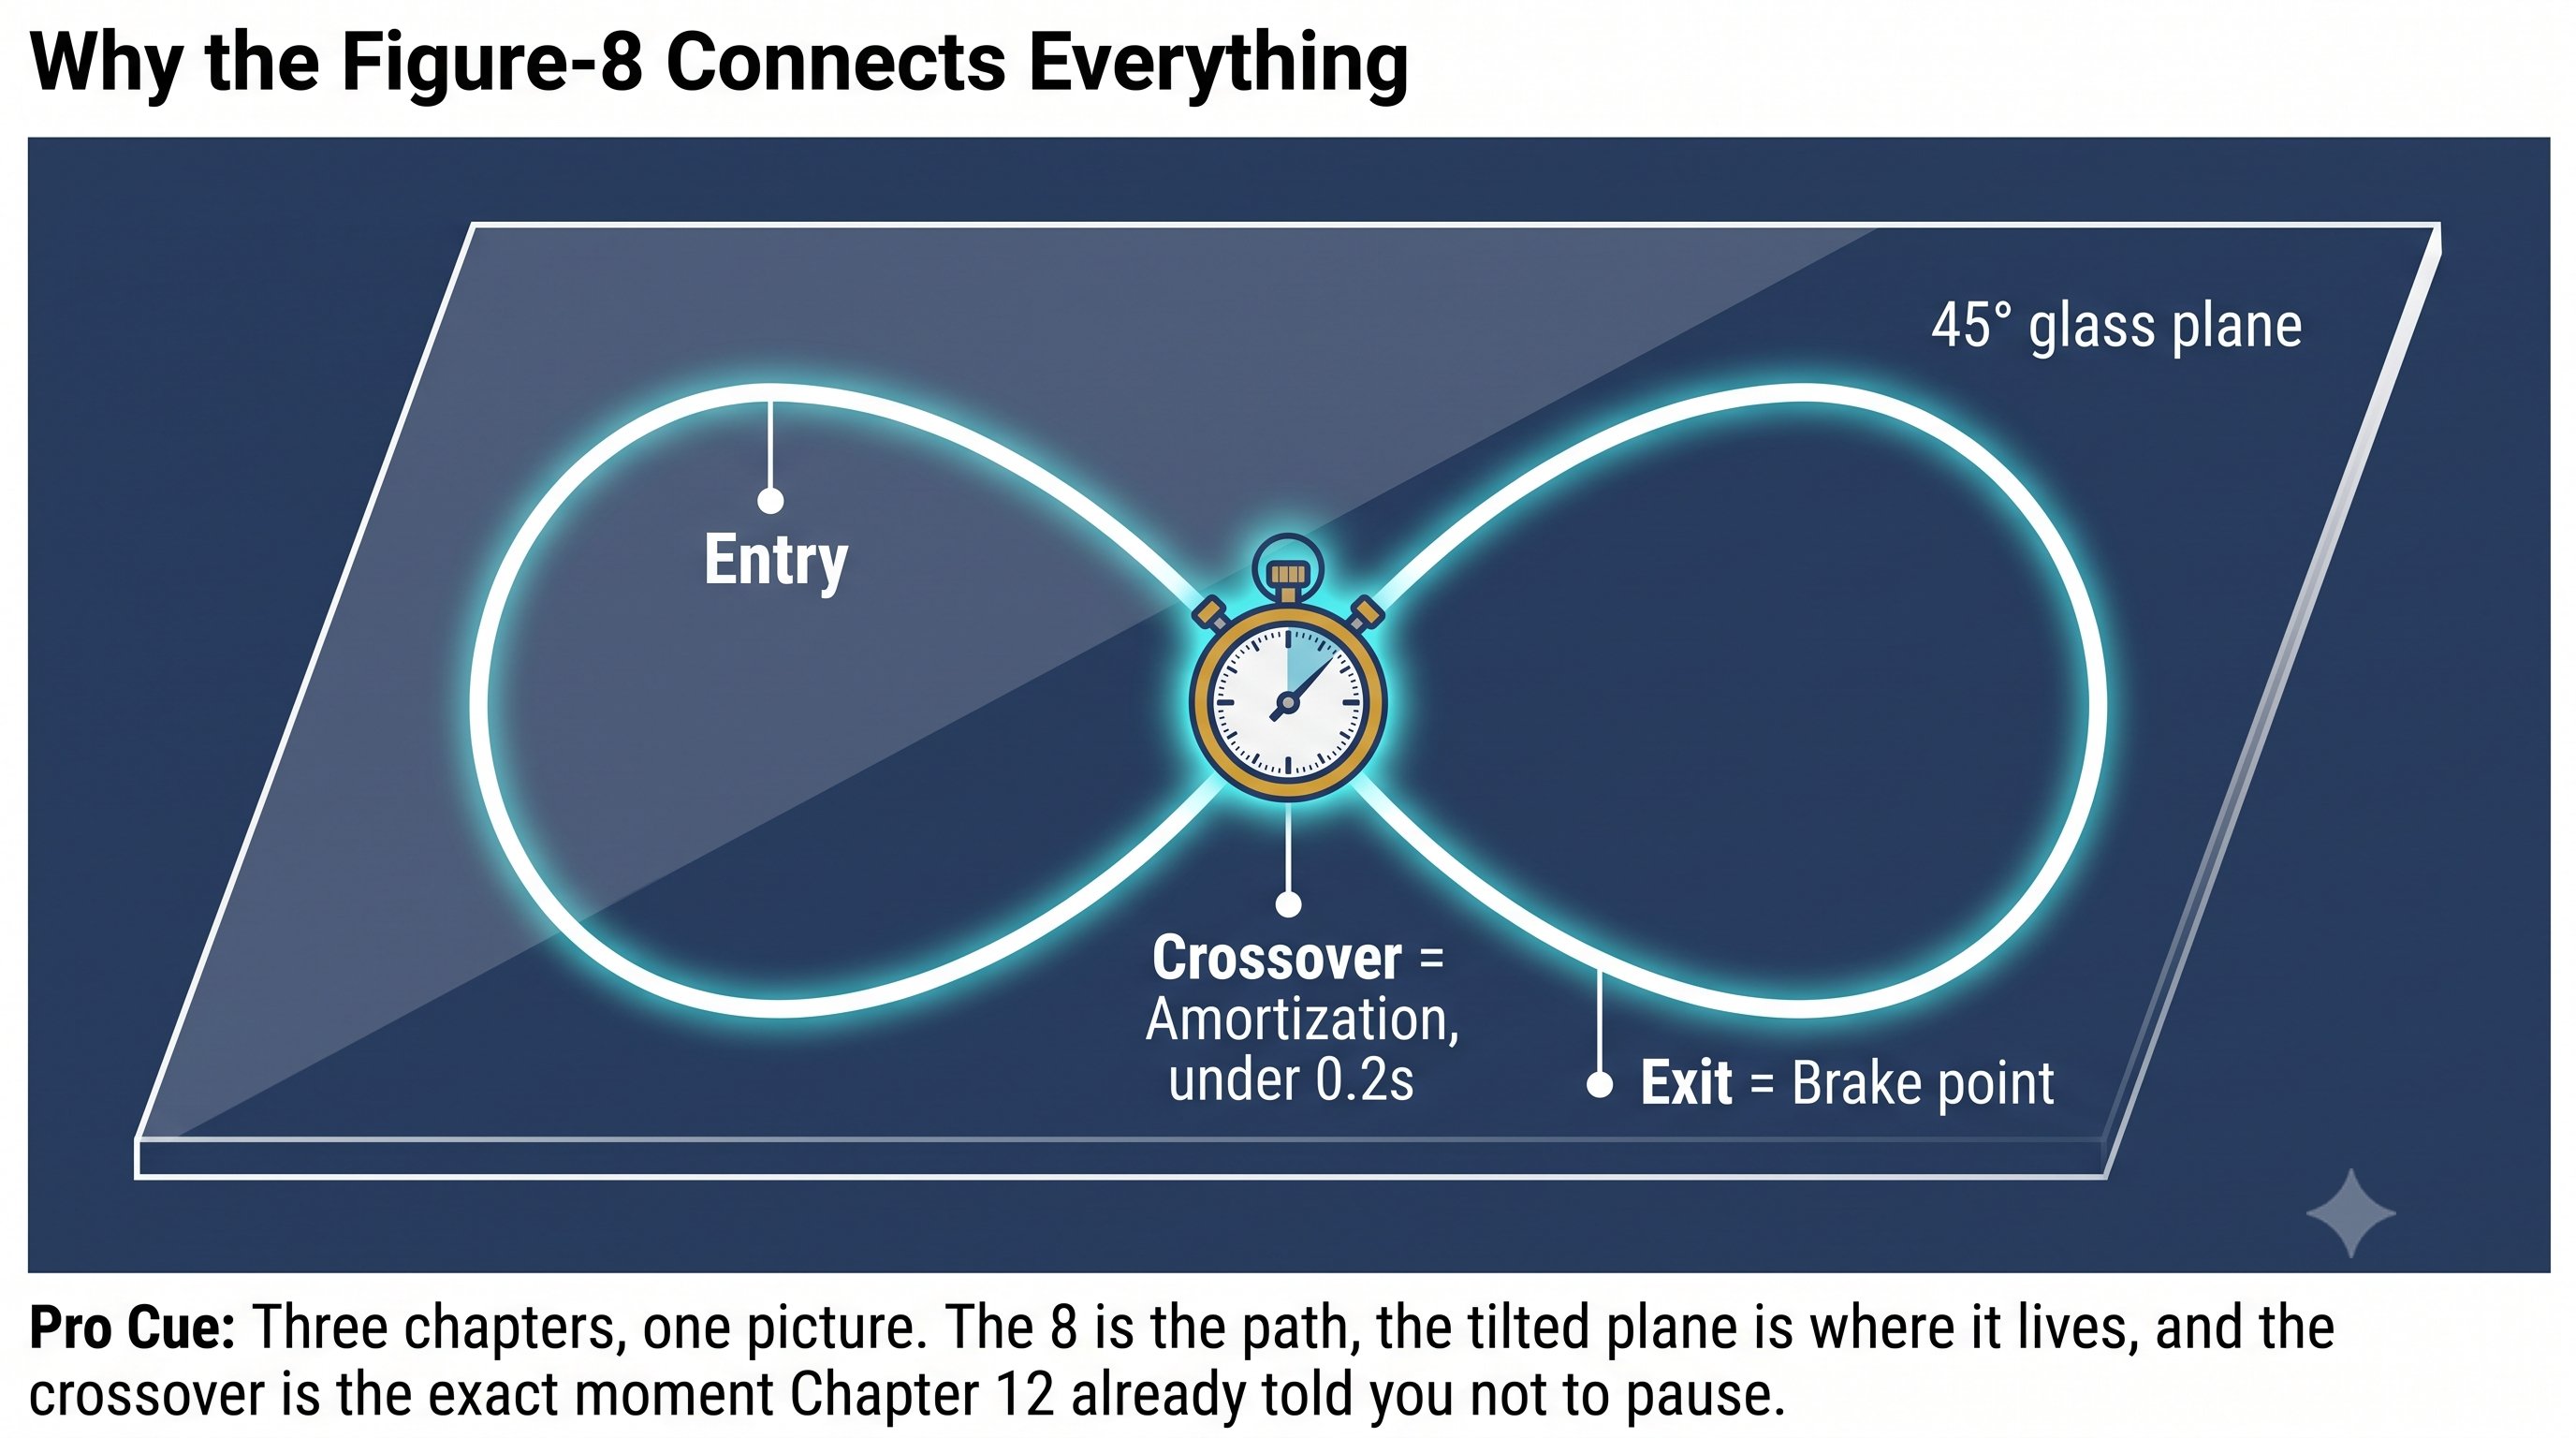
Figure-8 Regulation — Figure 4
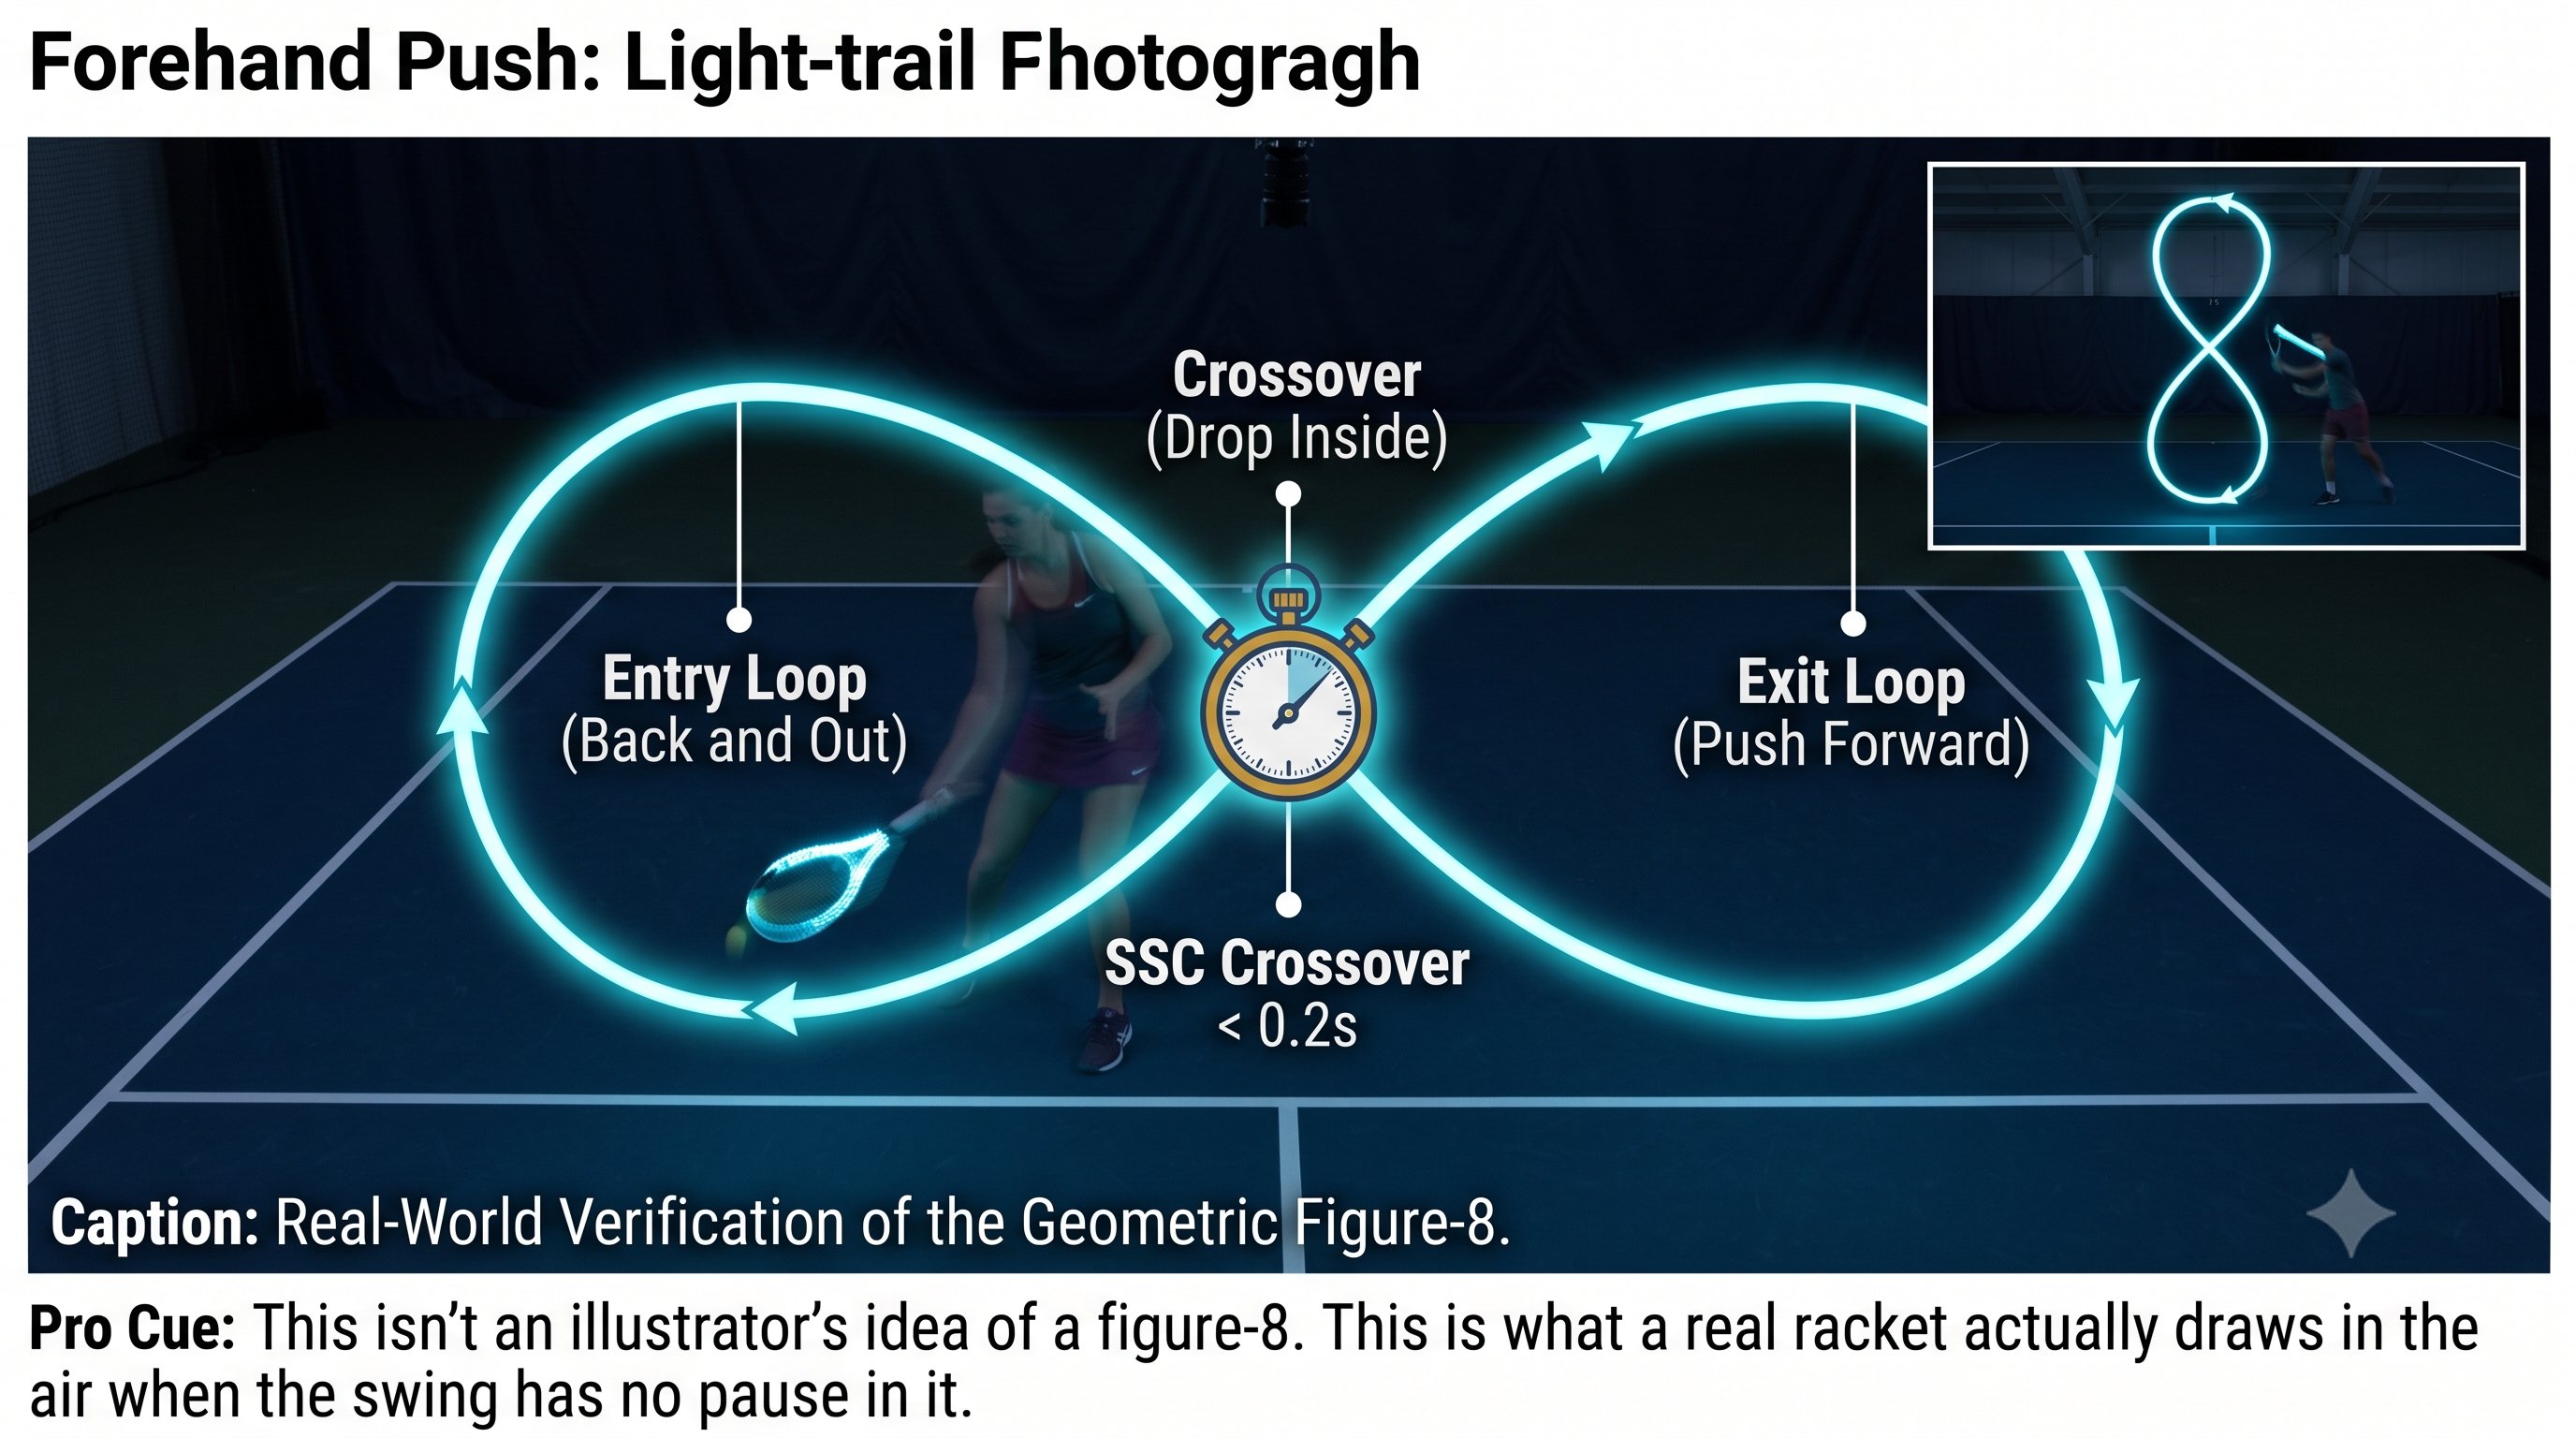
Figure-8 Regulation — Figure 5
Chapter 14: 45-Degree Swing Plane 4 figures
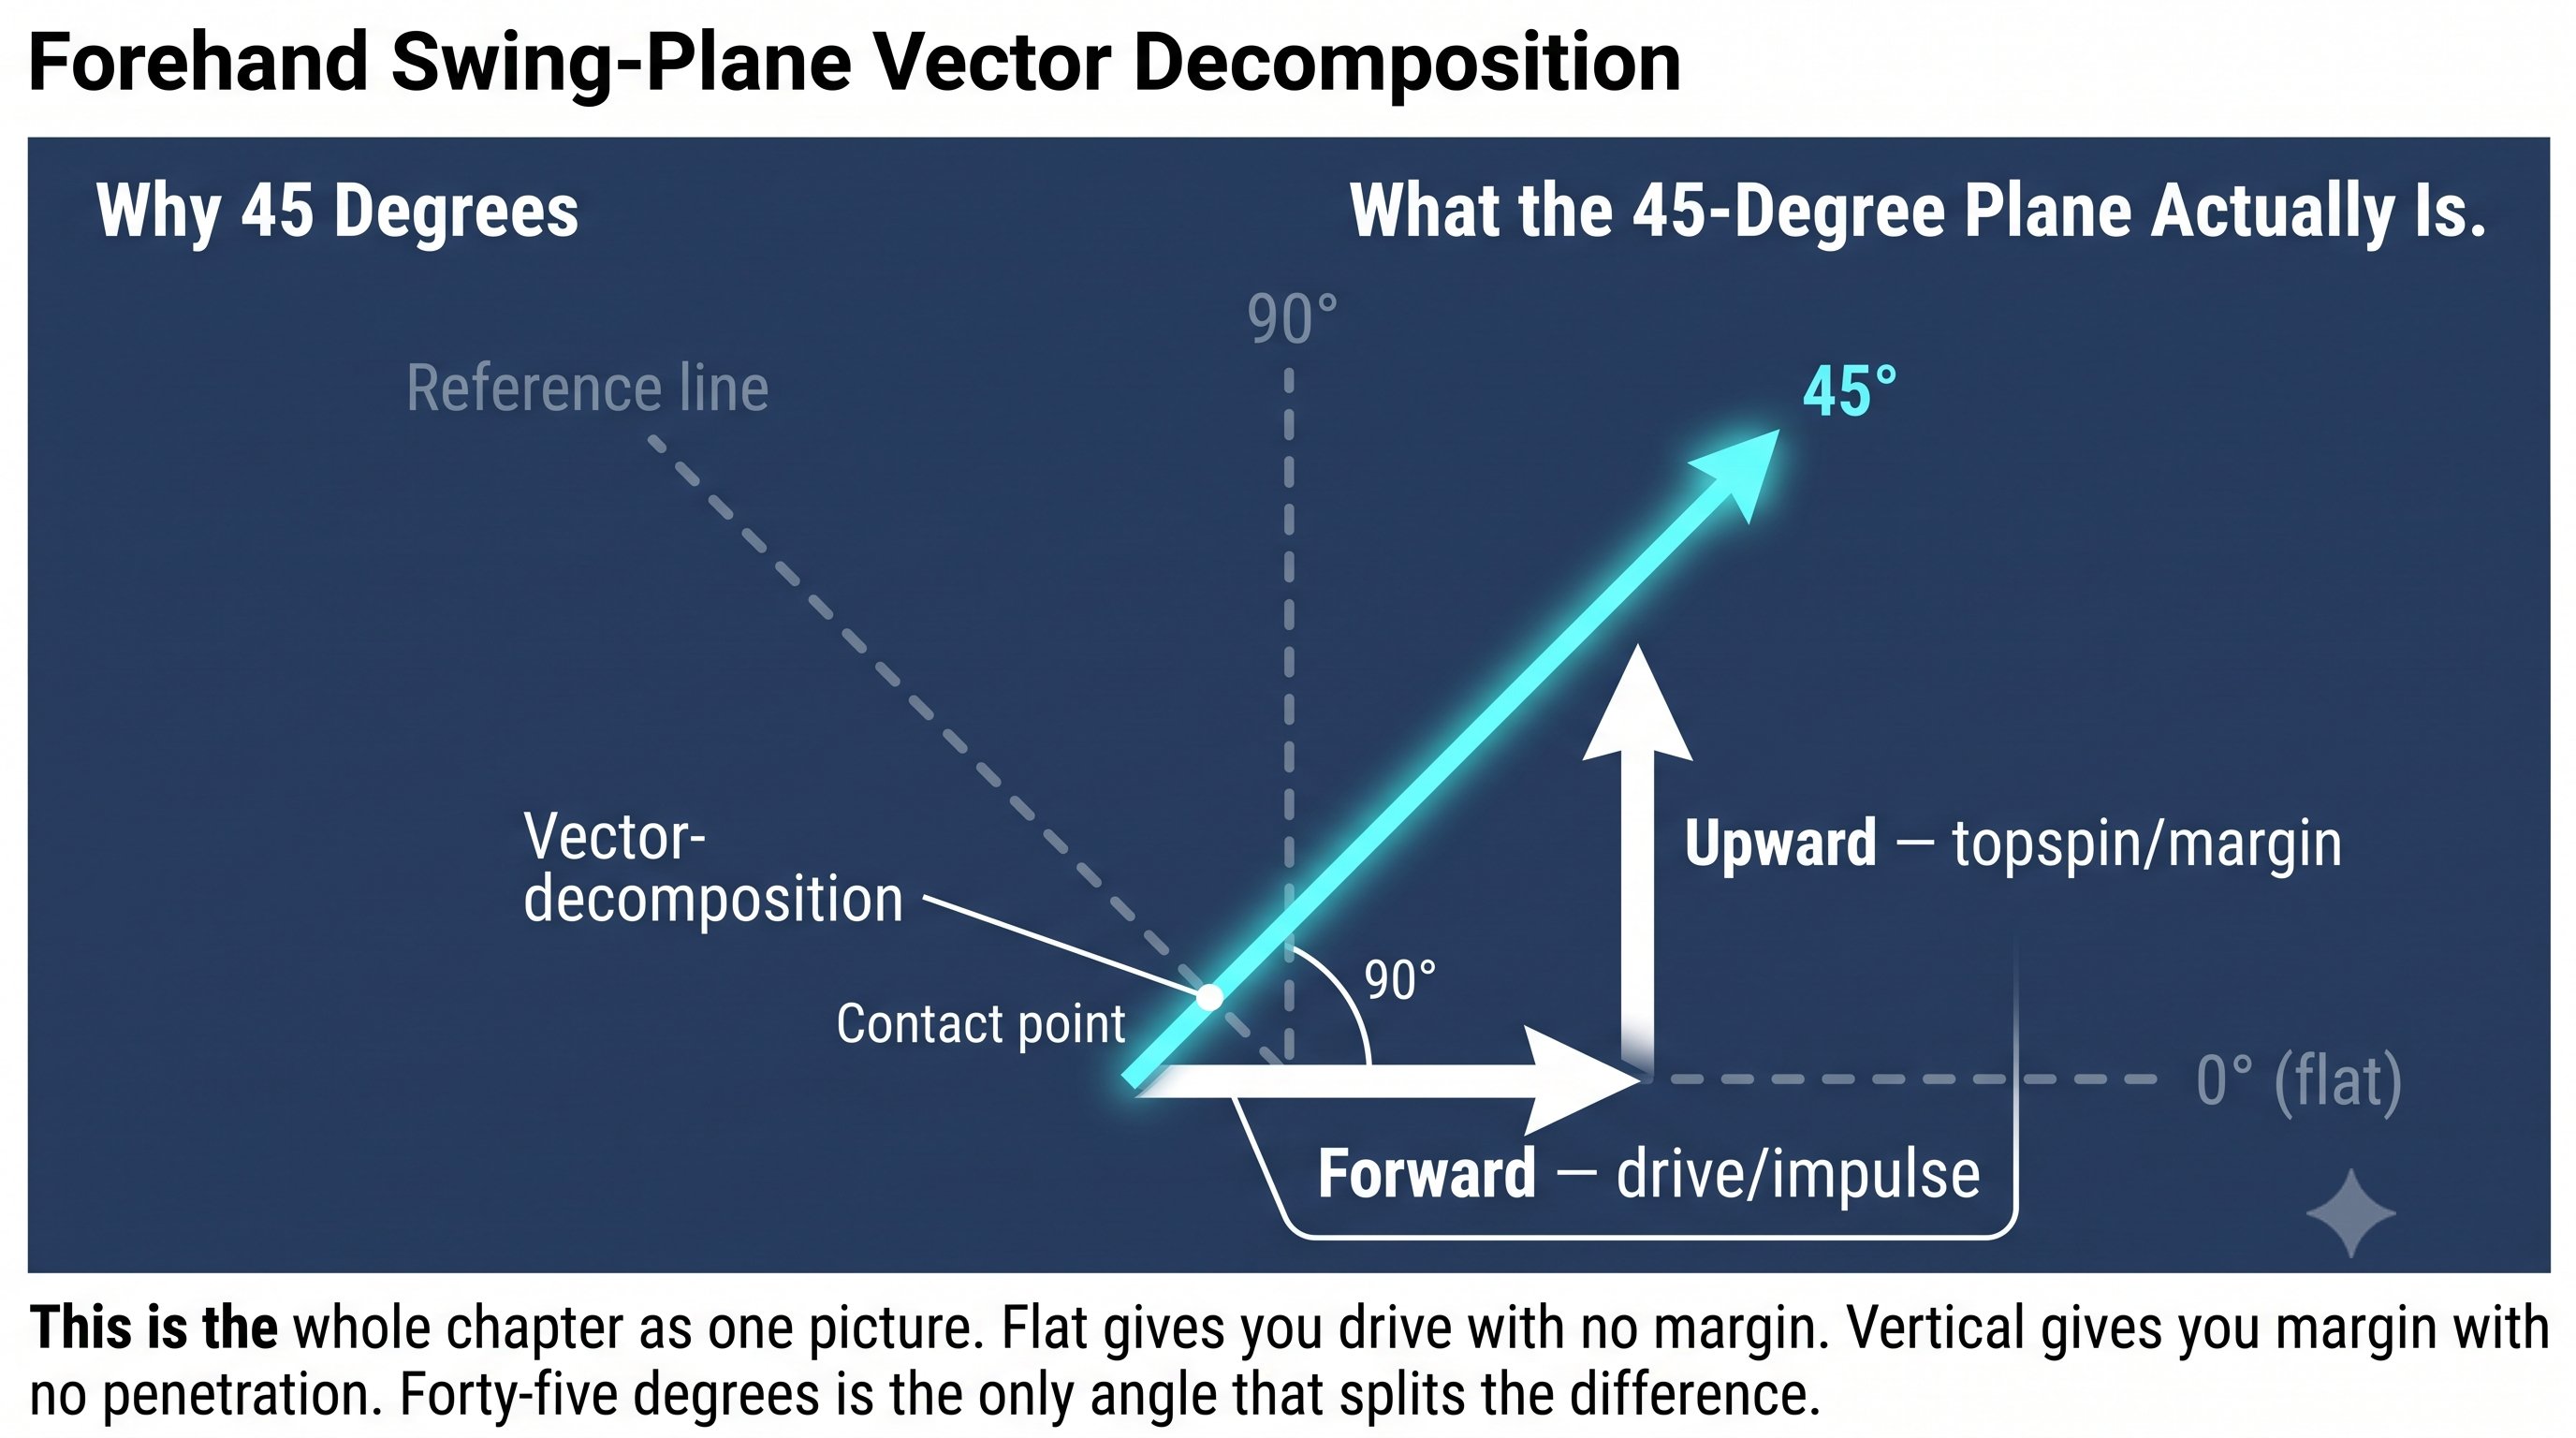
45-Degree Swing Plane — Figure 1
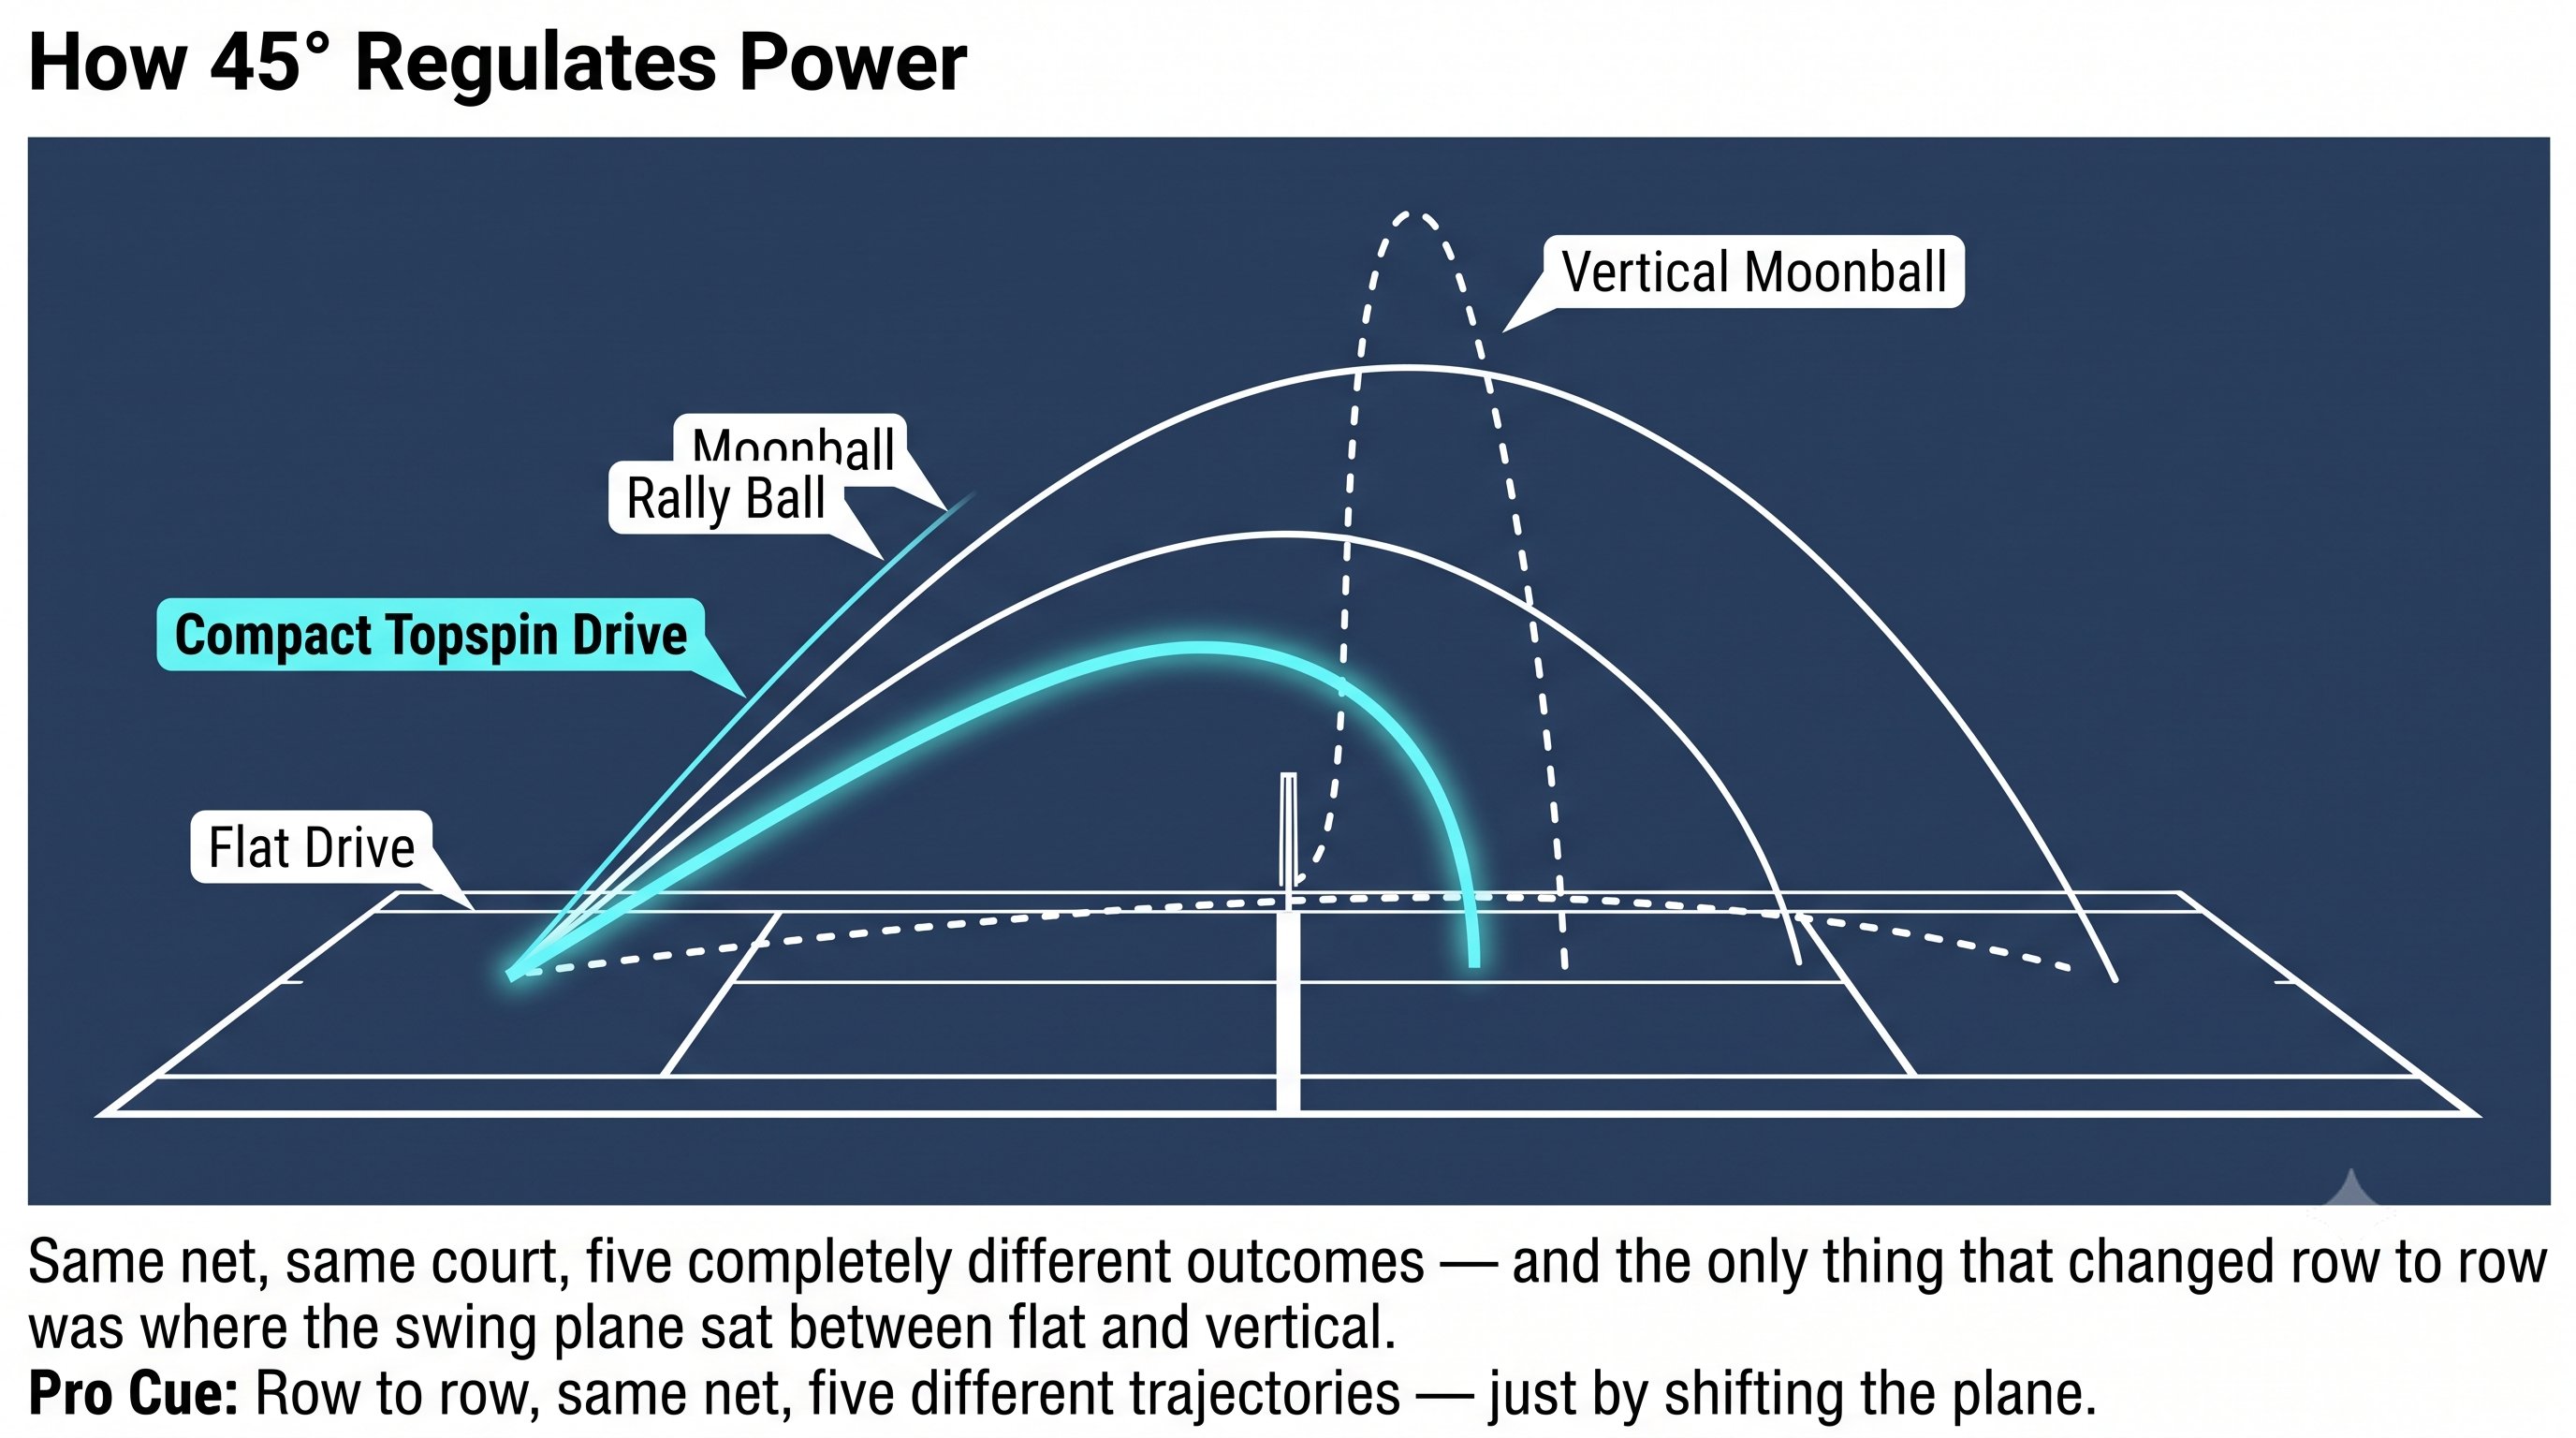
45-Degree Swing Plane — Figure 2
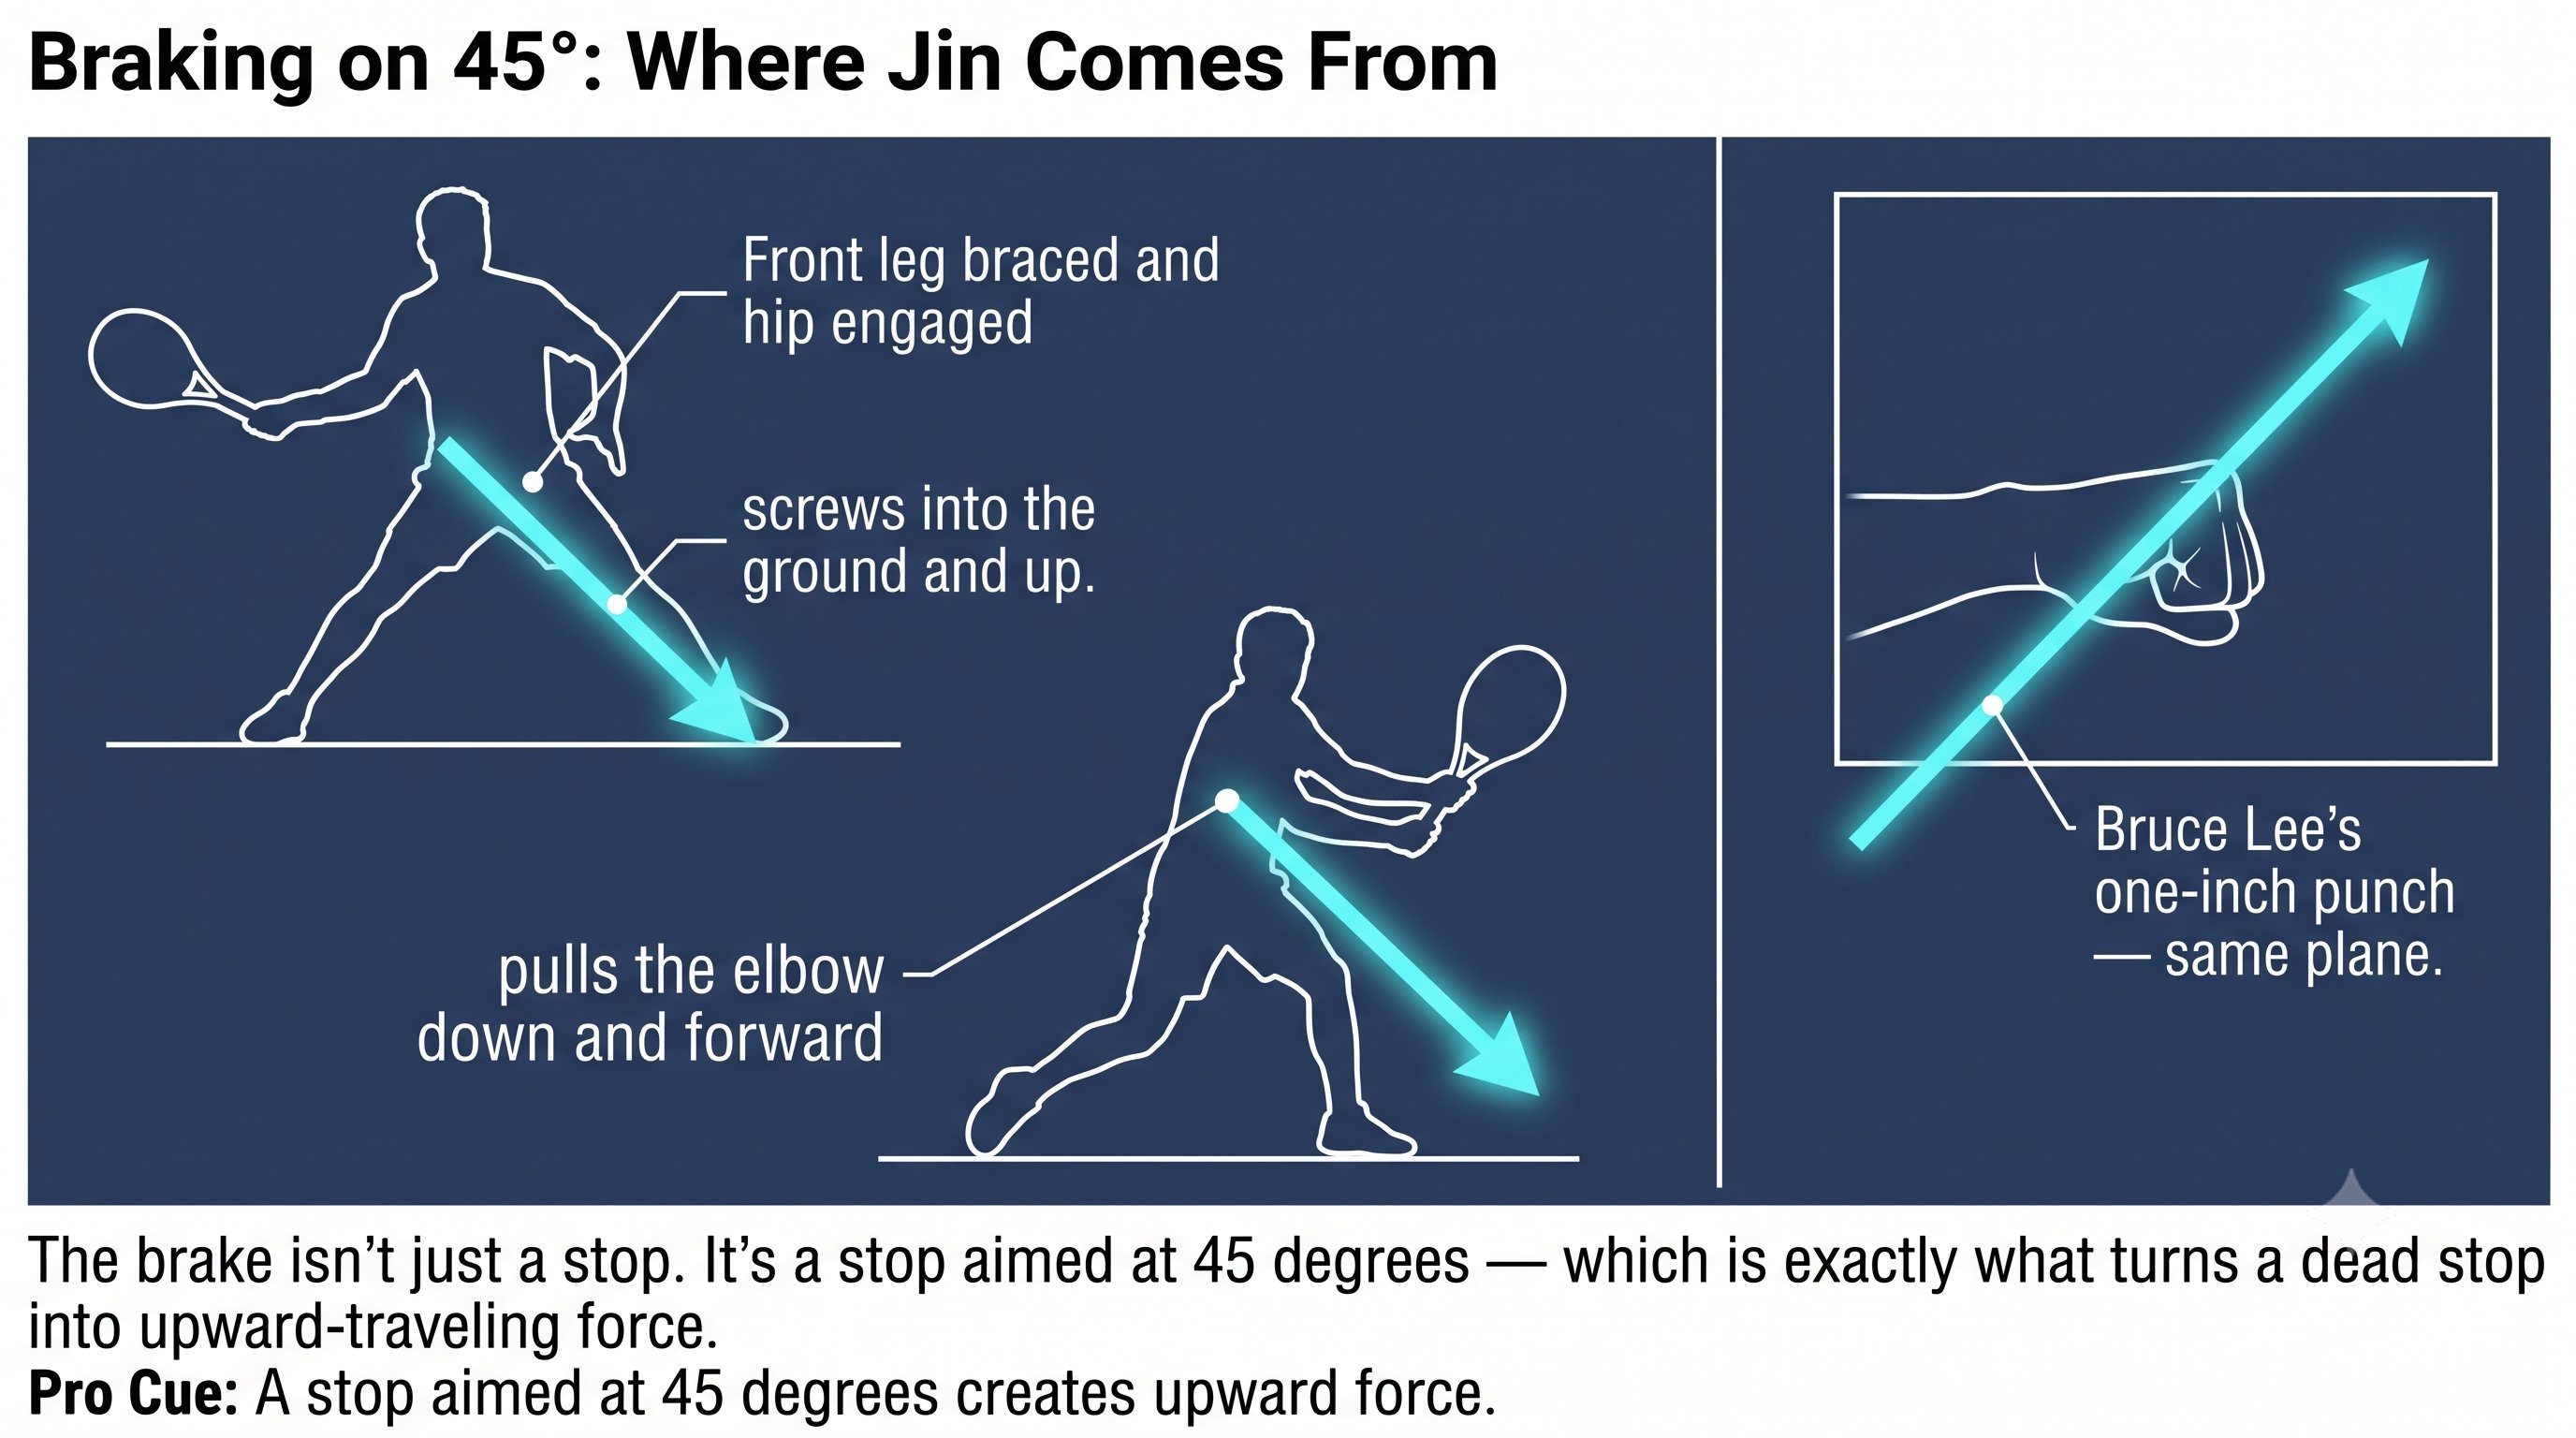
45-Degree Swing Plane — Figure 3
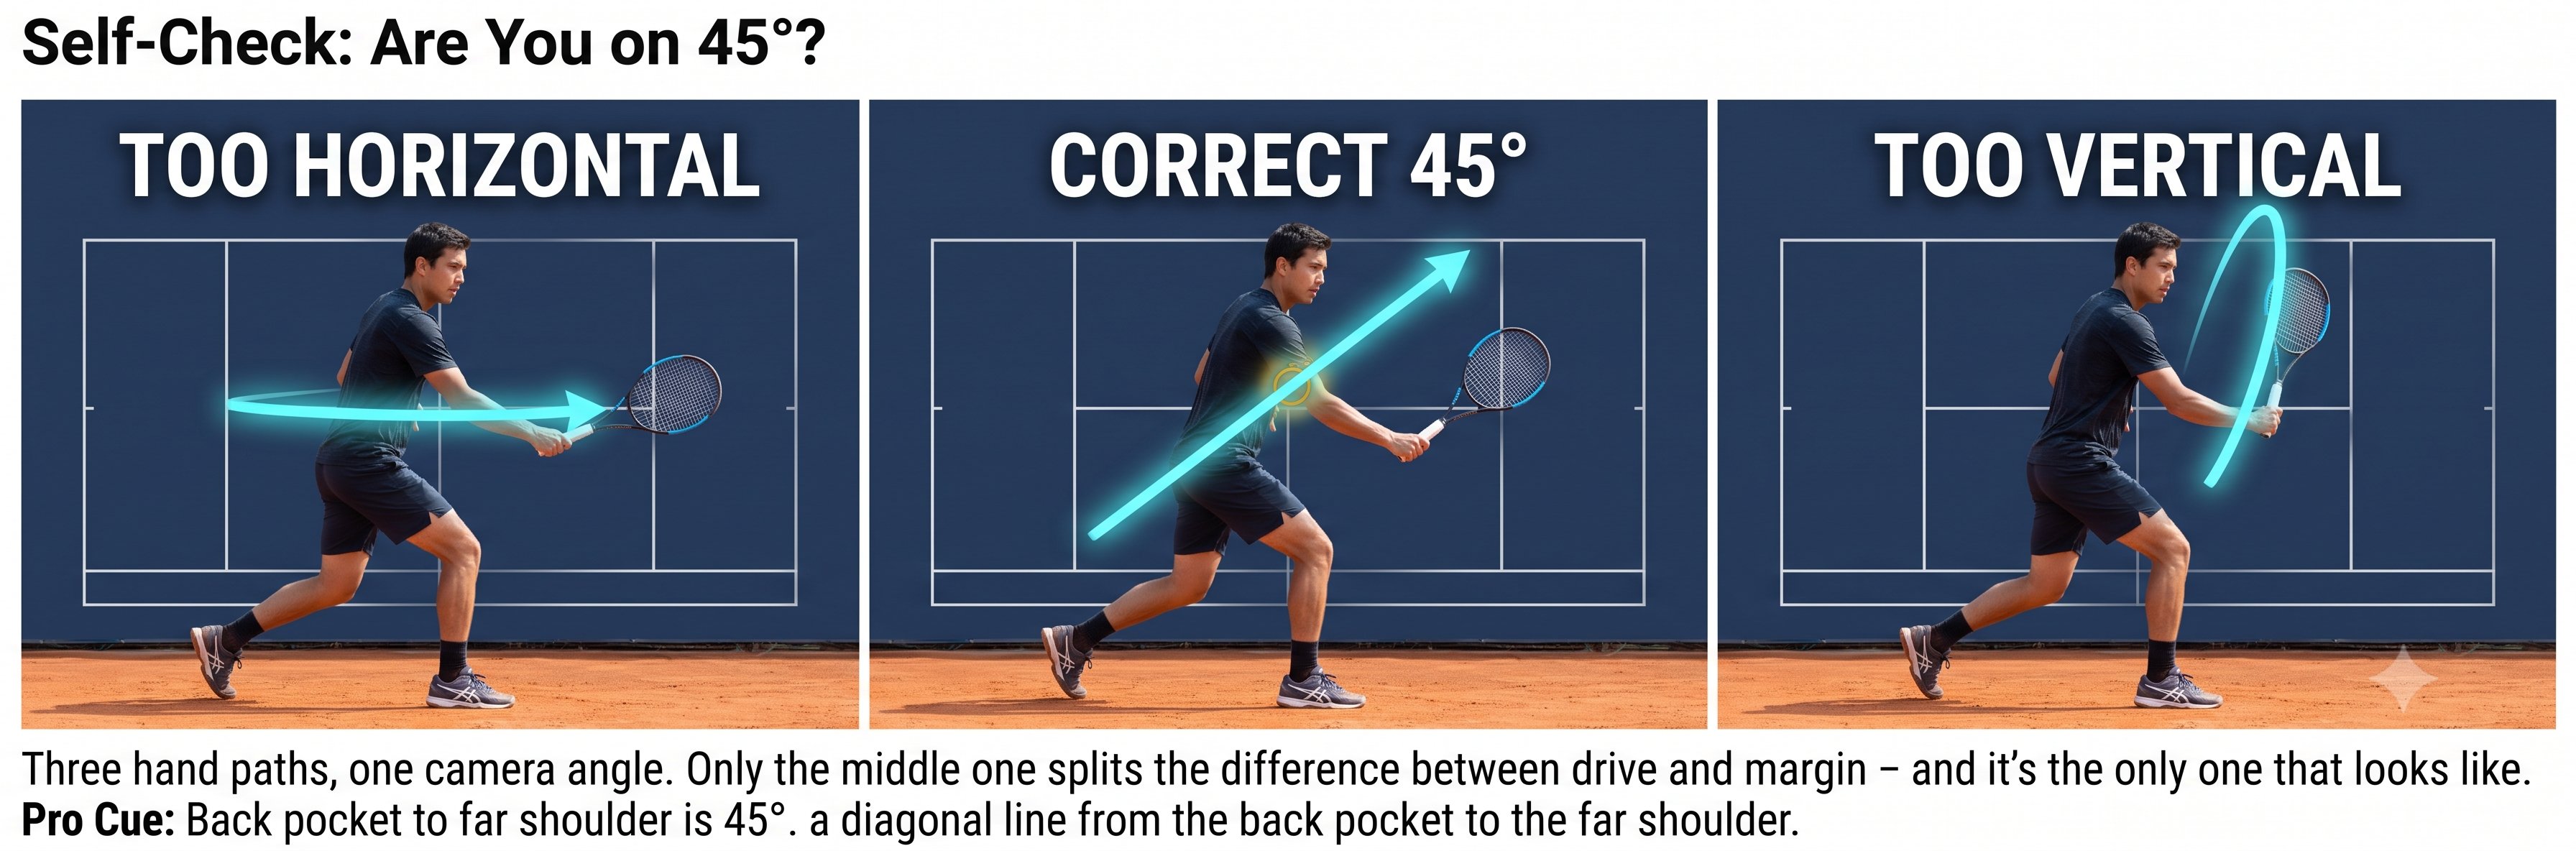
45-Degree Swing Plane — Figure 4
Chapter 15: Braking & Impulse 3 figures
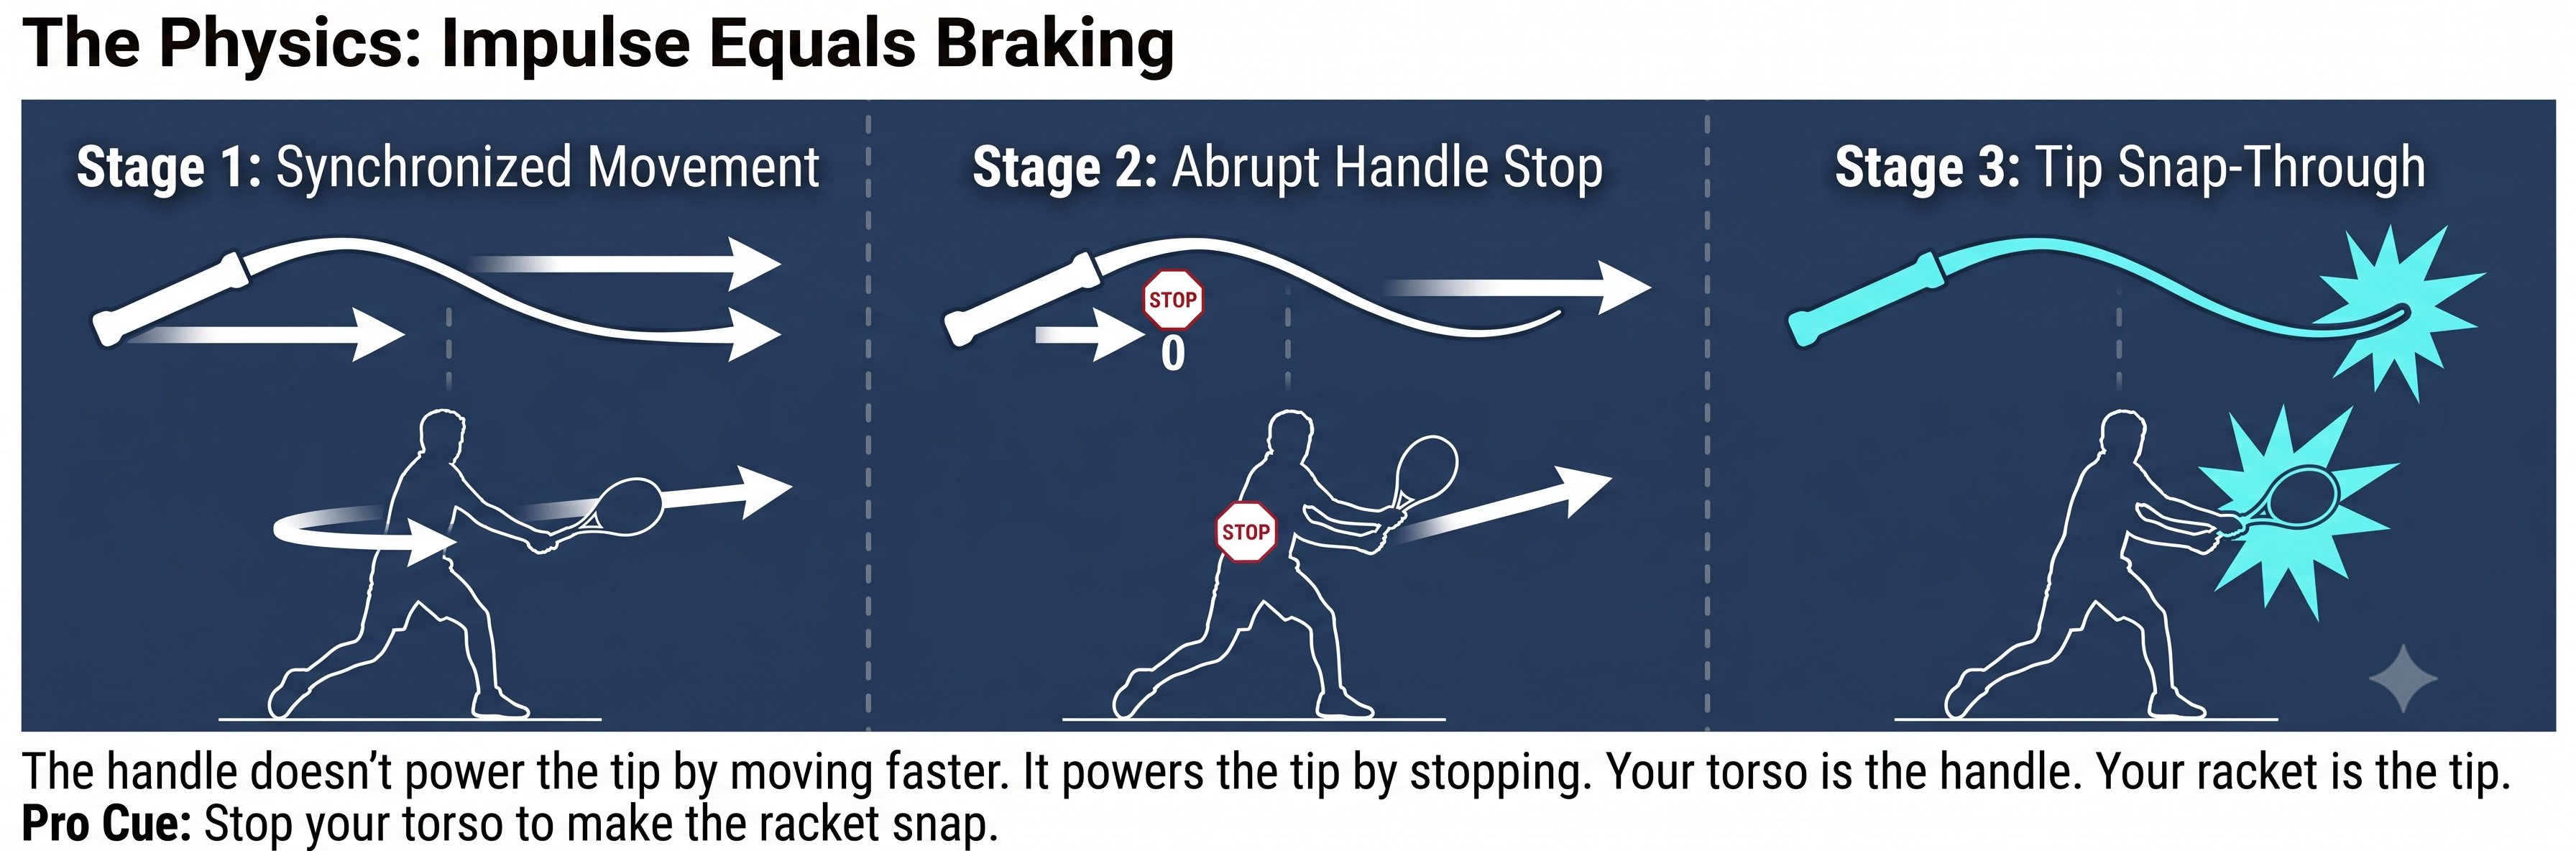
Braking & Impulse — Figure 1
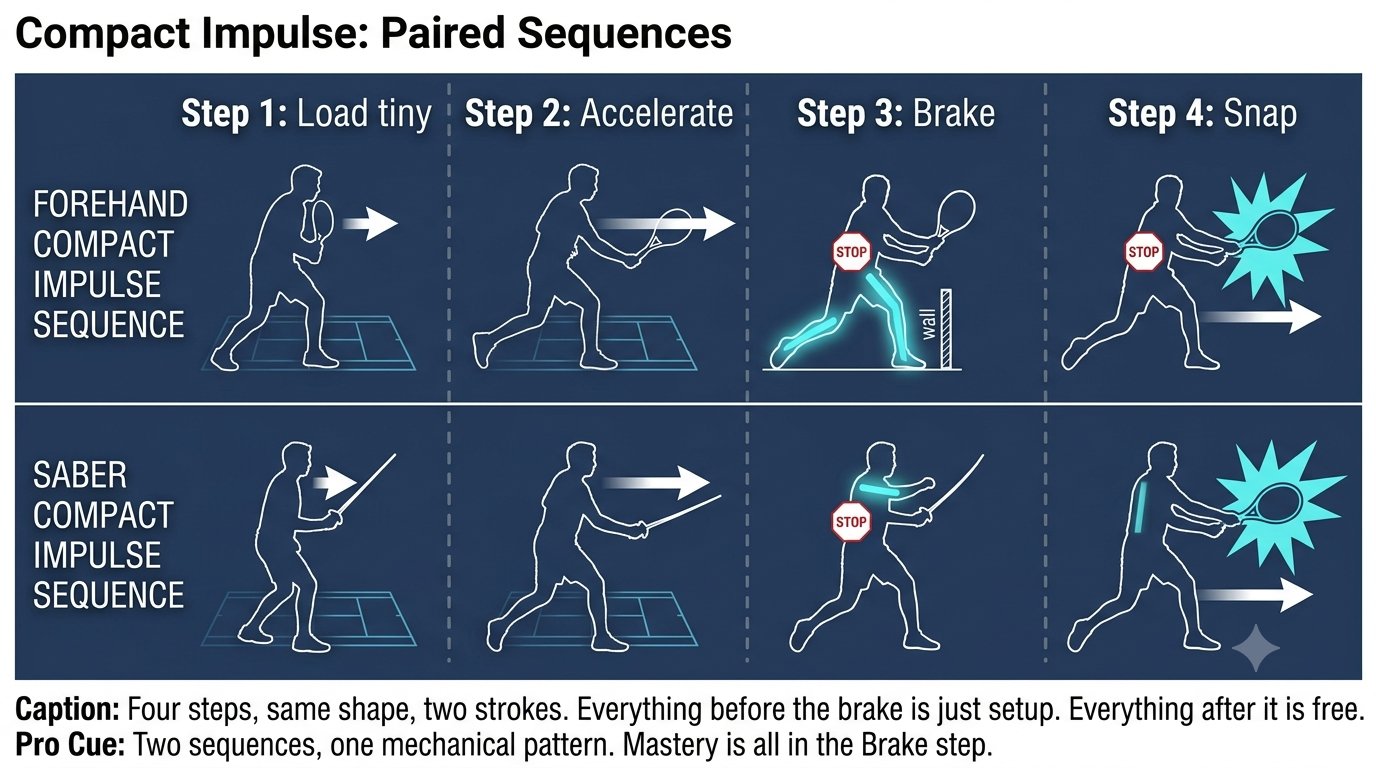
Braking & Impulse — Figure 2
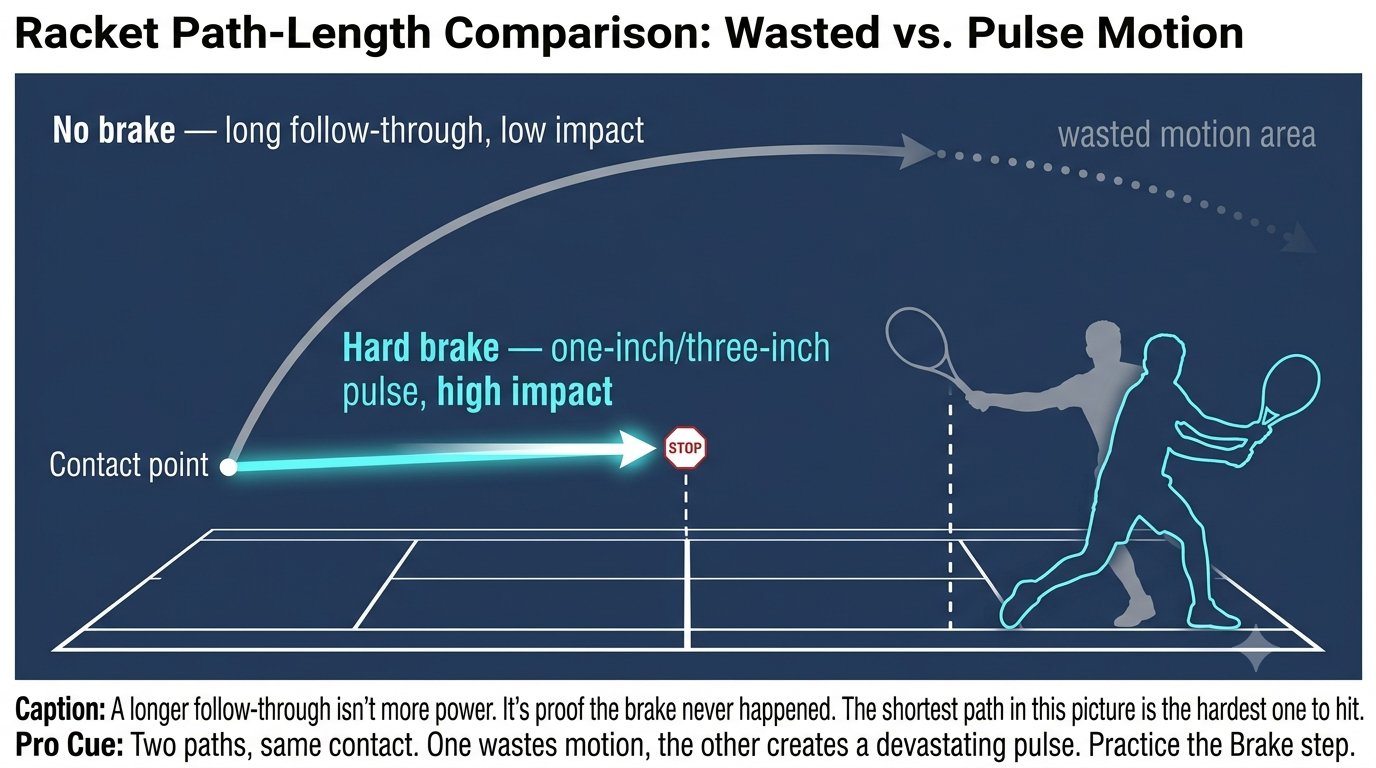
Braking & Impulse — Figure 3
Chapter 16: Jin (Unified Force) 4 figures
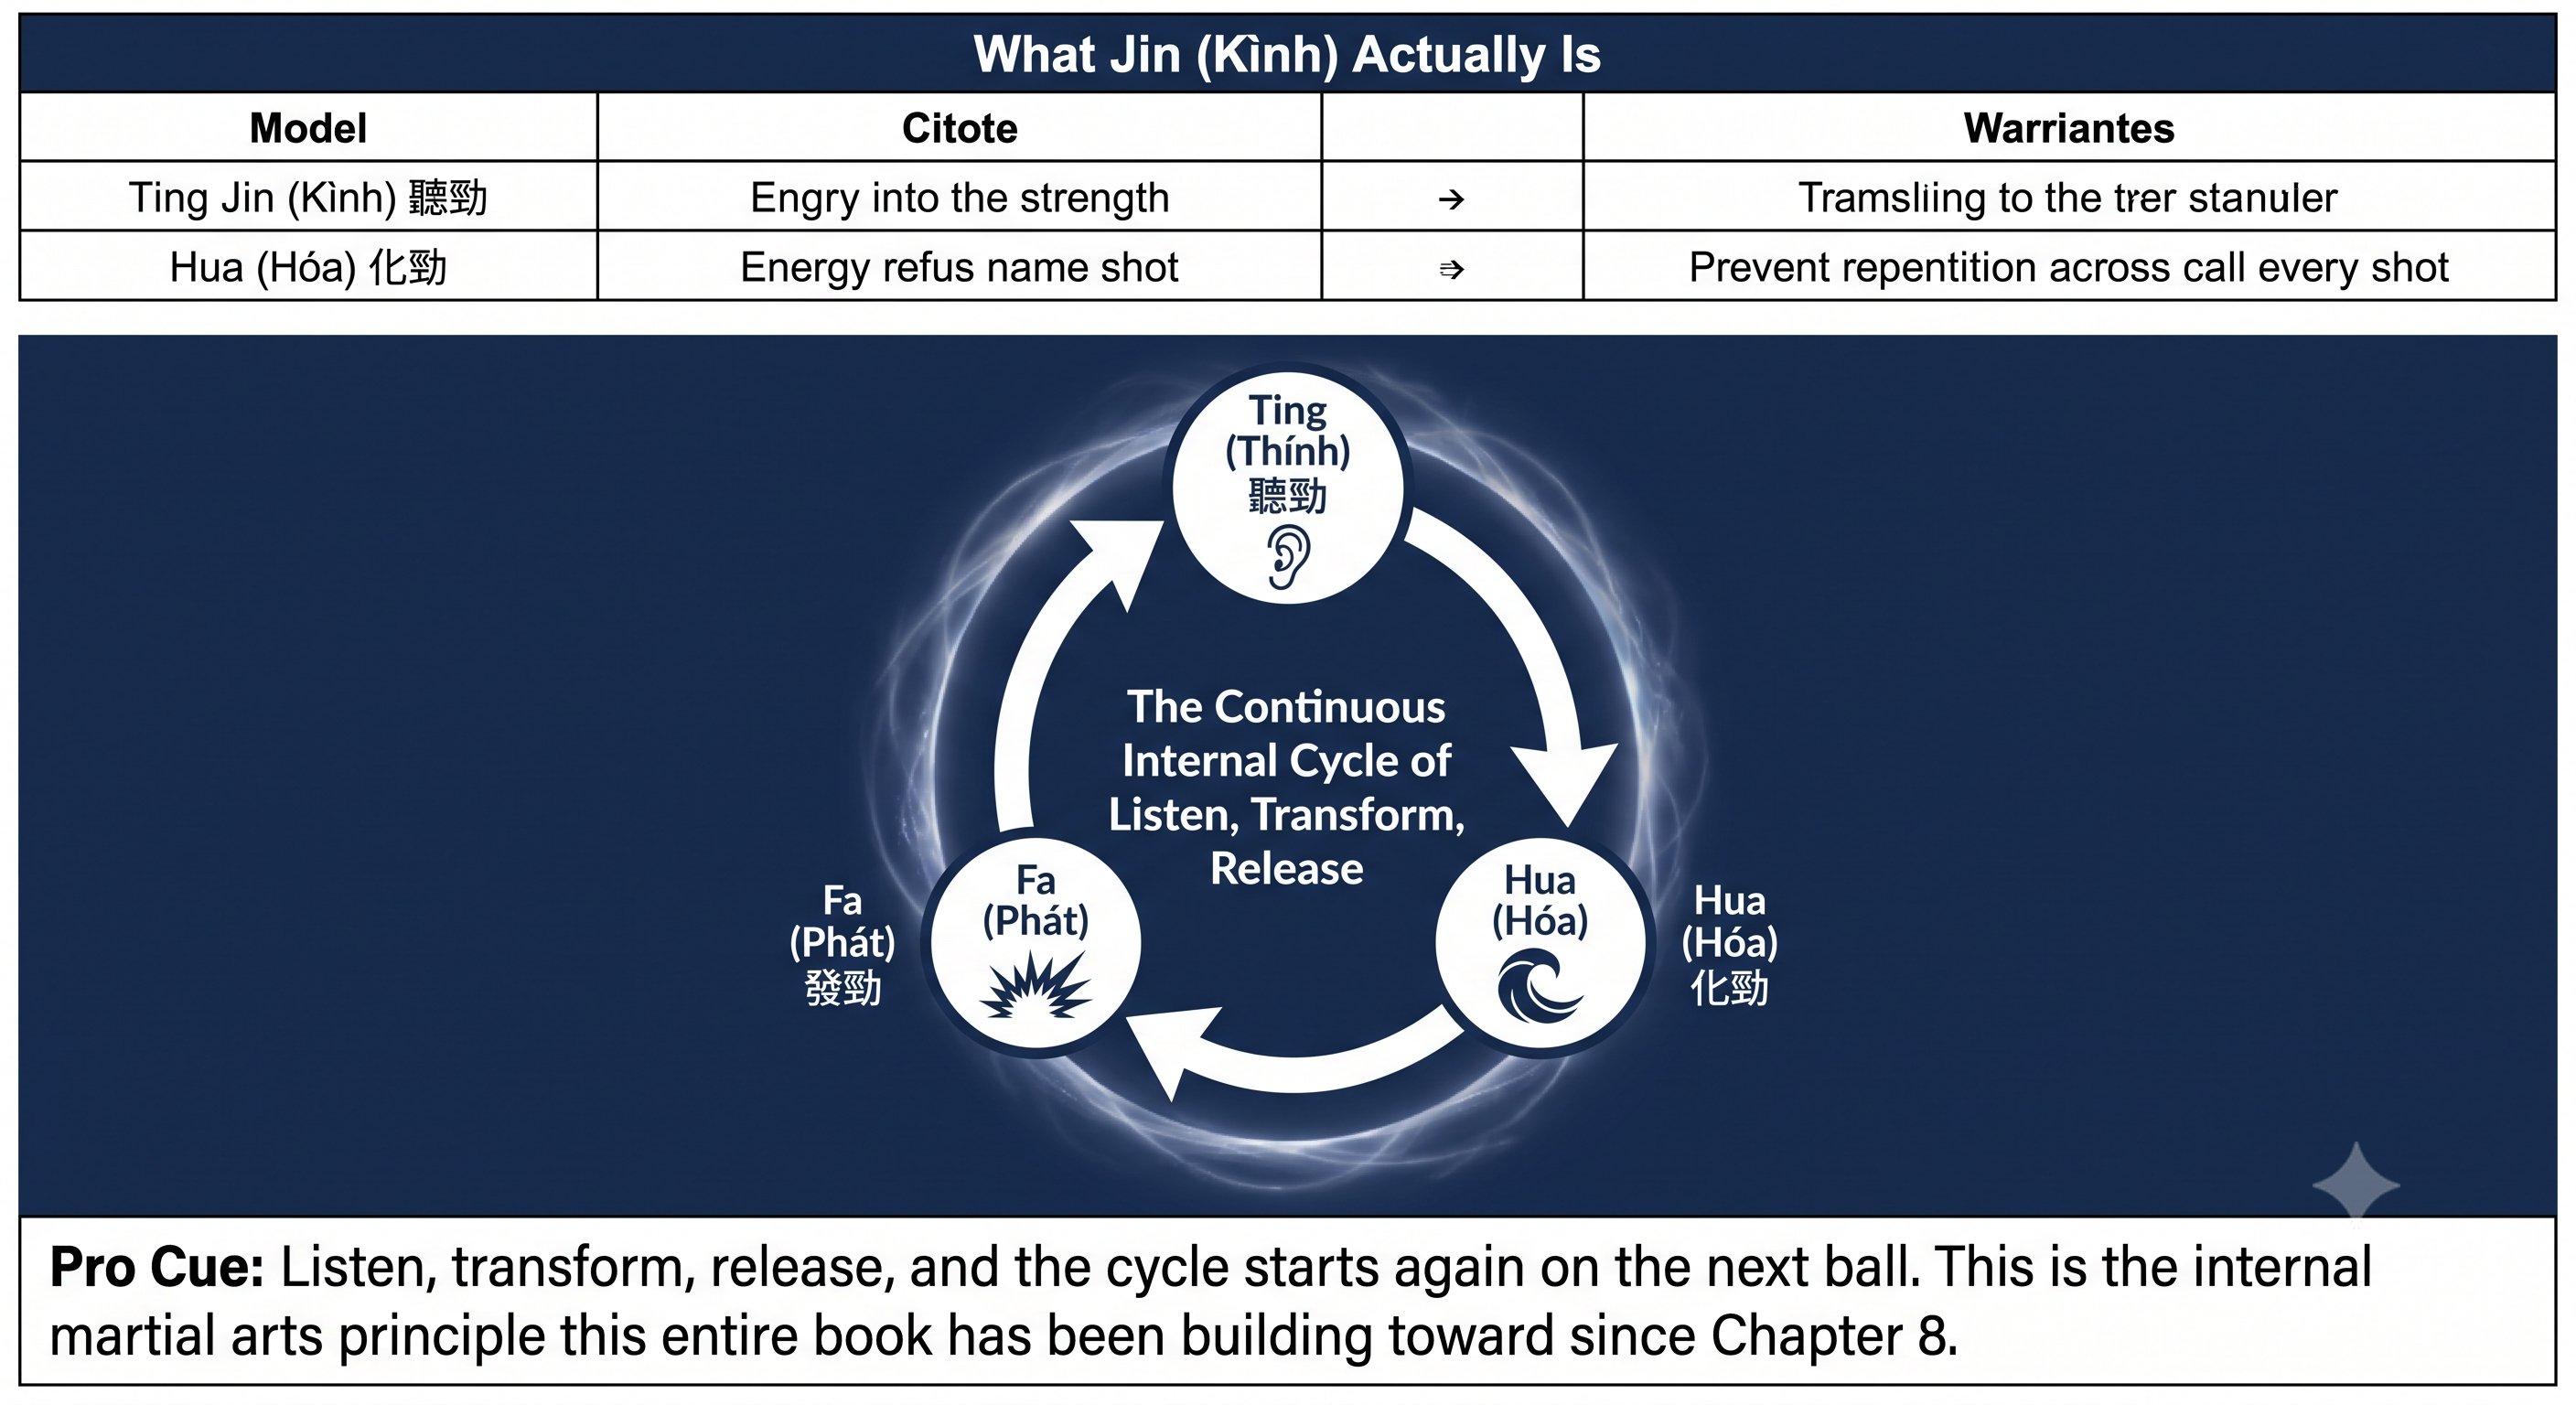
Jin (Unified Force) — Figure 1
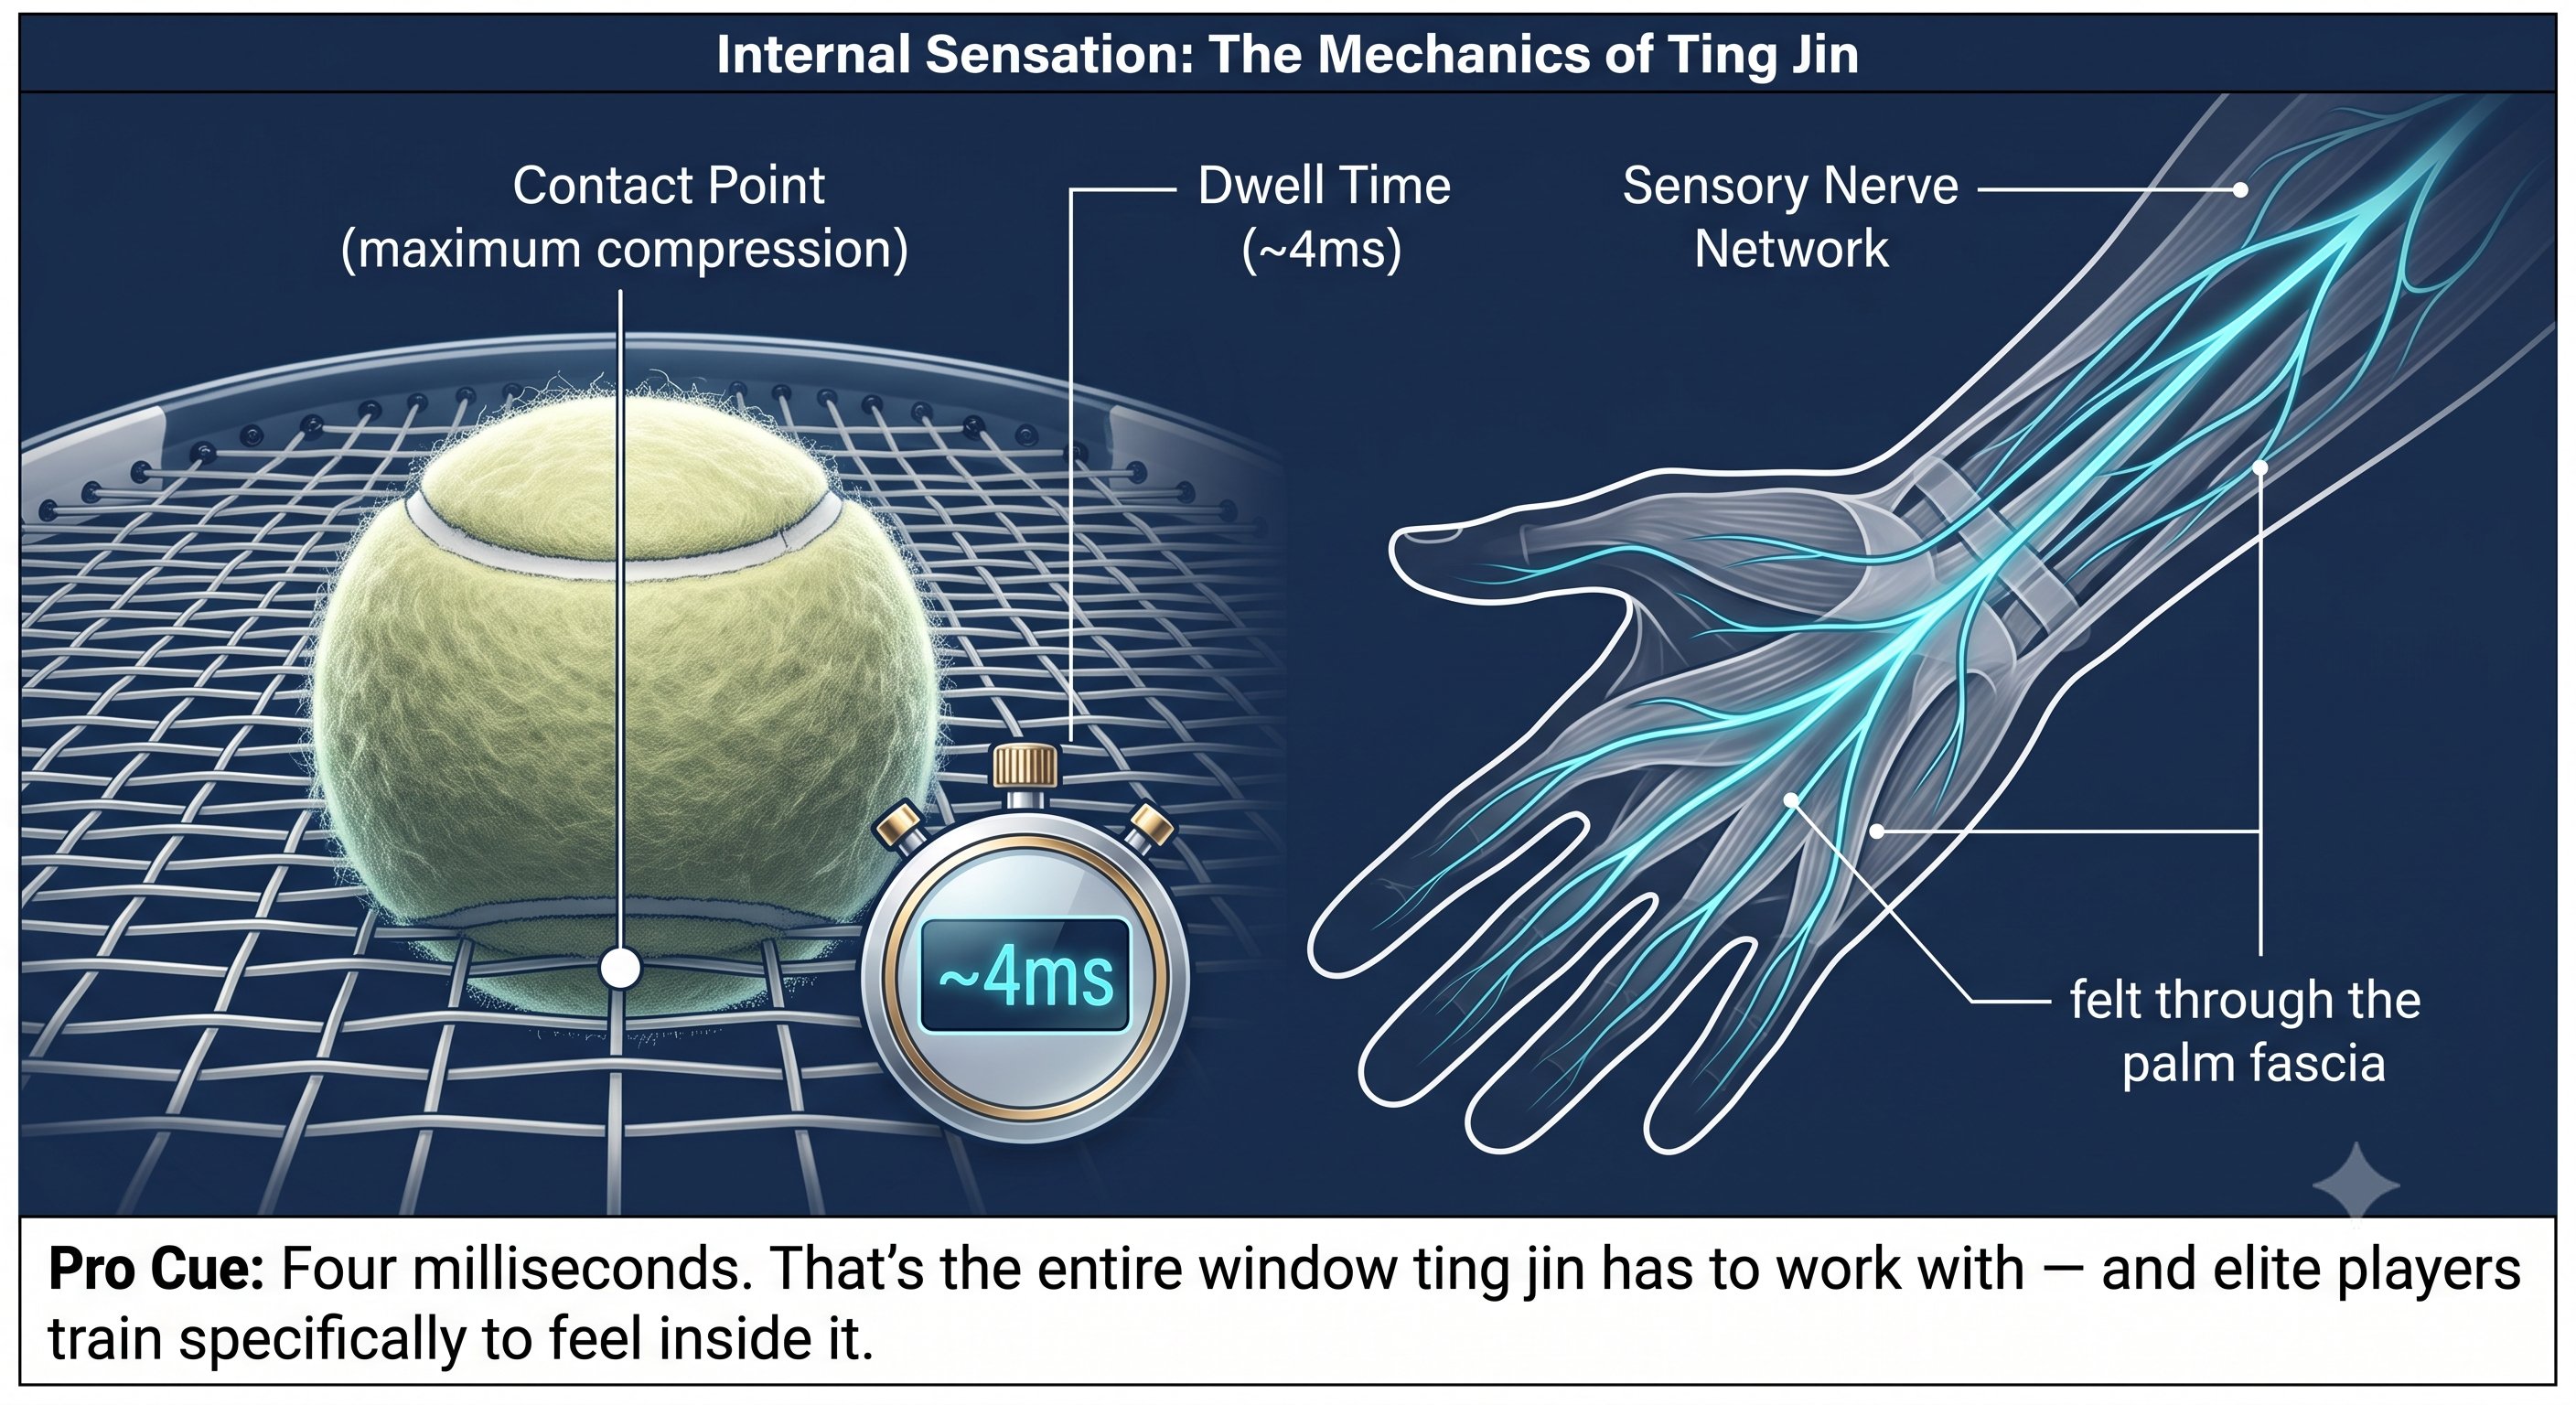
Jin (Unified Force) — Figure 2
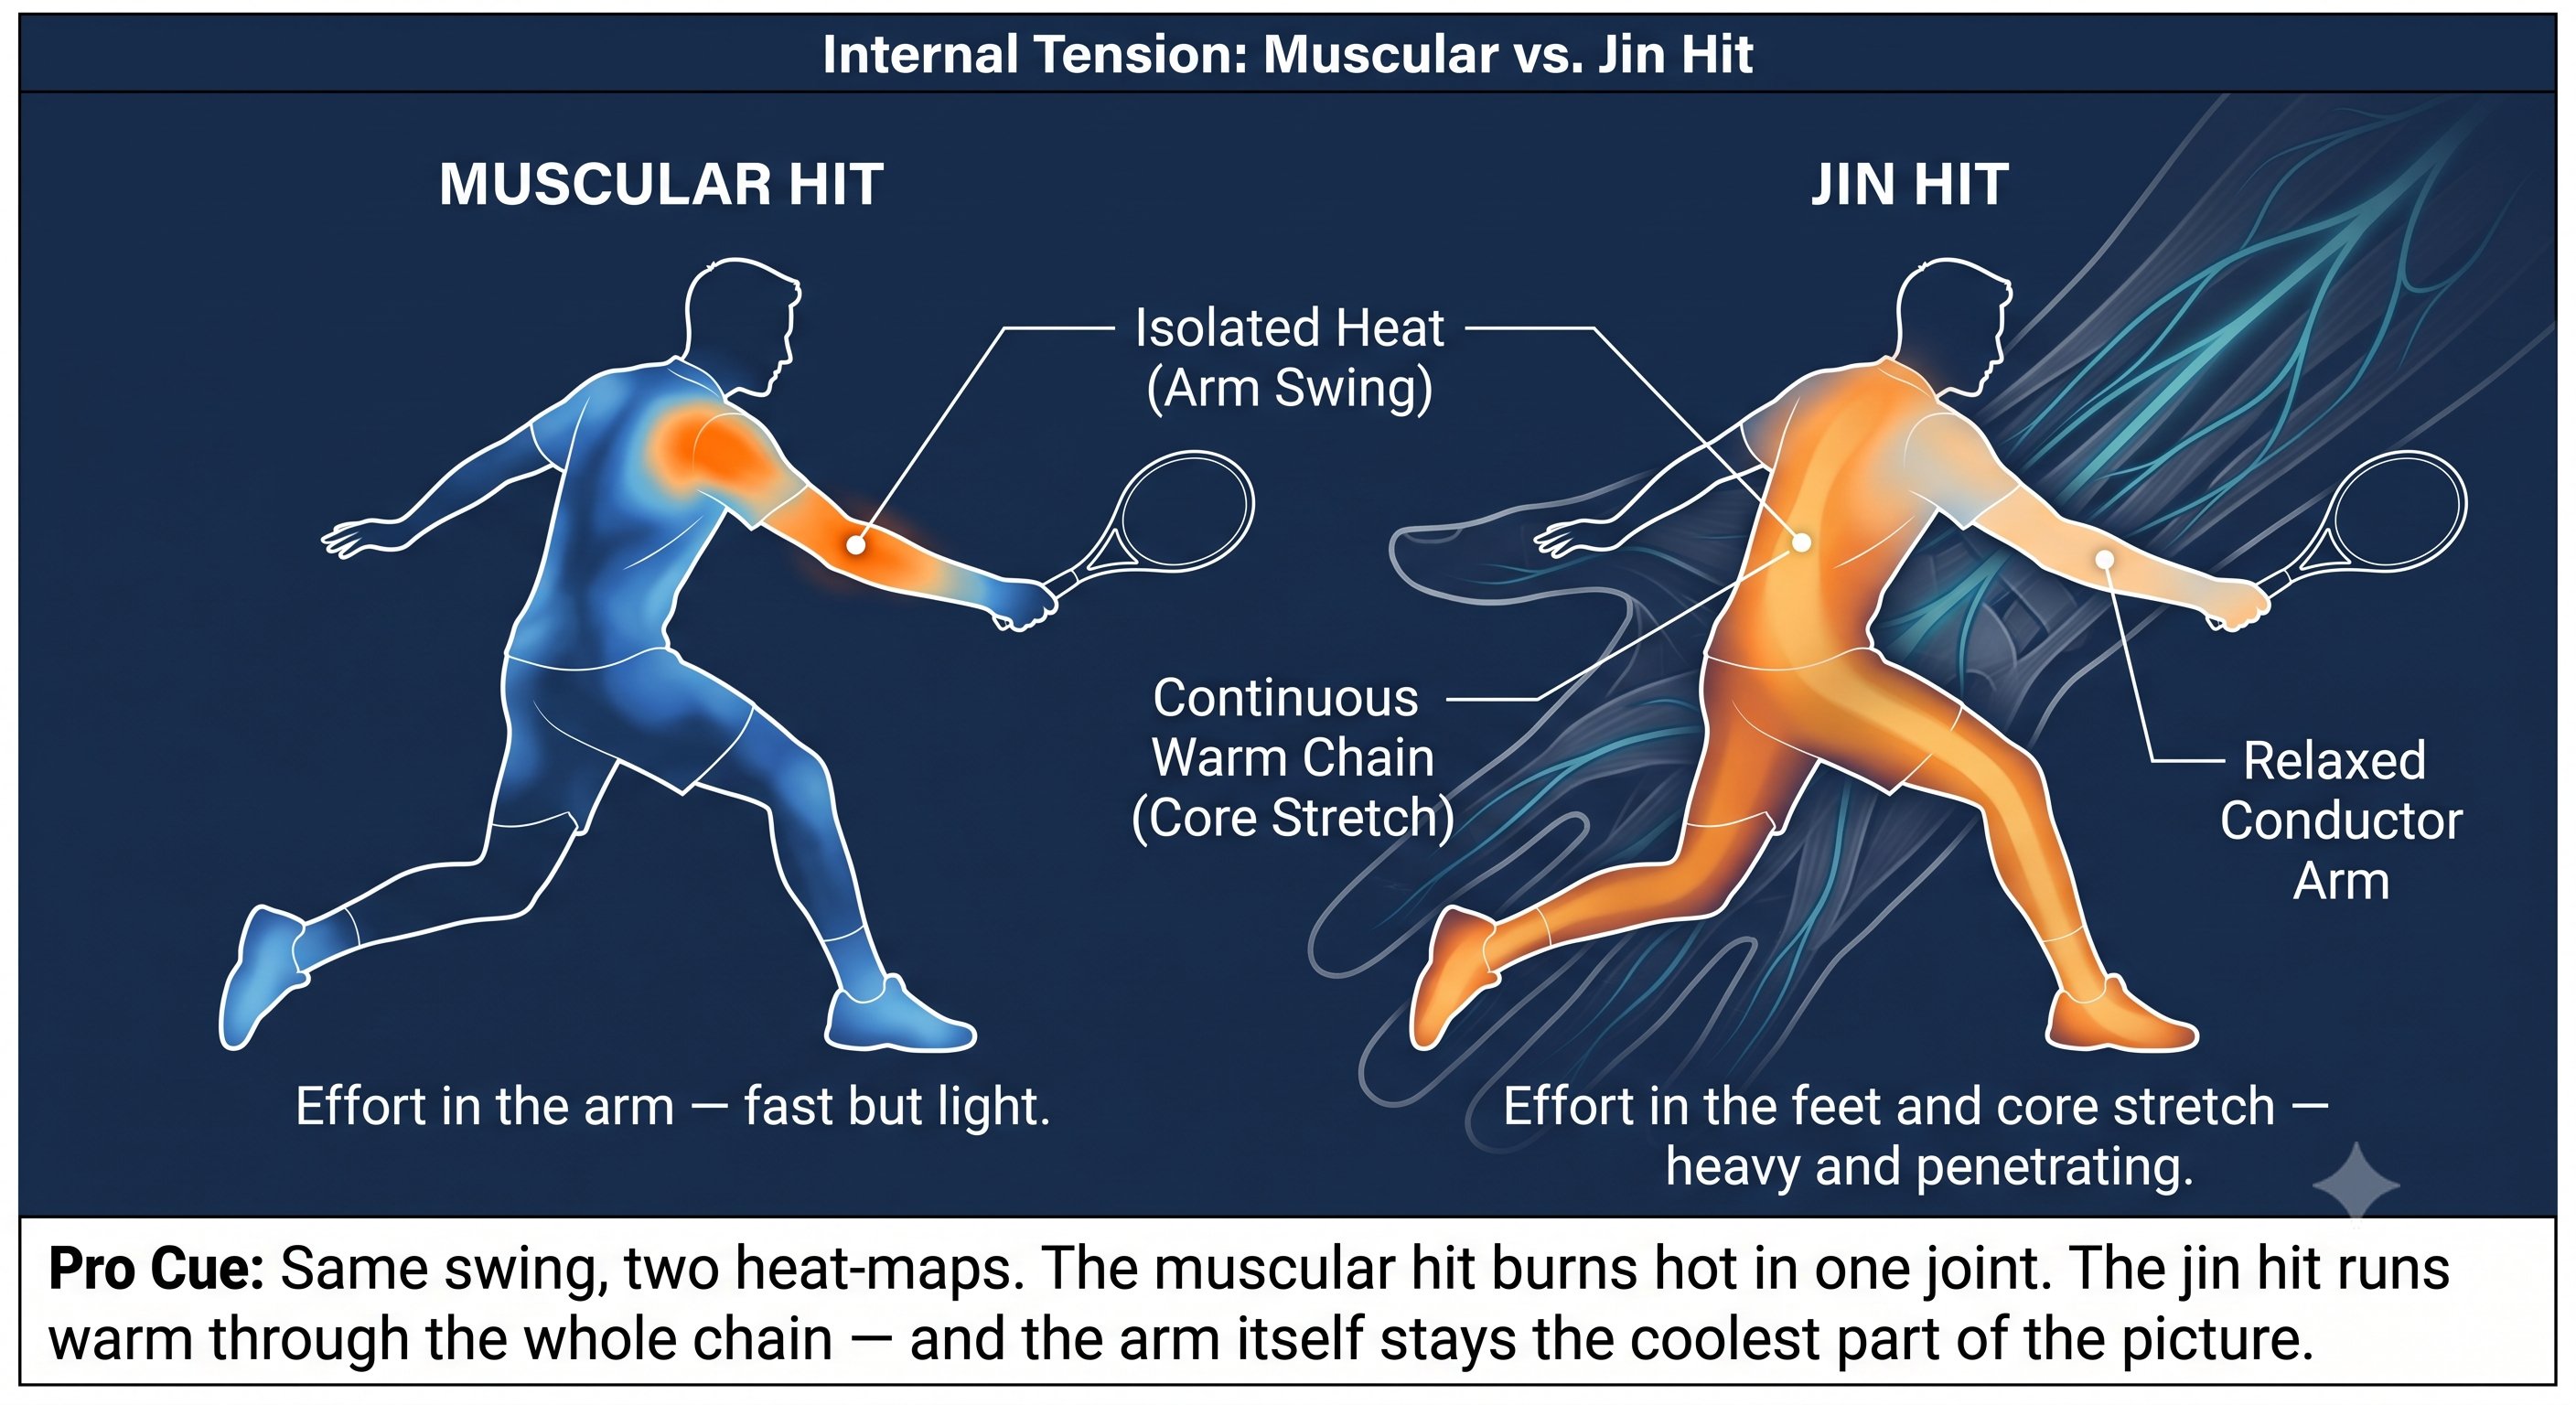
Jin (Unified Force) — Figure 3
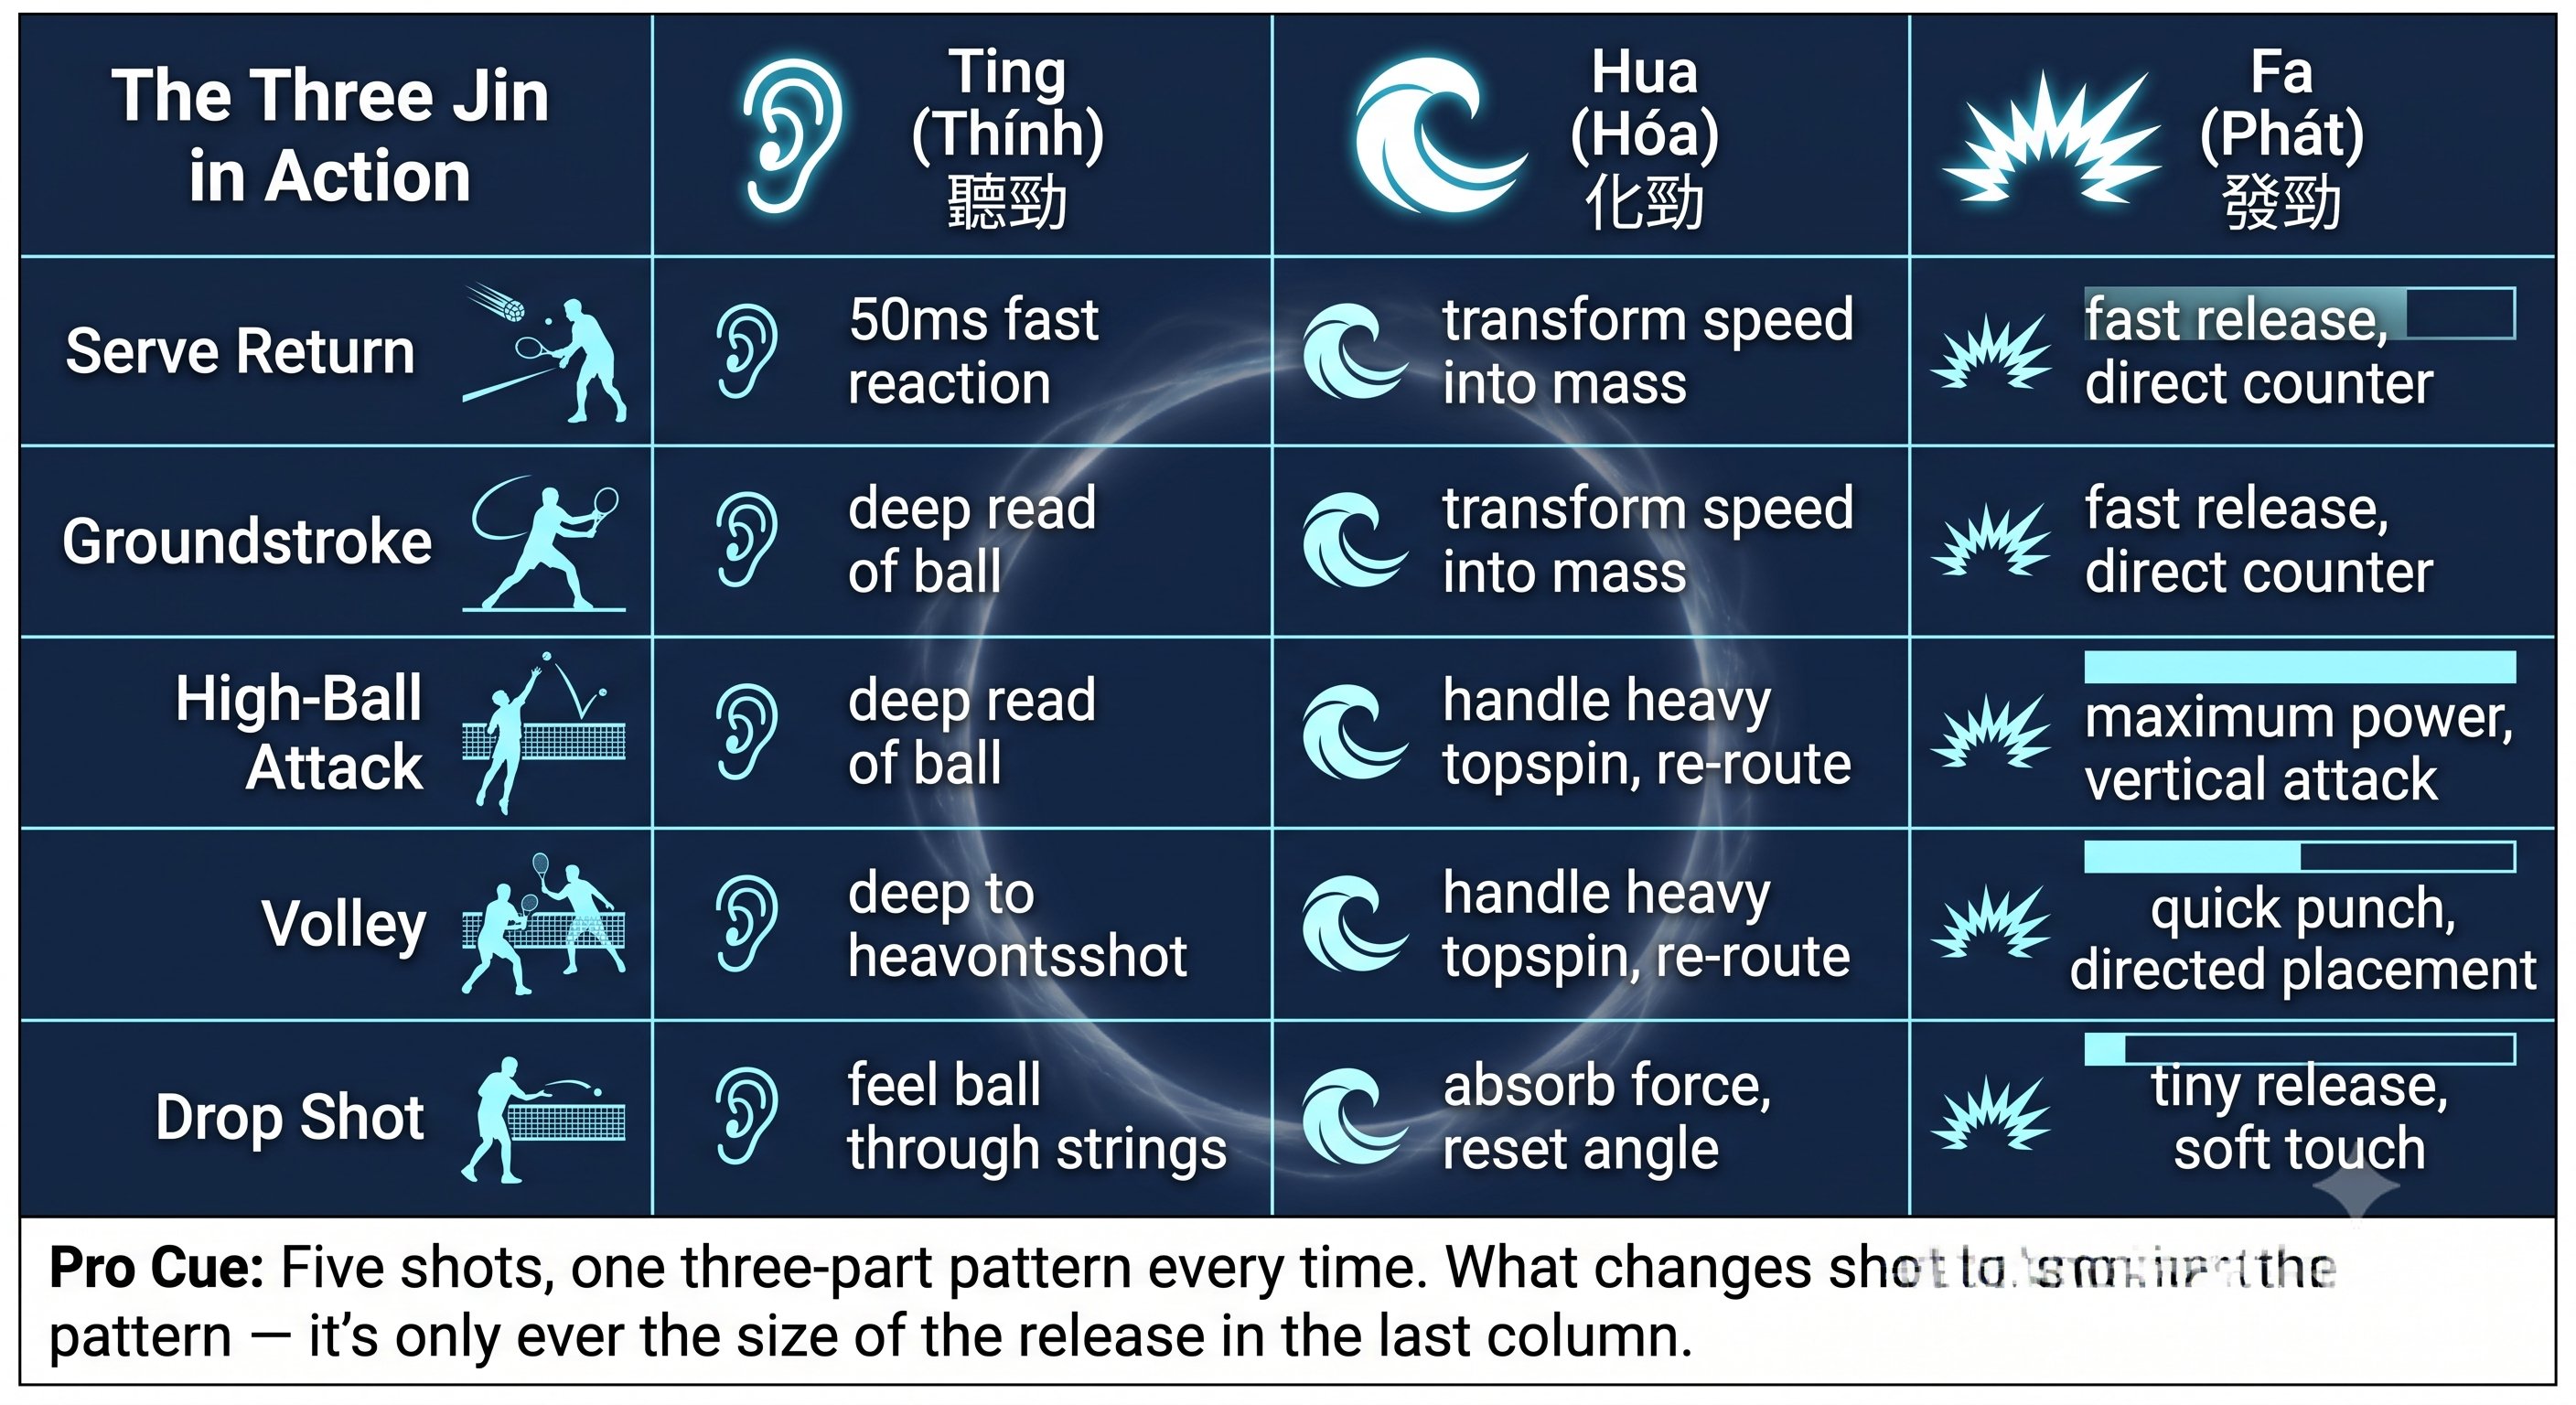
Jin (Unified Force) — Figure 4
🧠 Strategy · Chiến thuật ↑ back to topics
Singles & Doubles patterns, Mental Game, anticipation, shot disguise. Mẫu đơn & đôi, Mental Game, dự đoán, che giấu cú đánh.
Chapter 27: Singles Patterns & Doubles Systems 6 figures
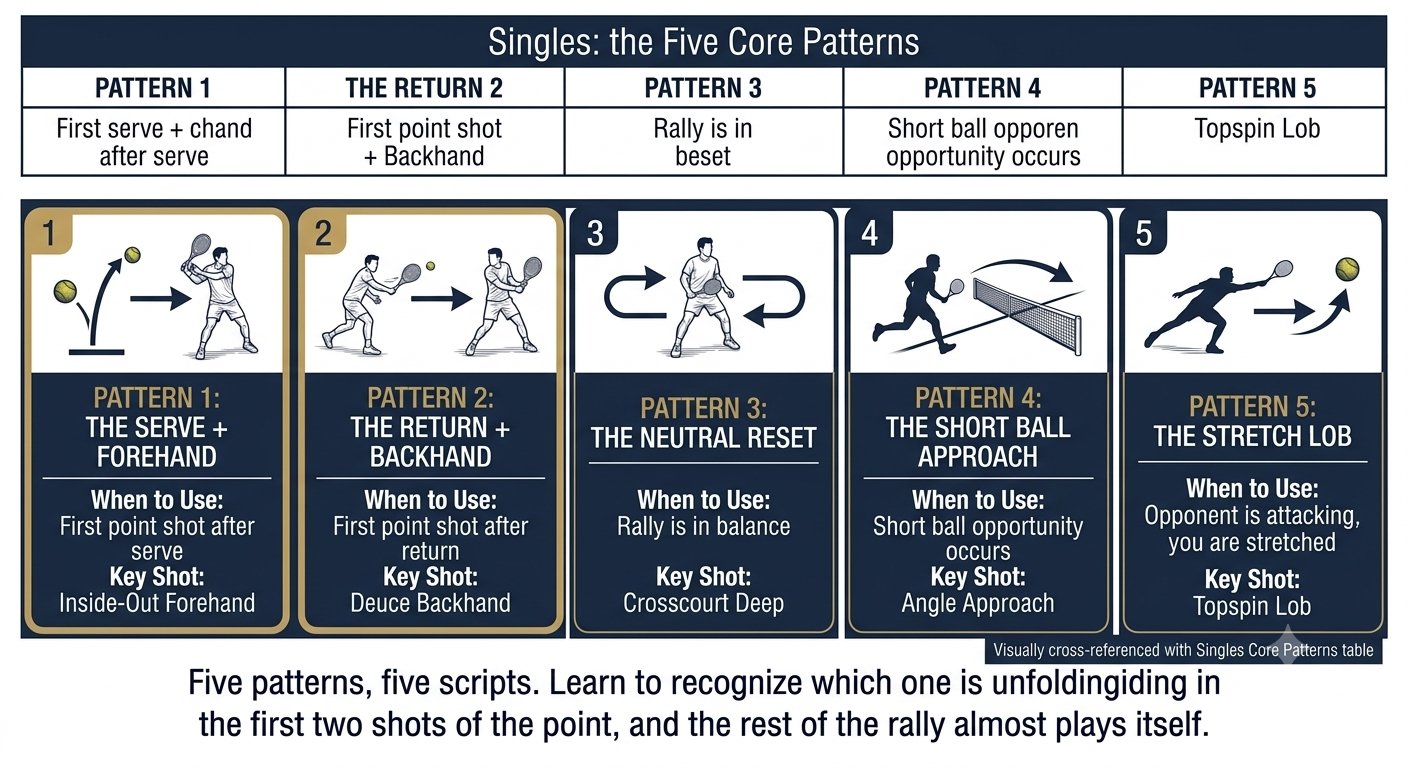
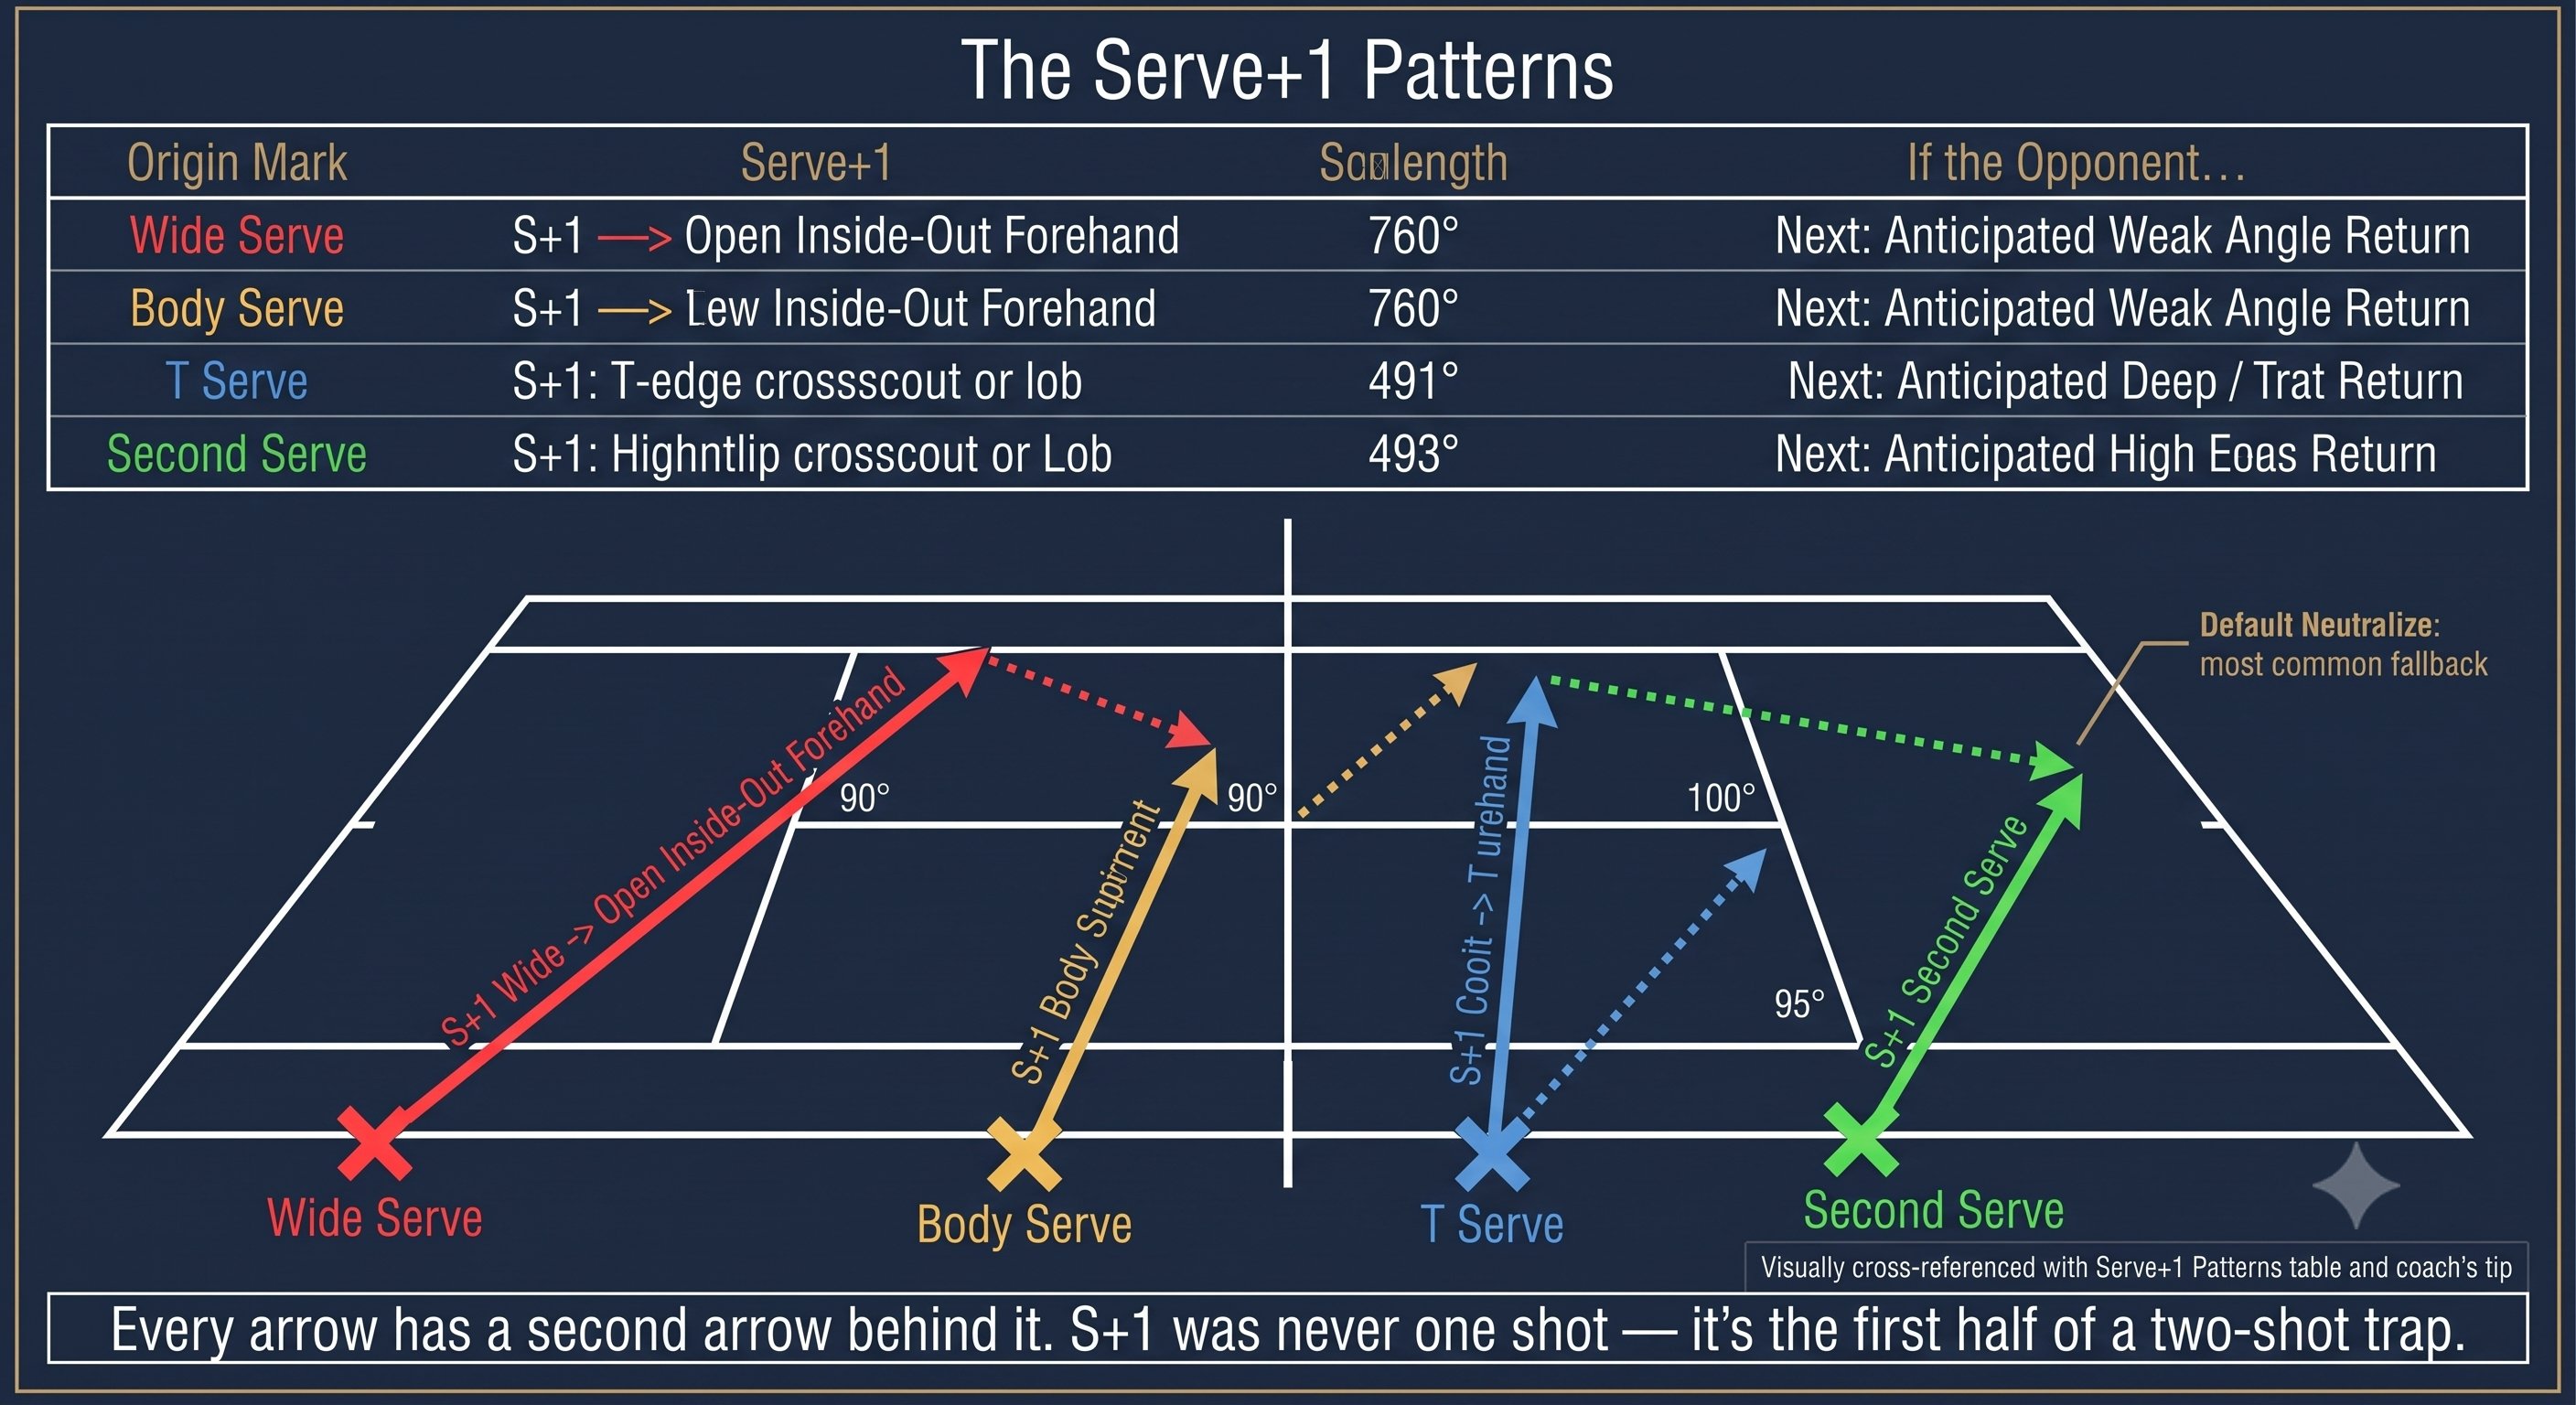
Singles Patterns & Doubles Systems — Figure 1
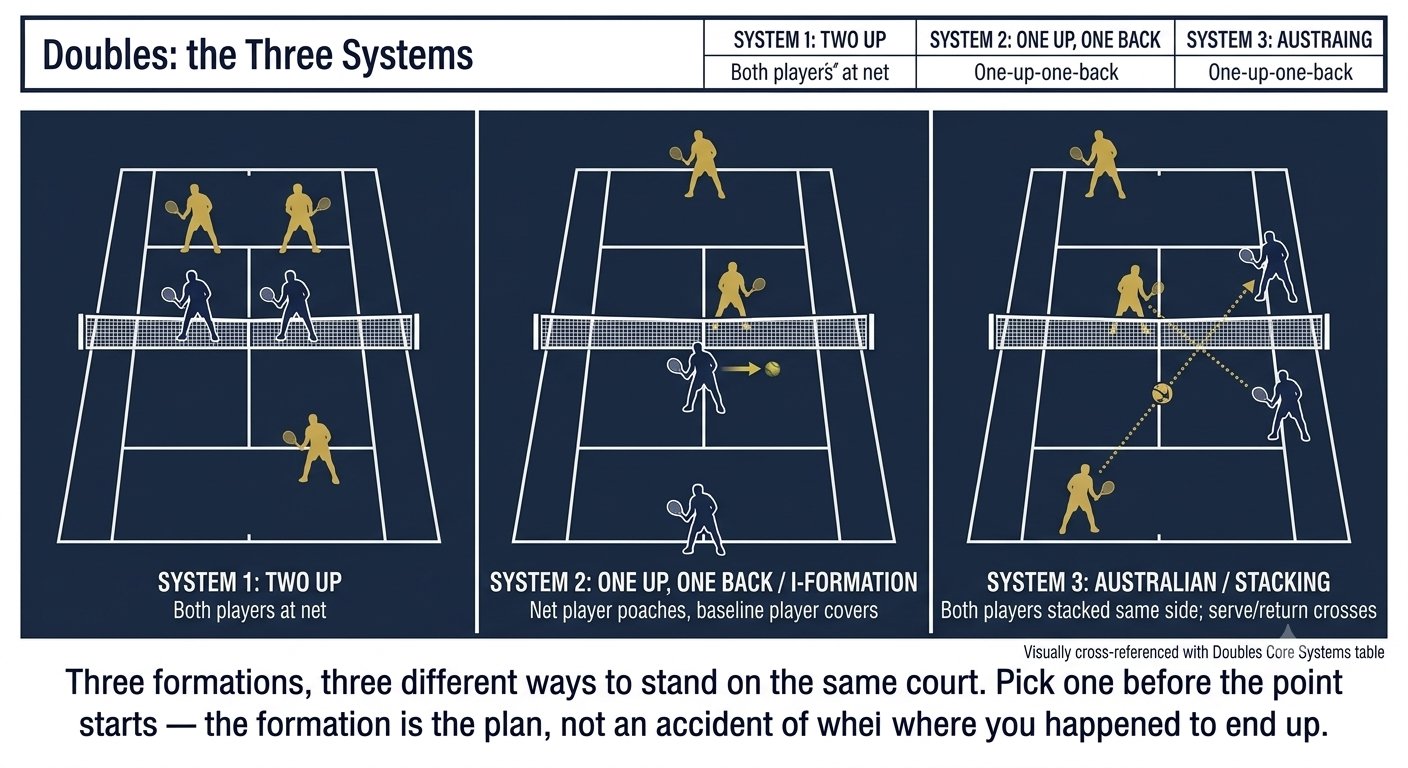
Singles Patterns & Doubles Systems — Figure 2
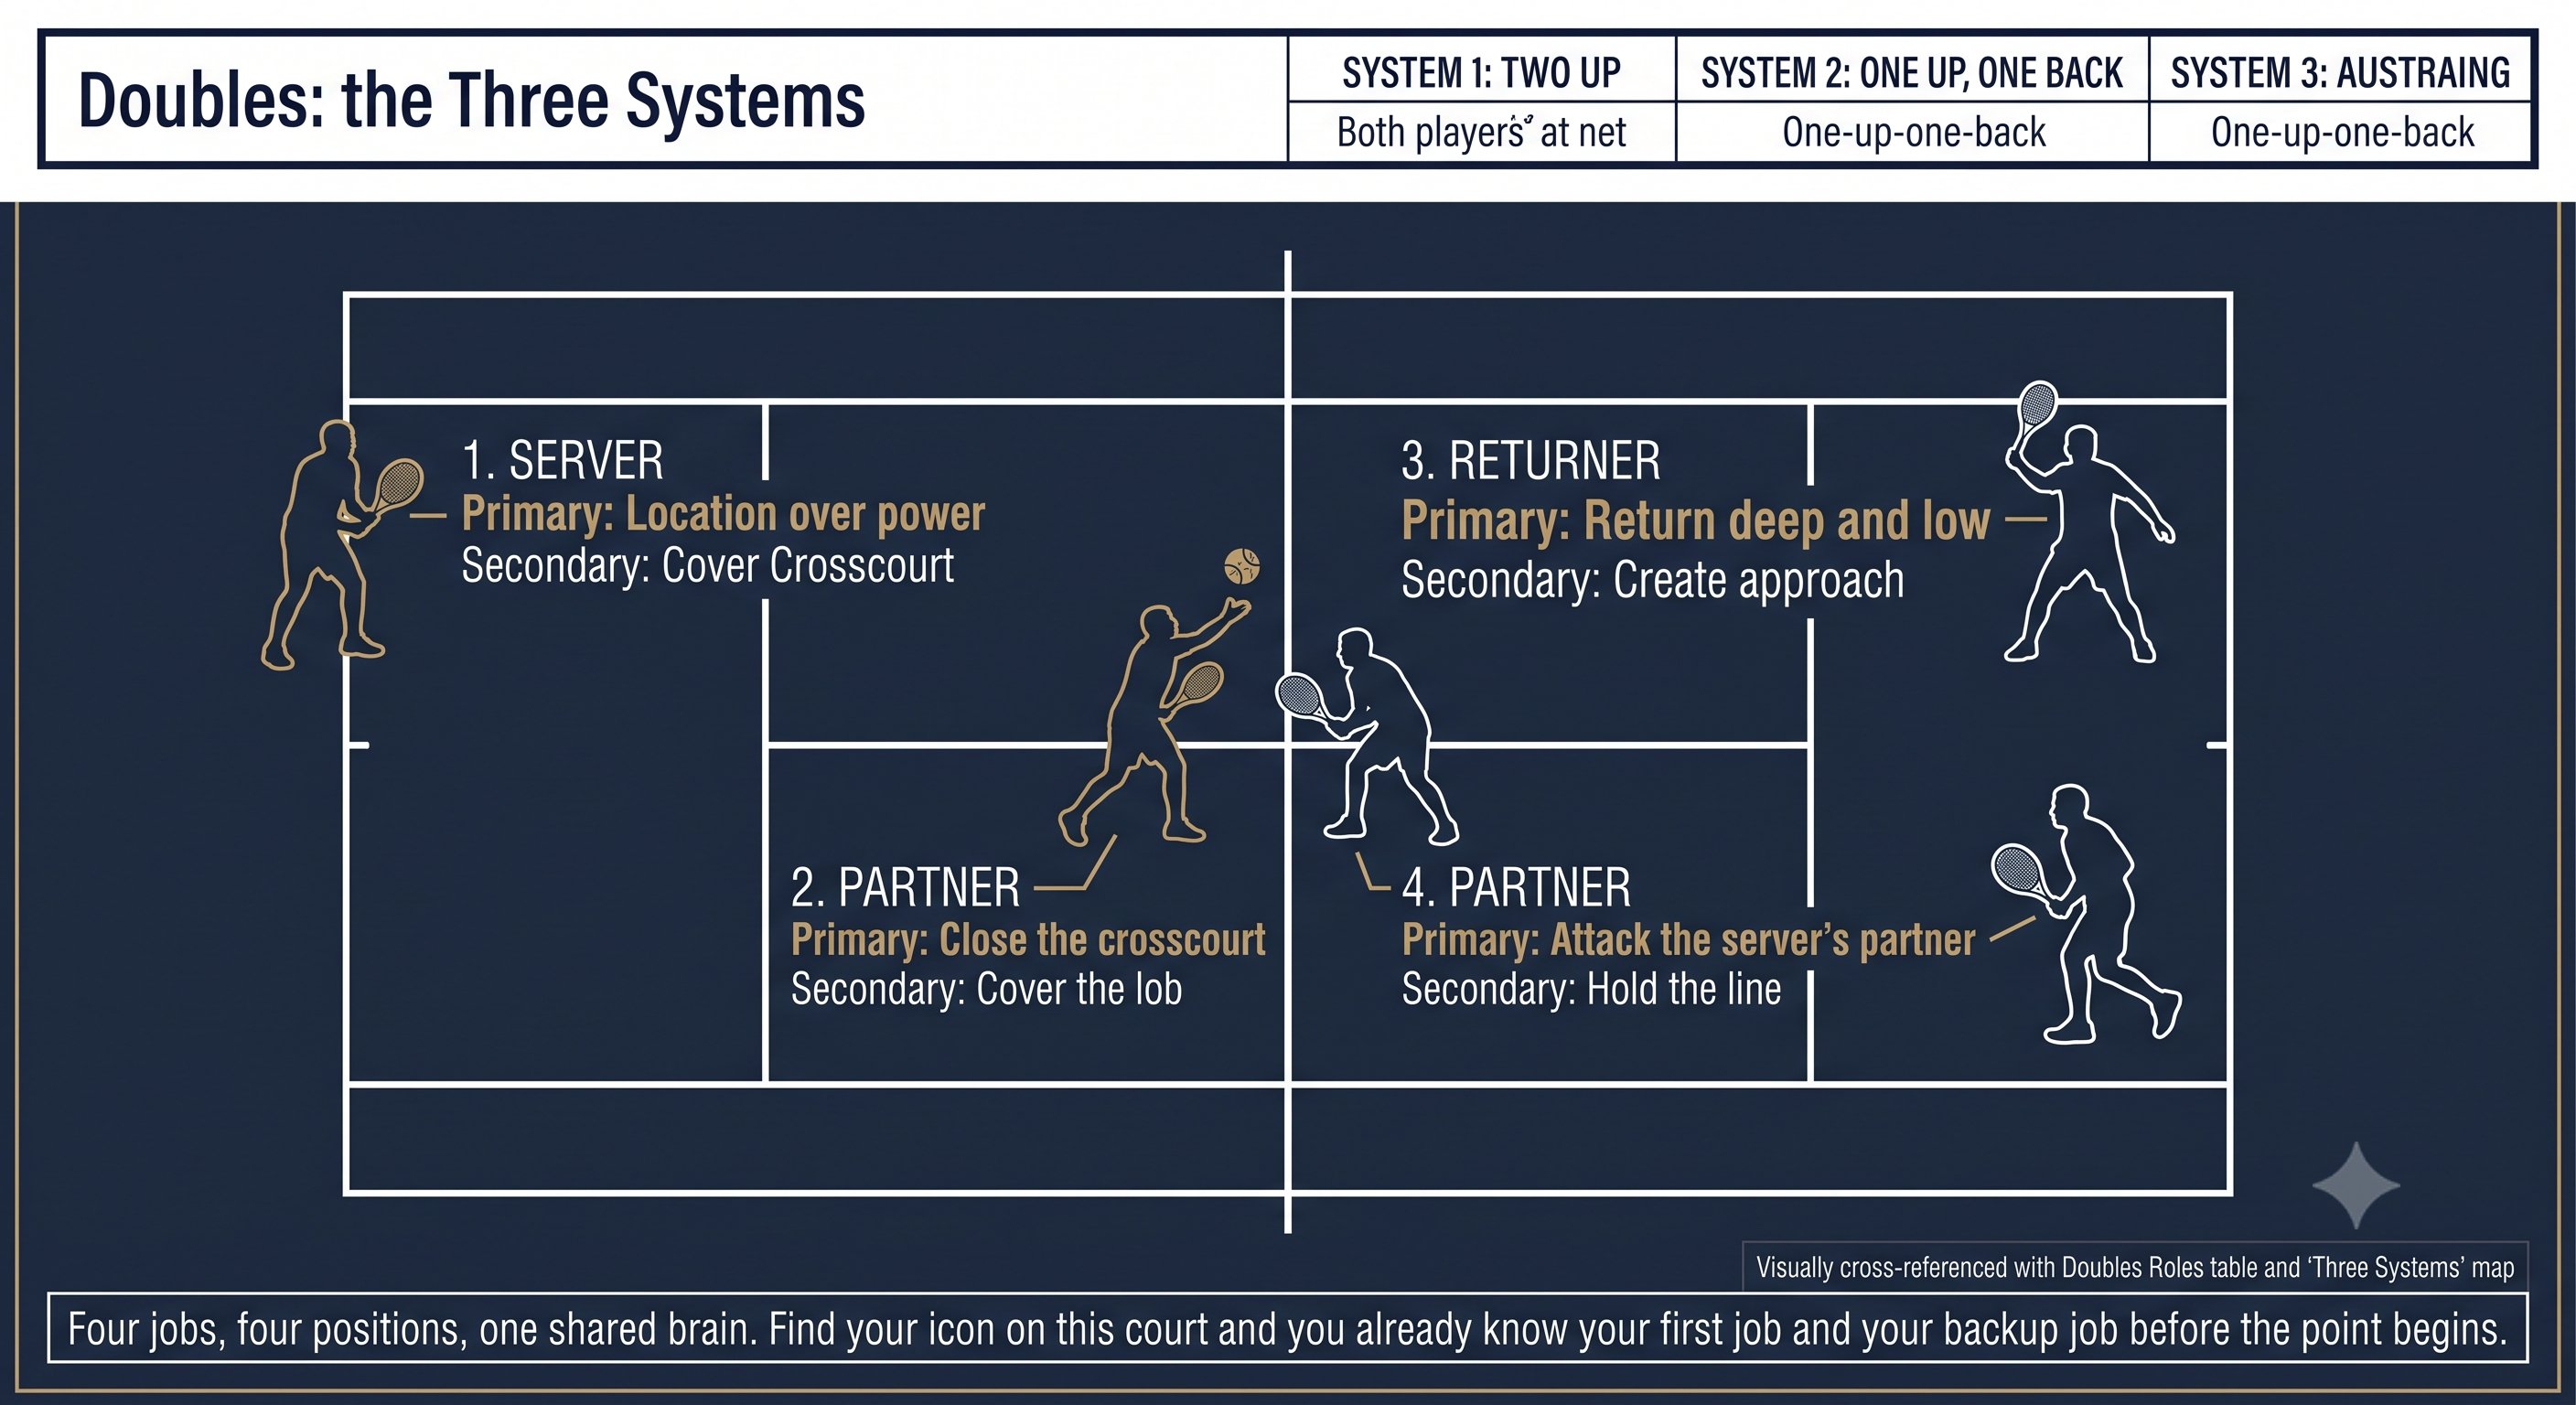
Singles Patterns & Doubles Systems — Figure 3
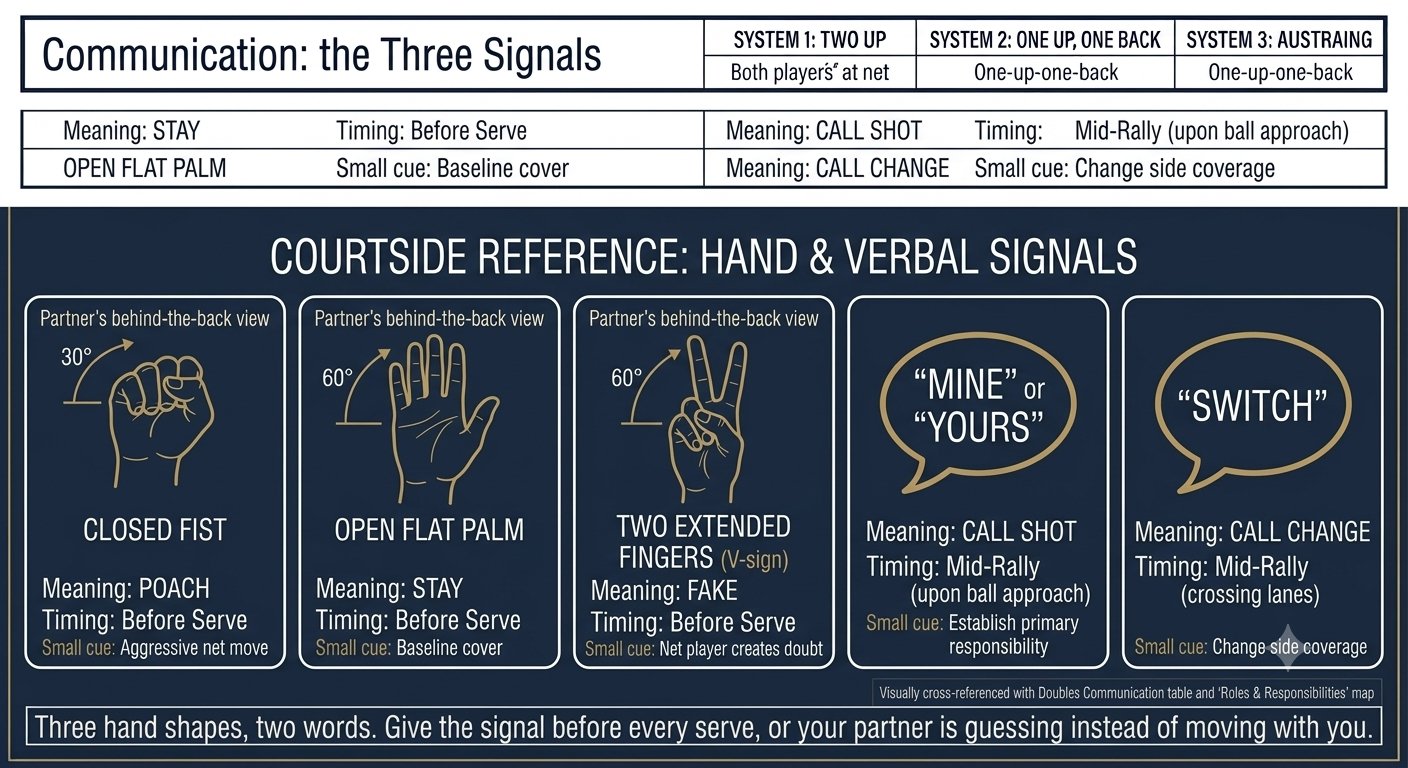
Singles Patterns & Doubles Systems — Figure 4
Singles Patterns & Doubles Systems — Figure 5
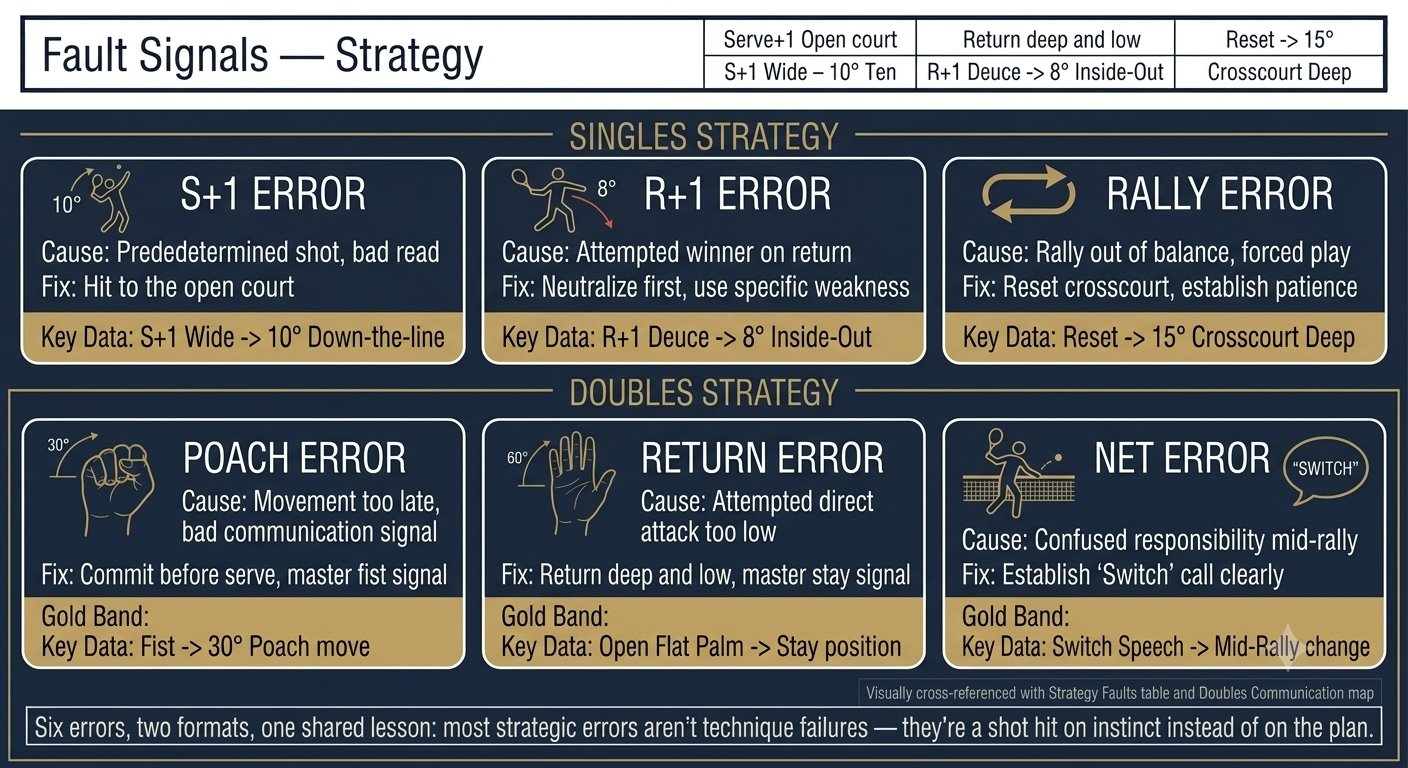
Singles Patterns & Doubles Systems — Figure 6
Chapter 28: Mental Game 4 figures
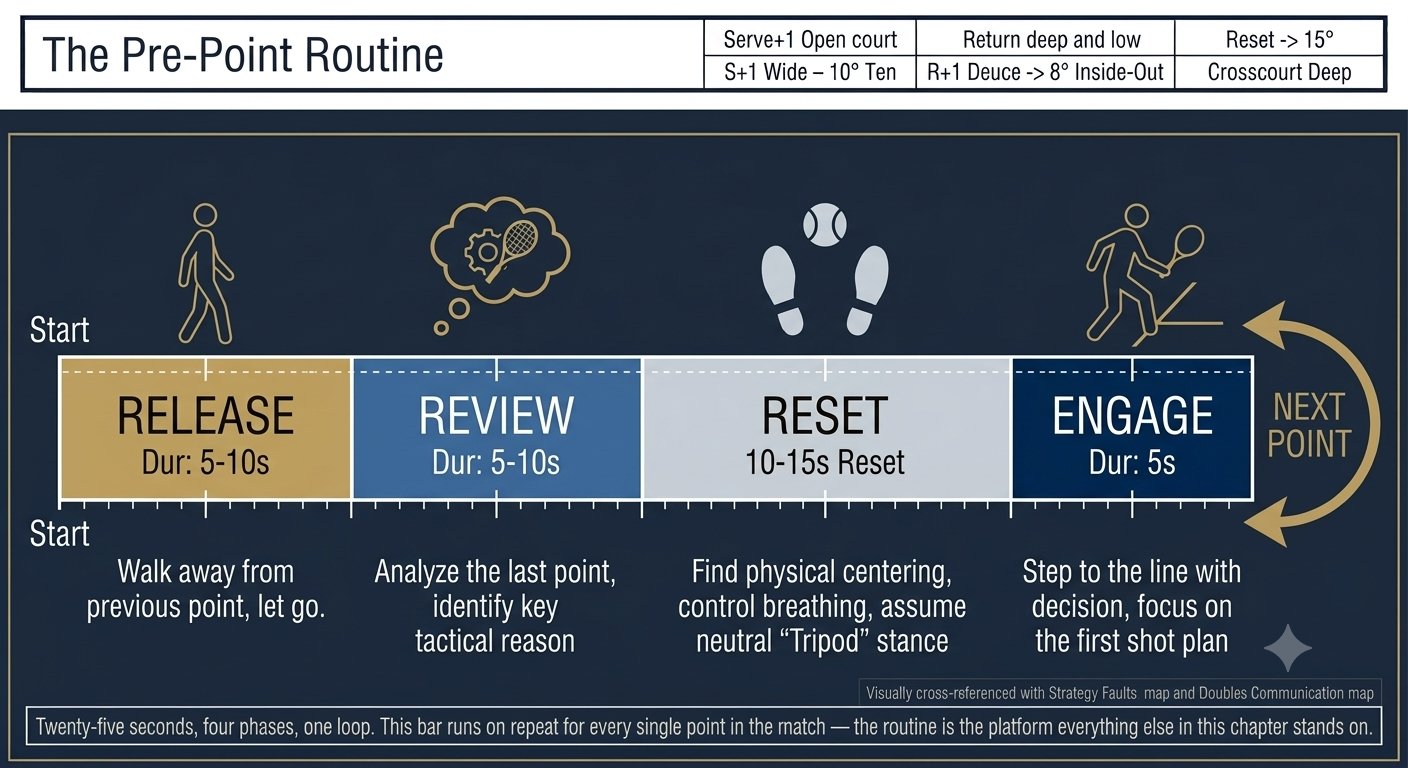
Mental Game — Figure 1
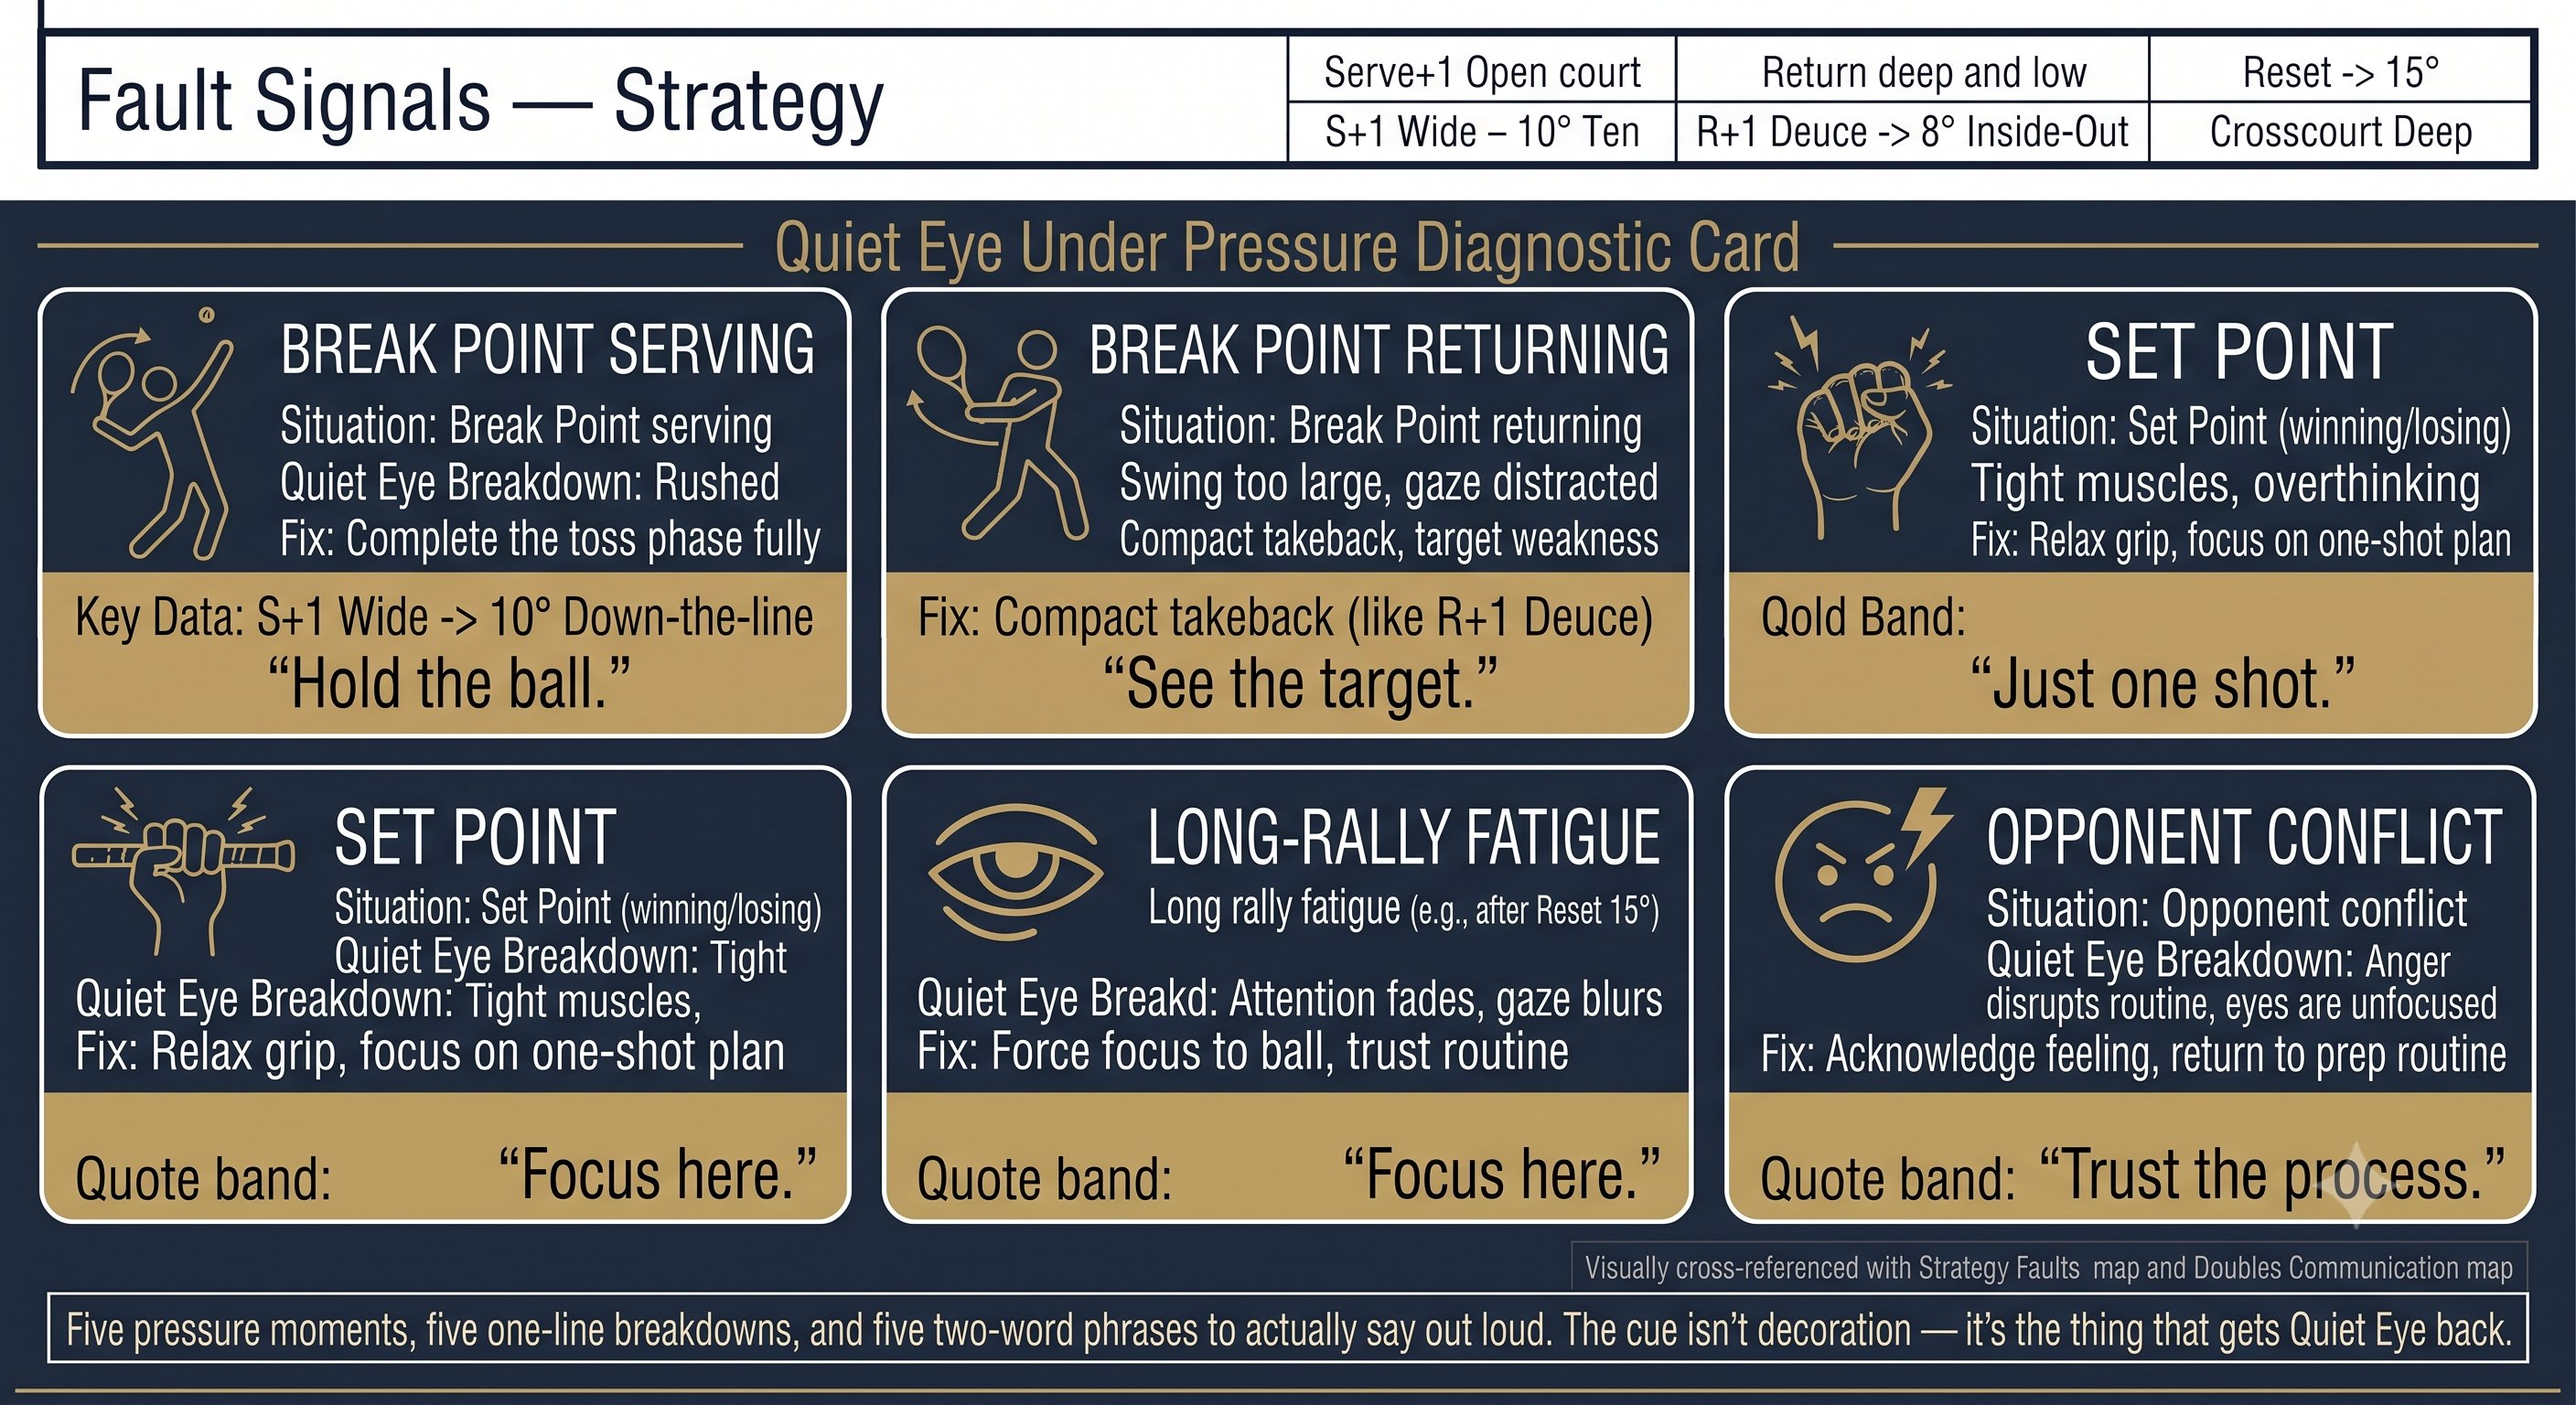
Mental Game — Figure 2
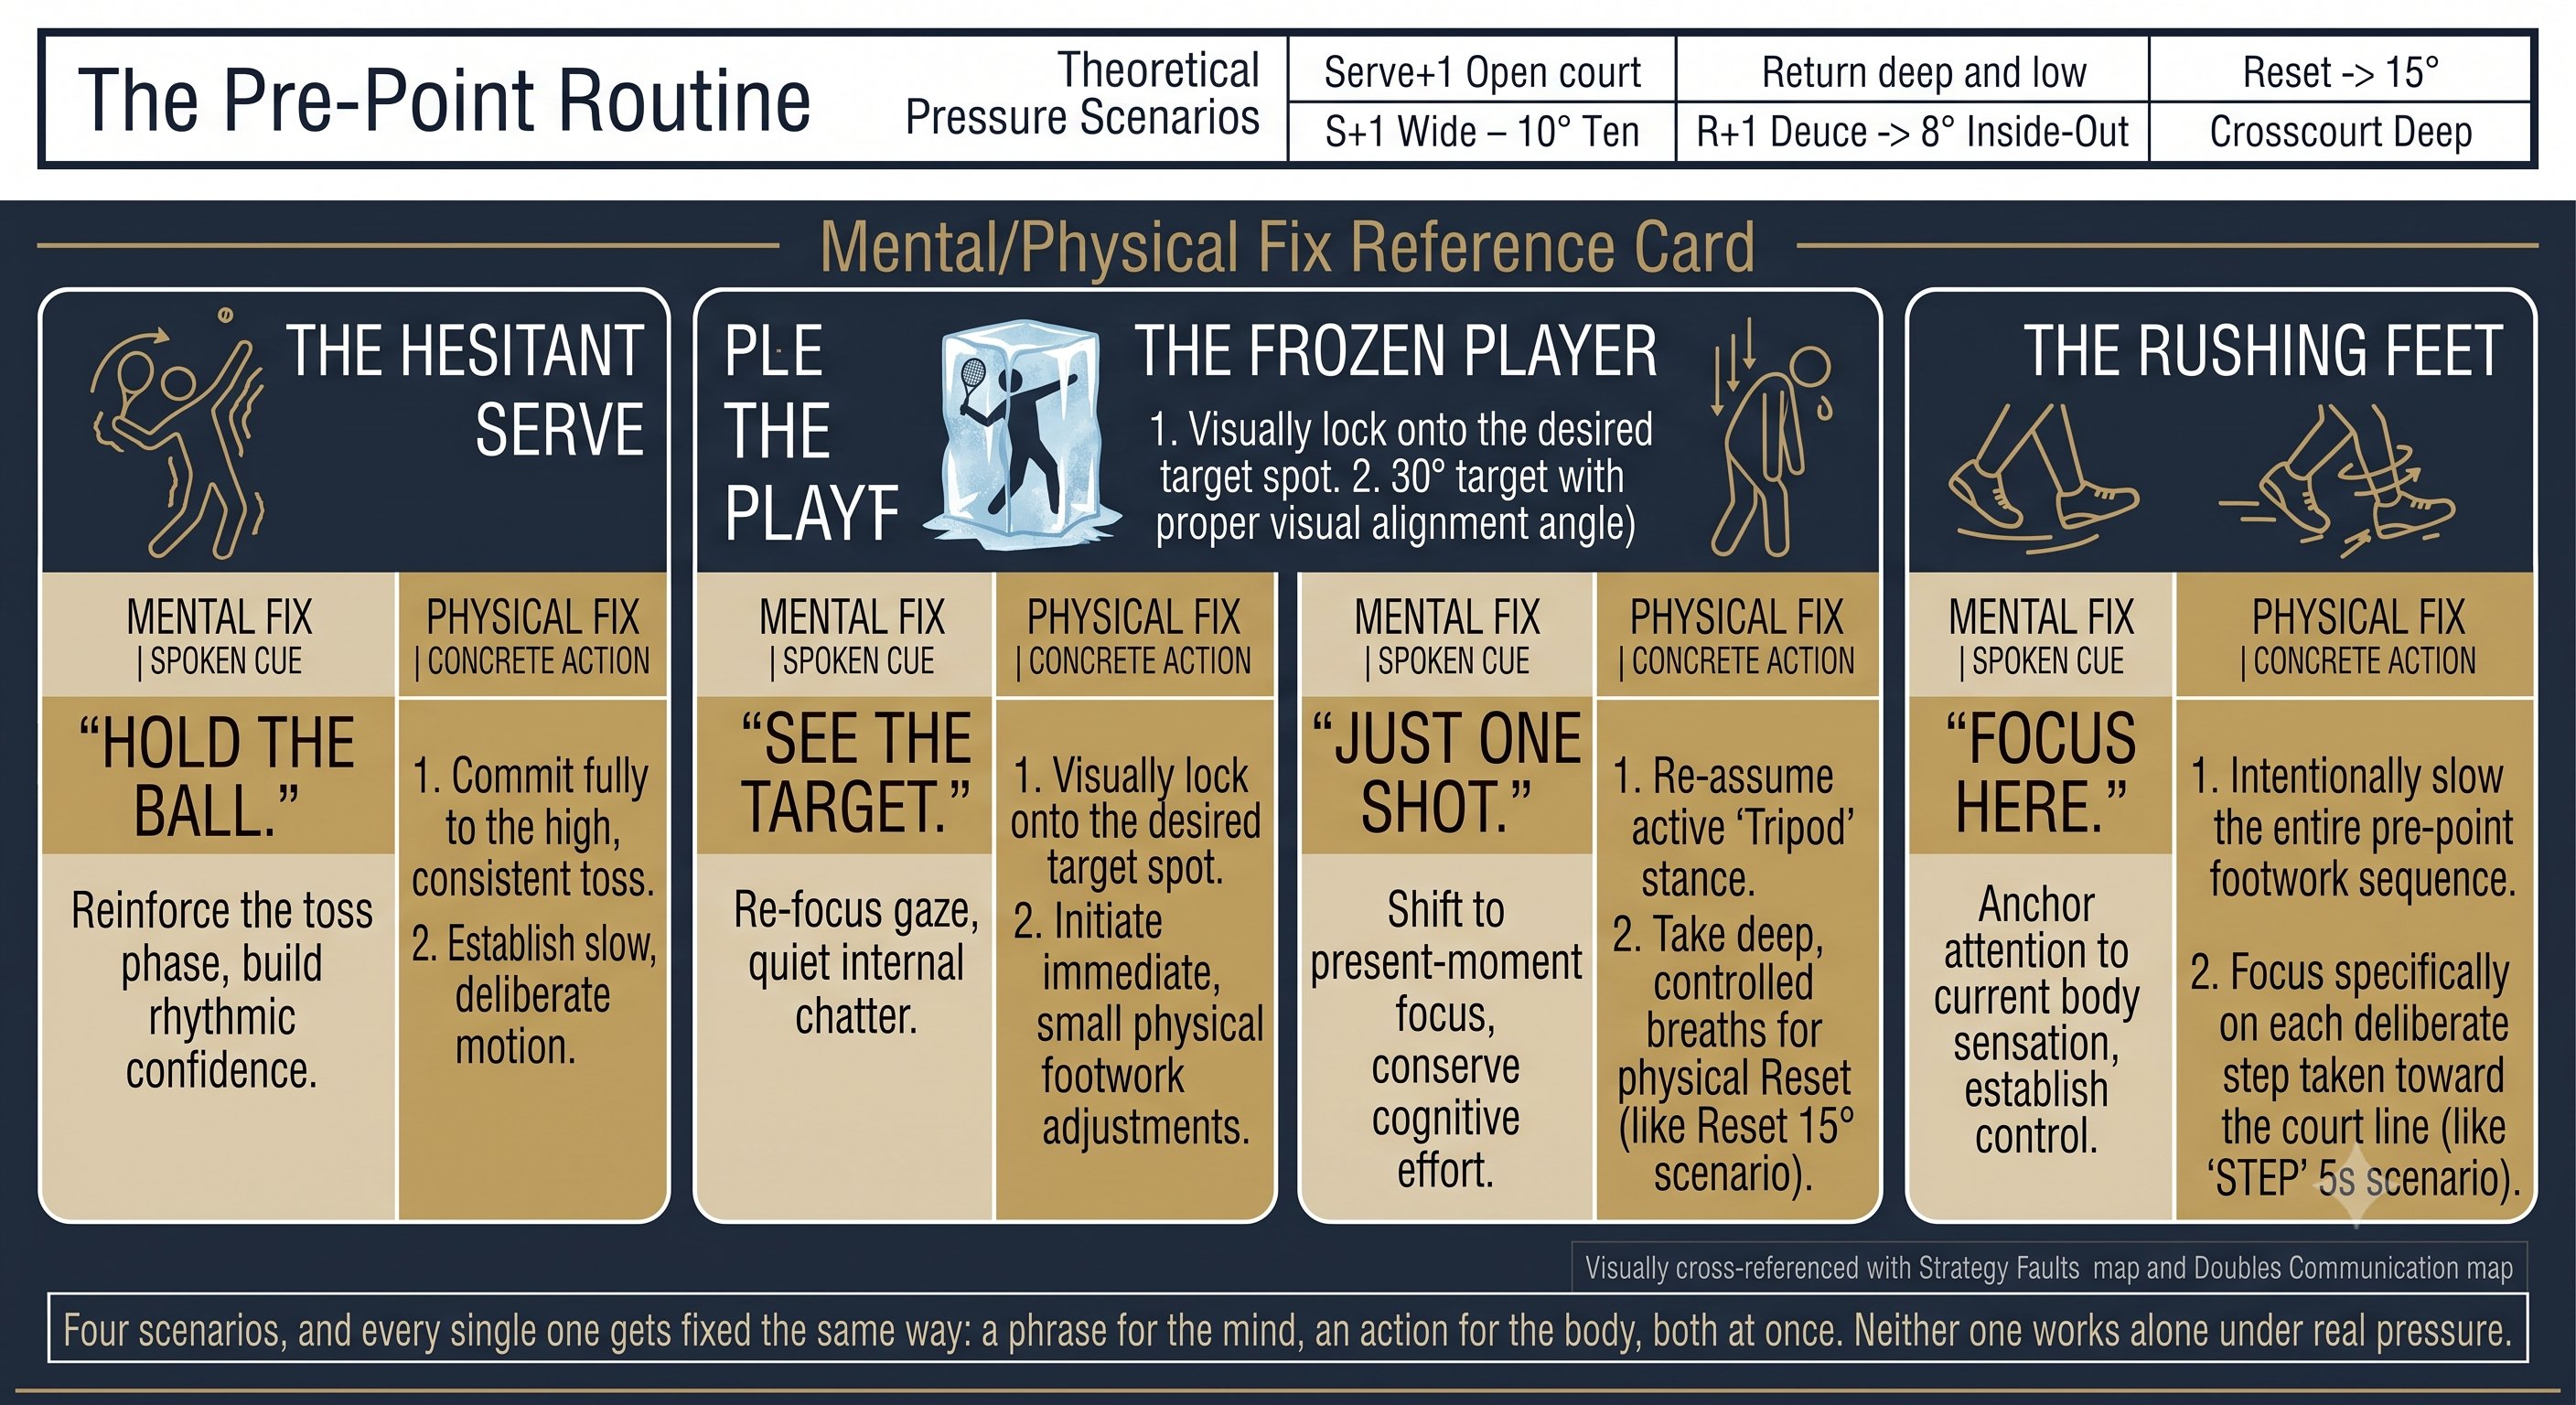
Mental Game — Figure 3
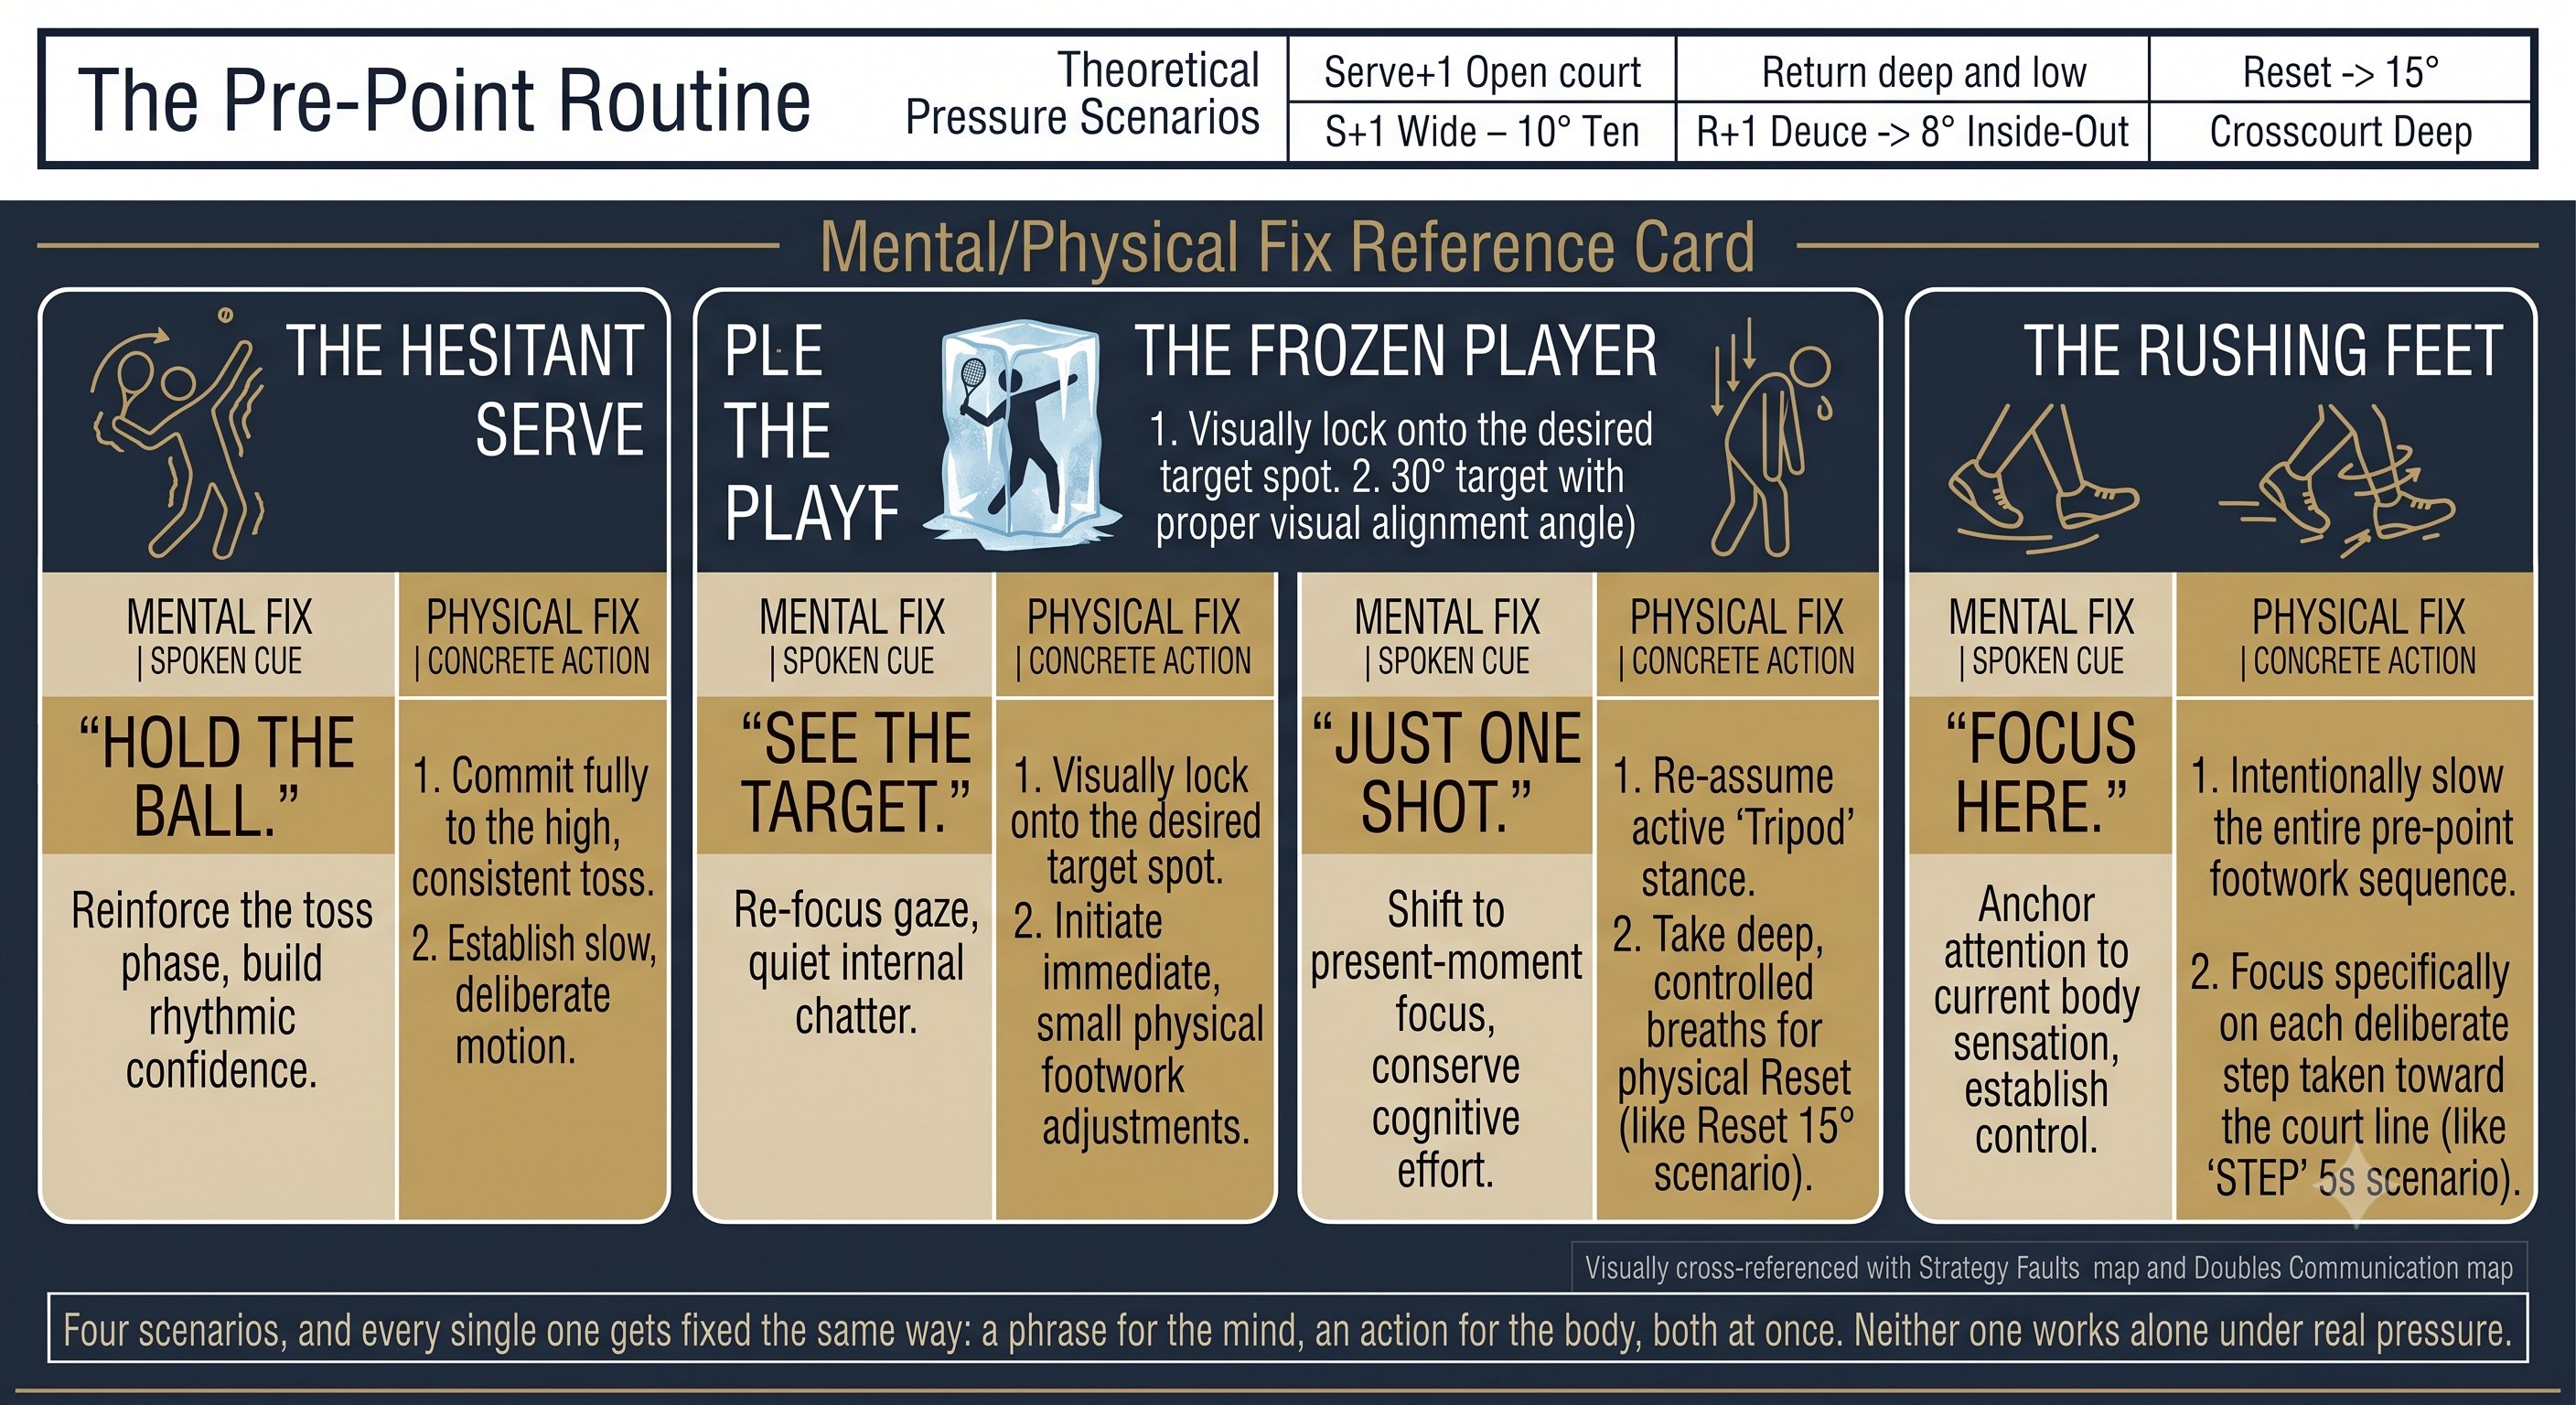
Mental Game — Figure 4
🌐 Multi-topic · Đa chủ đề ↑ back to topics
Foundations — Problem, Tool, Precision, Outcome, Energy, Transmission, CORE; Physical; Unified System. Nền tảng — Vấn đề, Công cụ, Chính xác, Kết quả, Năng lượng, Truyền lực, CORE; Thể lực; Hệ thống hợp nhất.
Chapter 1: The Problem 5 figures
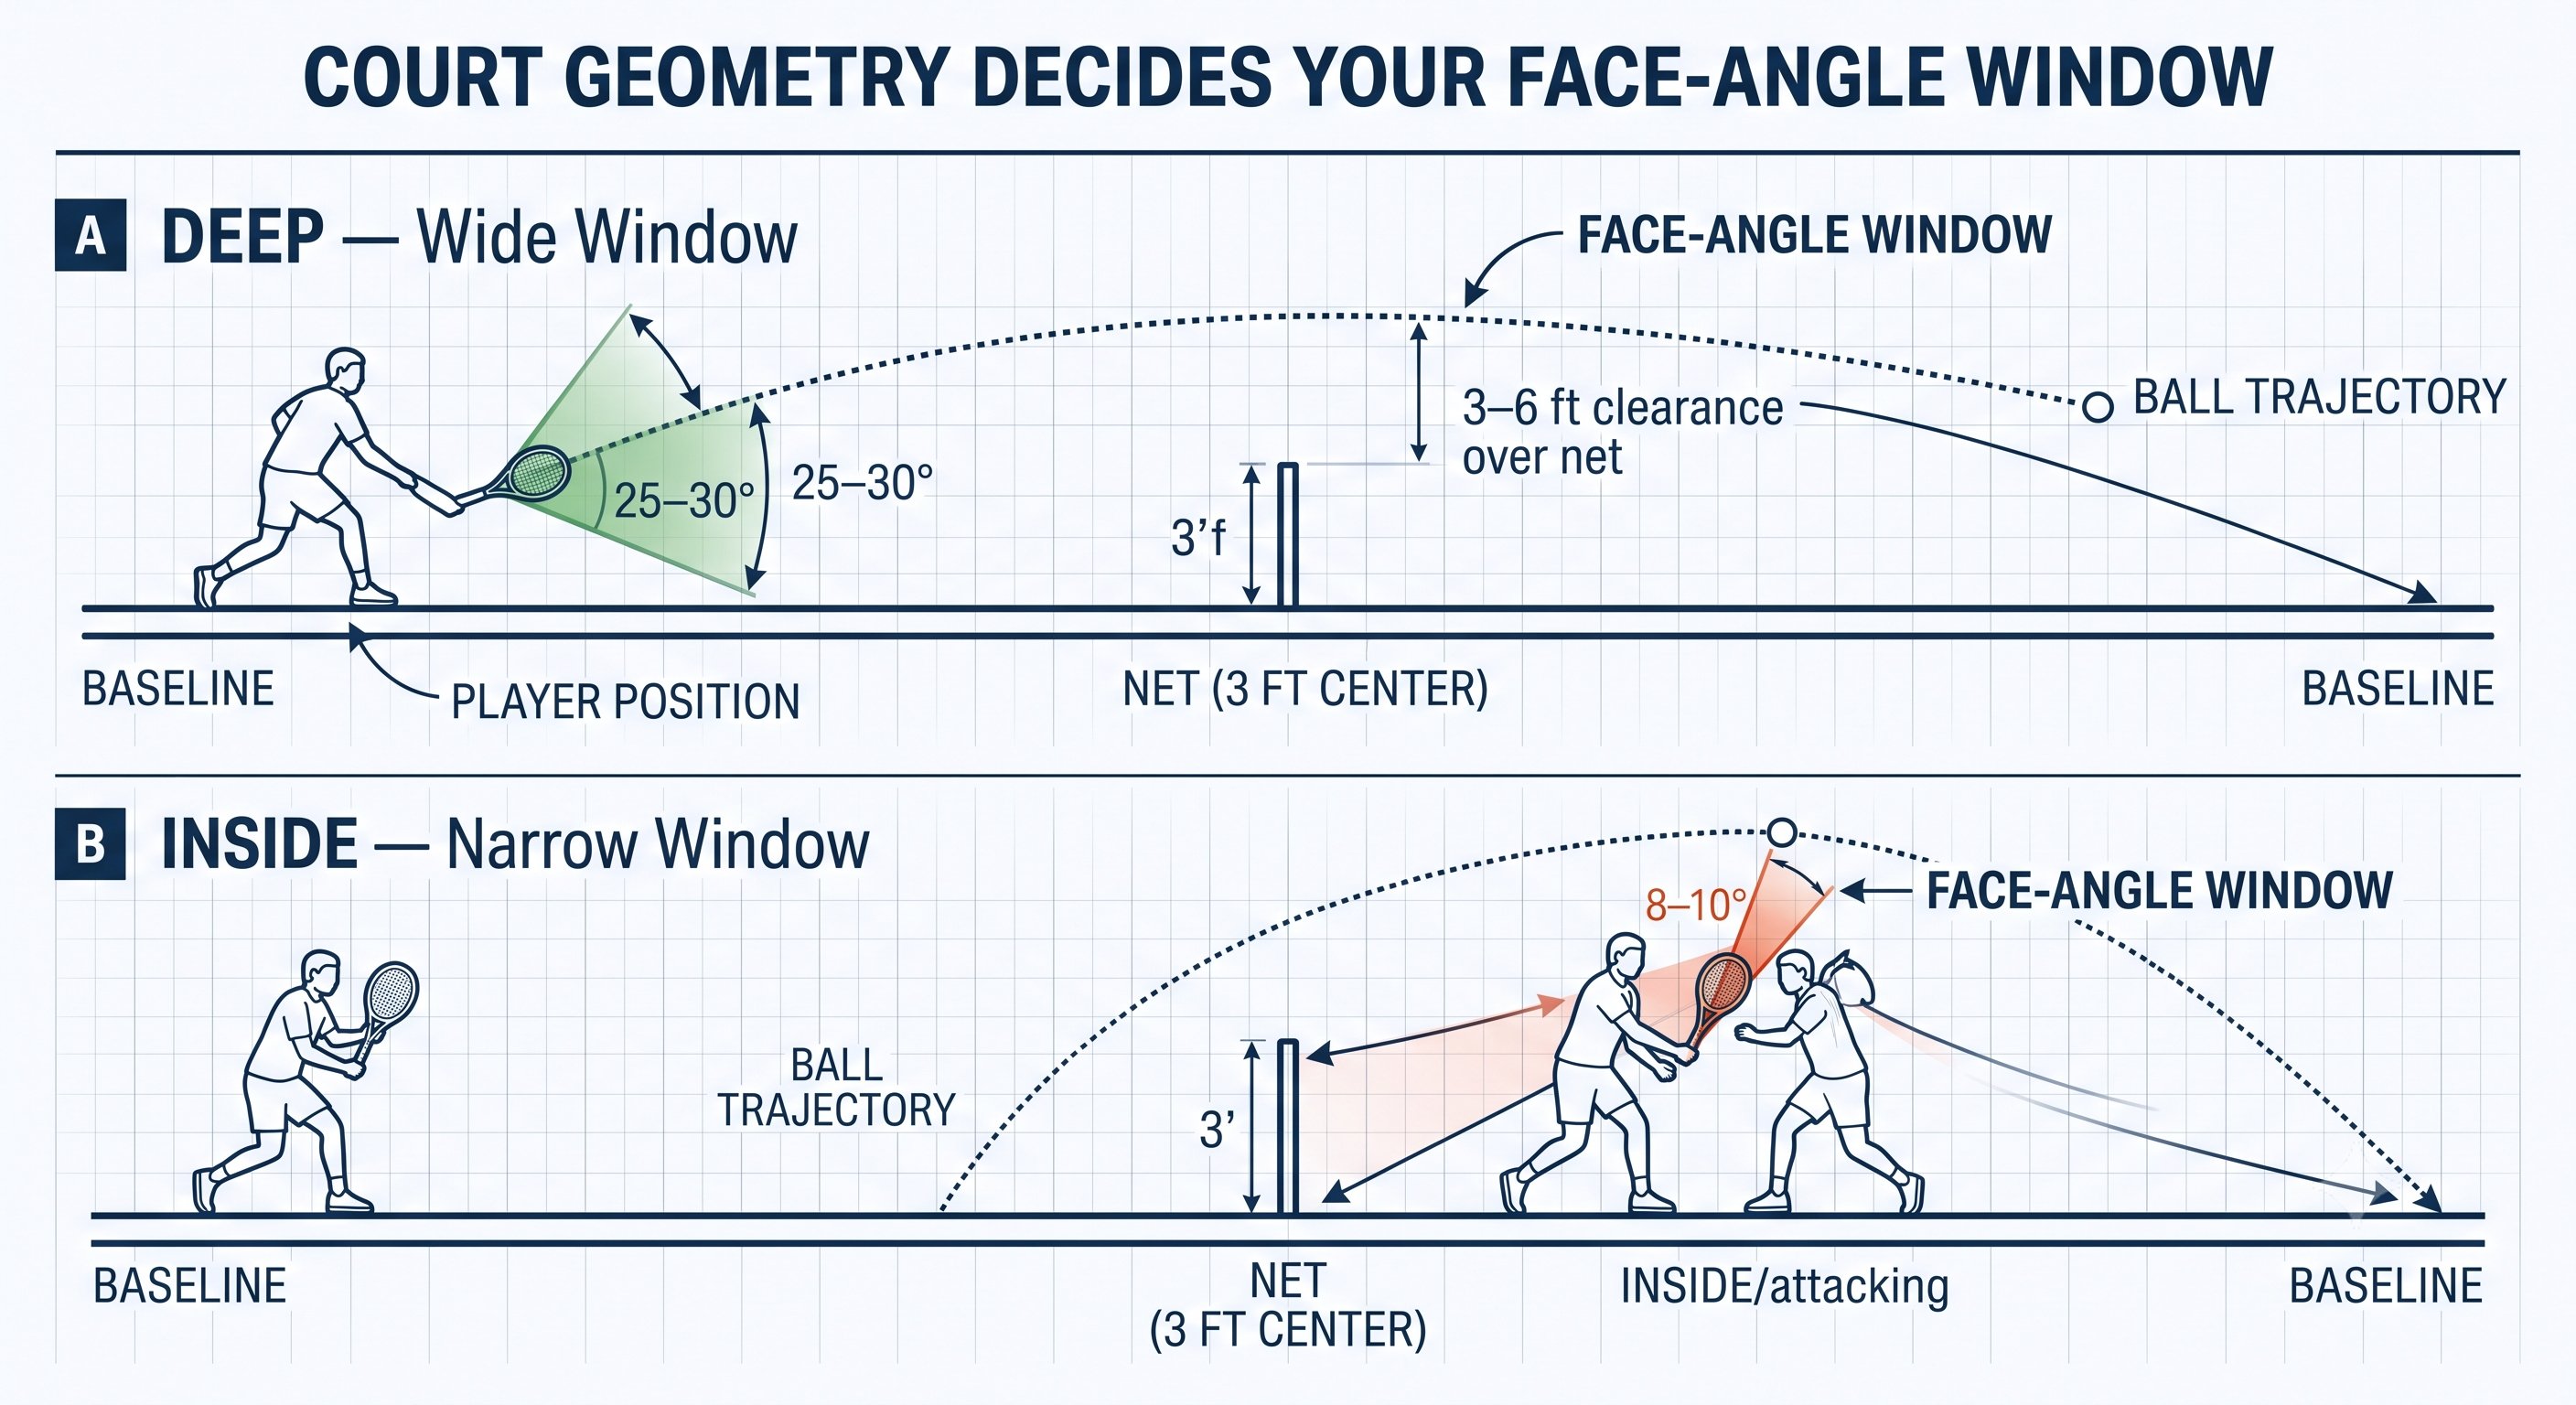
The Problem — Figure 1
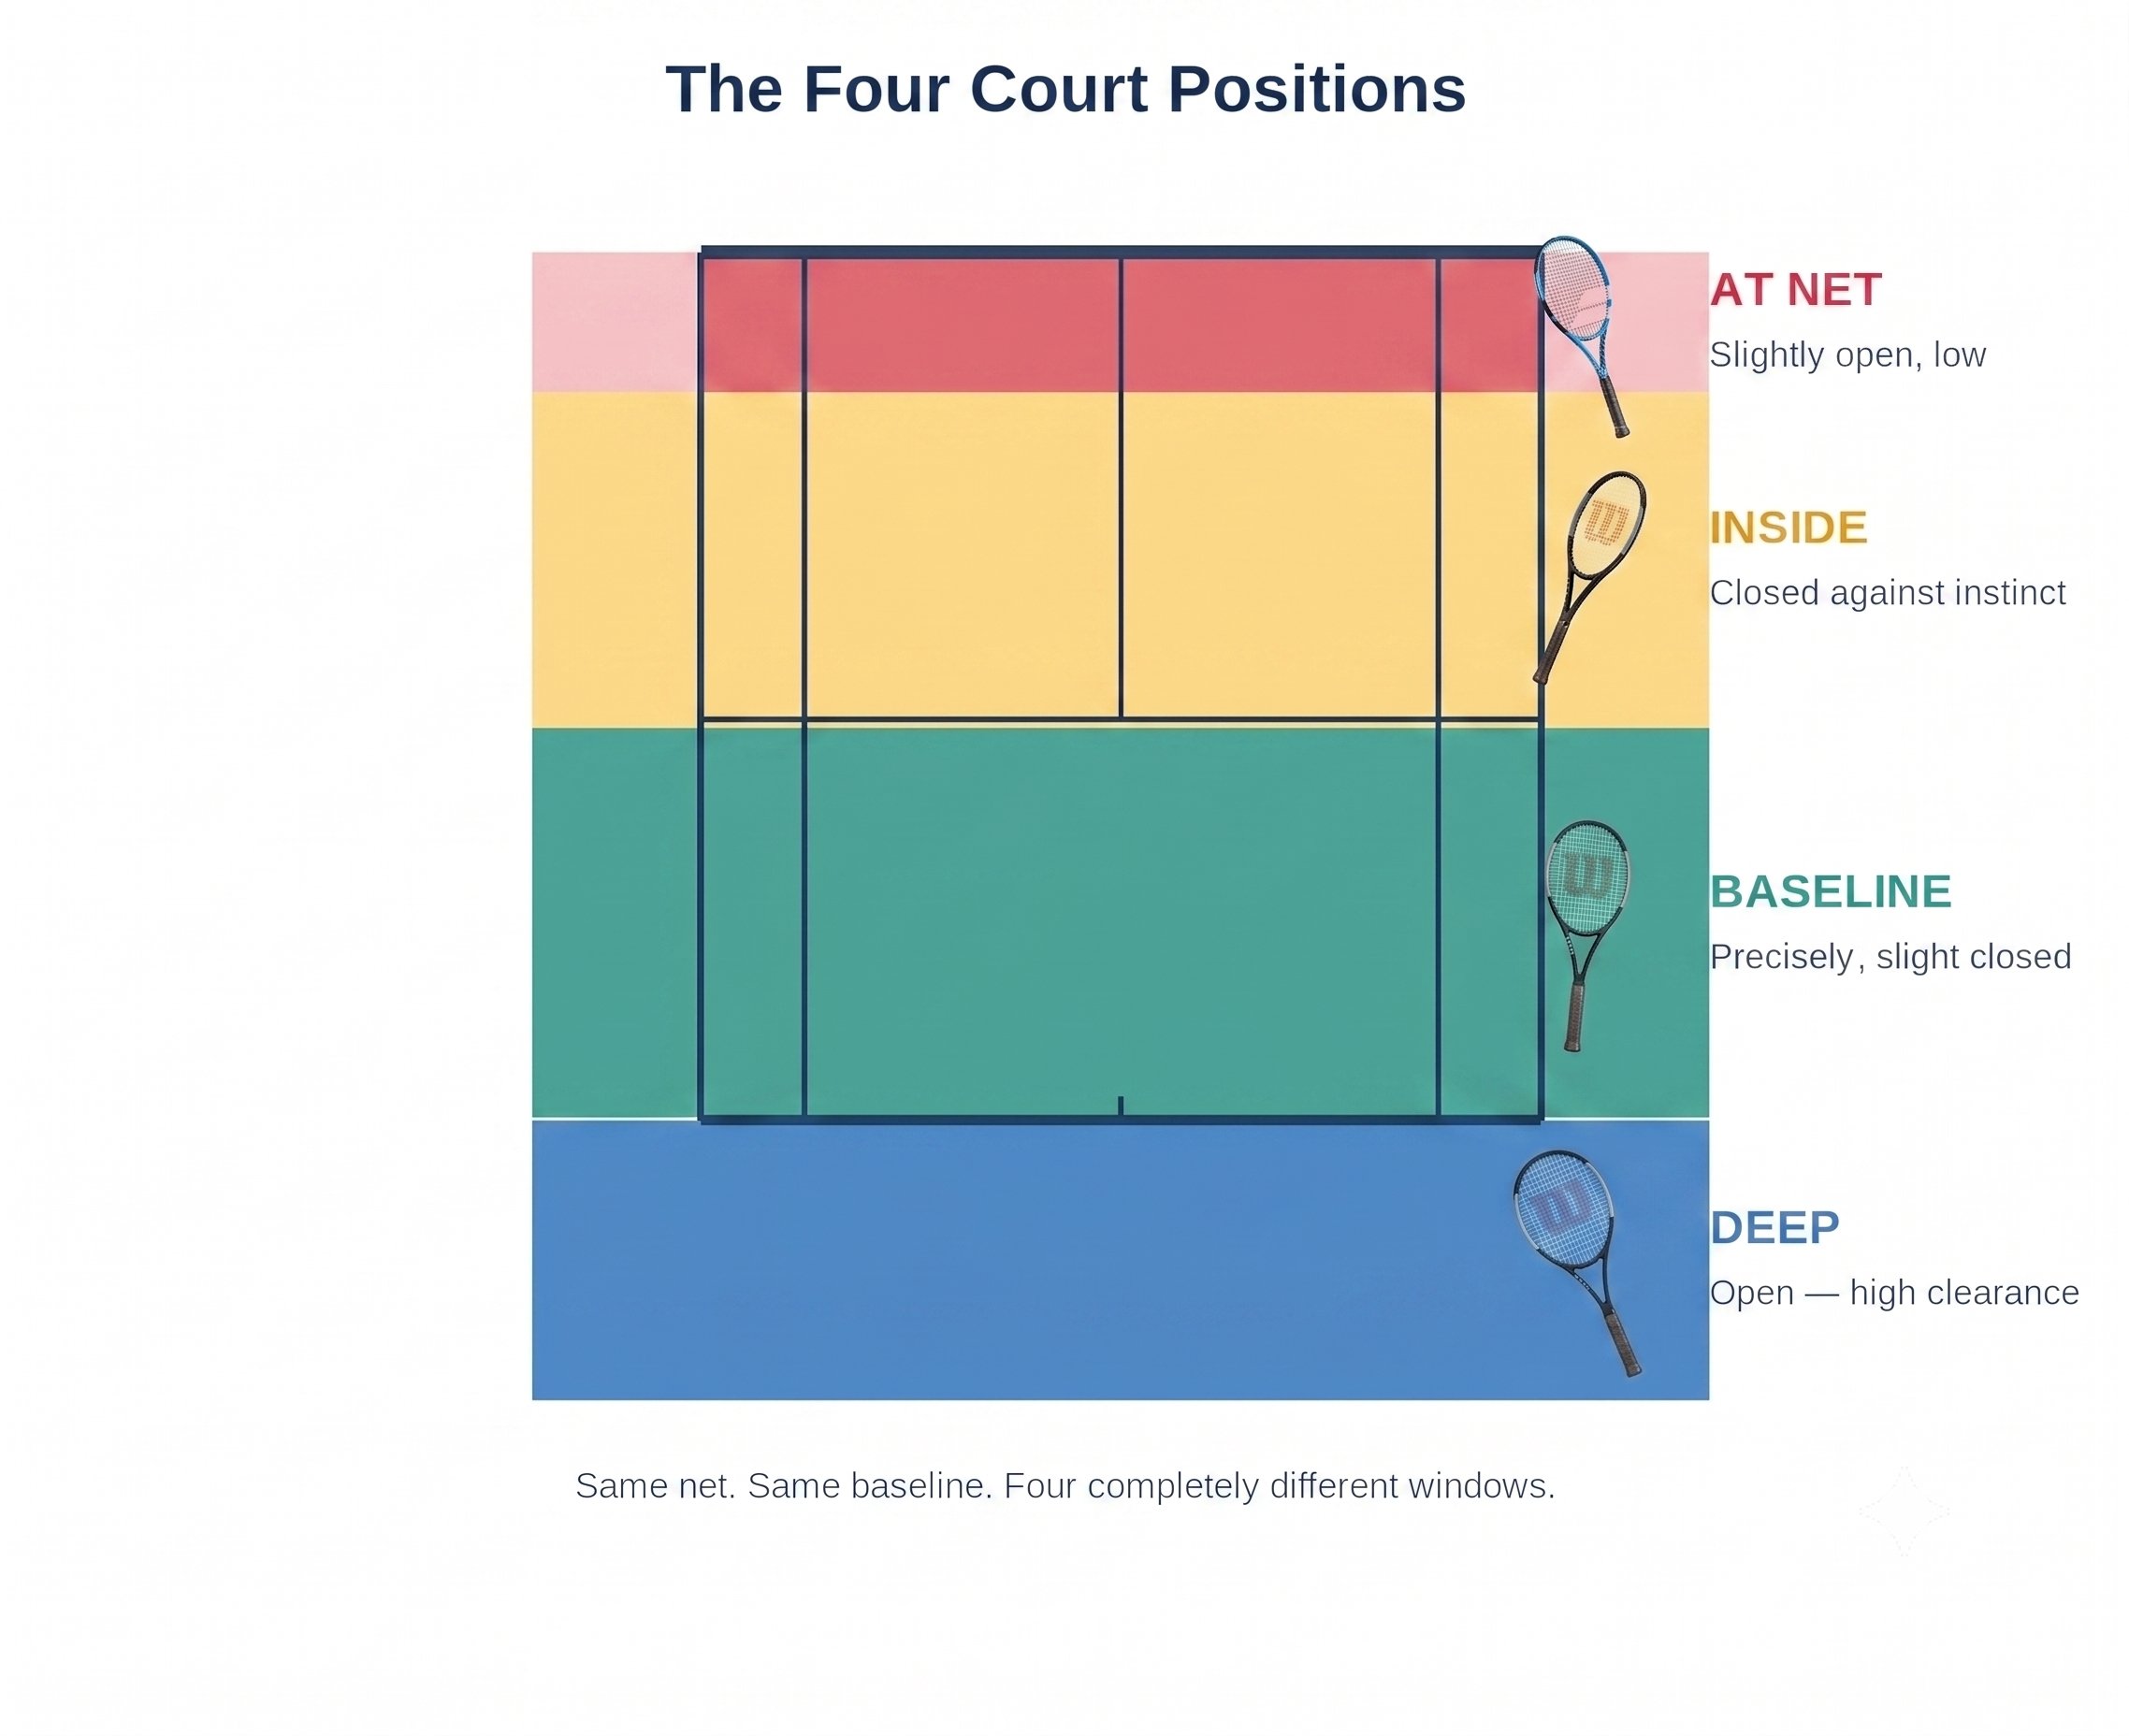
The Problem — Figure 2
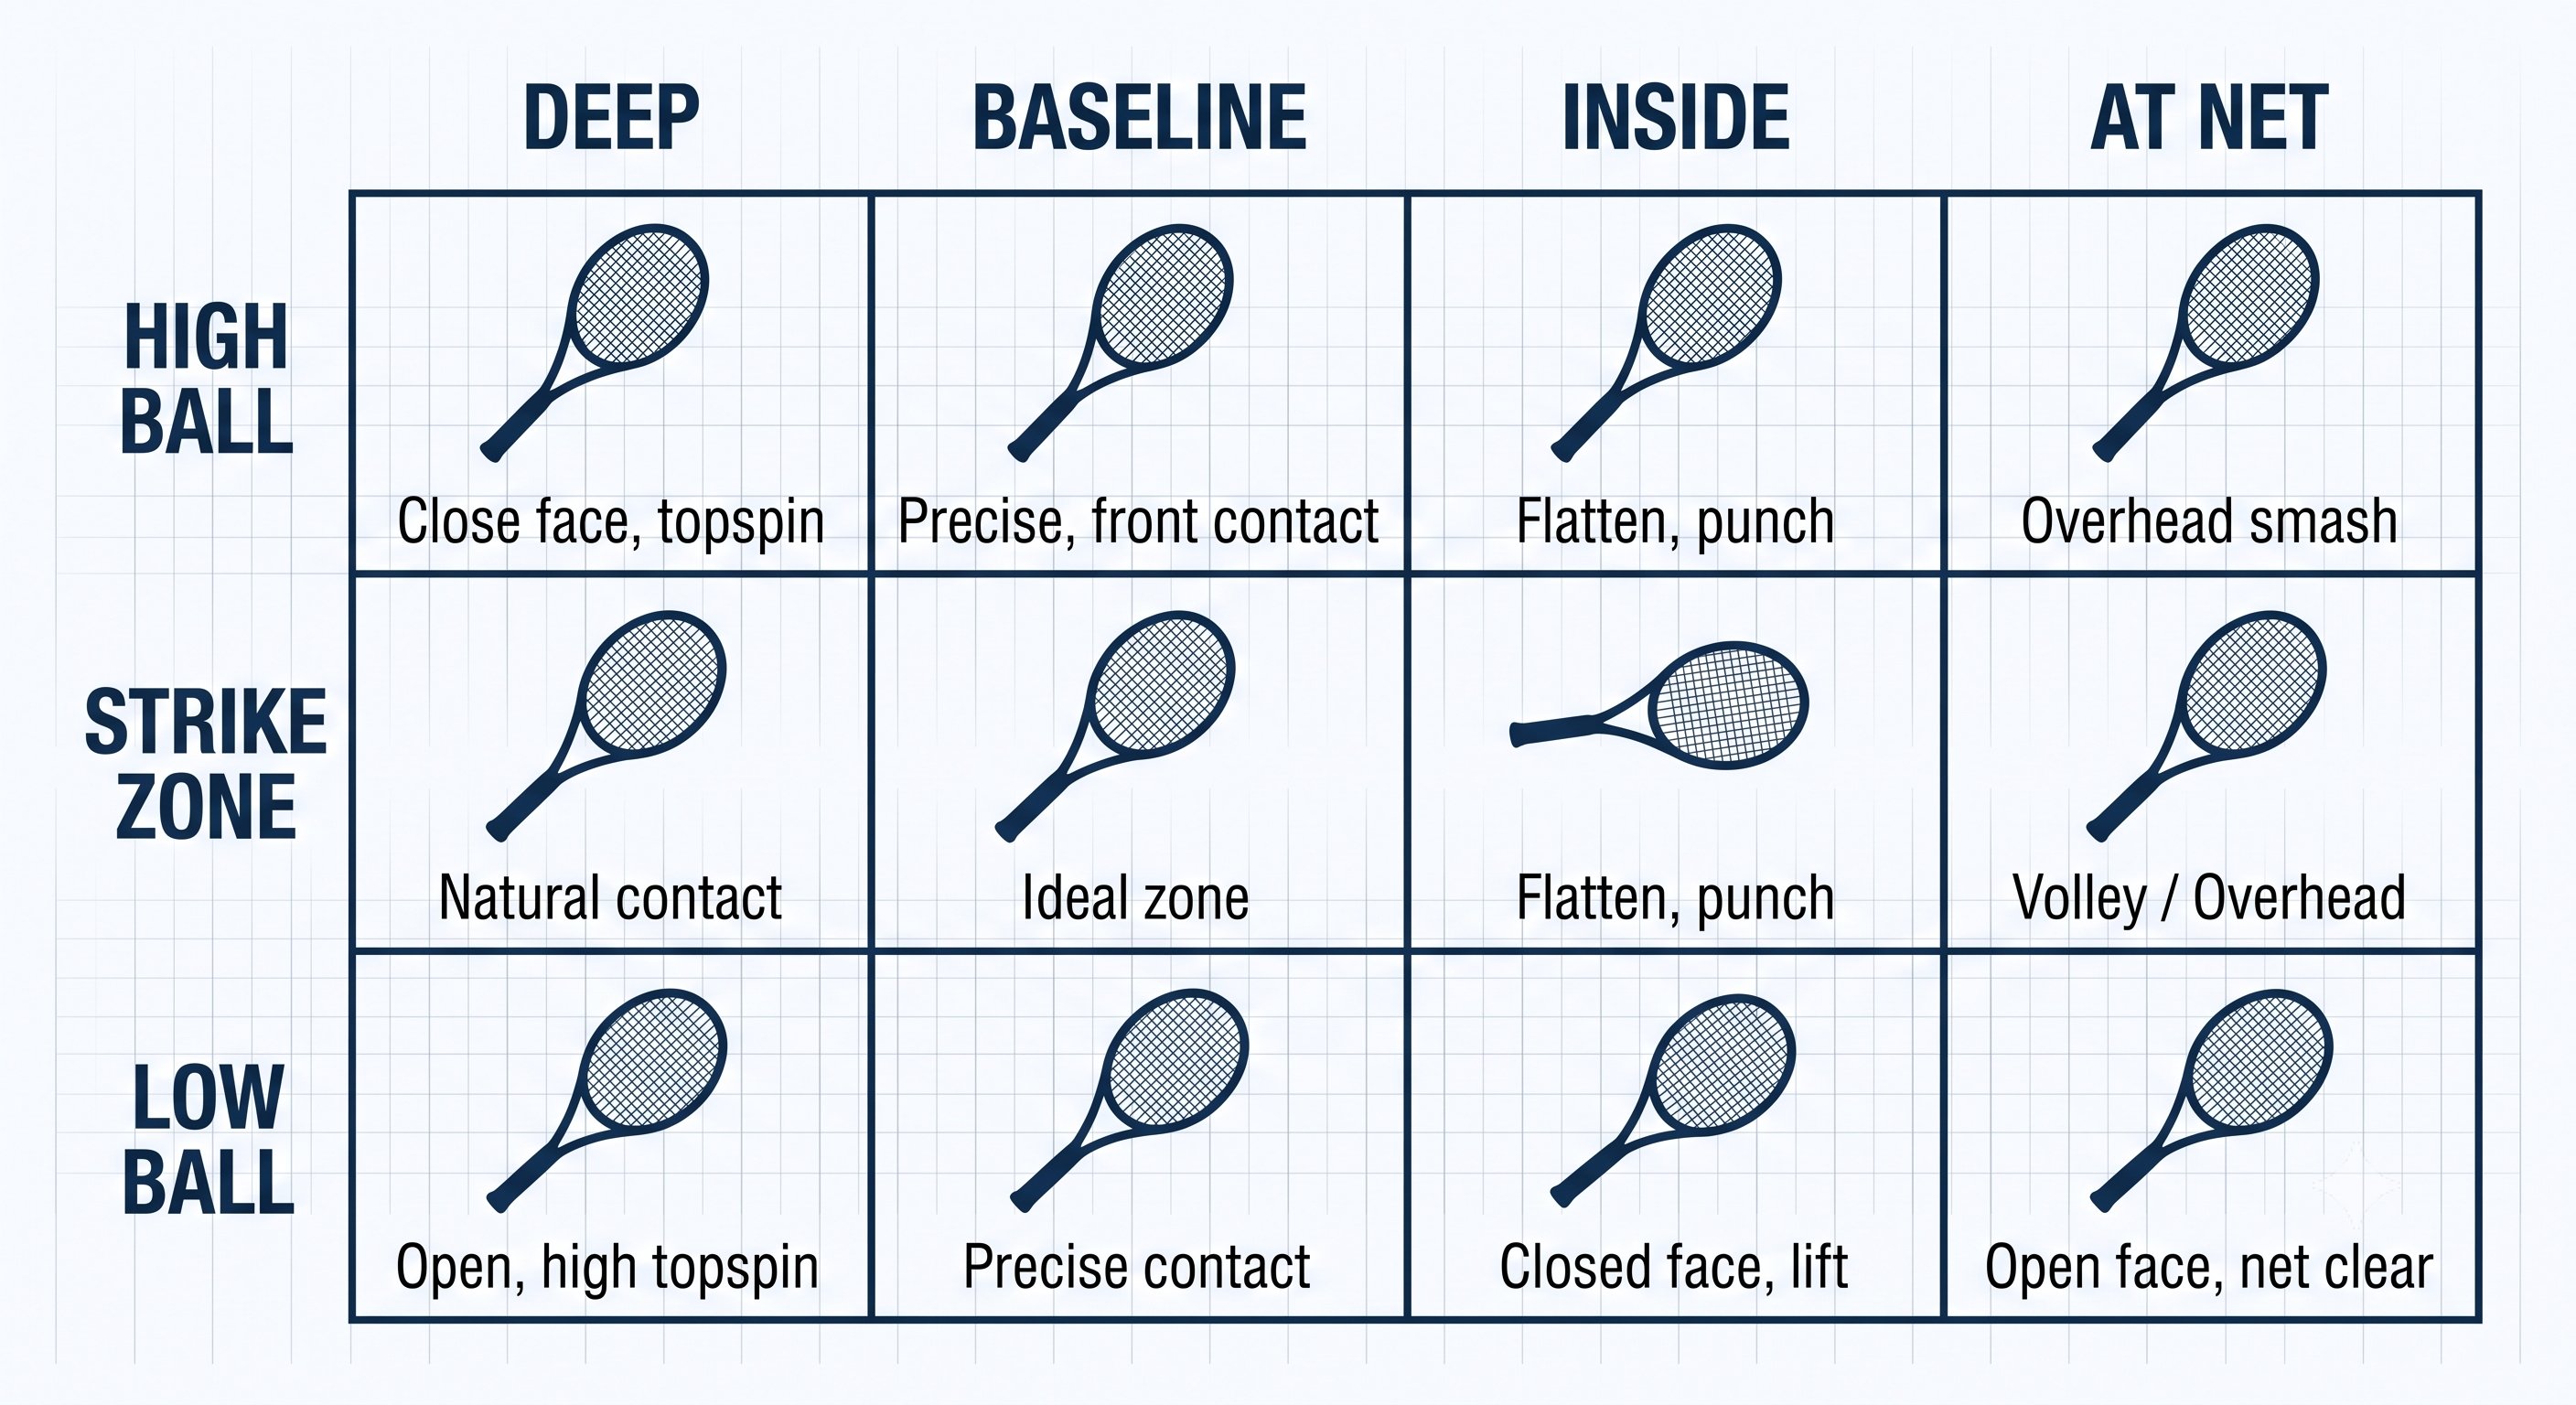
The Problem — Figure 3
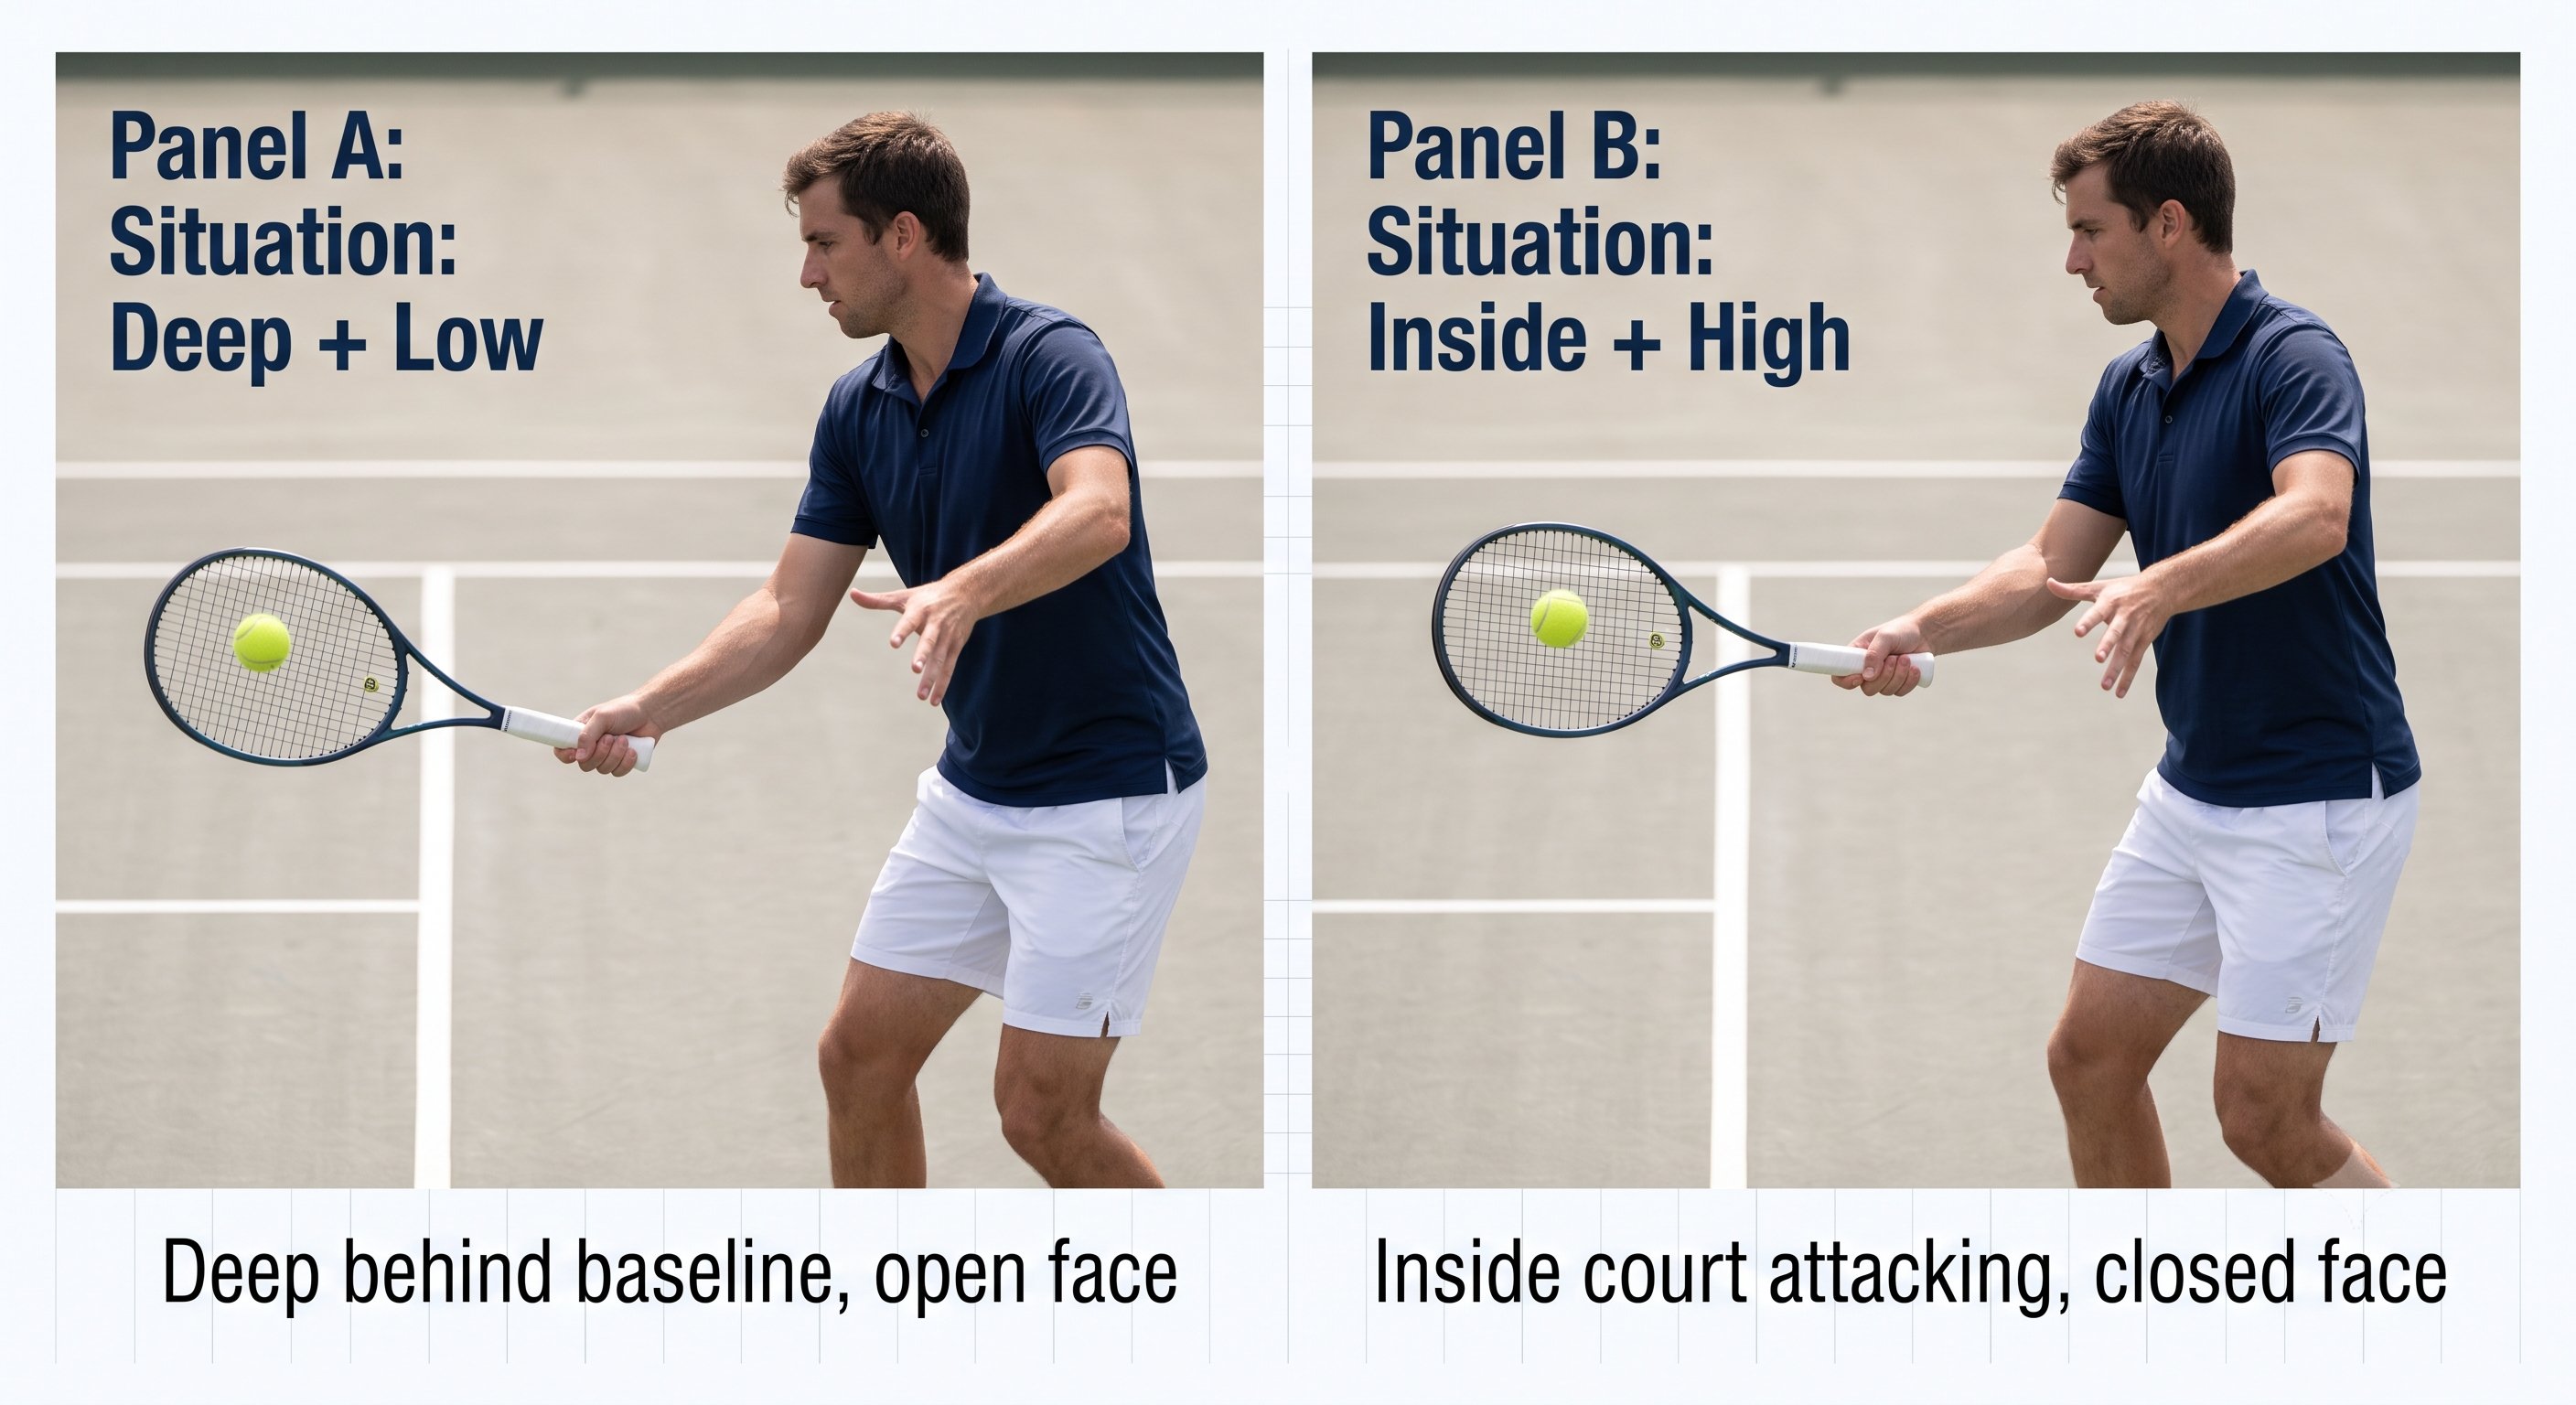
The Problem — Figure 4
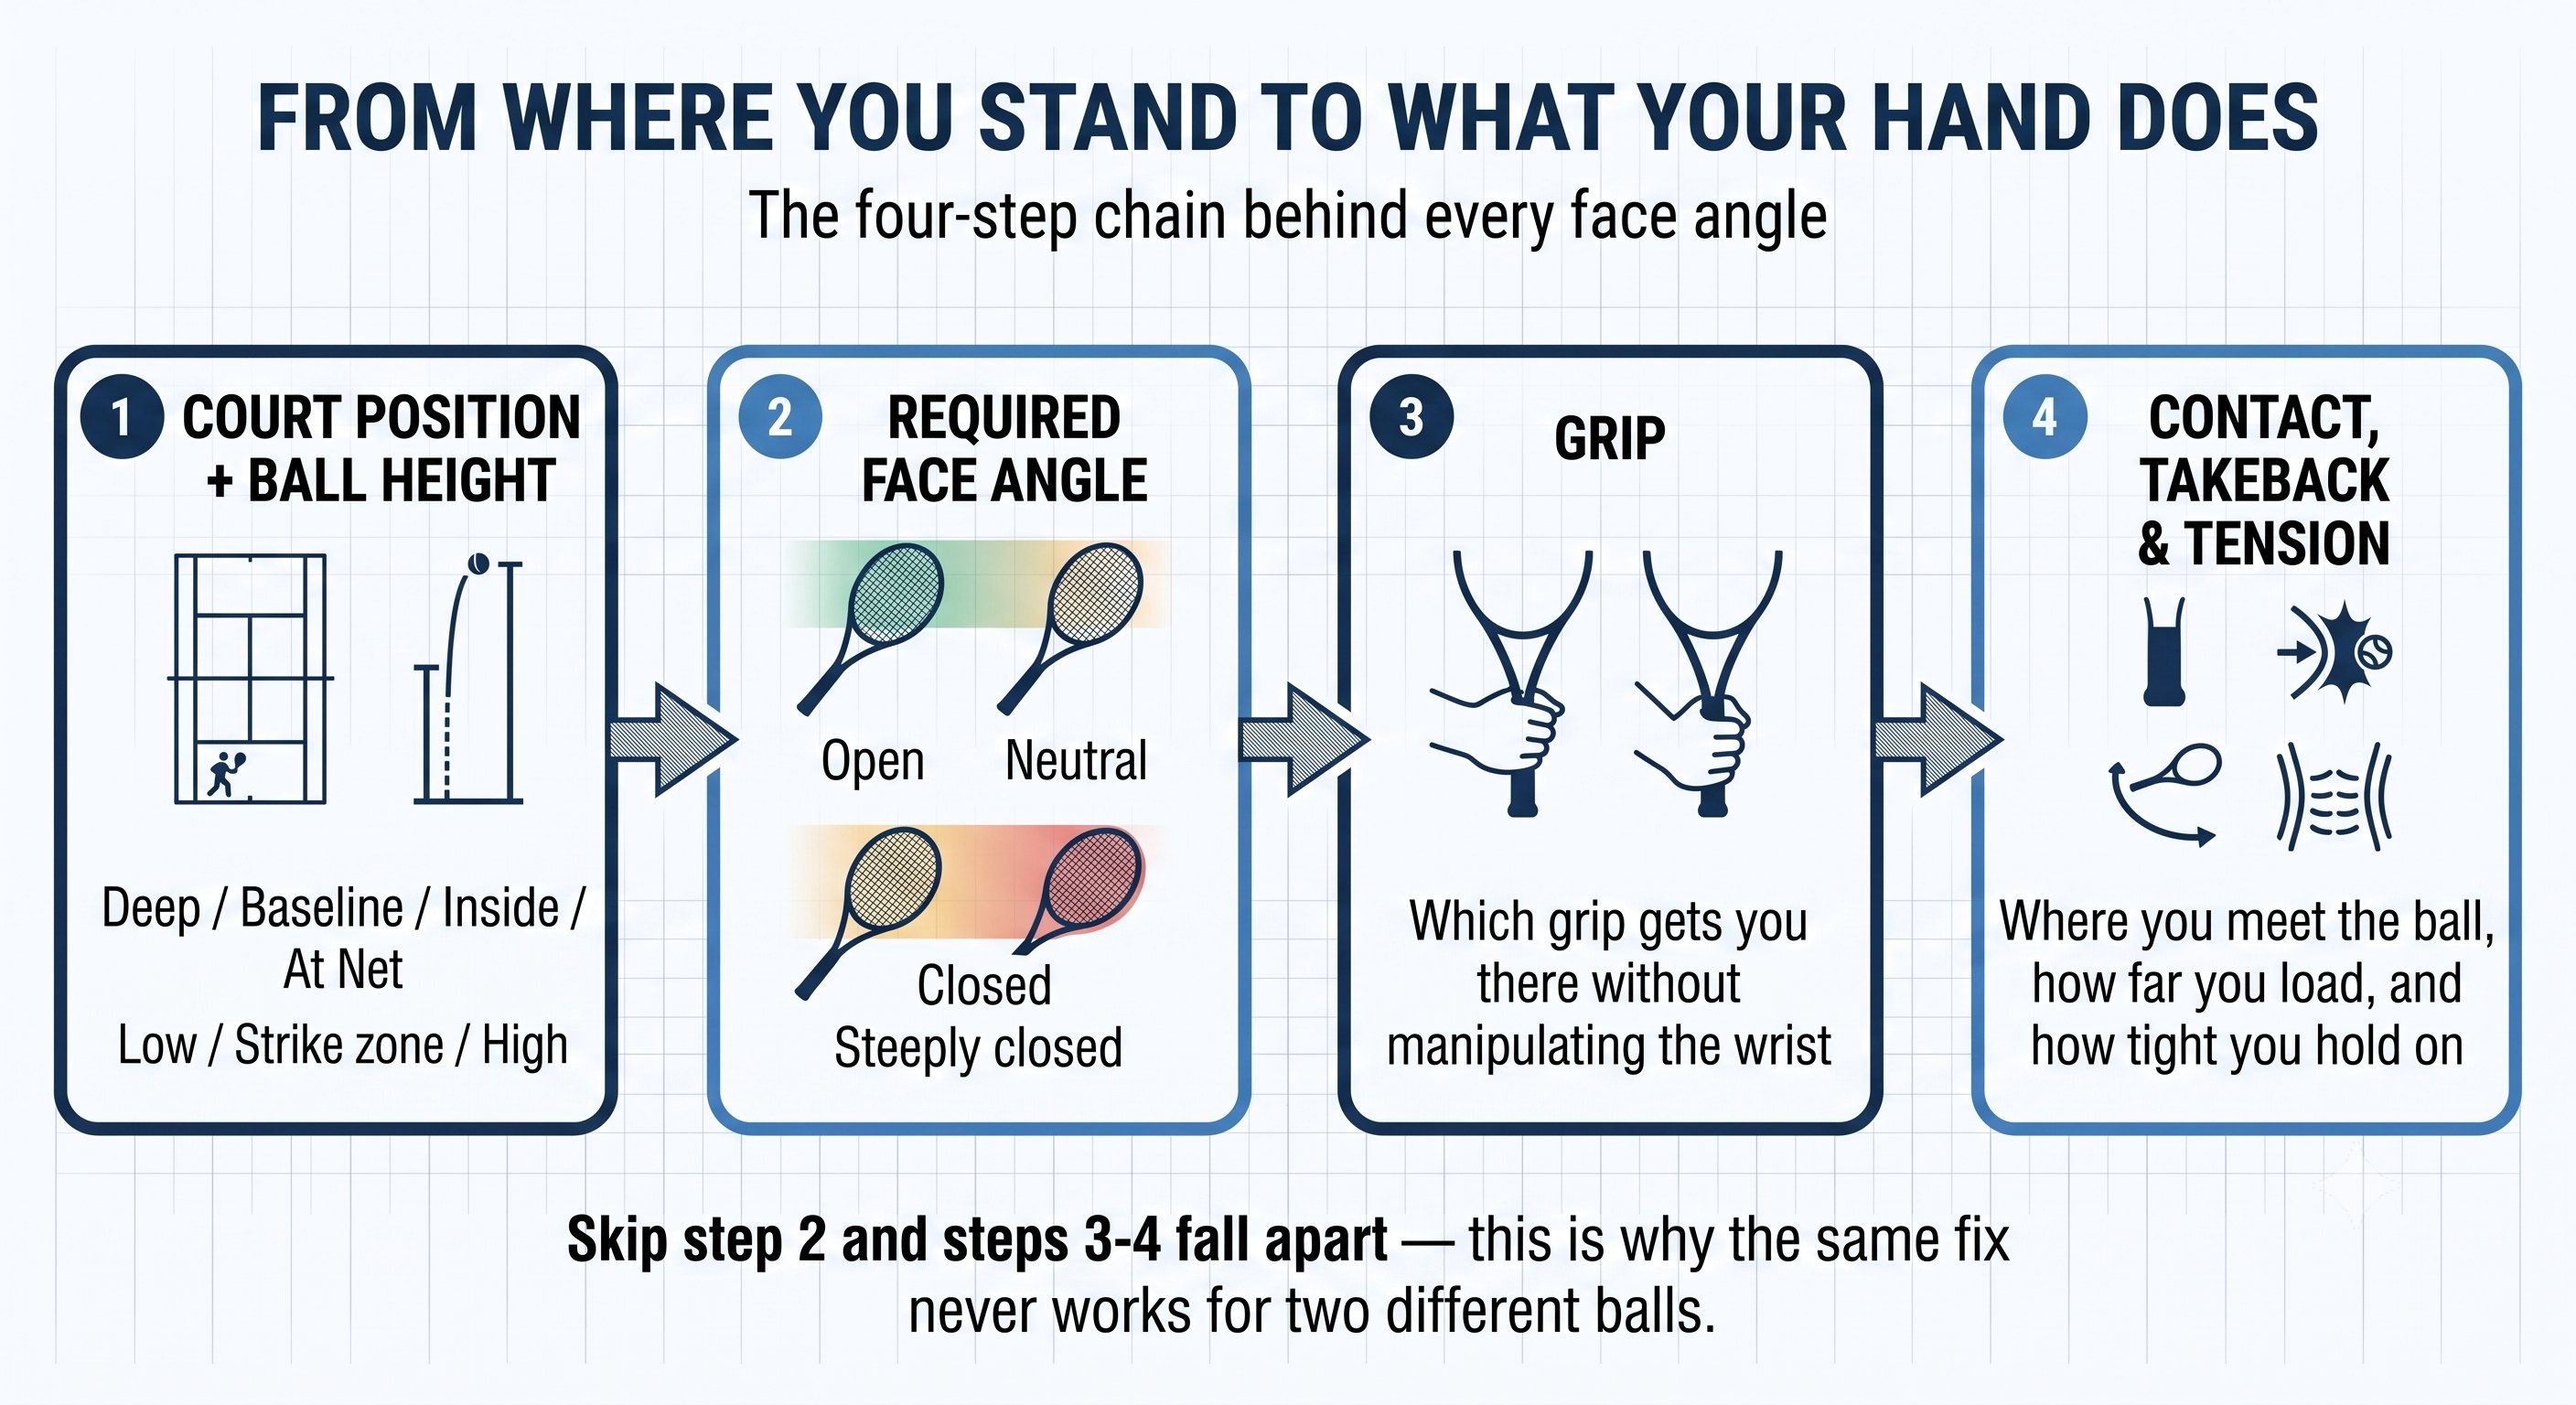
The Problem — Figure 5
Chapter 2: The Tool 5 figures
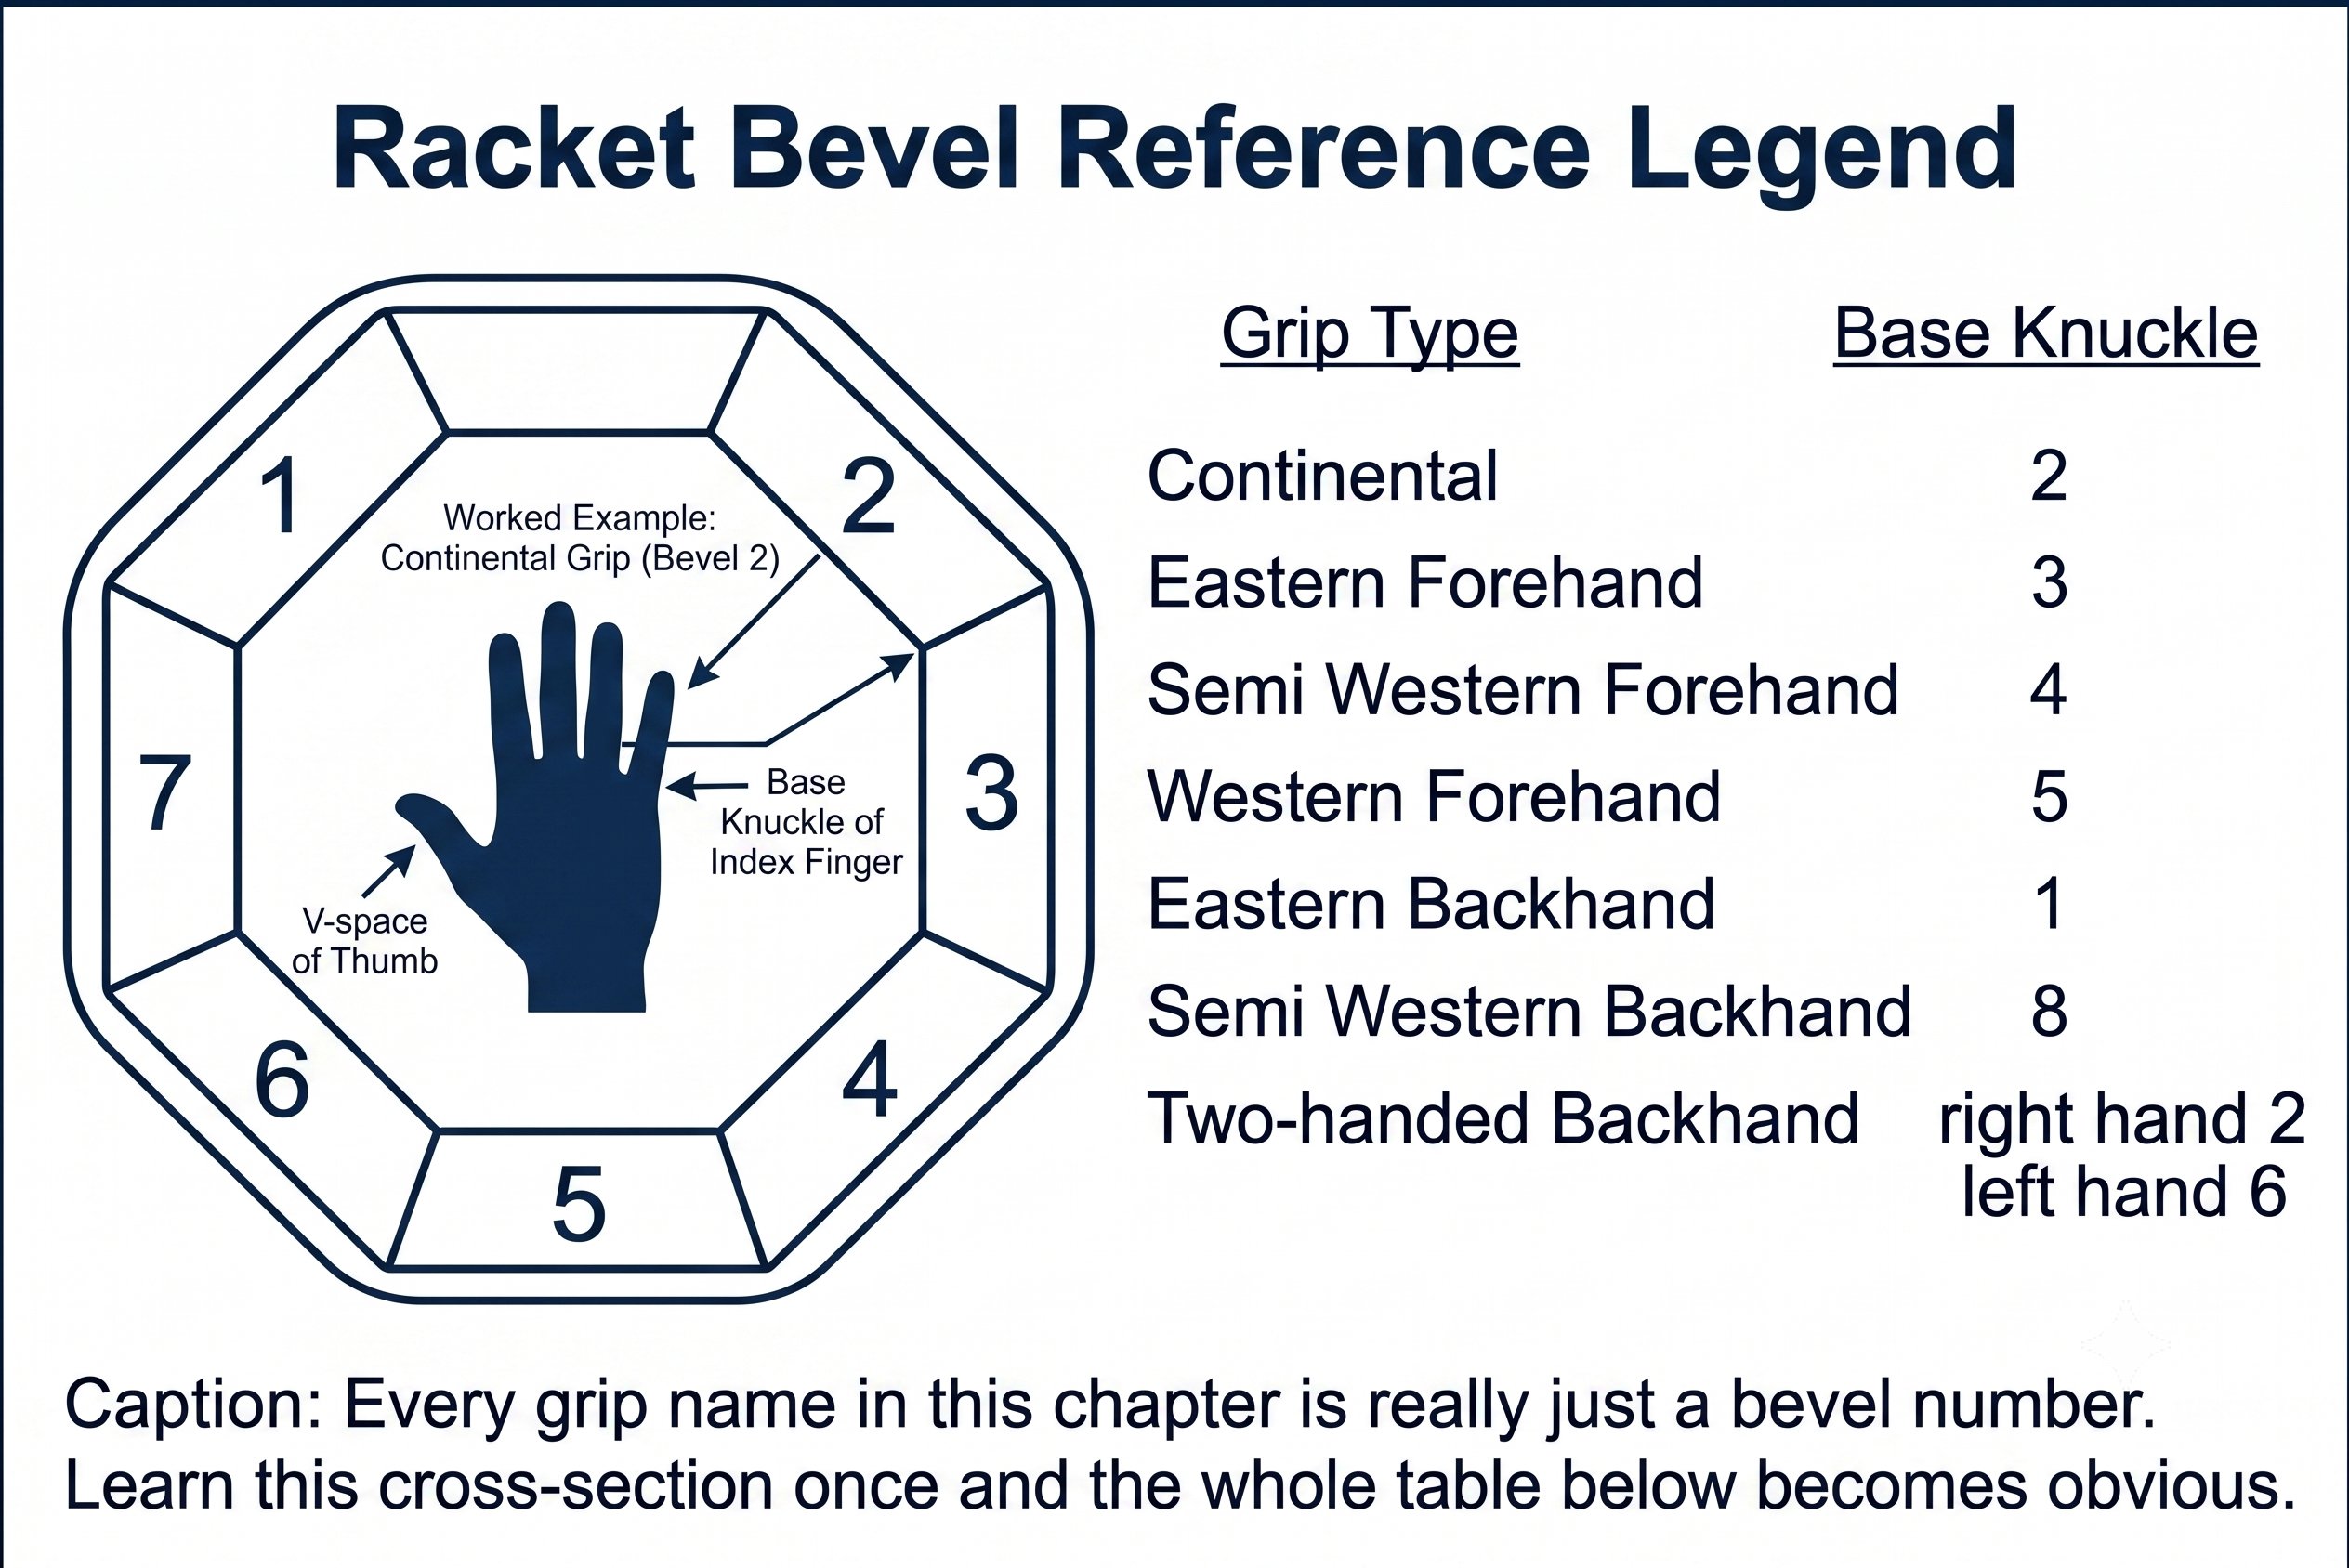
The Tool — Figure 1
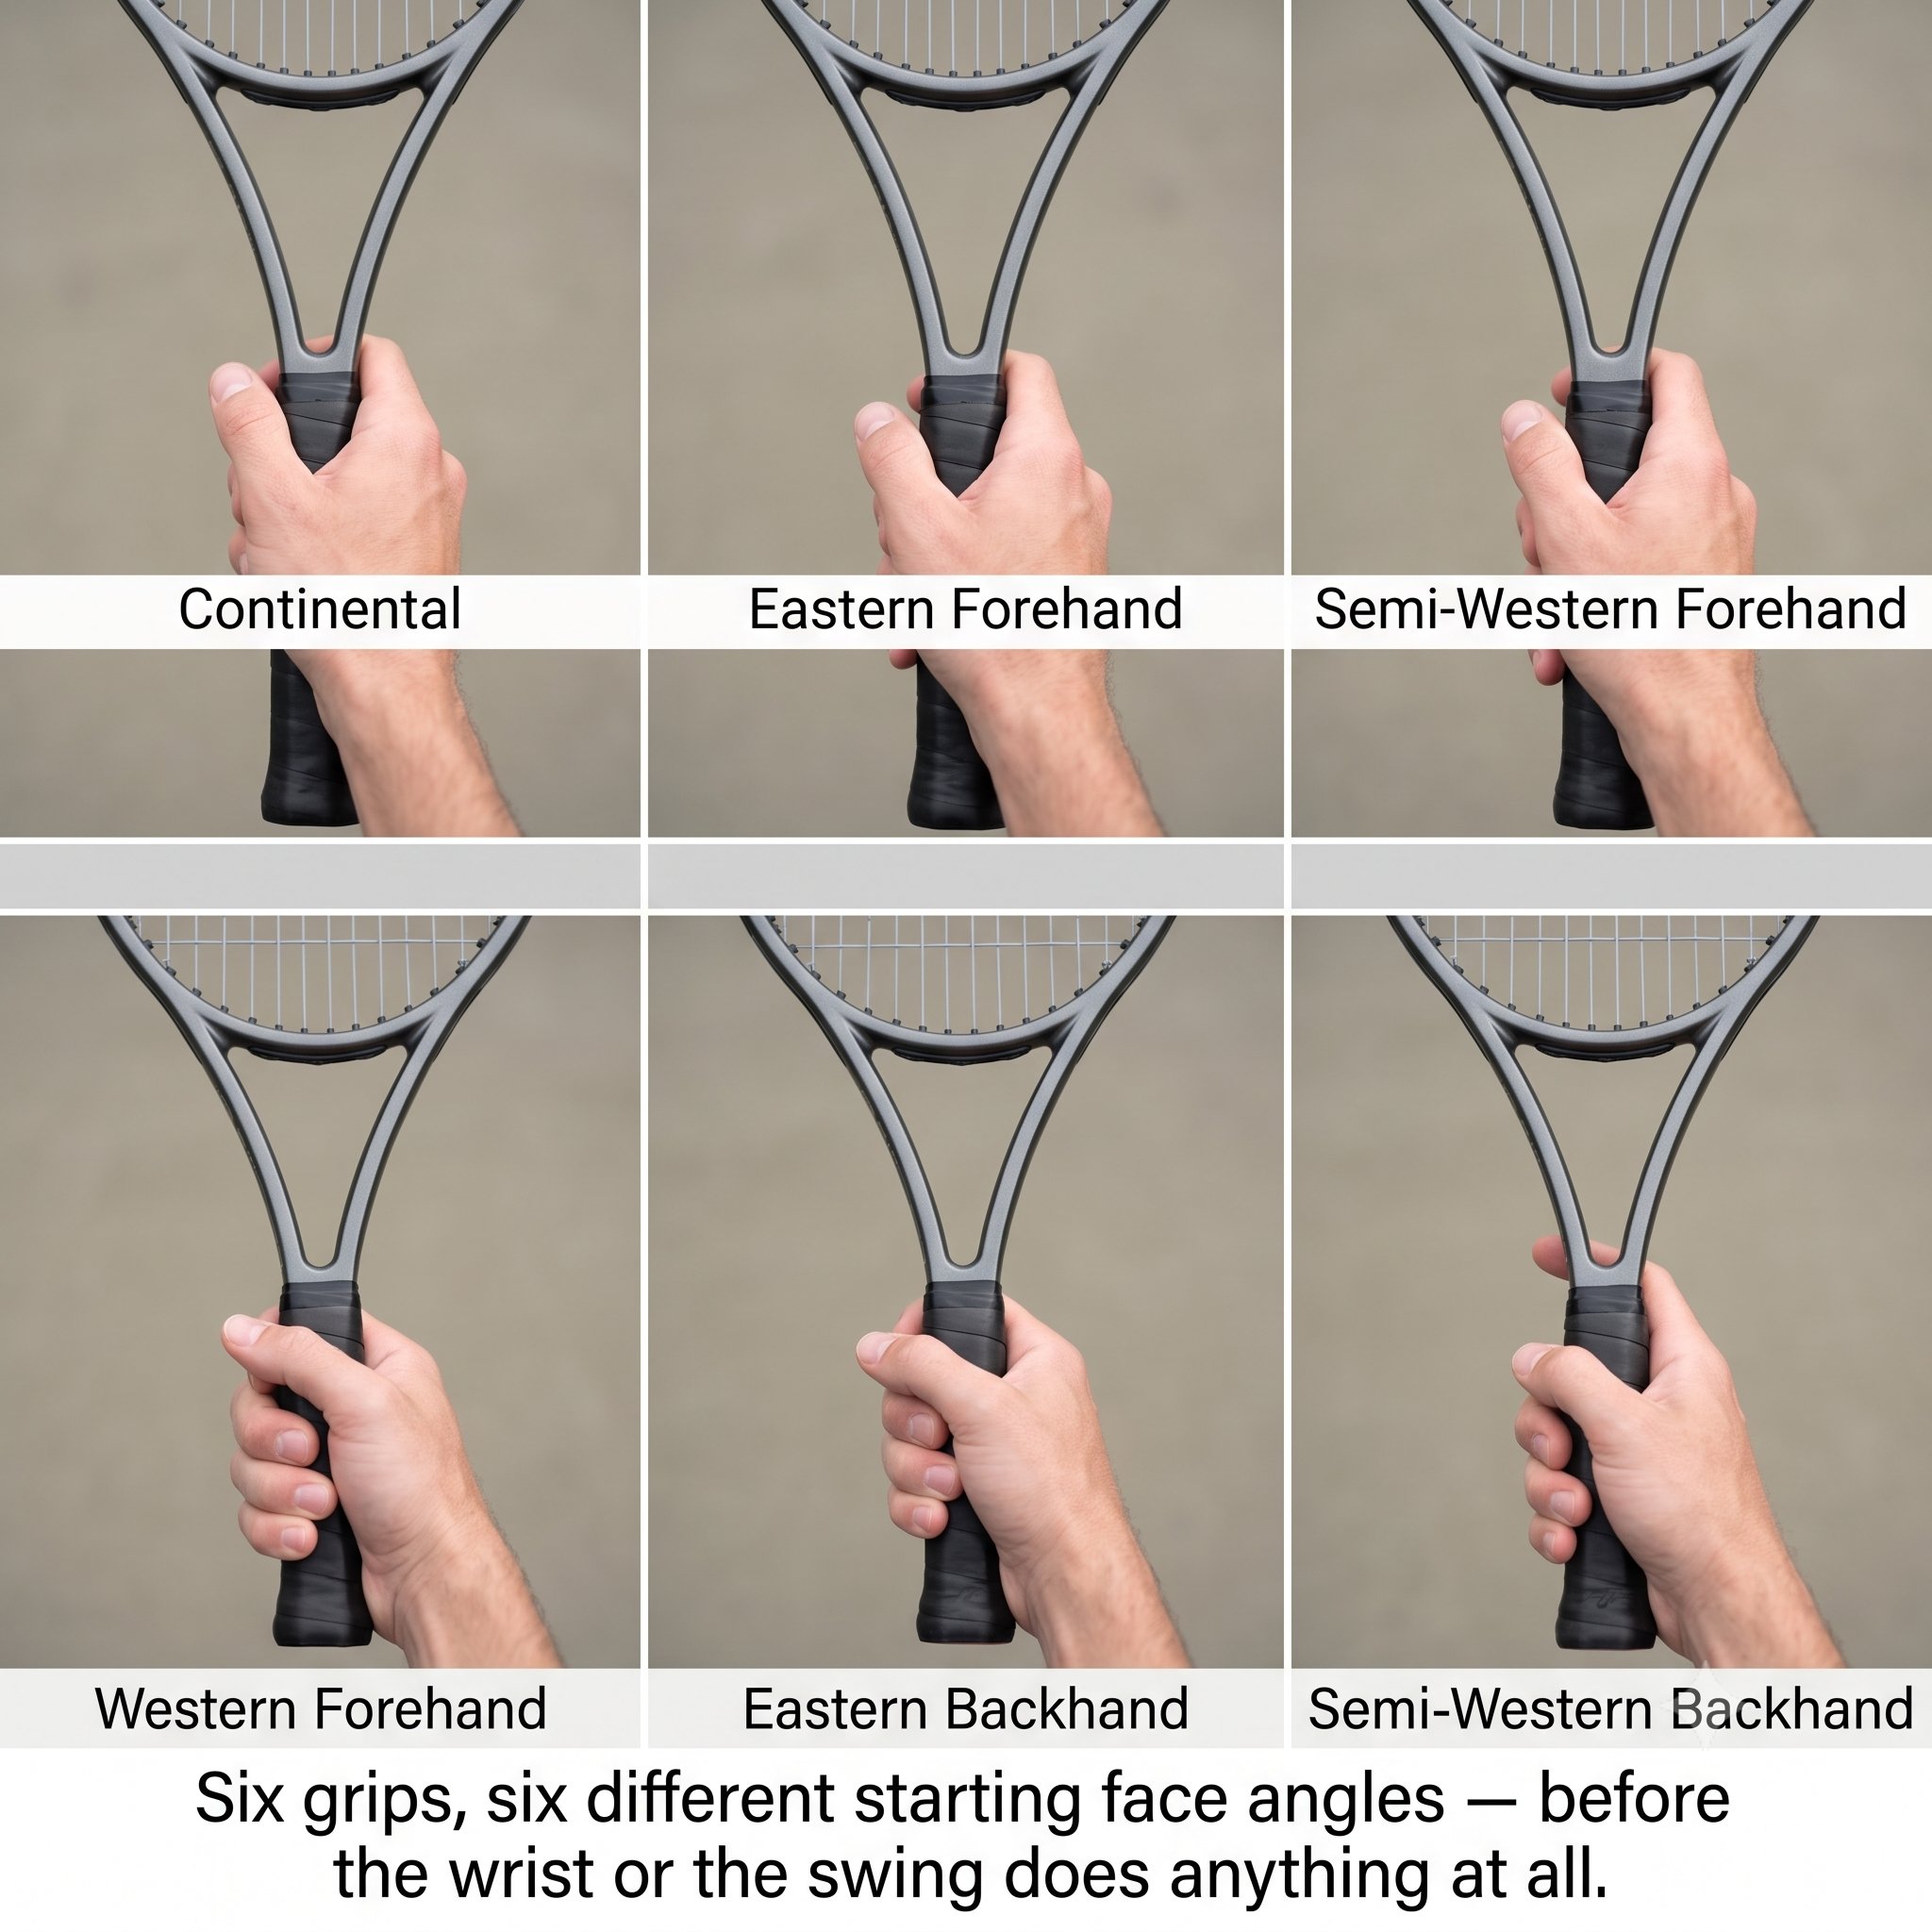
The Tool — Figure 2
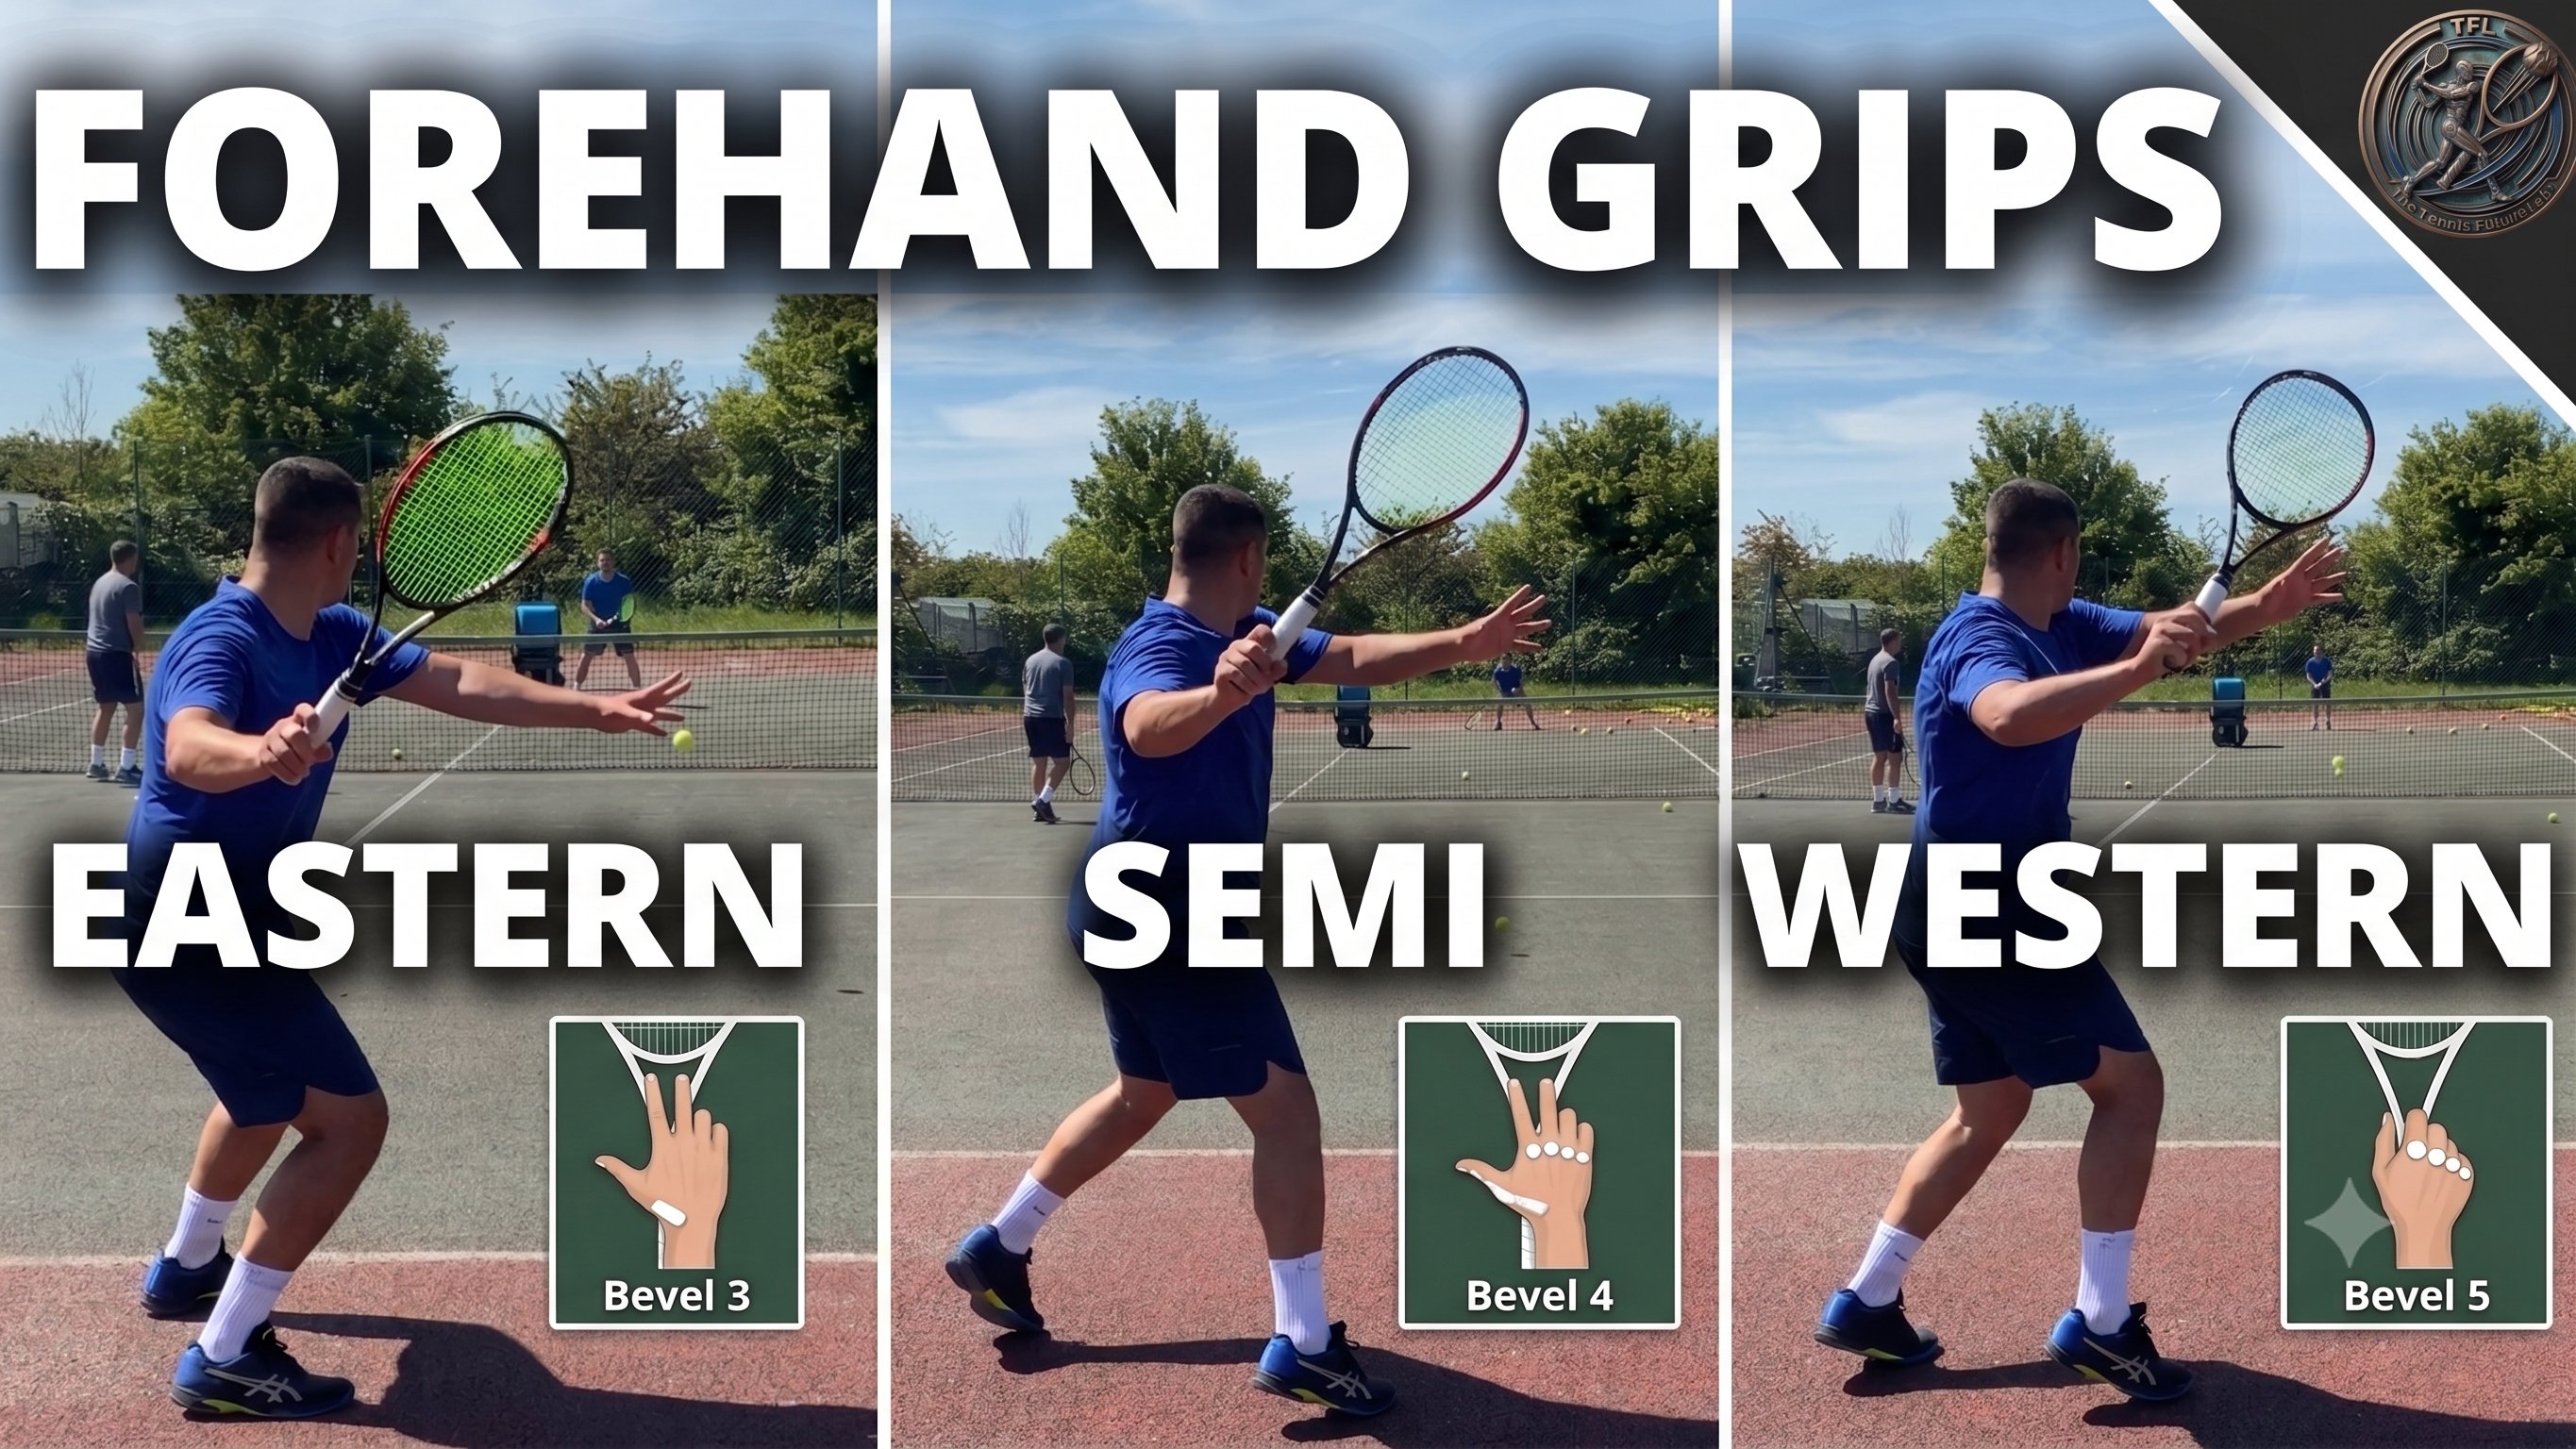
The Tool — Figure 3
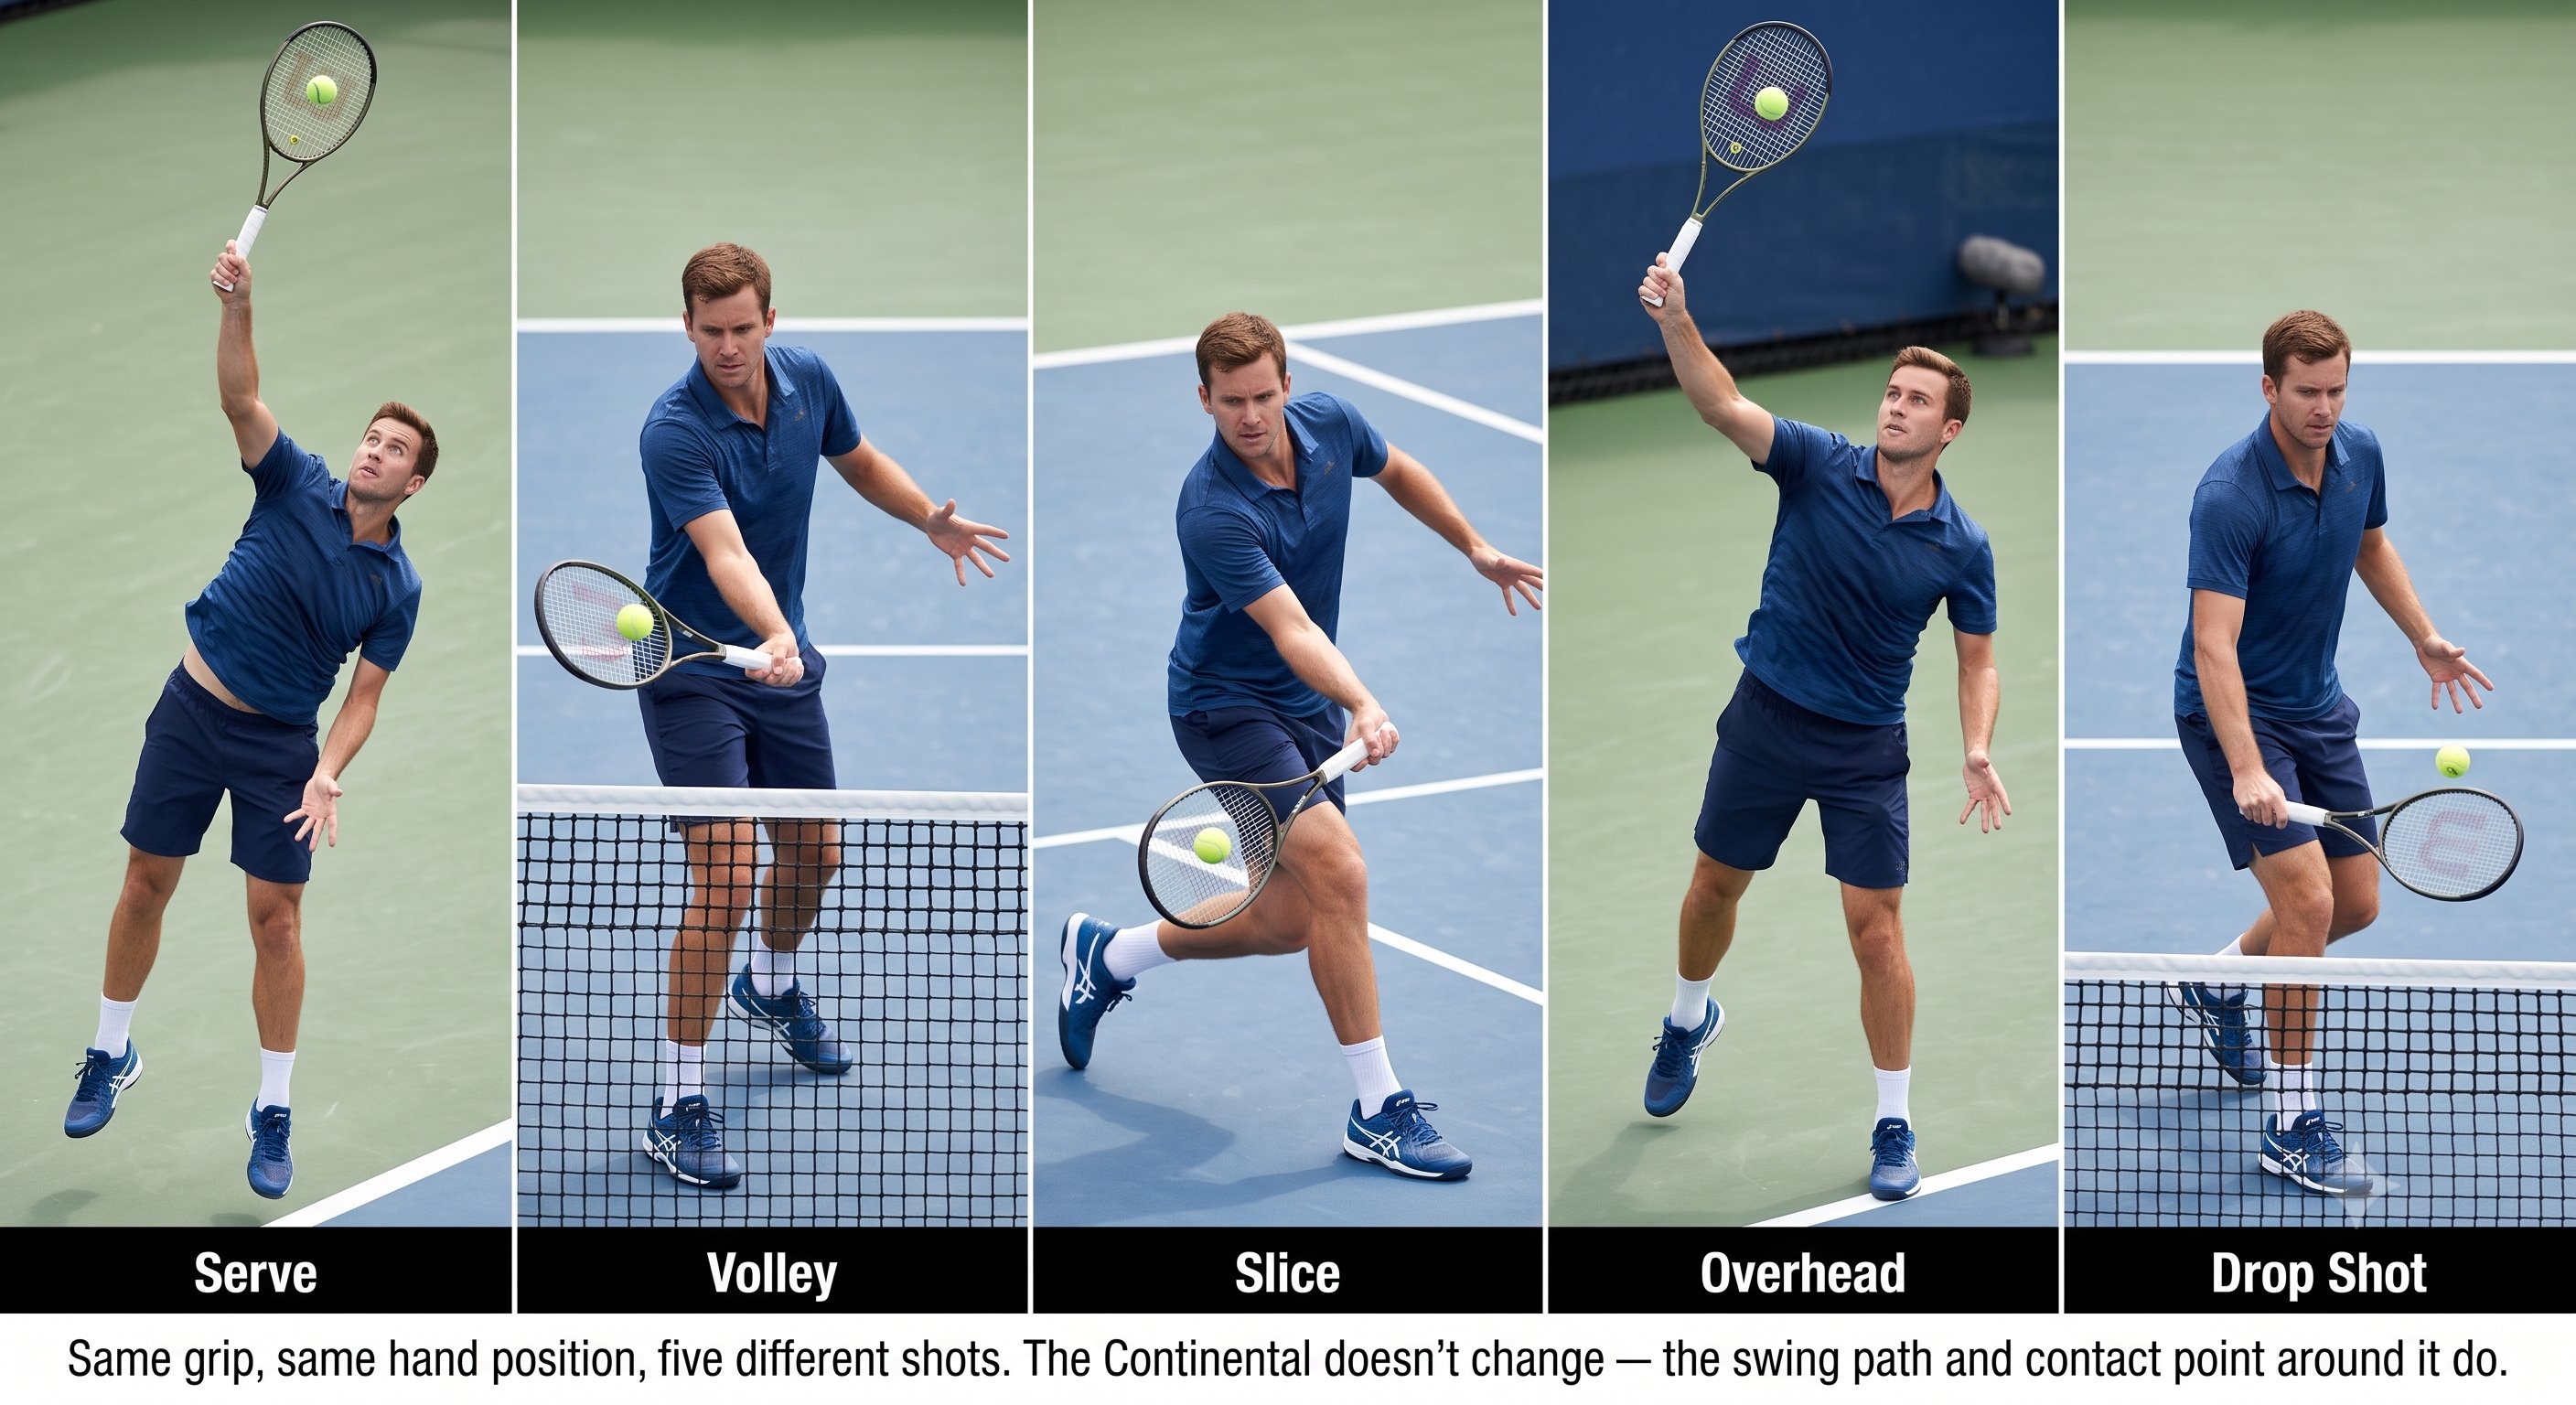
The Tool — Figure 4
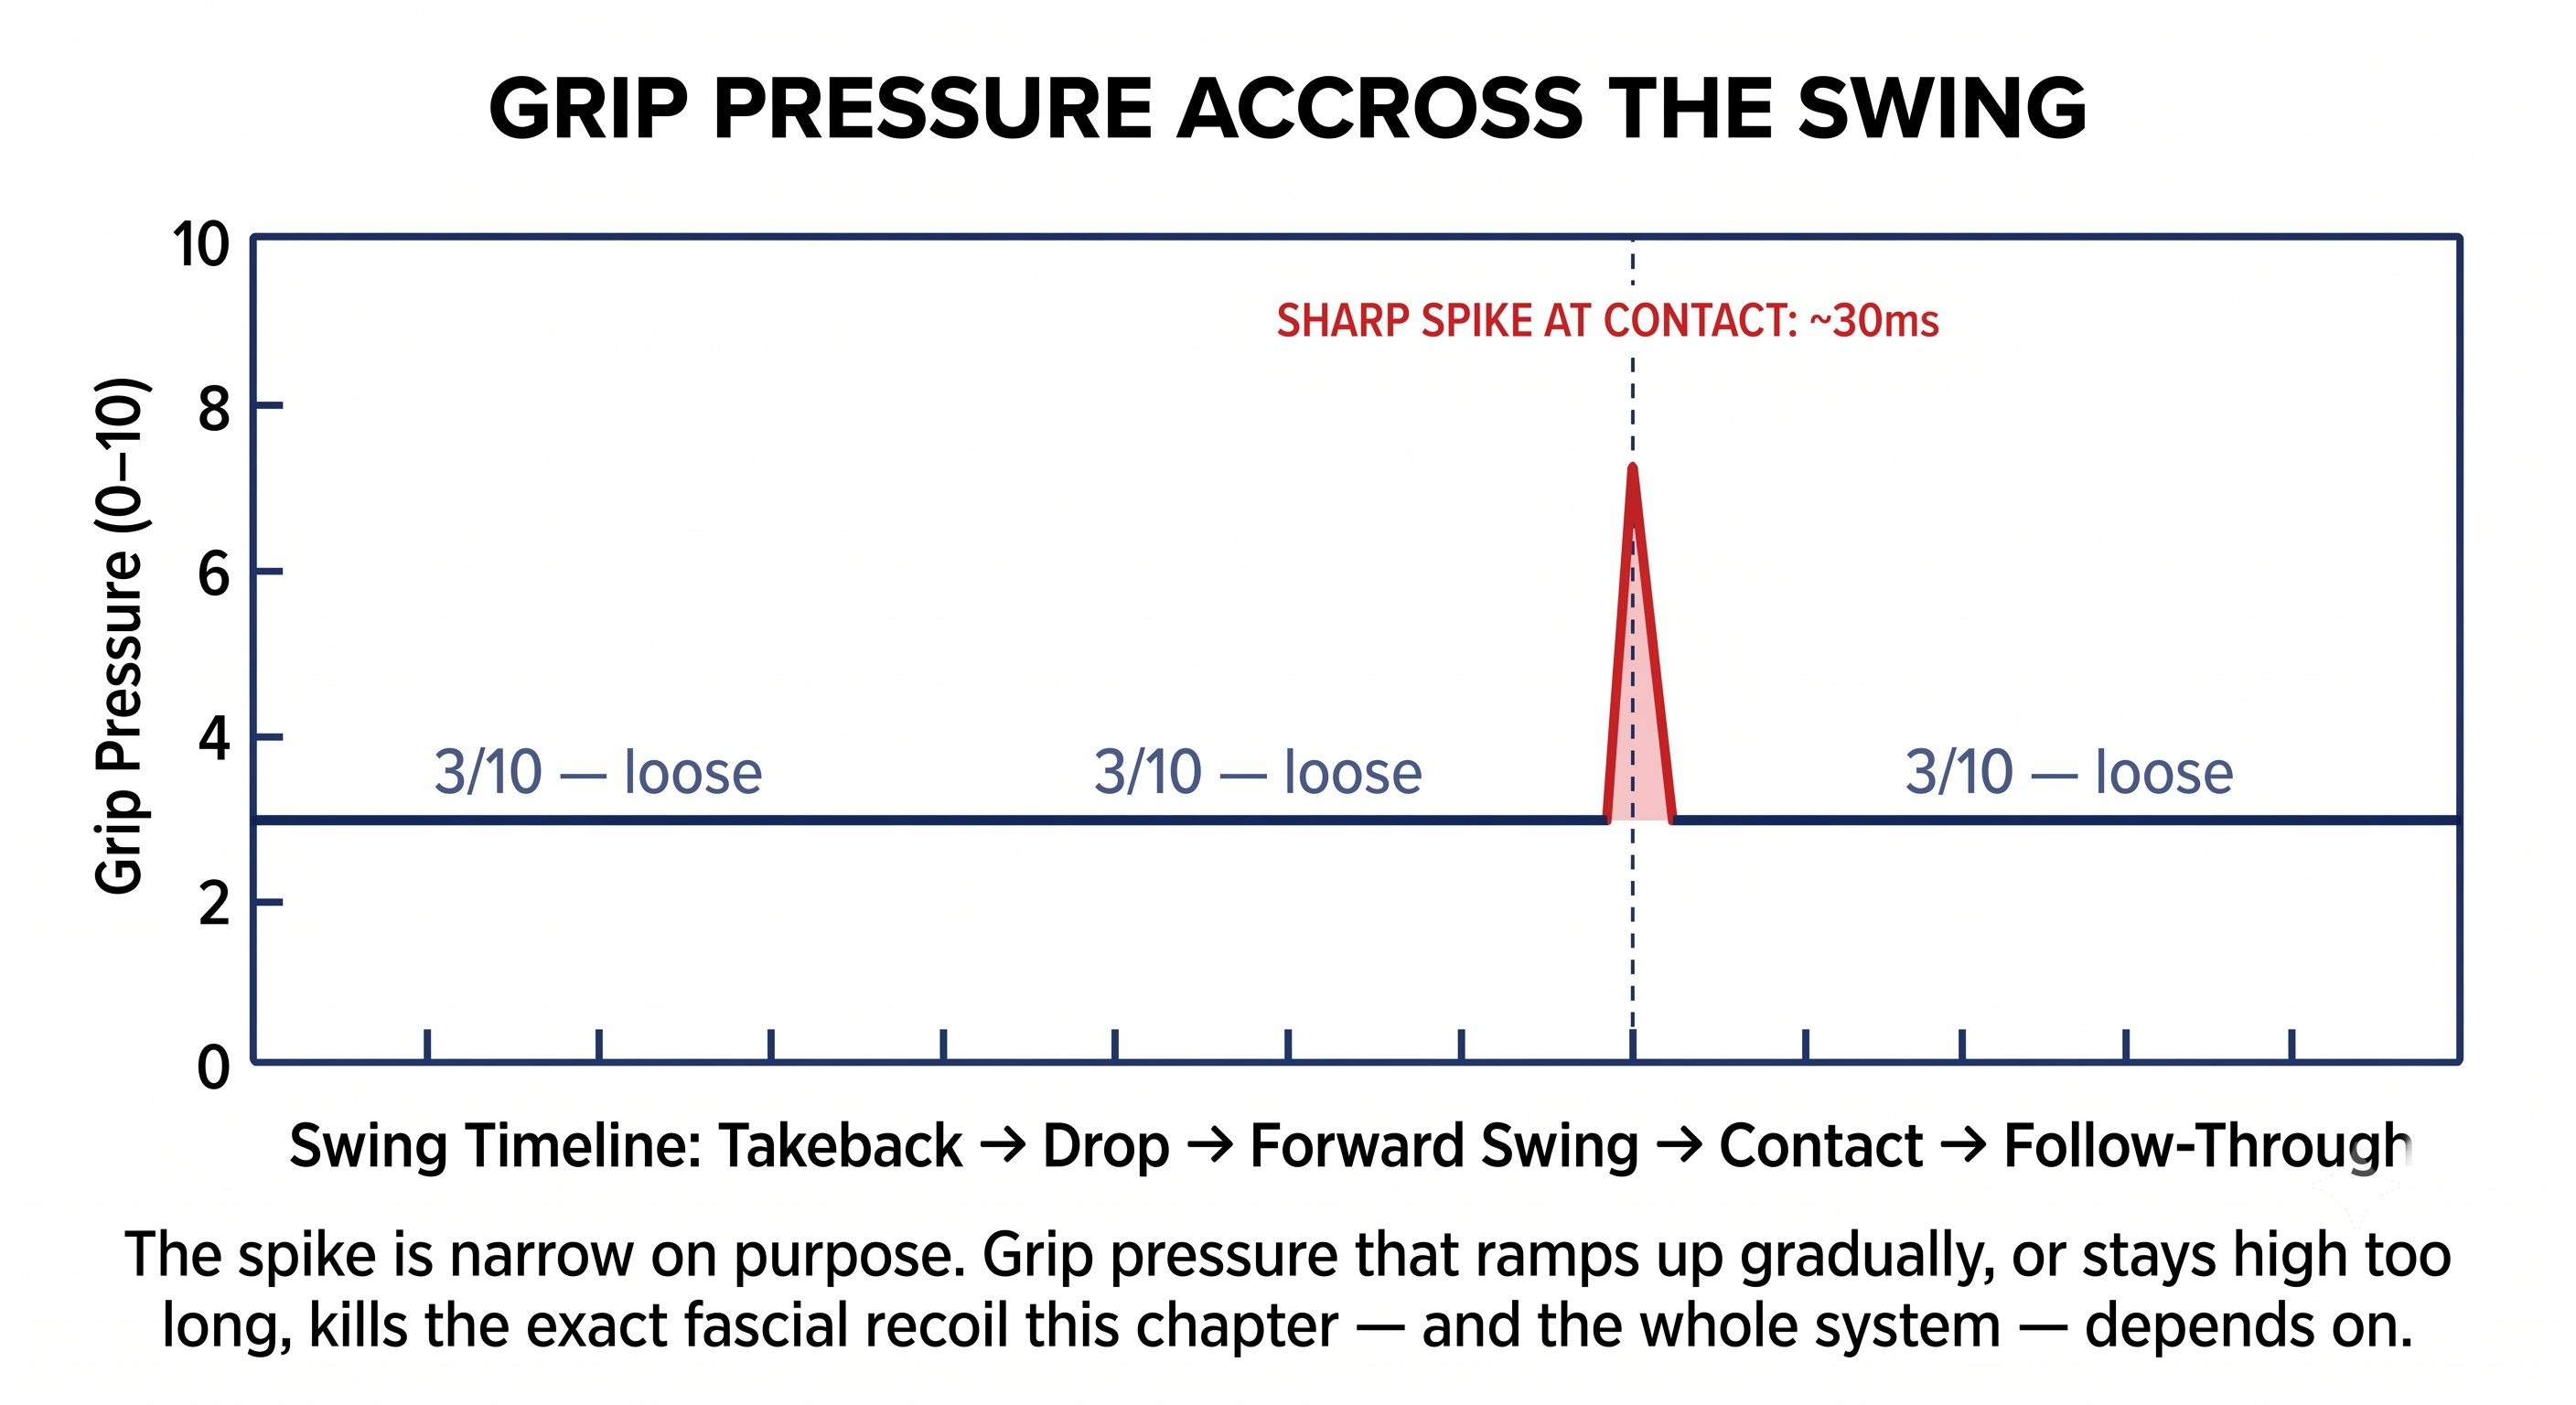
The Tool — Figure 5
Chapter 3: Precision 5 figures
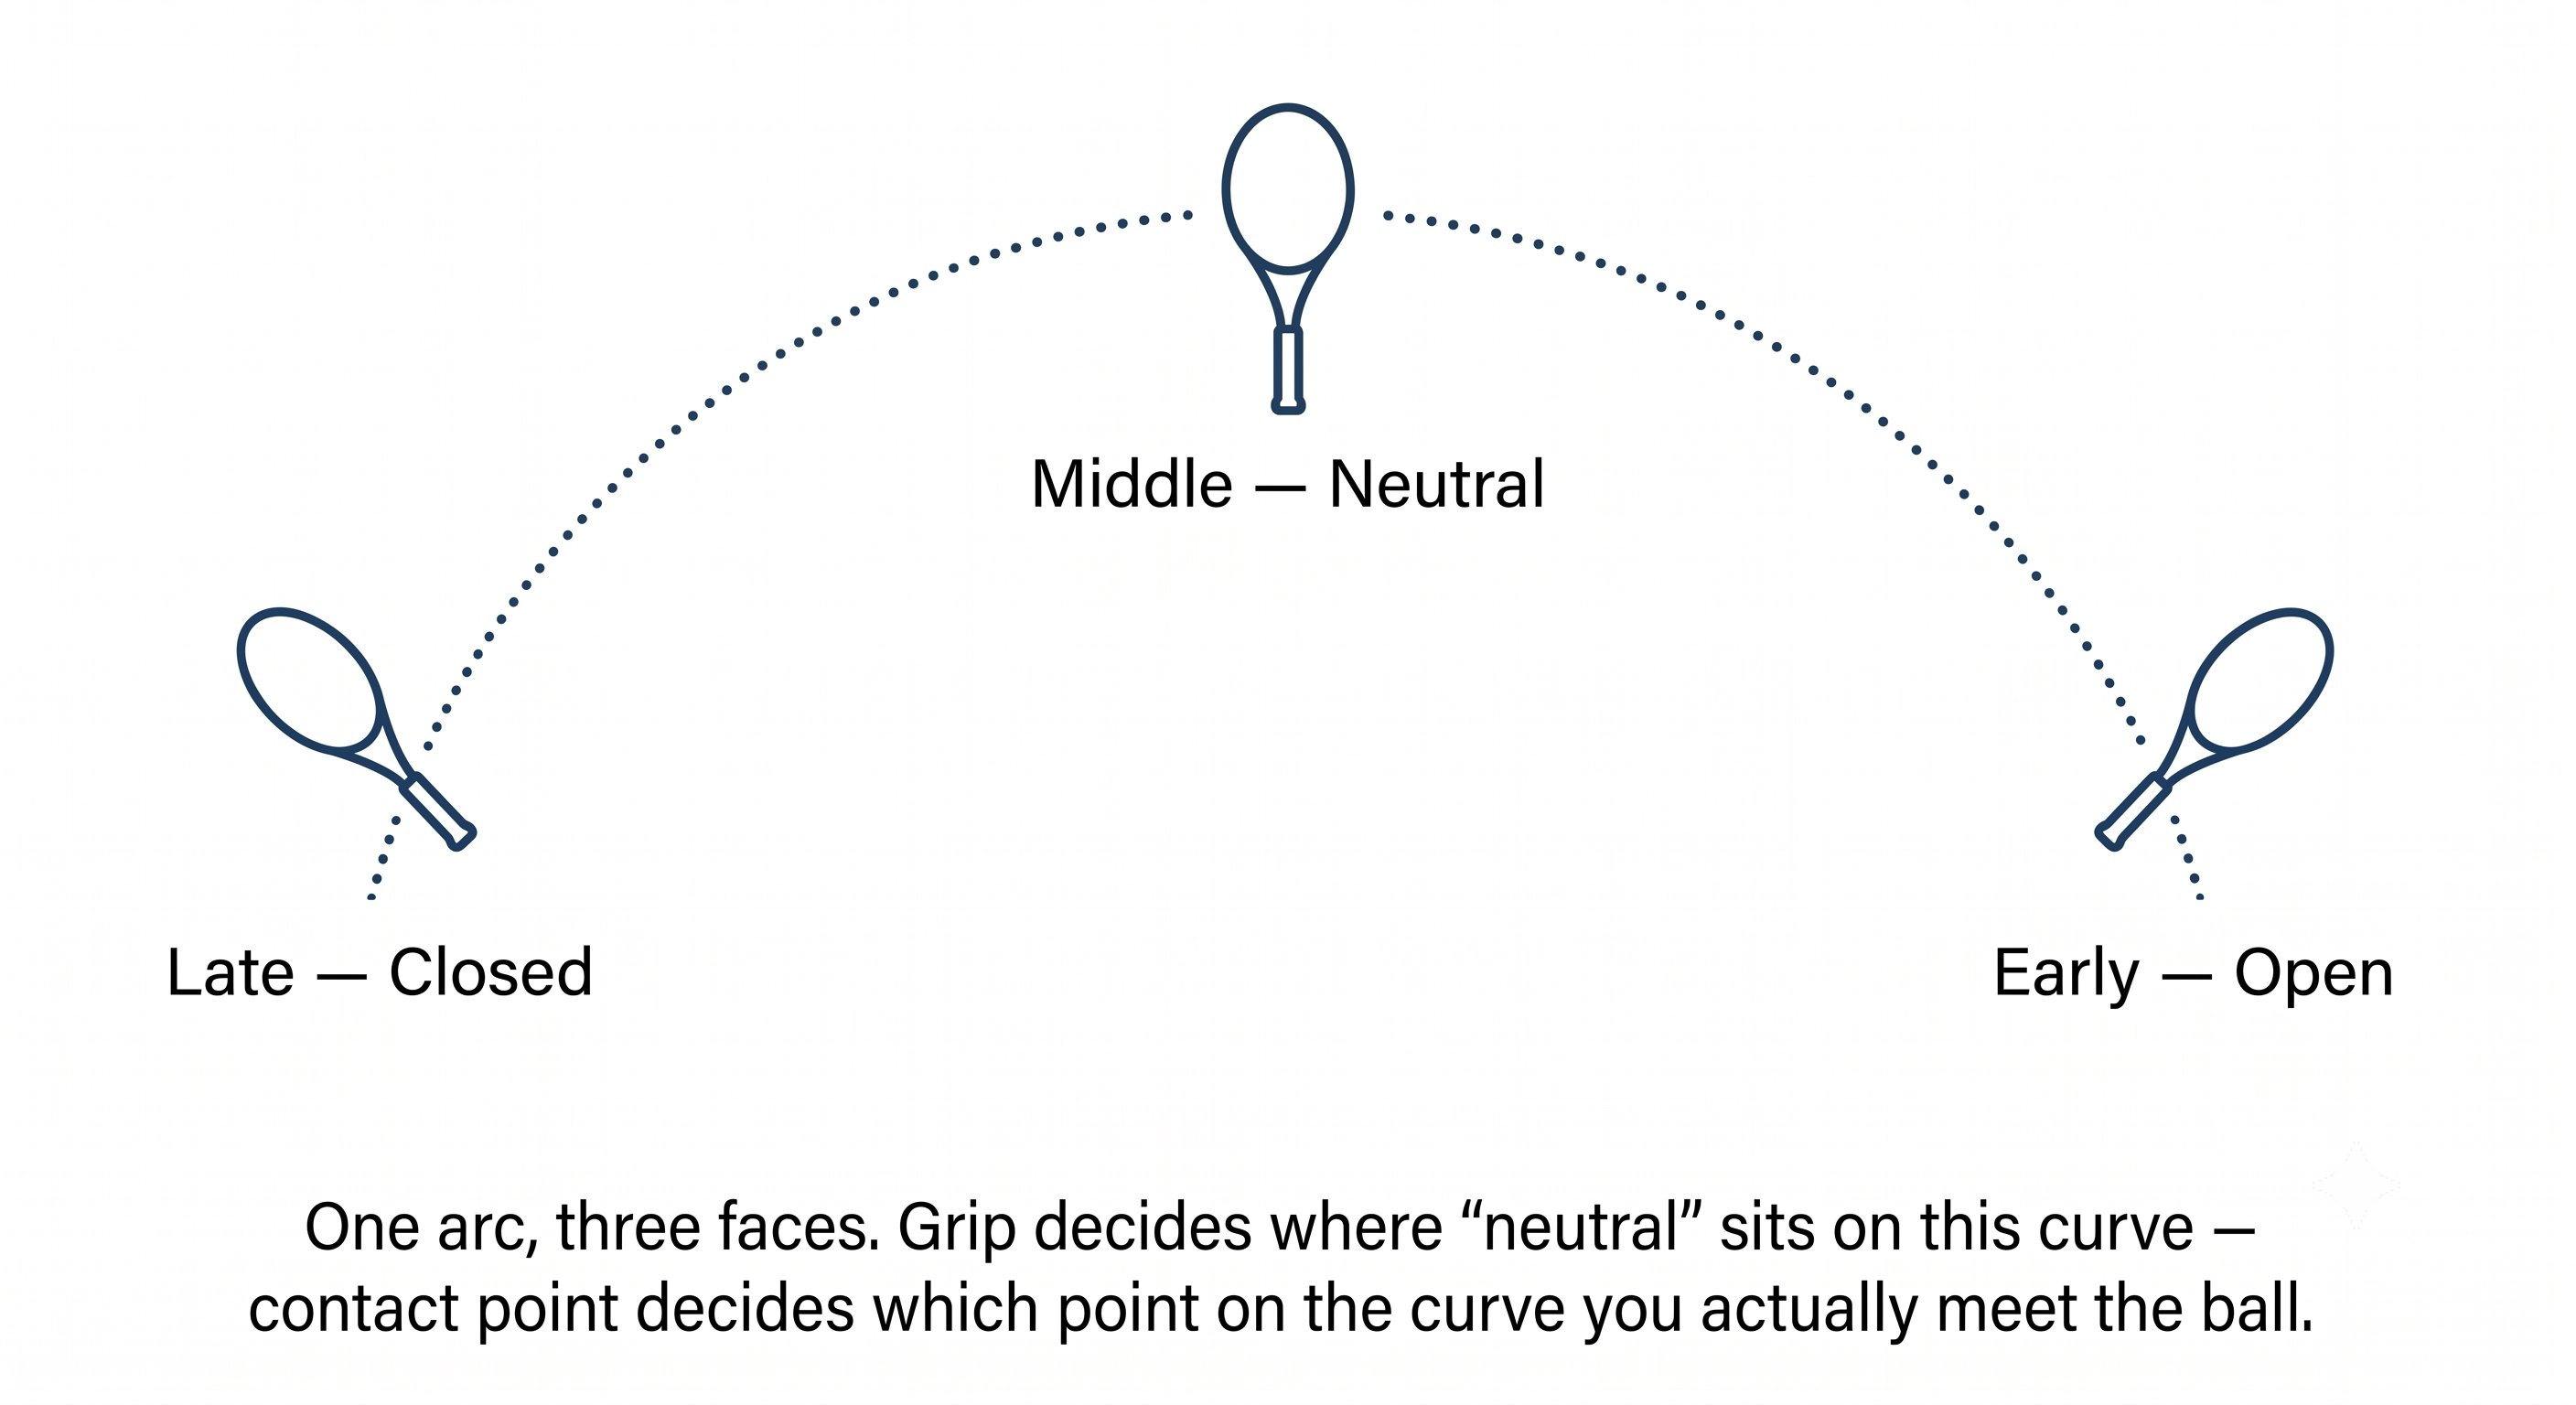
Precision — Figure 1
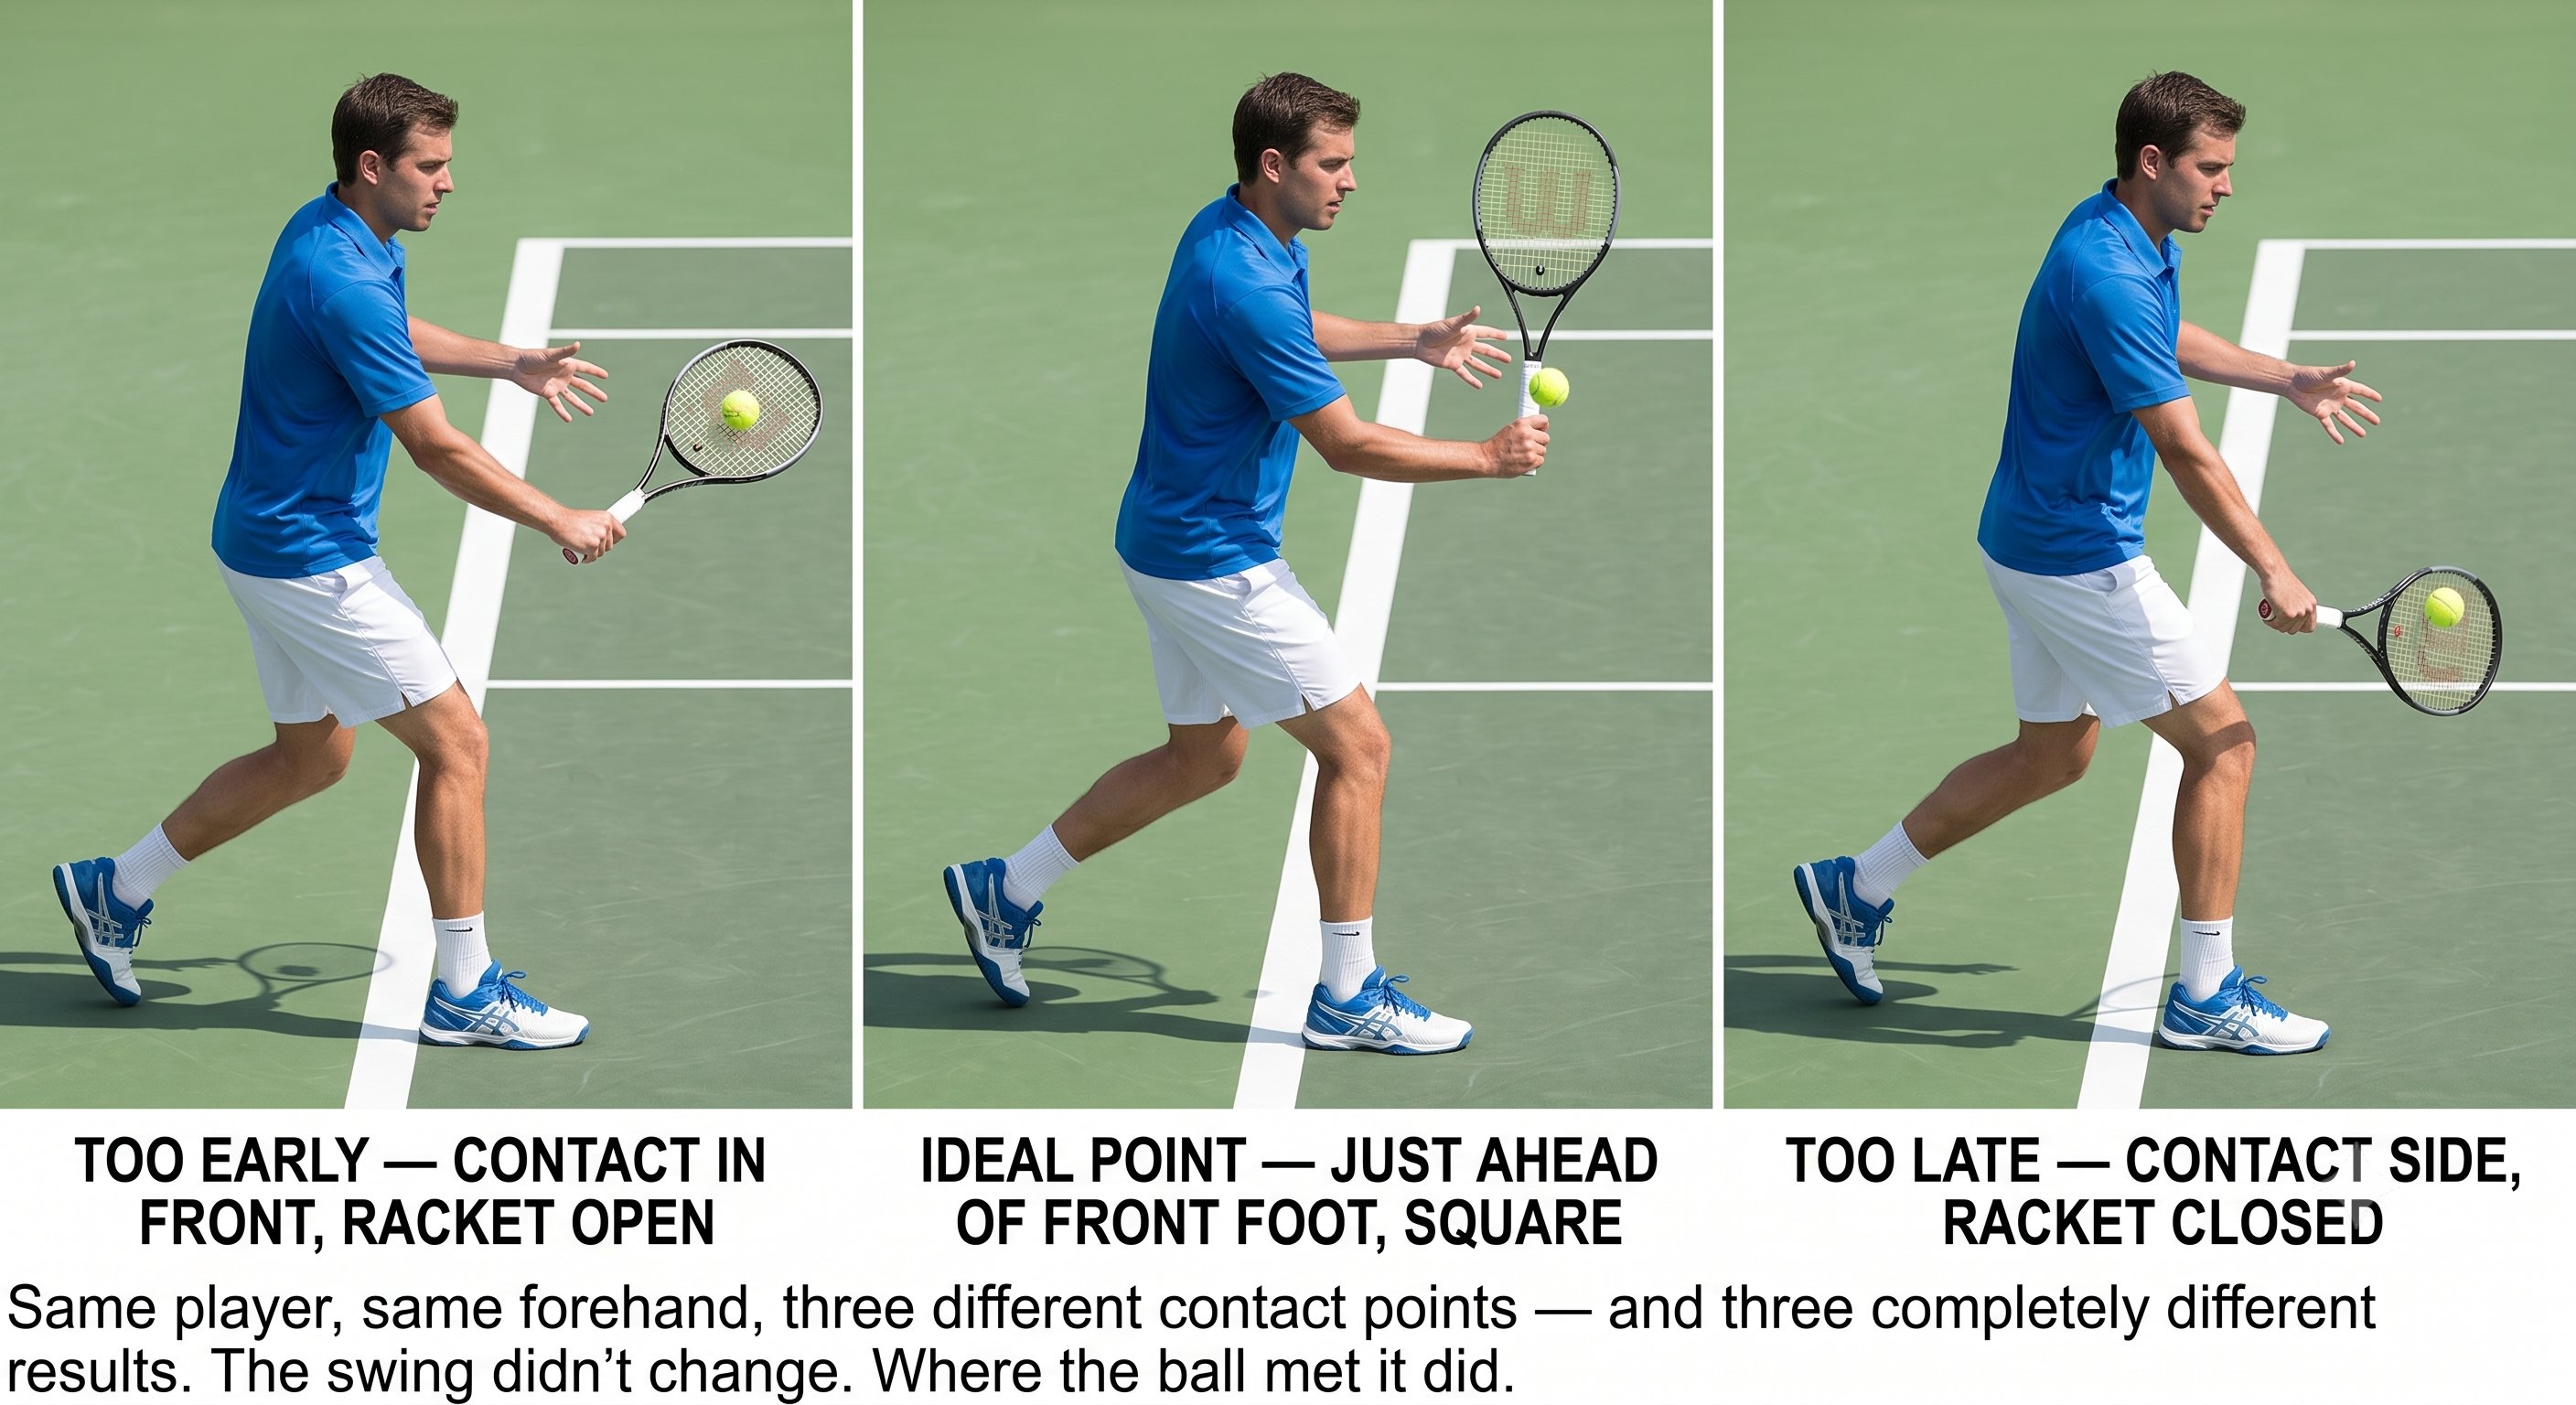
Precision — Figure 2
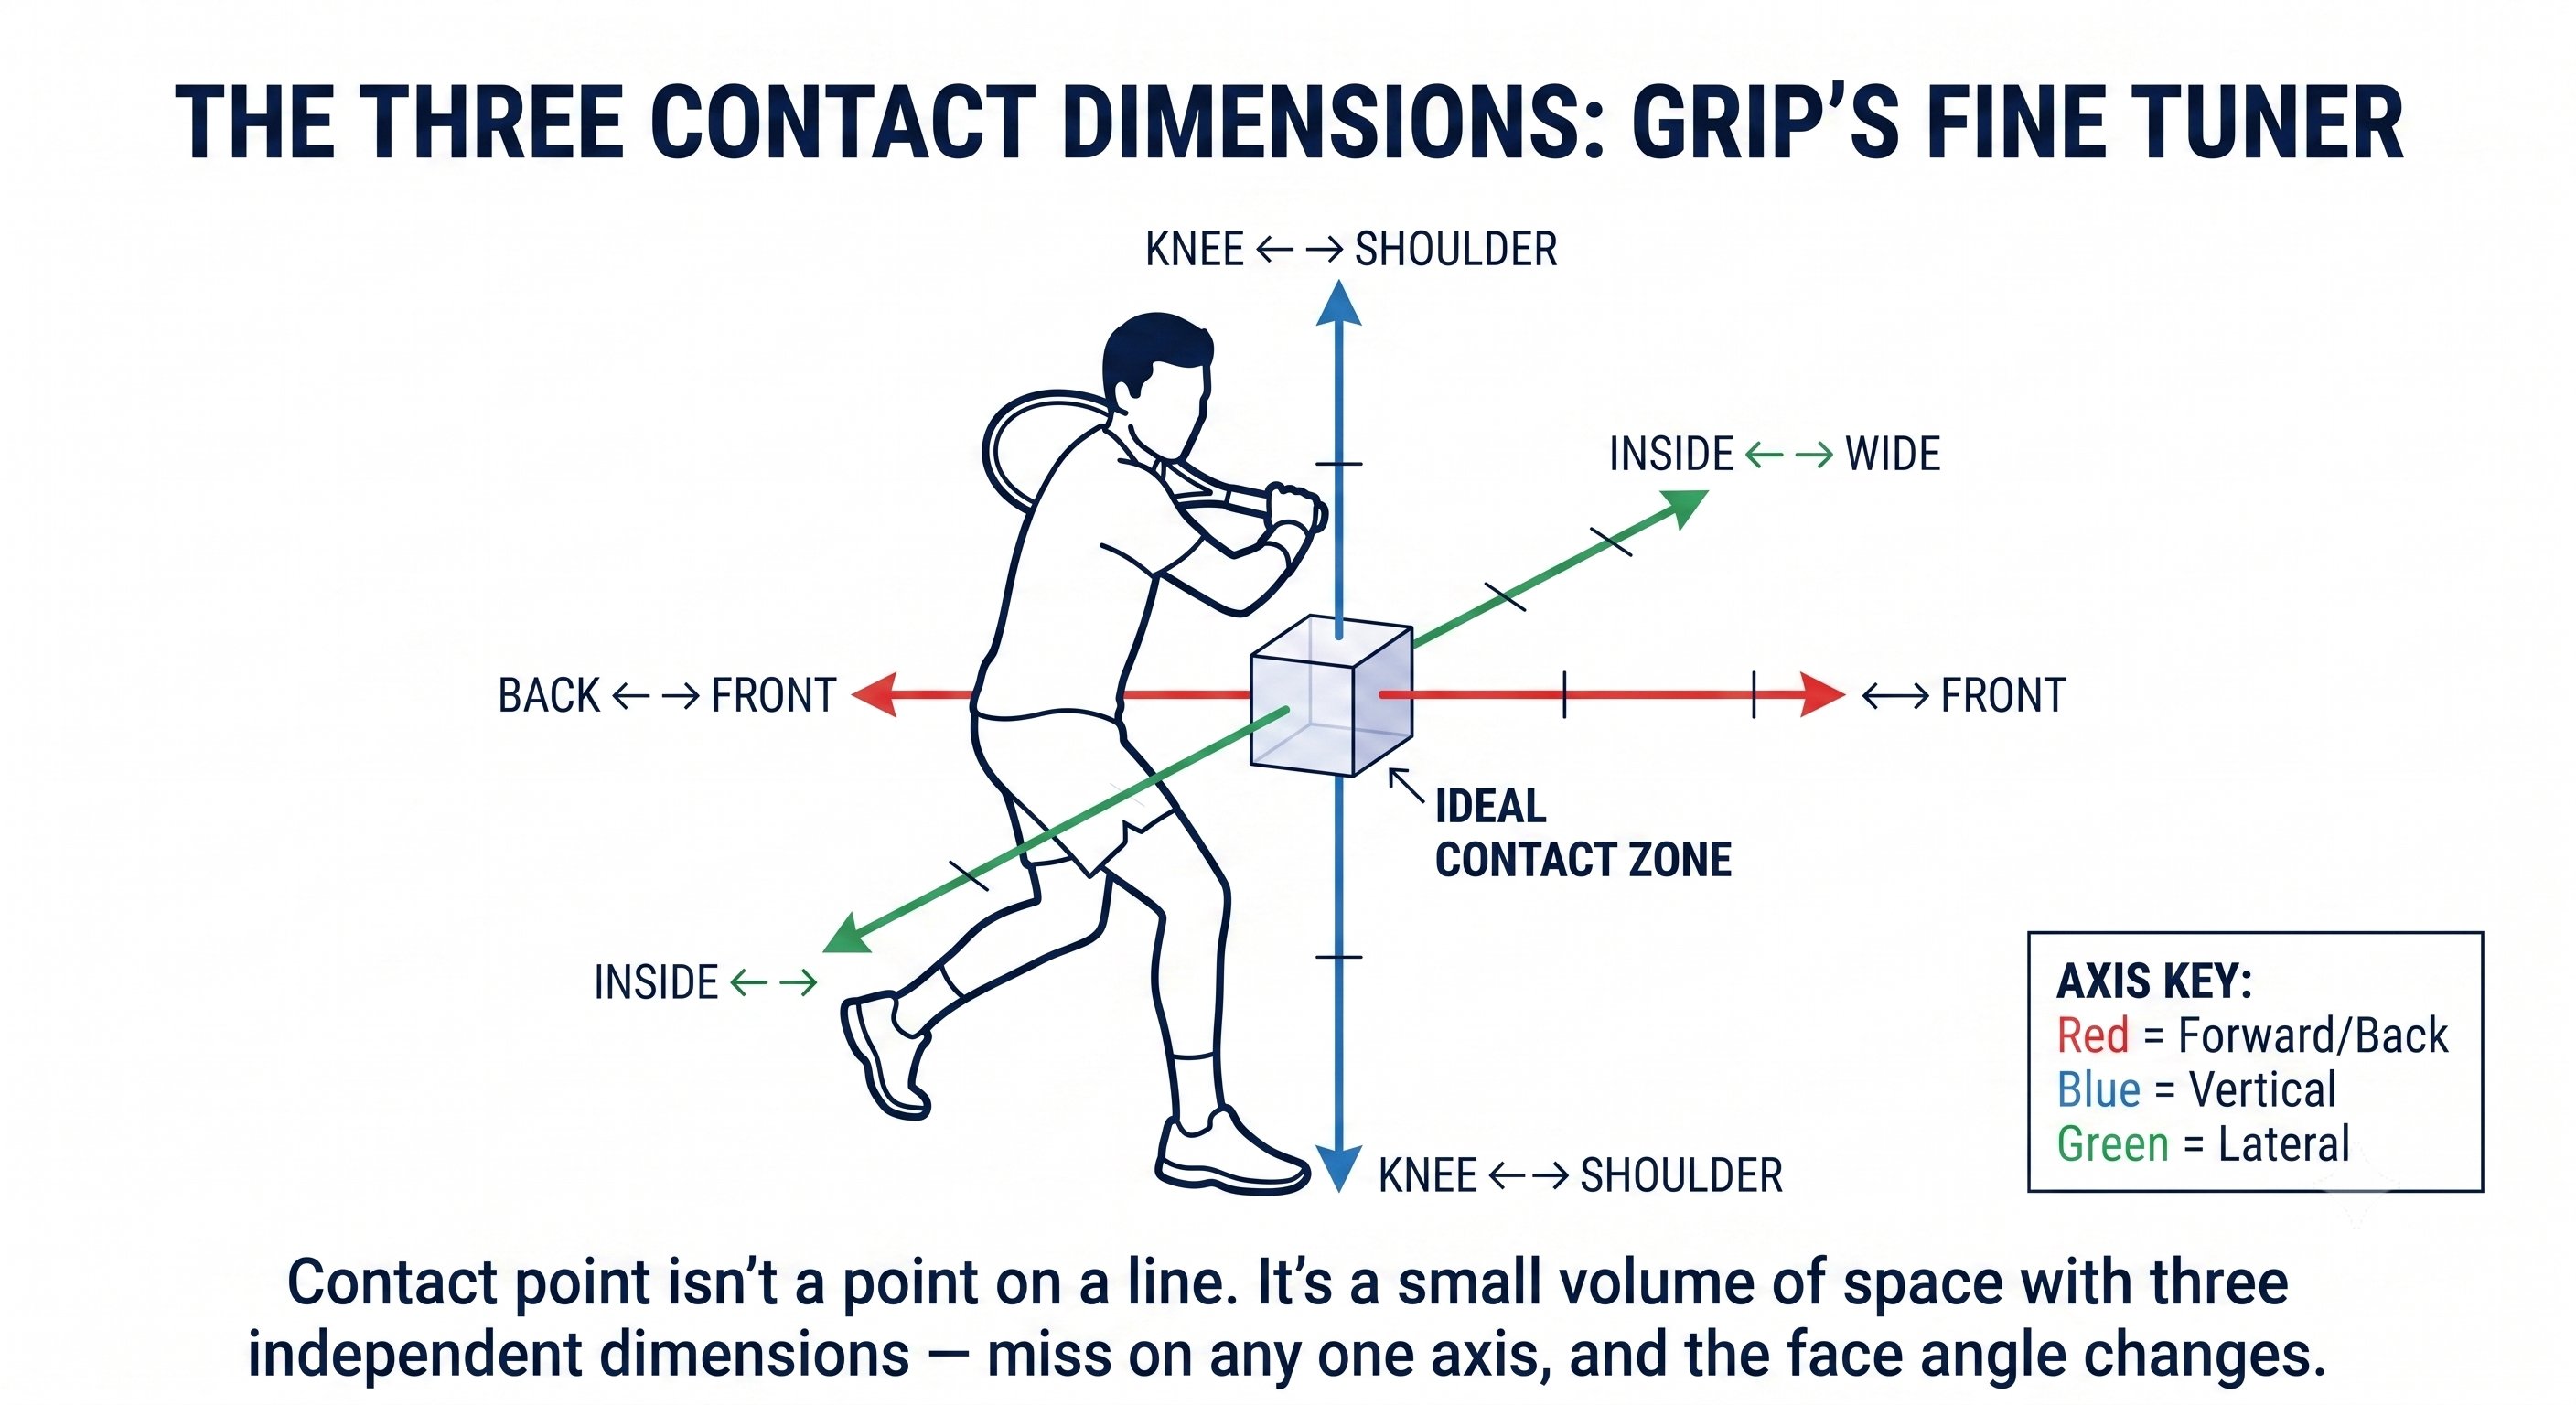
Precision — Figure 3
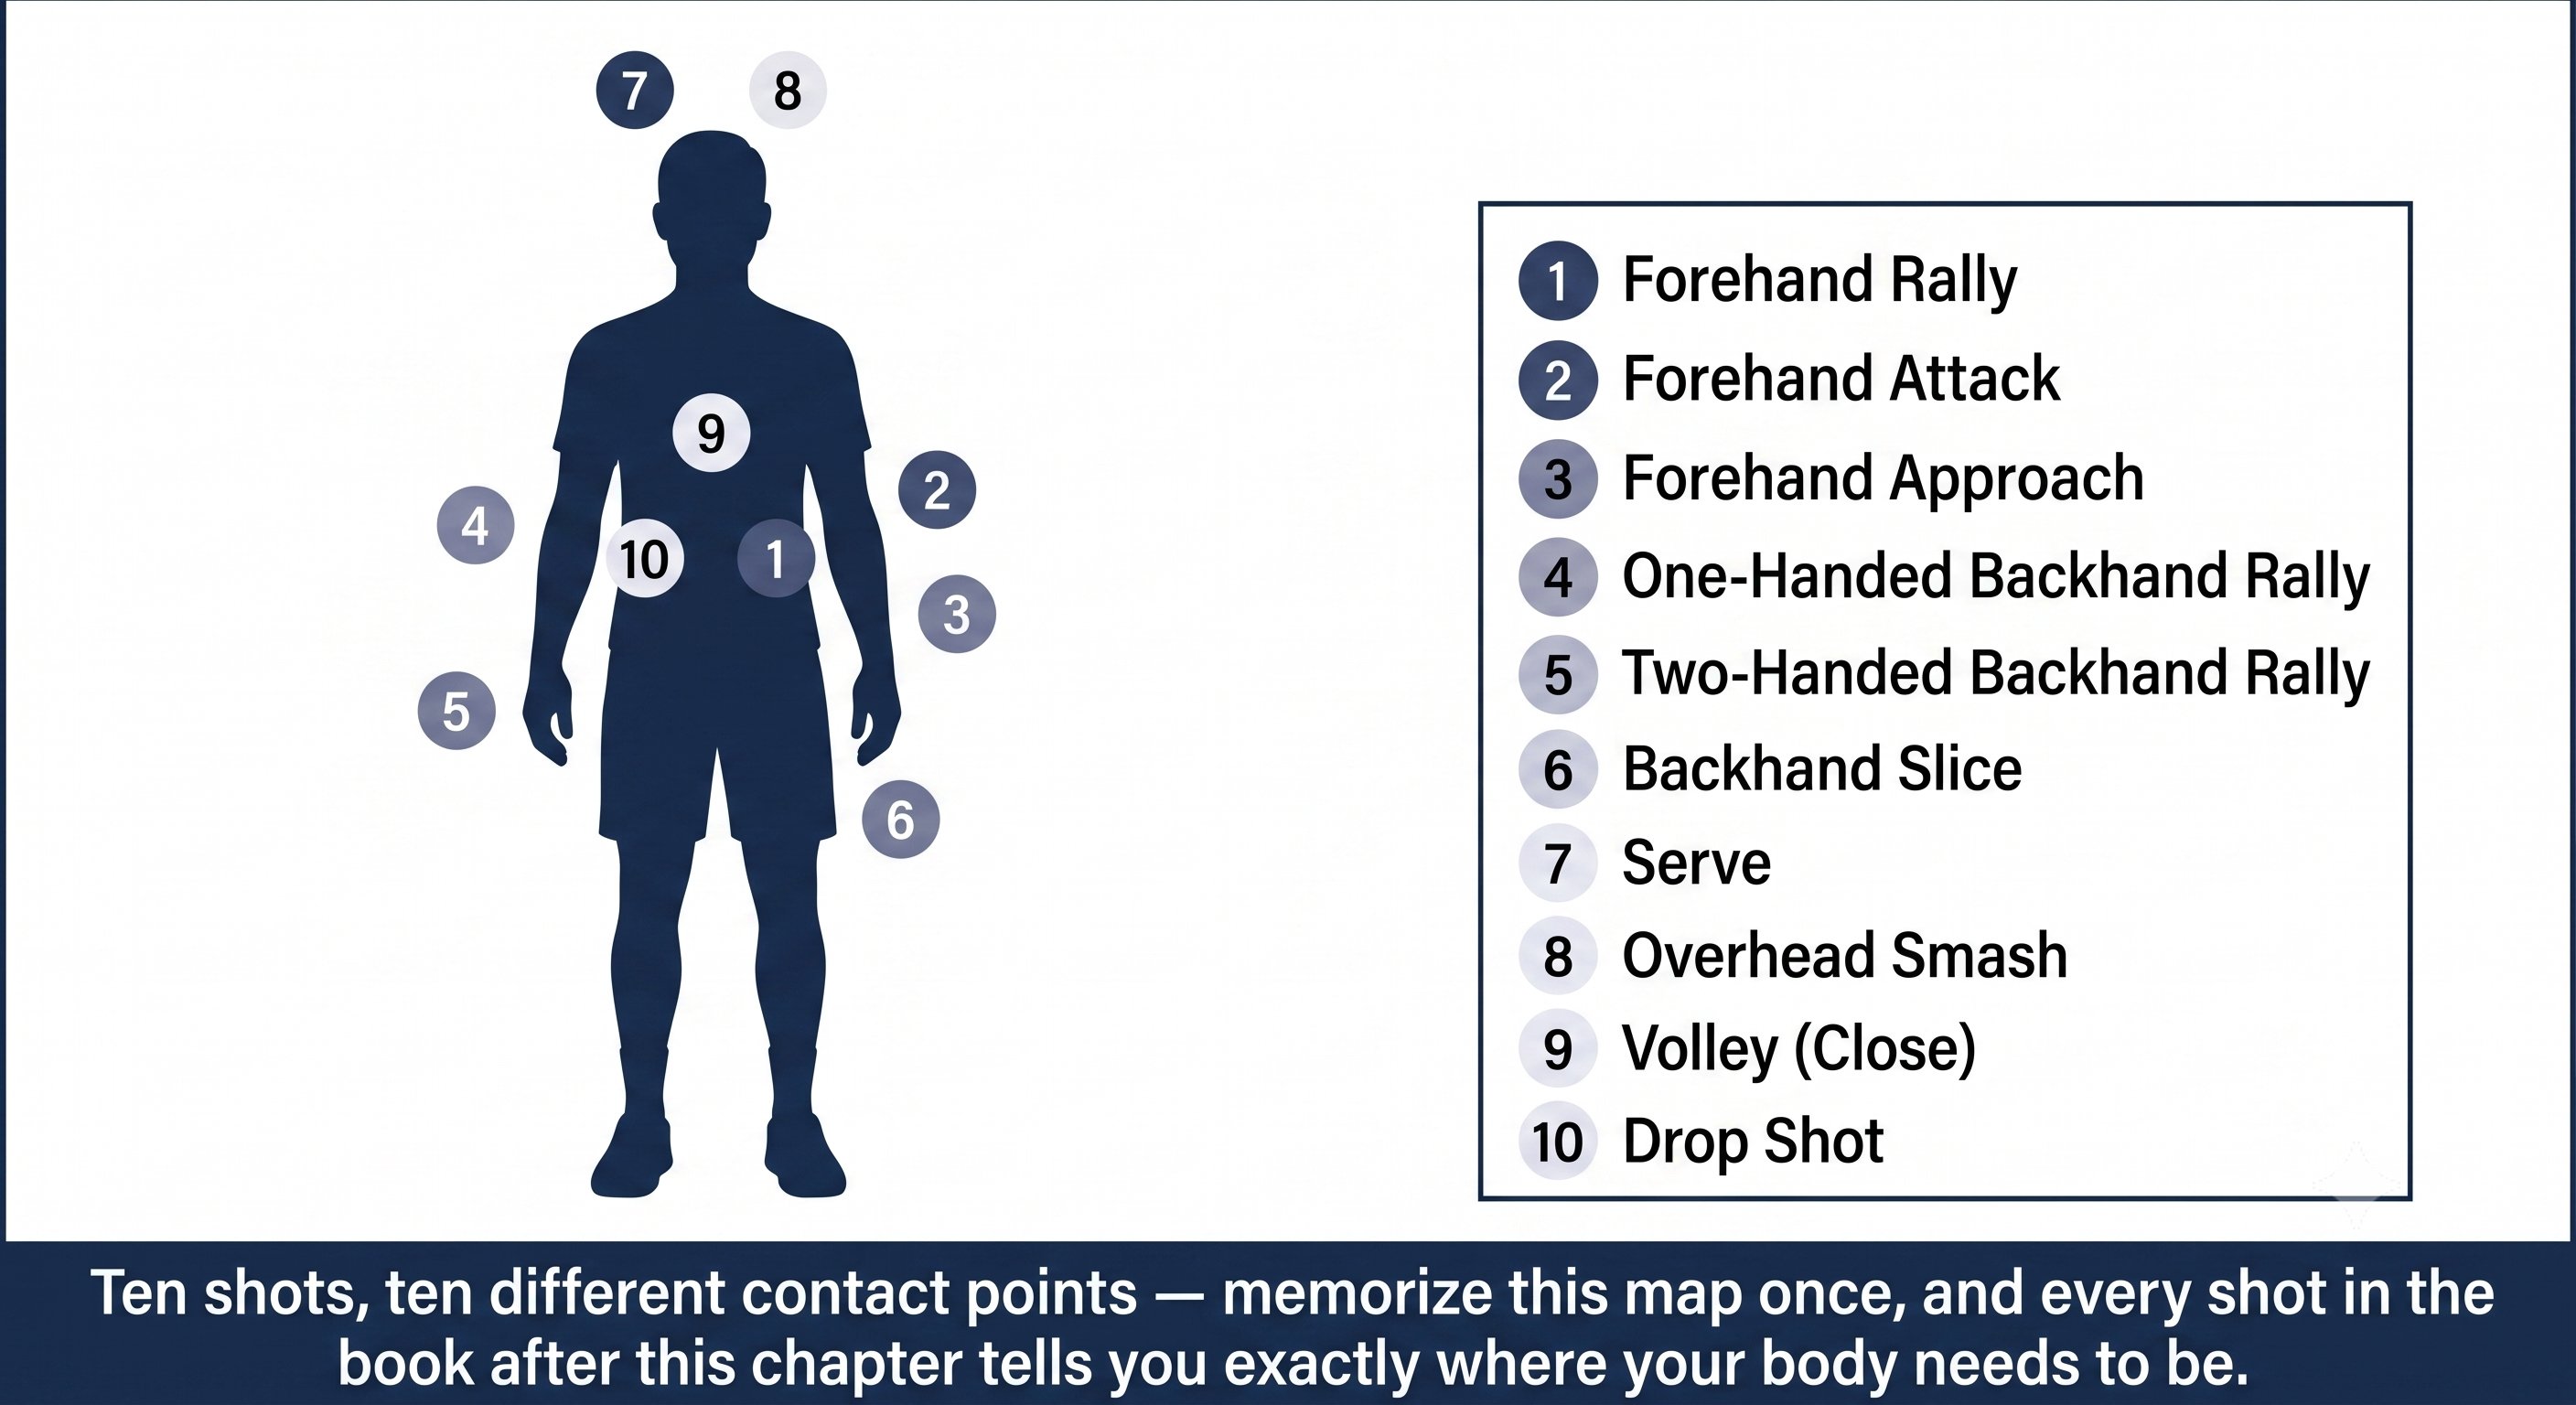
Precision — Figure 4
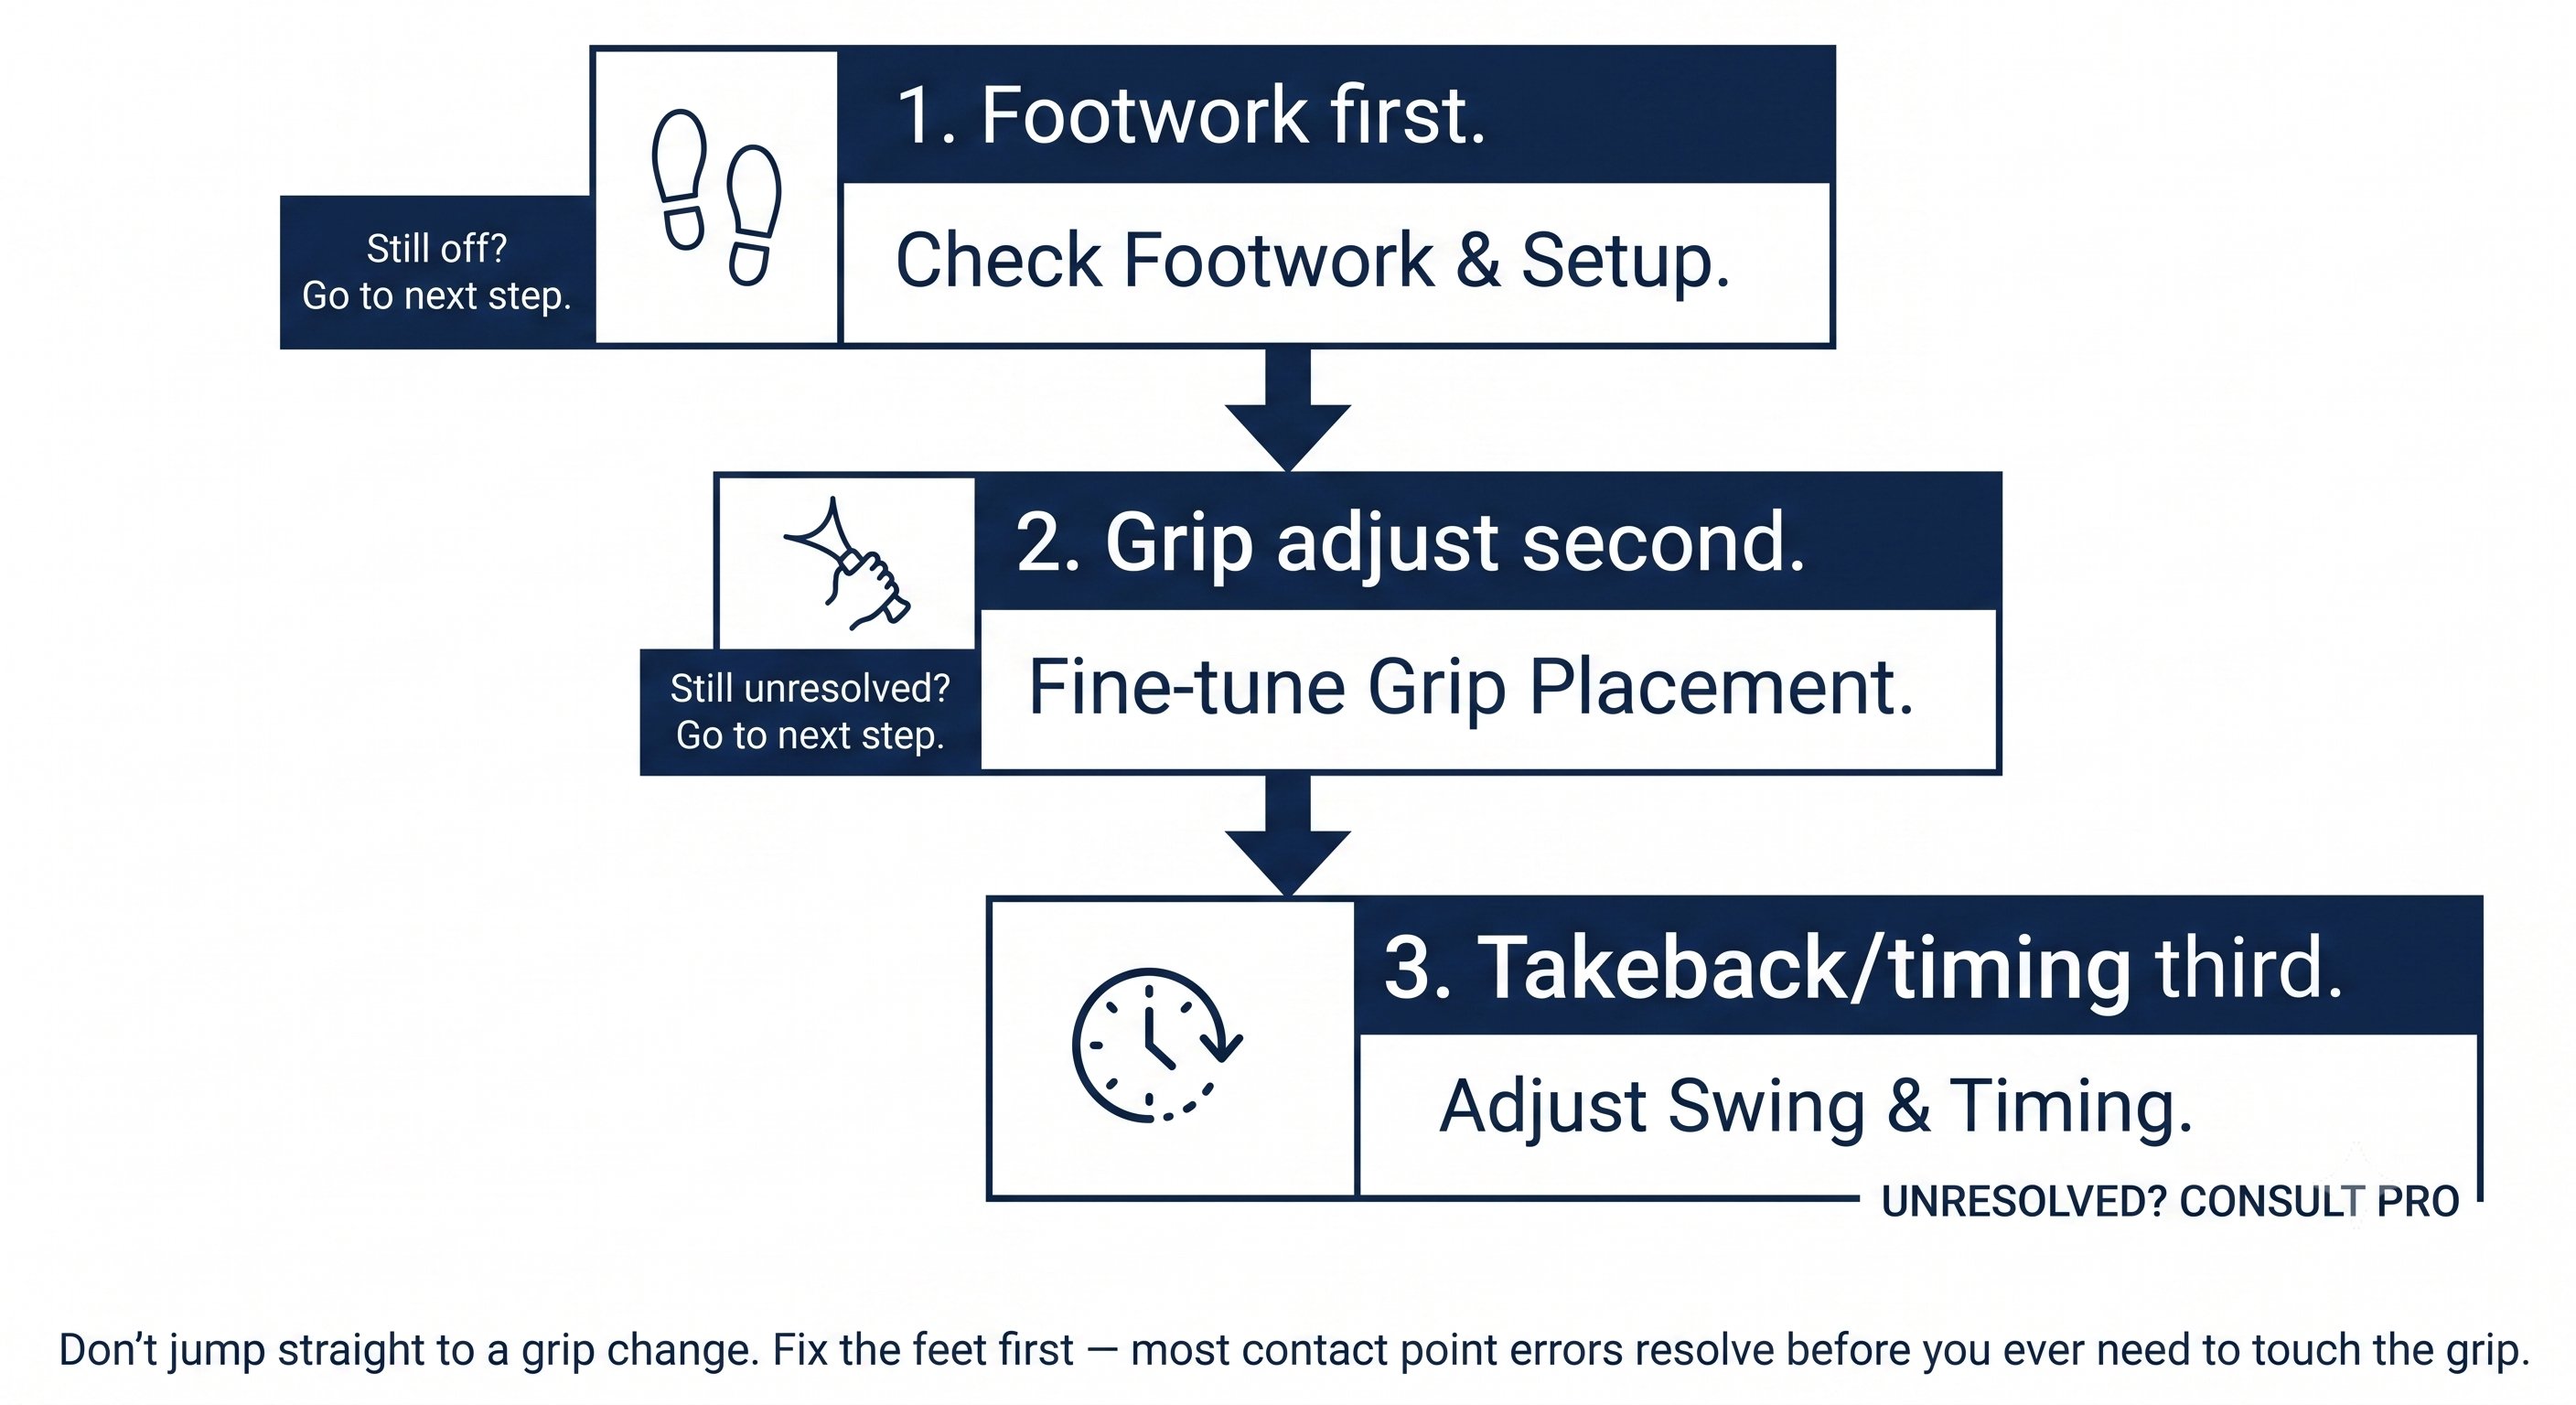
Precision — Figure 5
Chapter 4: Outcome 5 figures
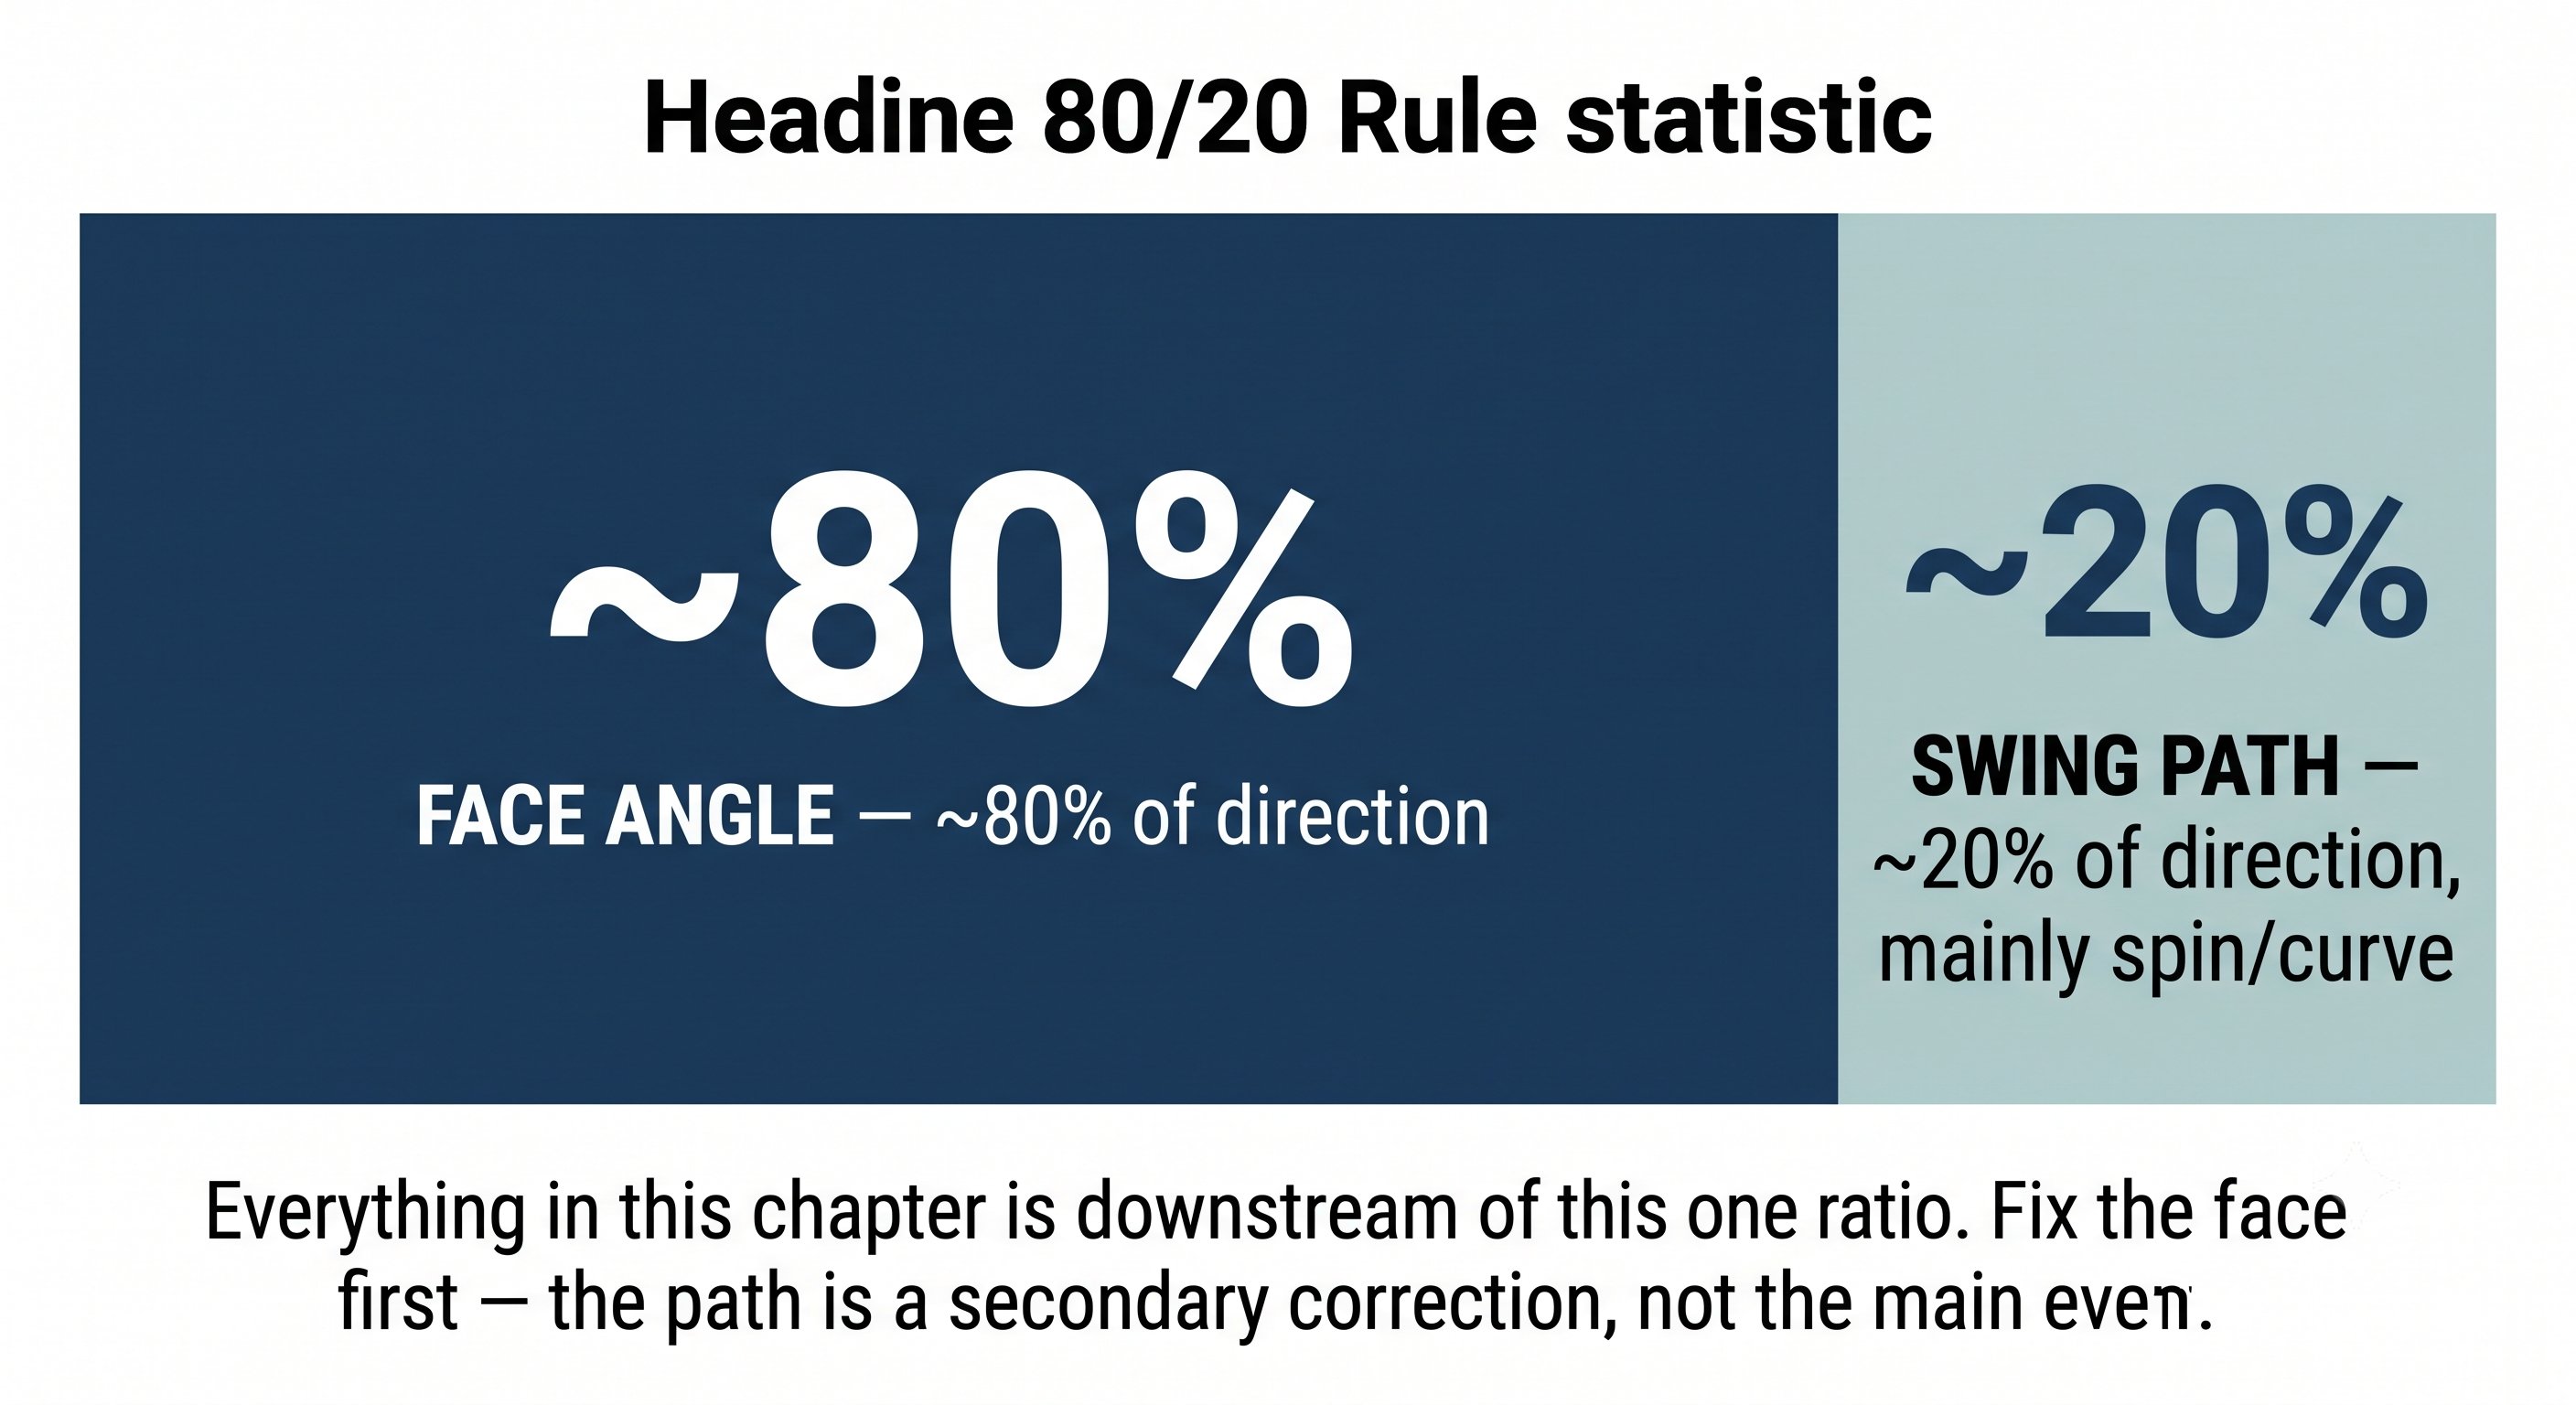
Outcome — Figure 1
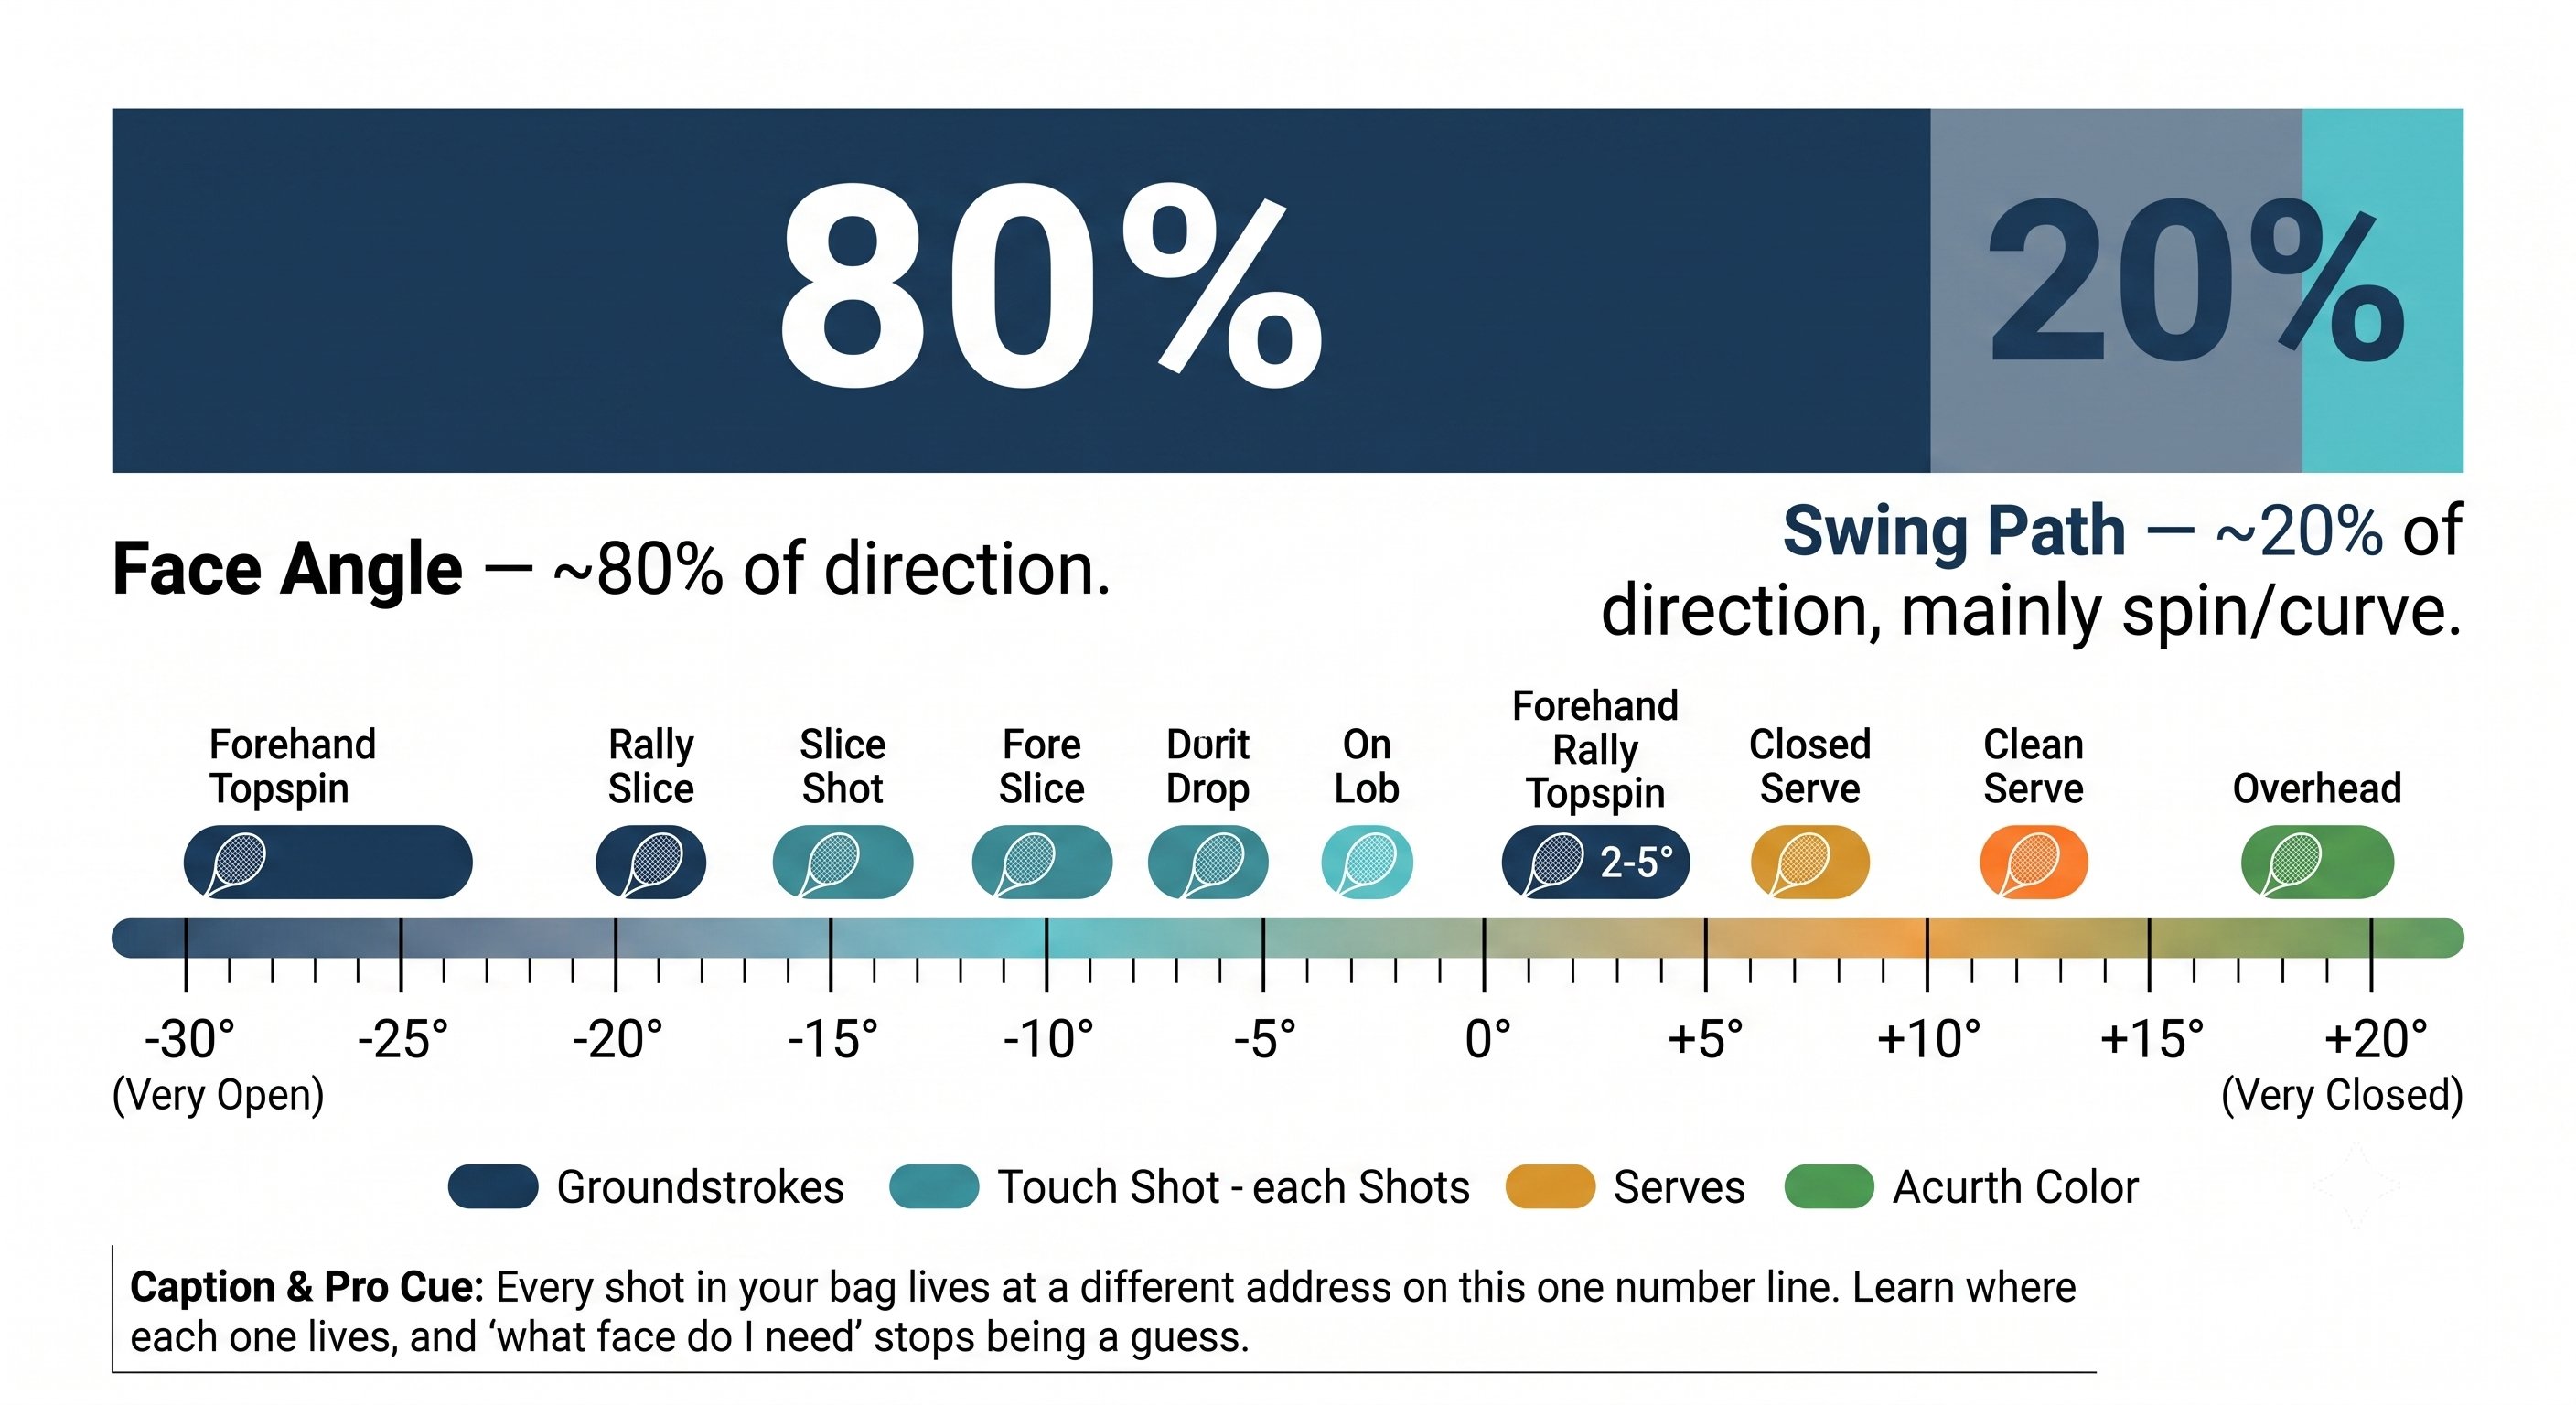
Outcome — Figure 2
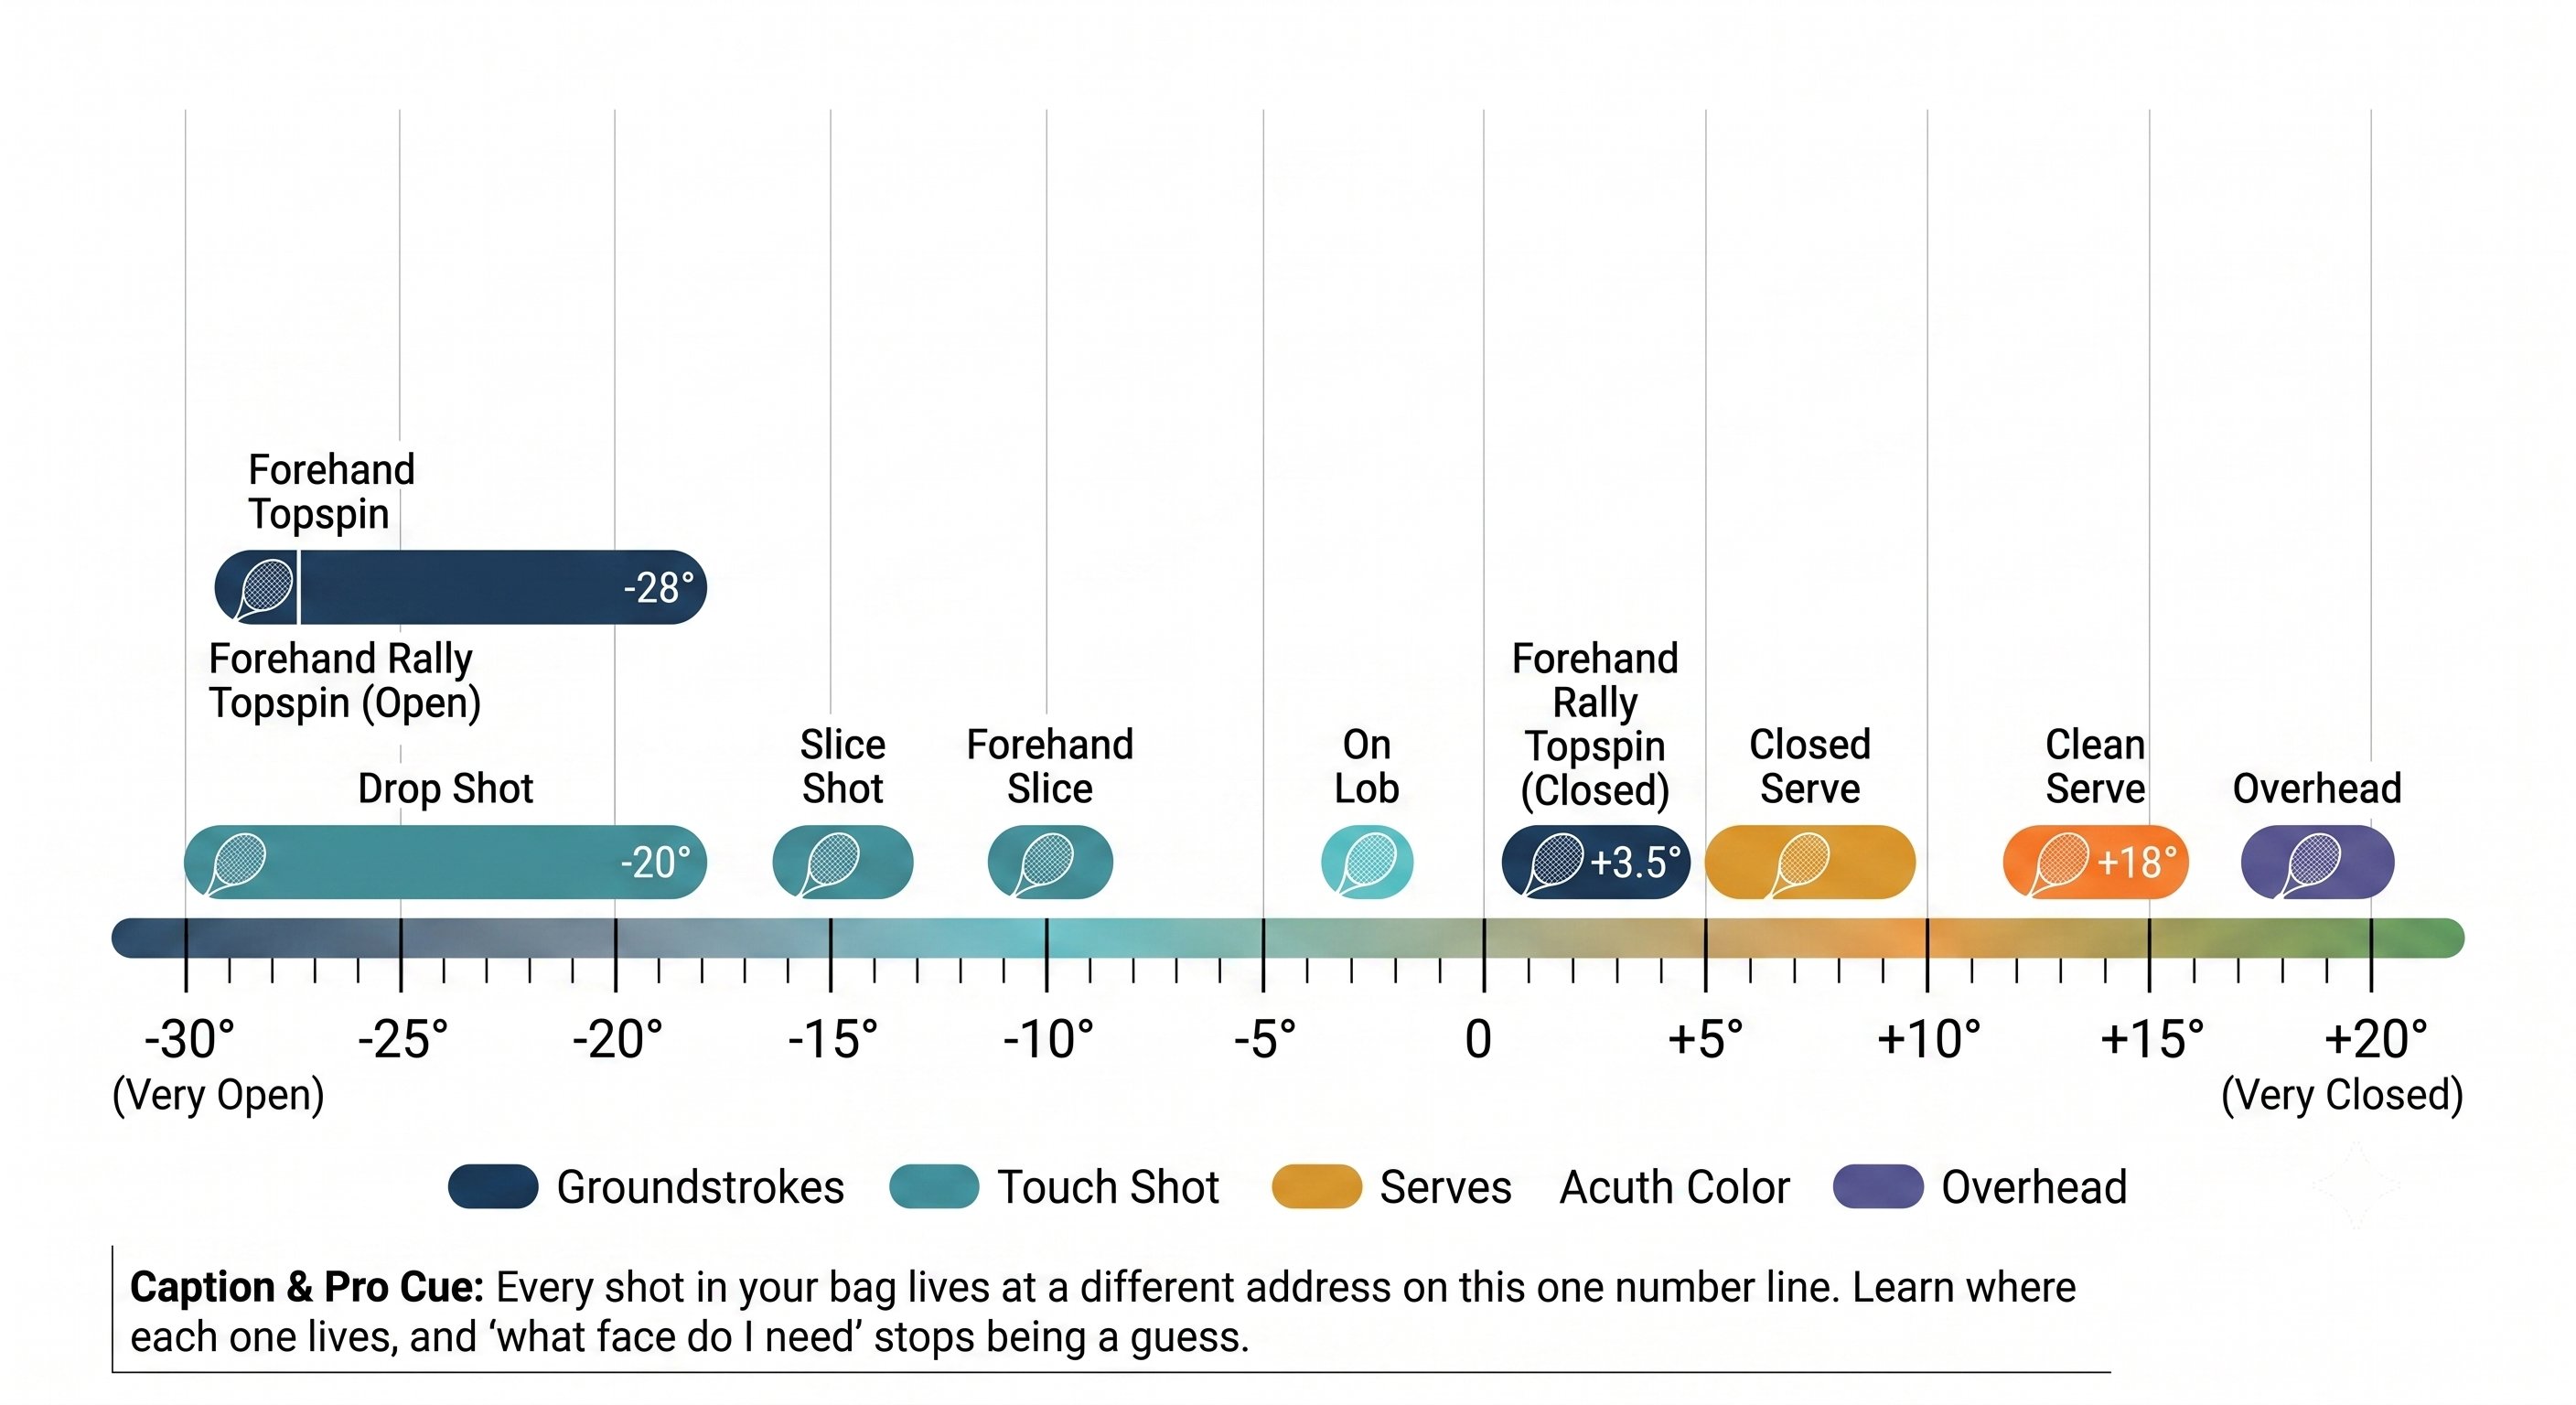
Outcome — Figure 3
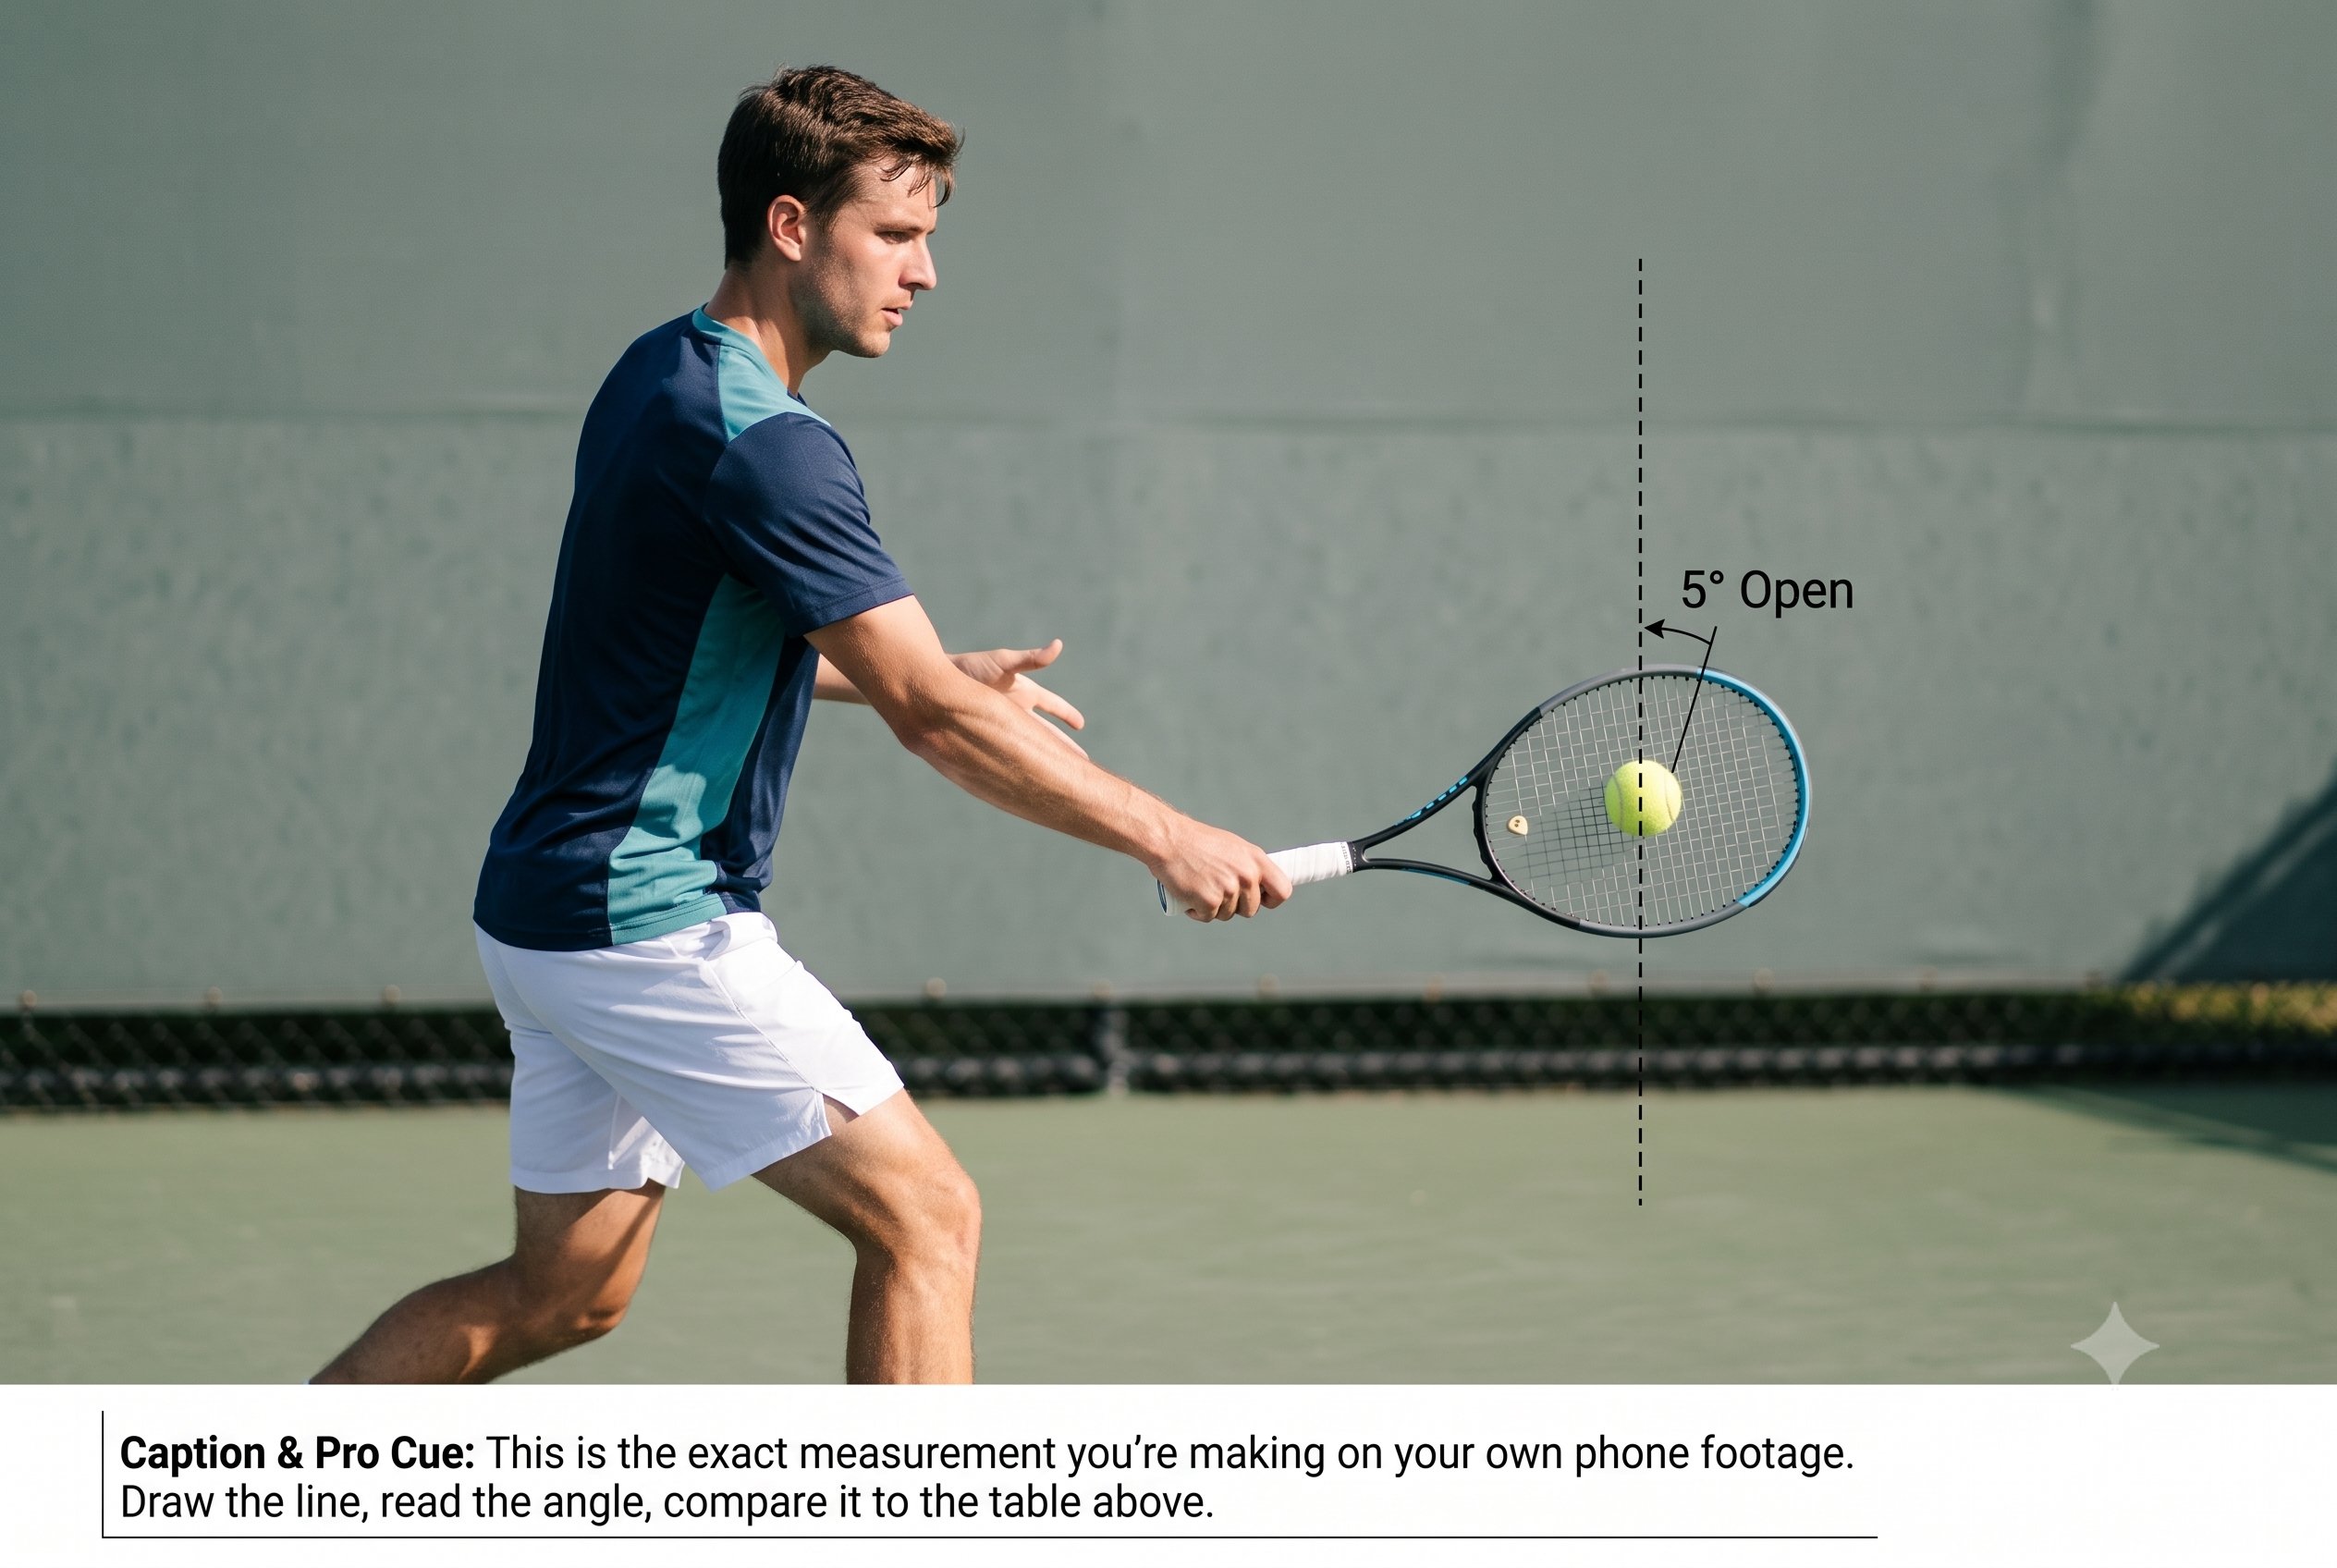
Outcome — Figure 4
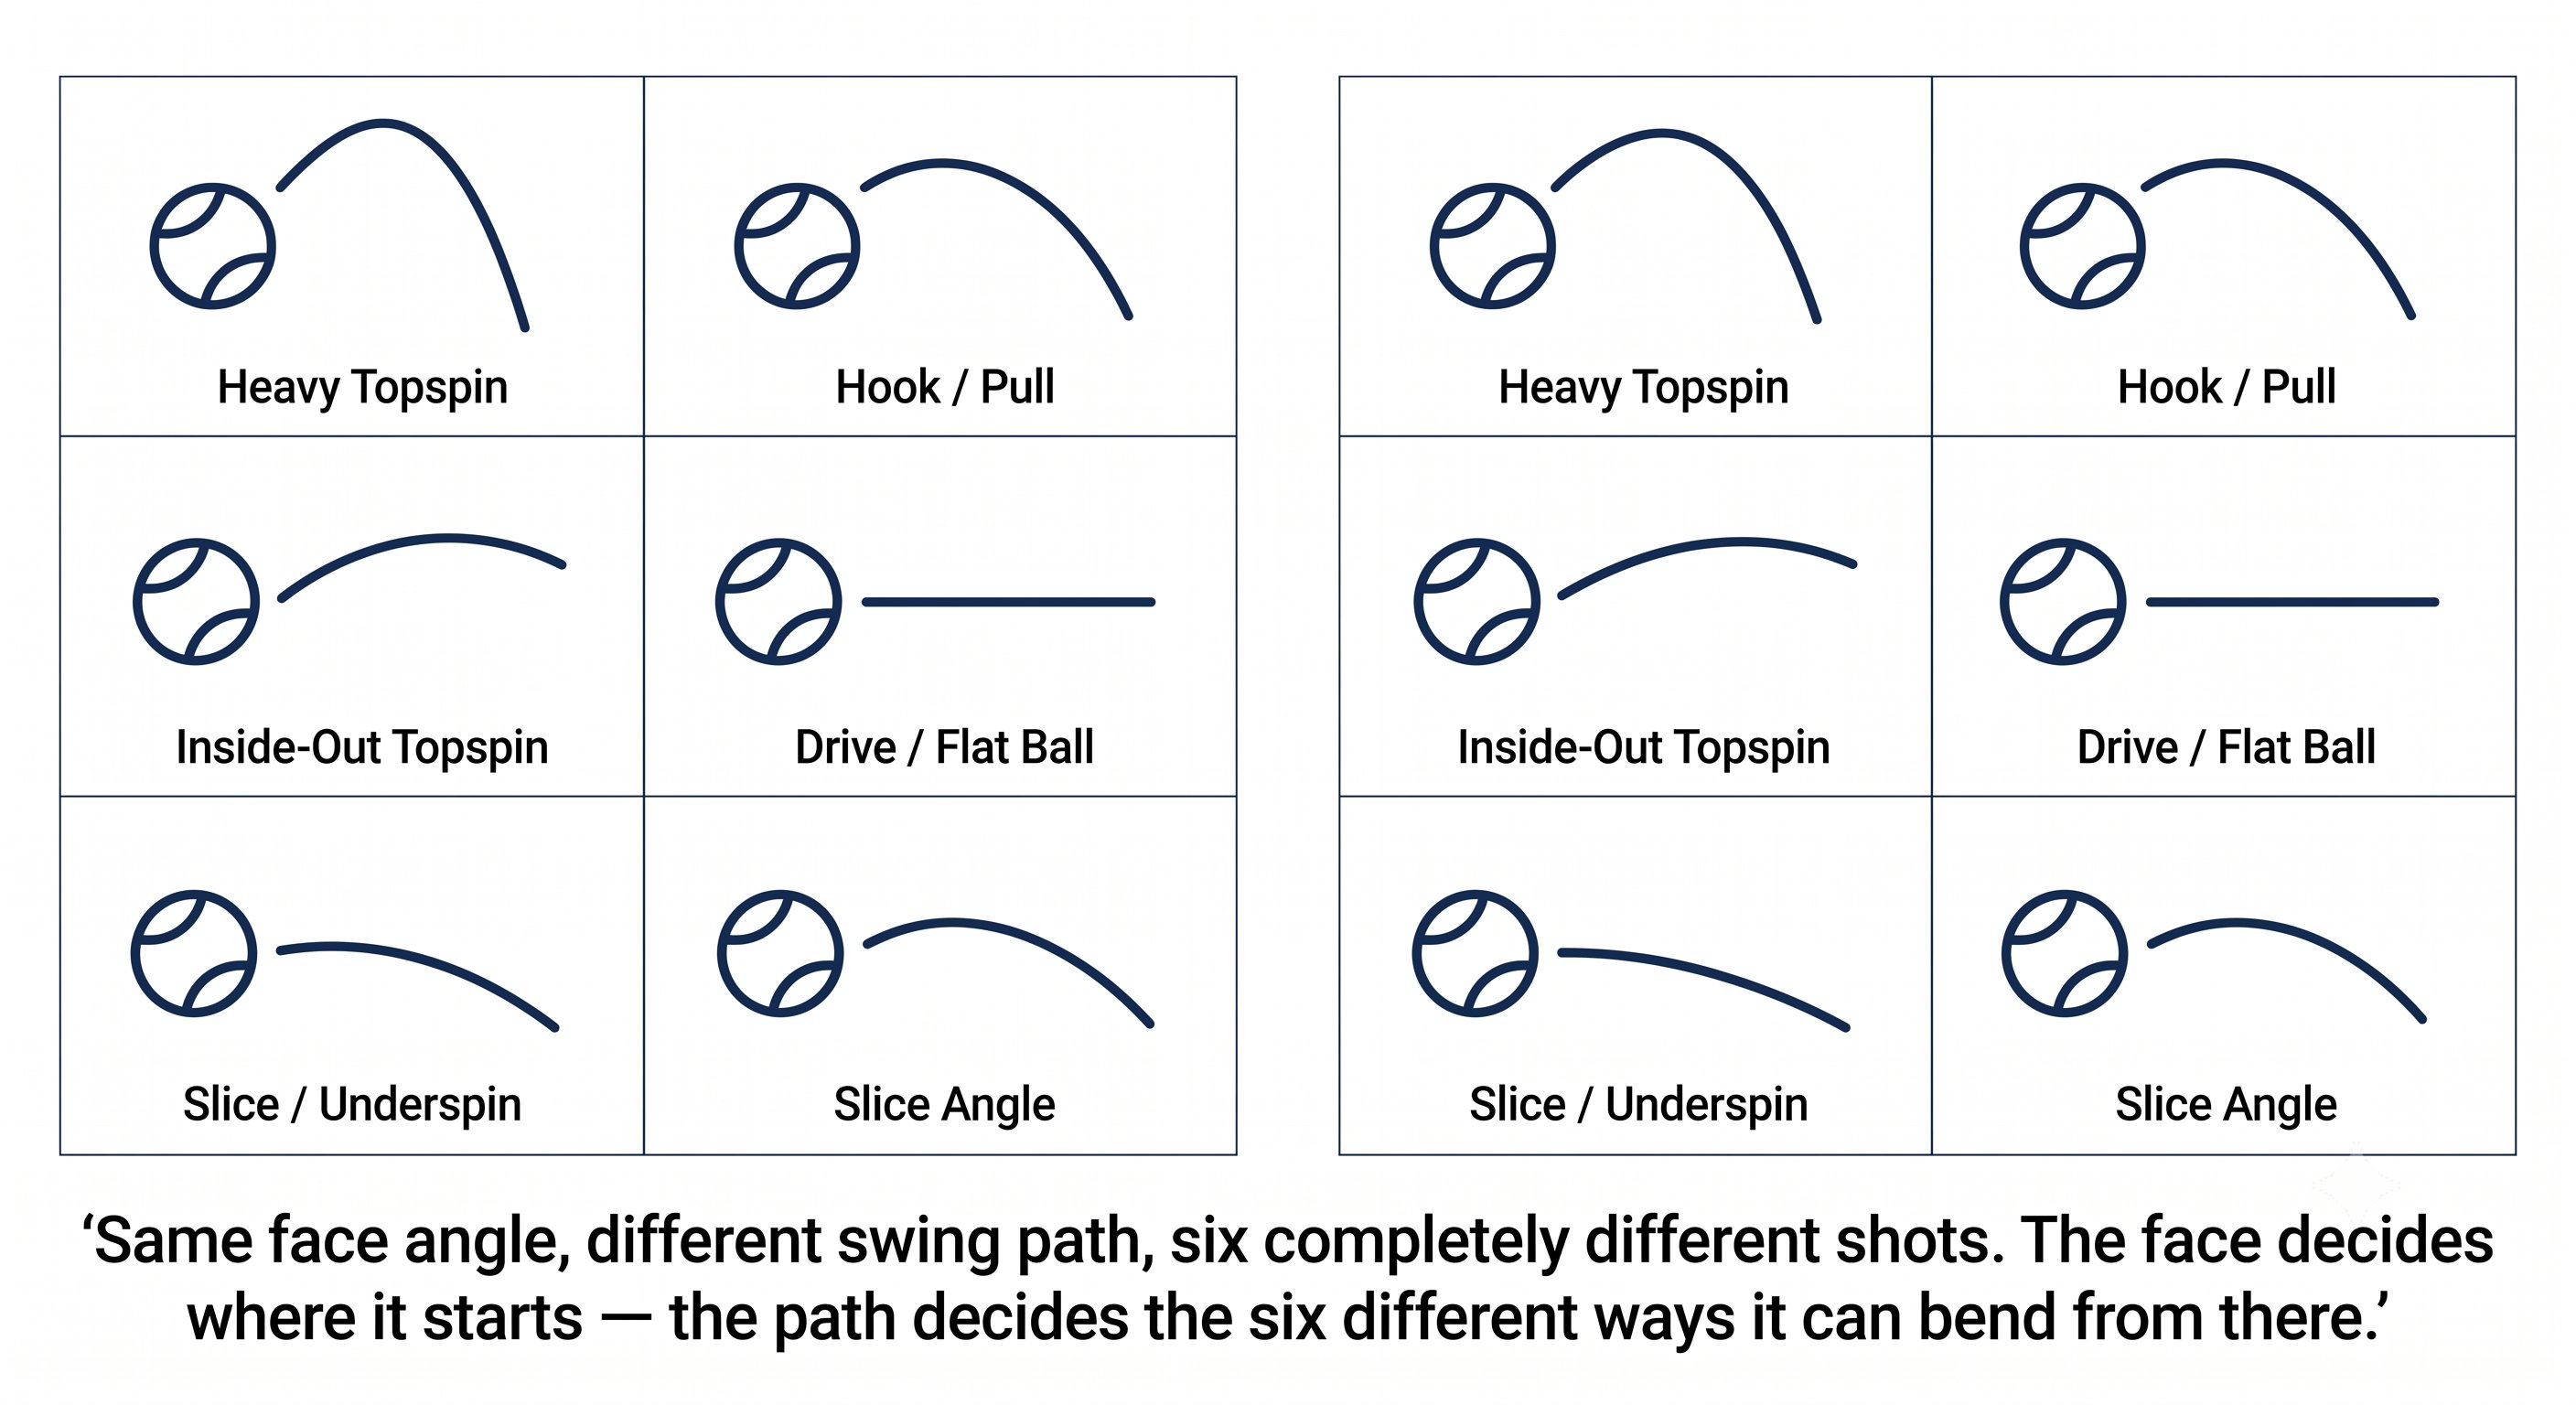
Outcome — Figure 5
Chapter 5: Energy Store 5 figures
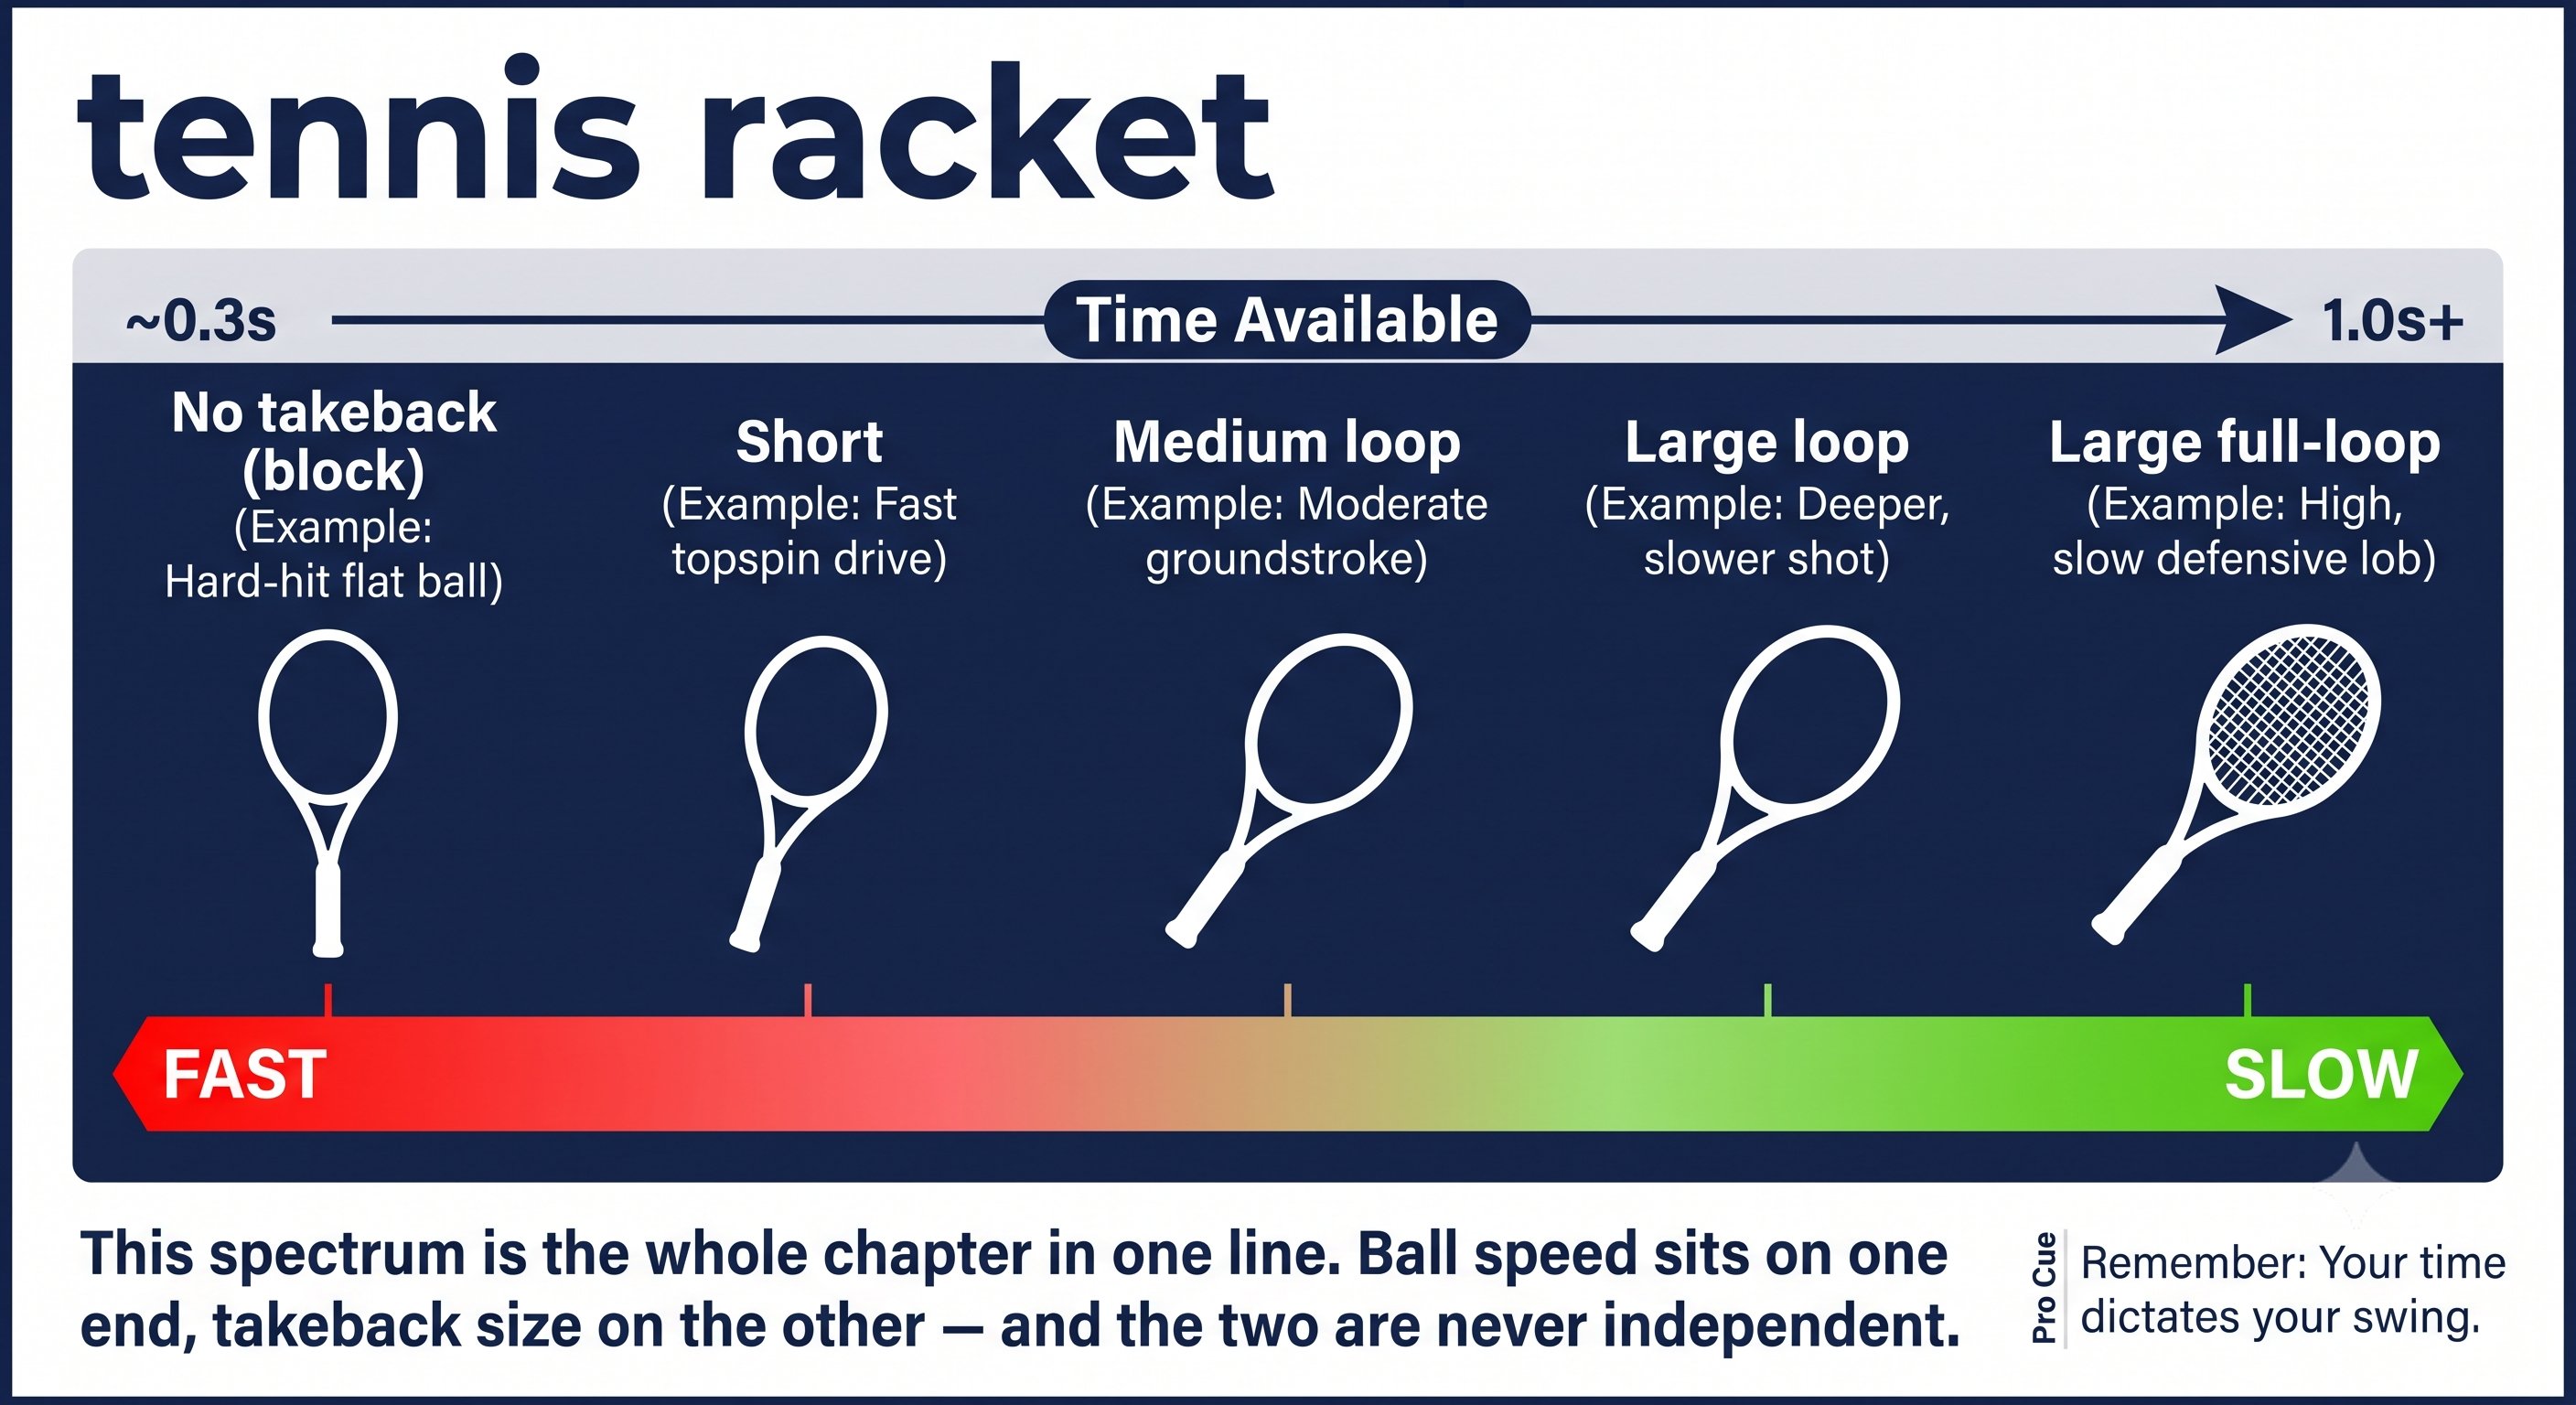
Energy Store — Figure 1
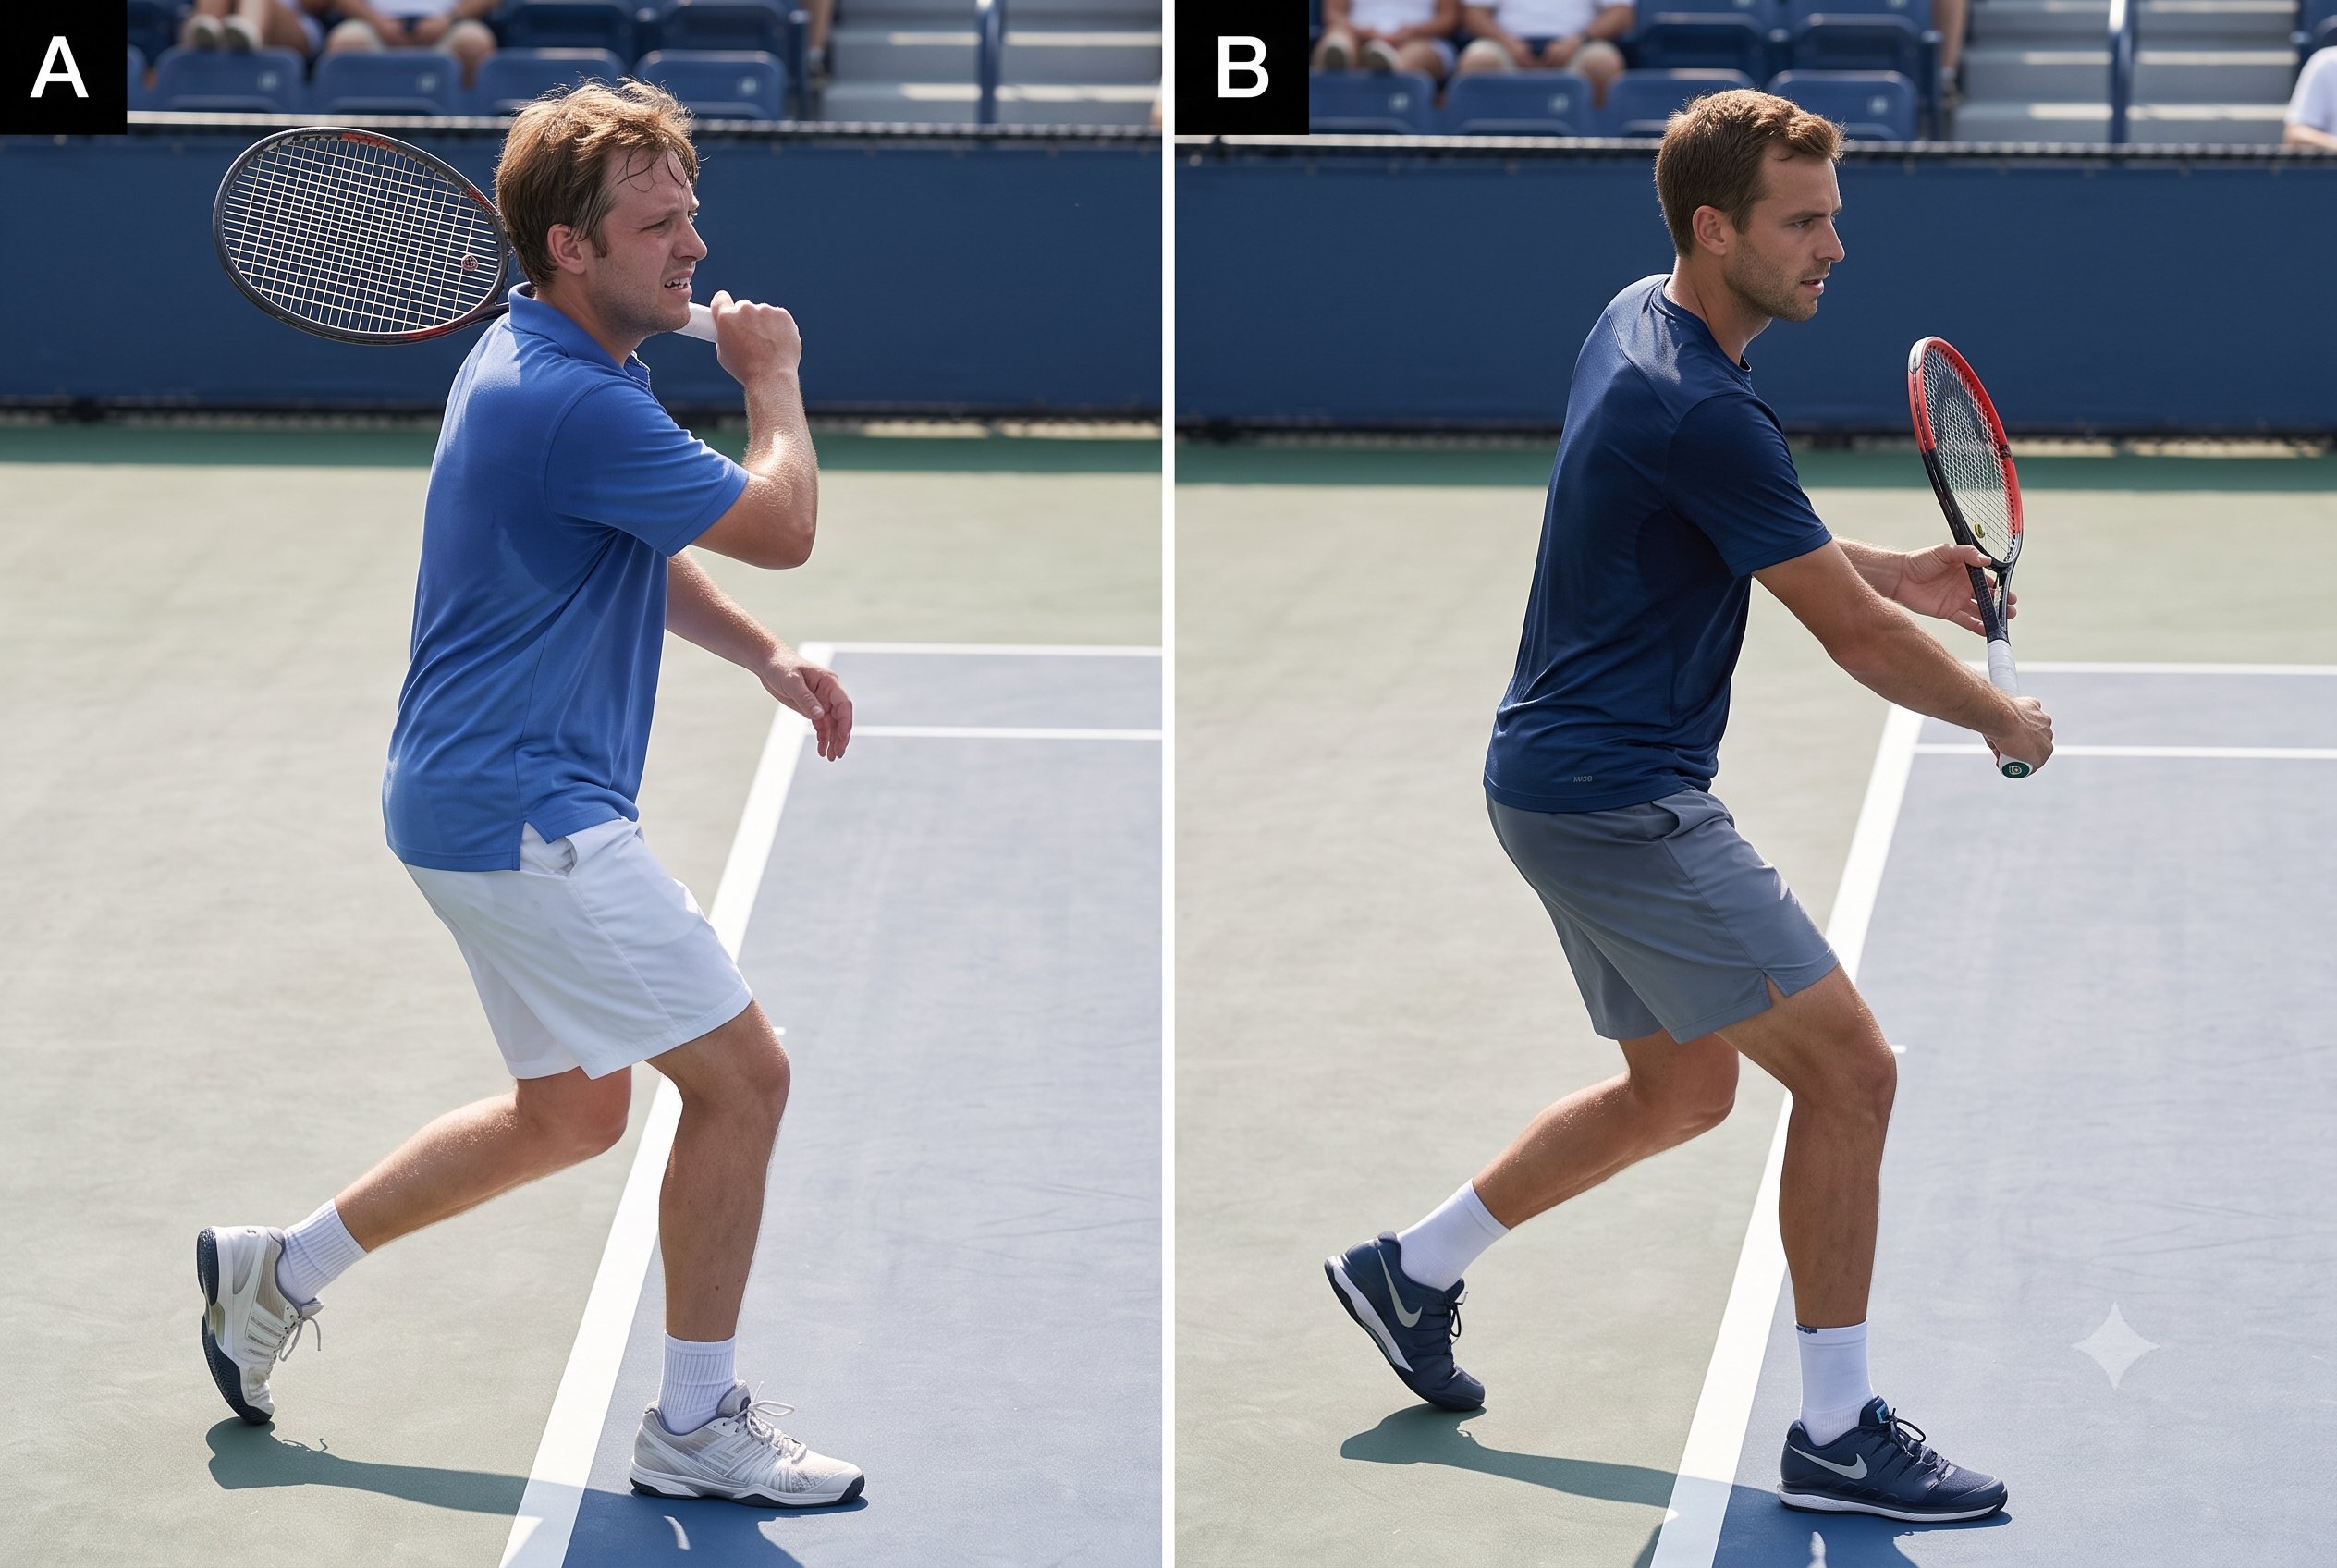
Energy Store — Figure 2
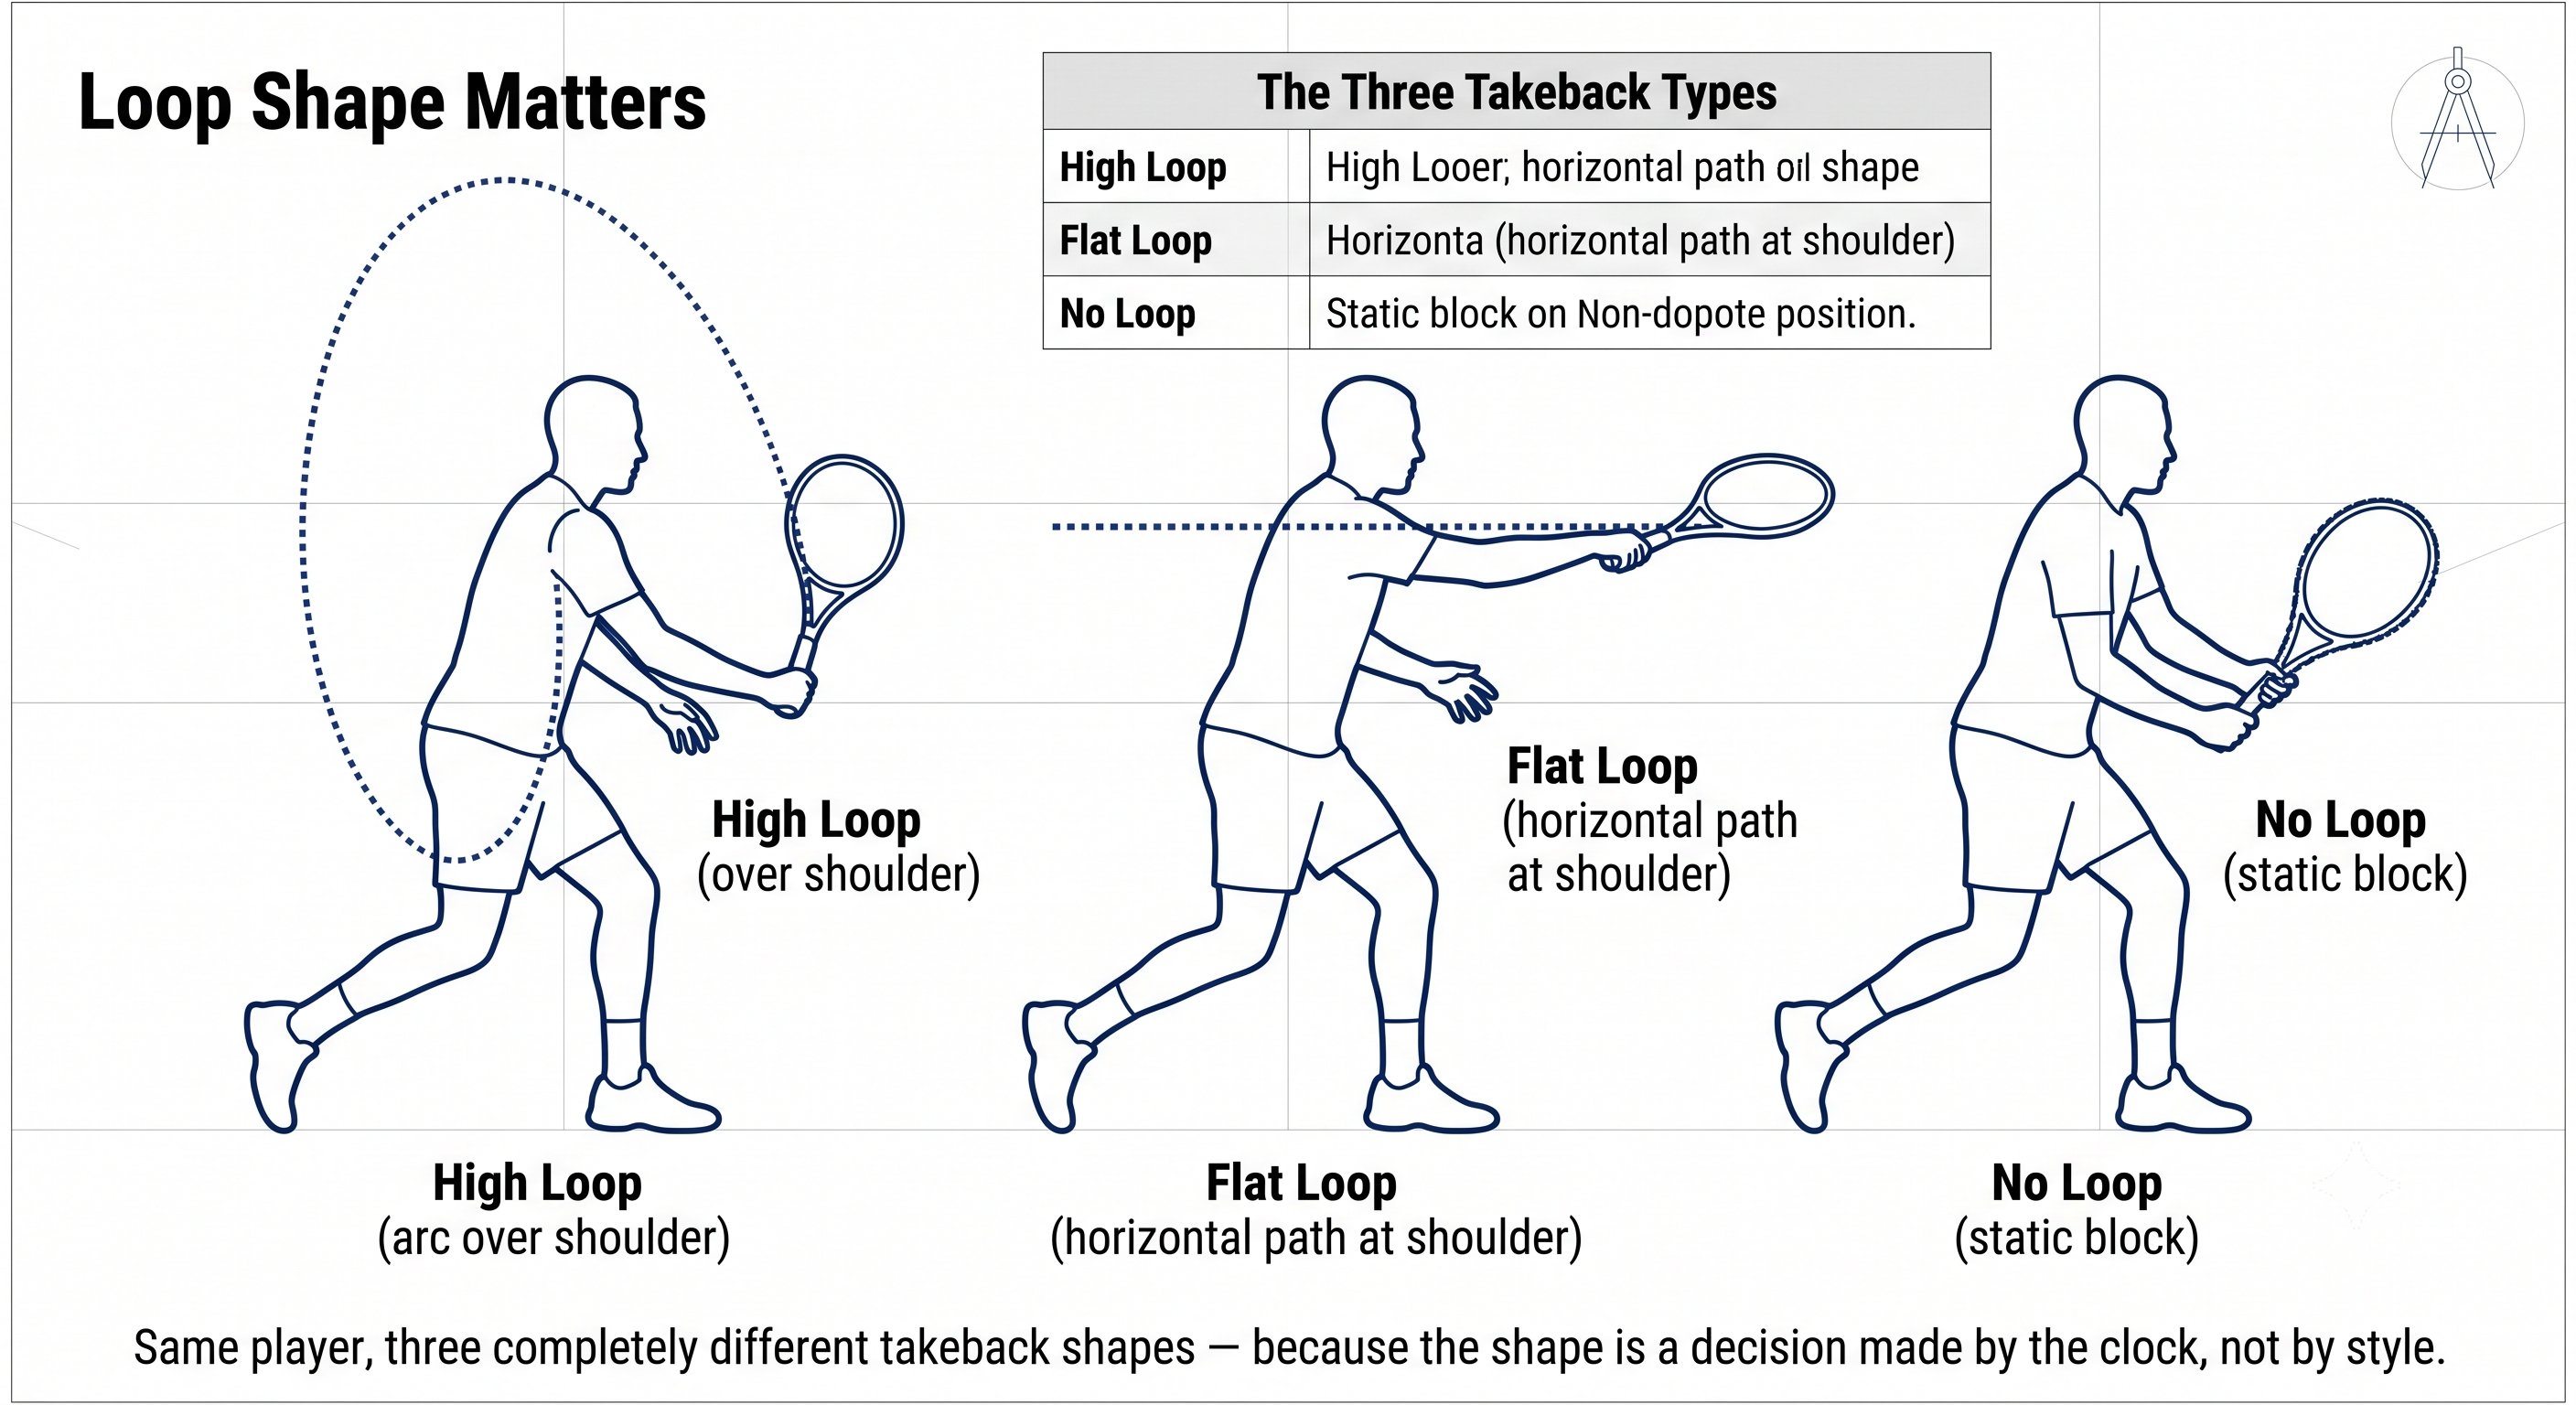
Energy Store — Figure 3
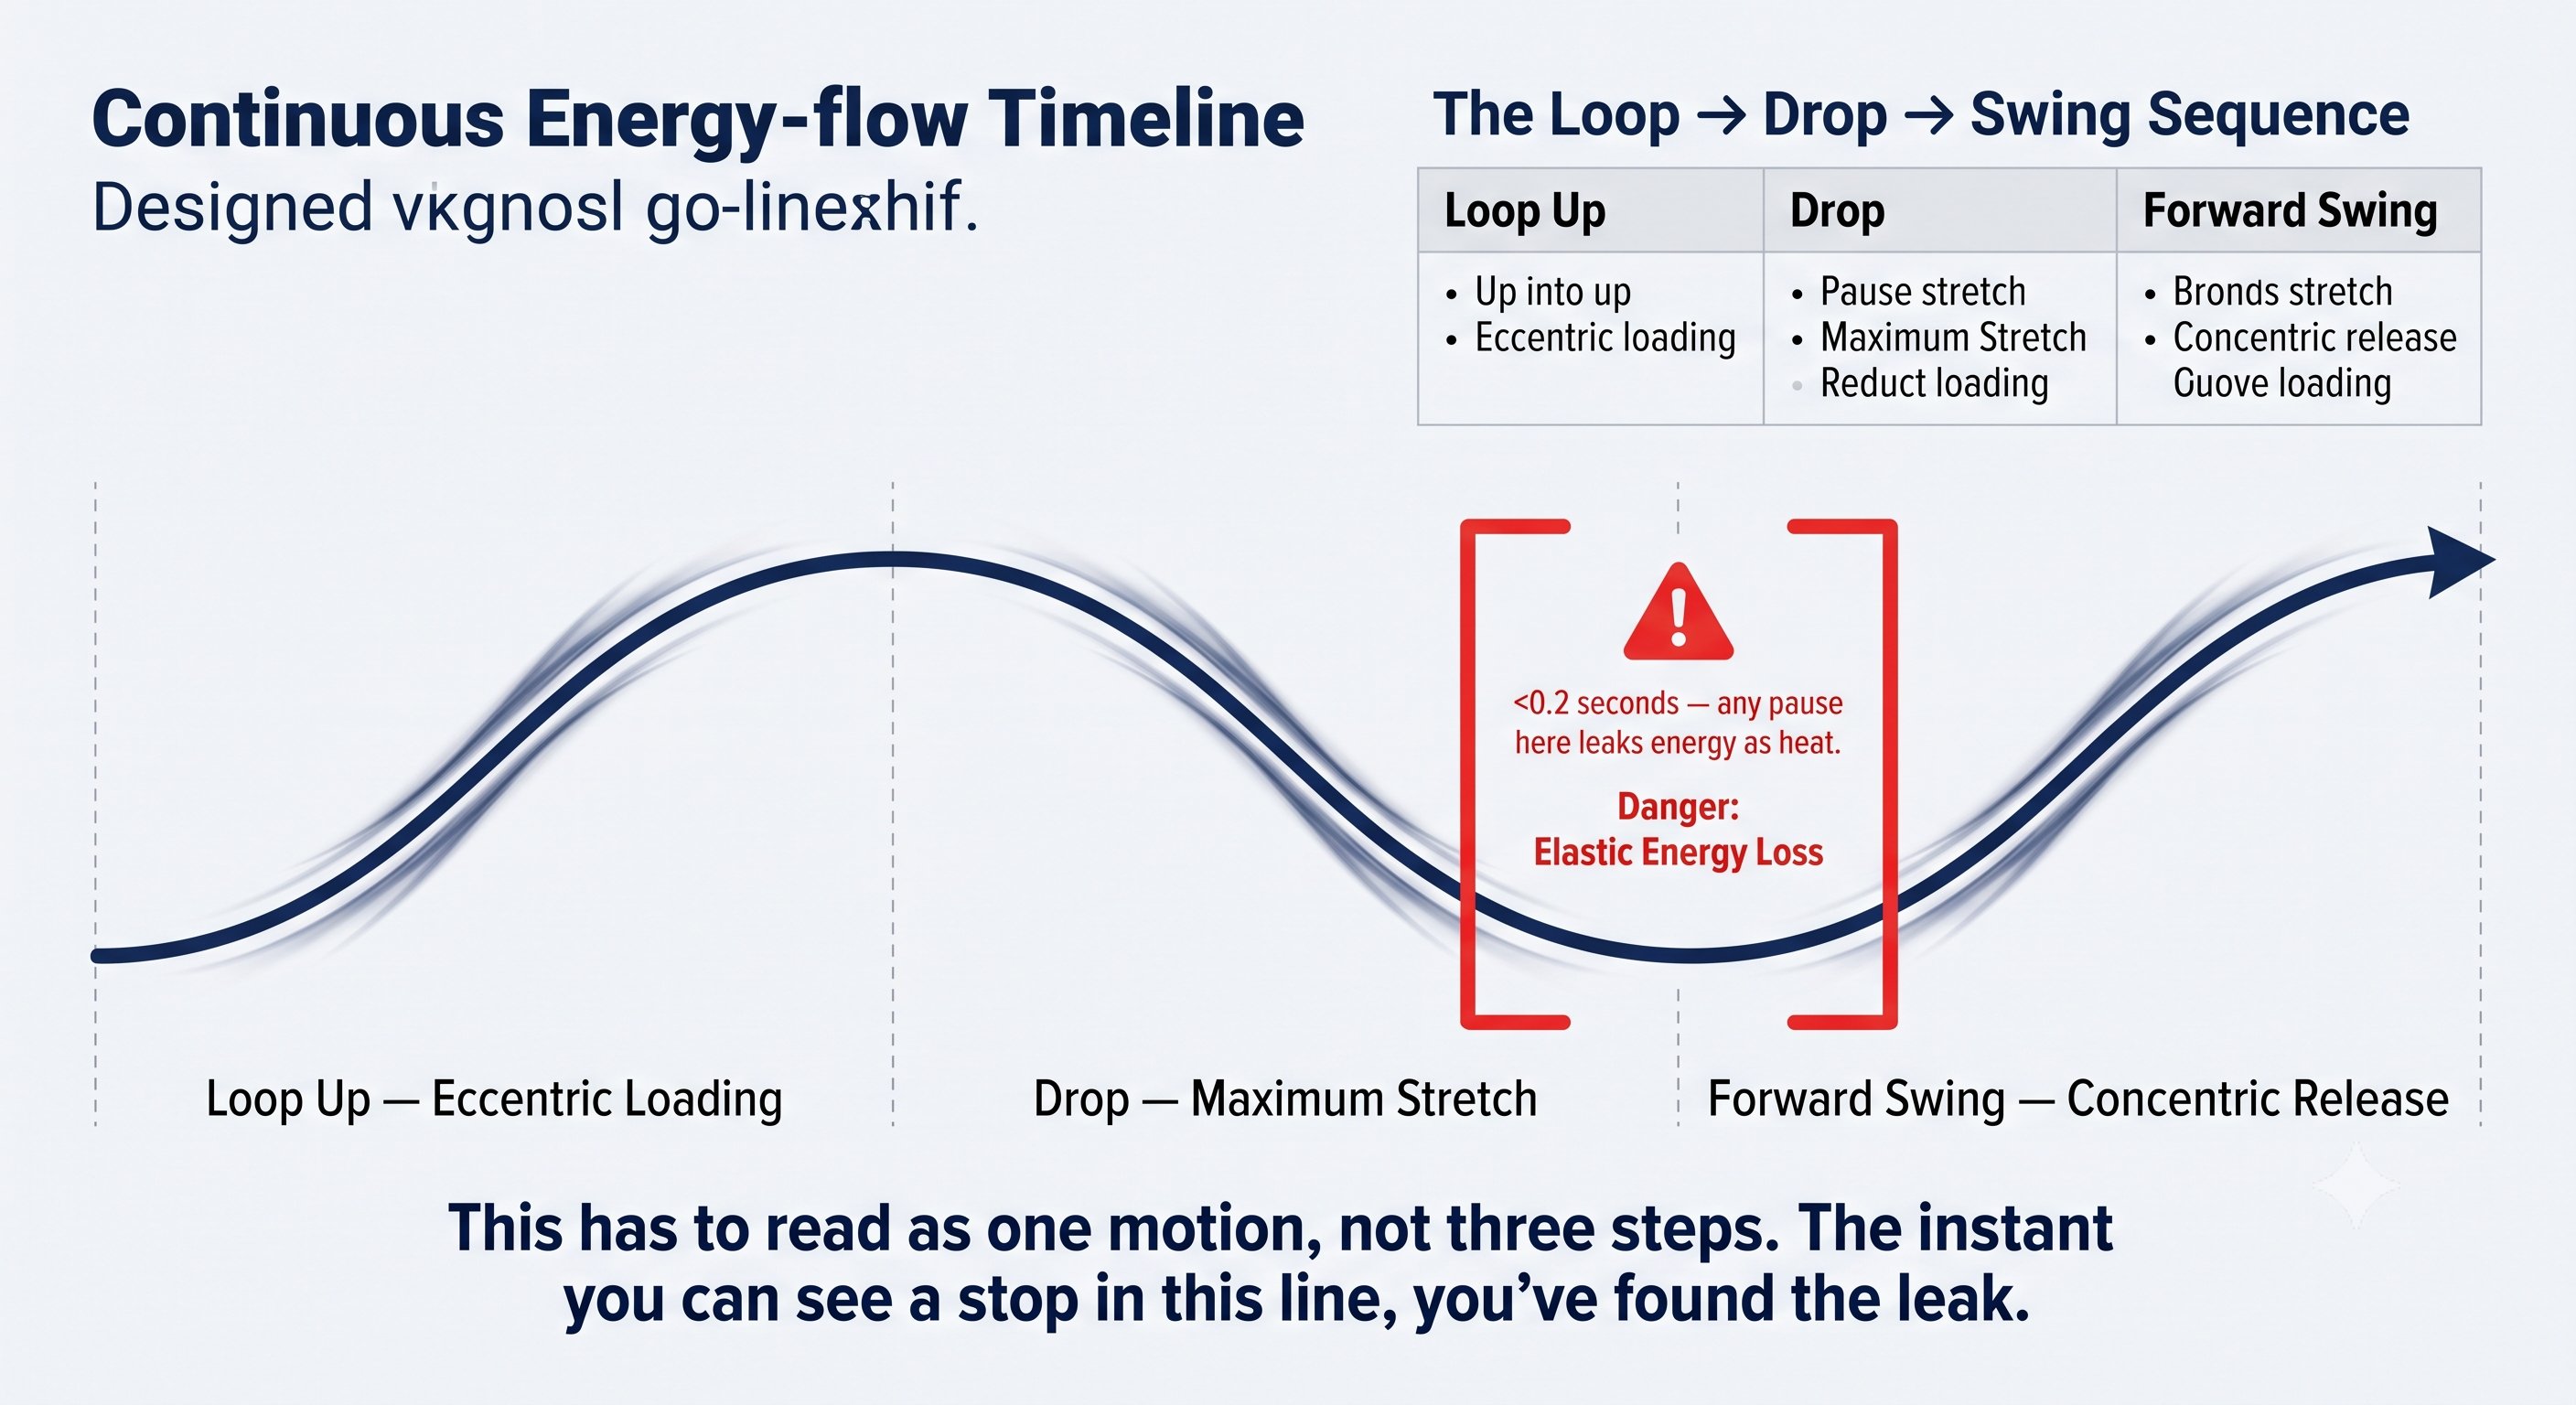
Energy Store — Figure 4
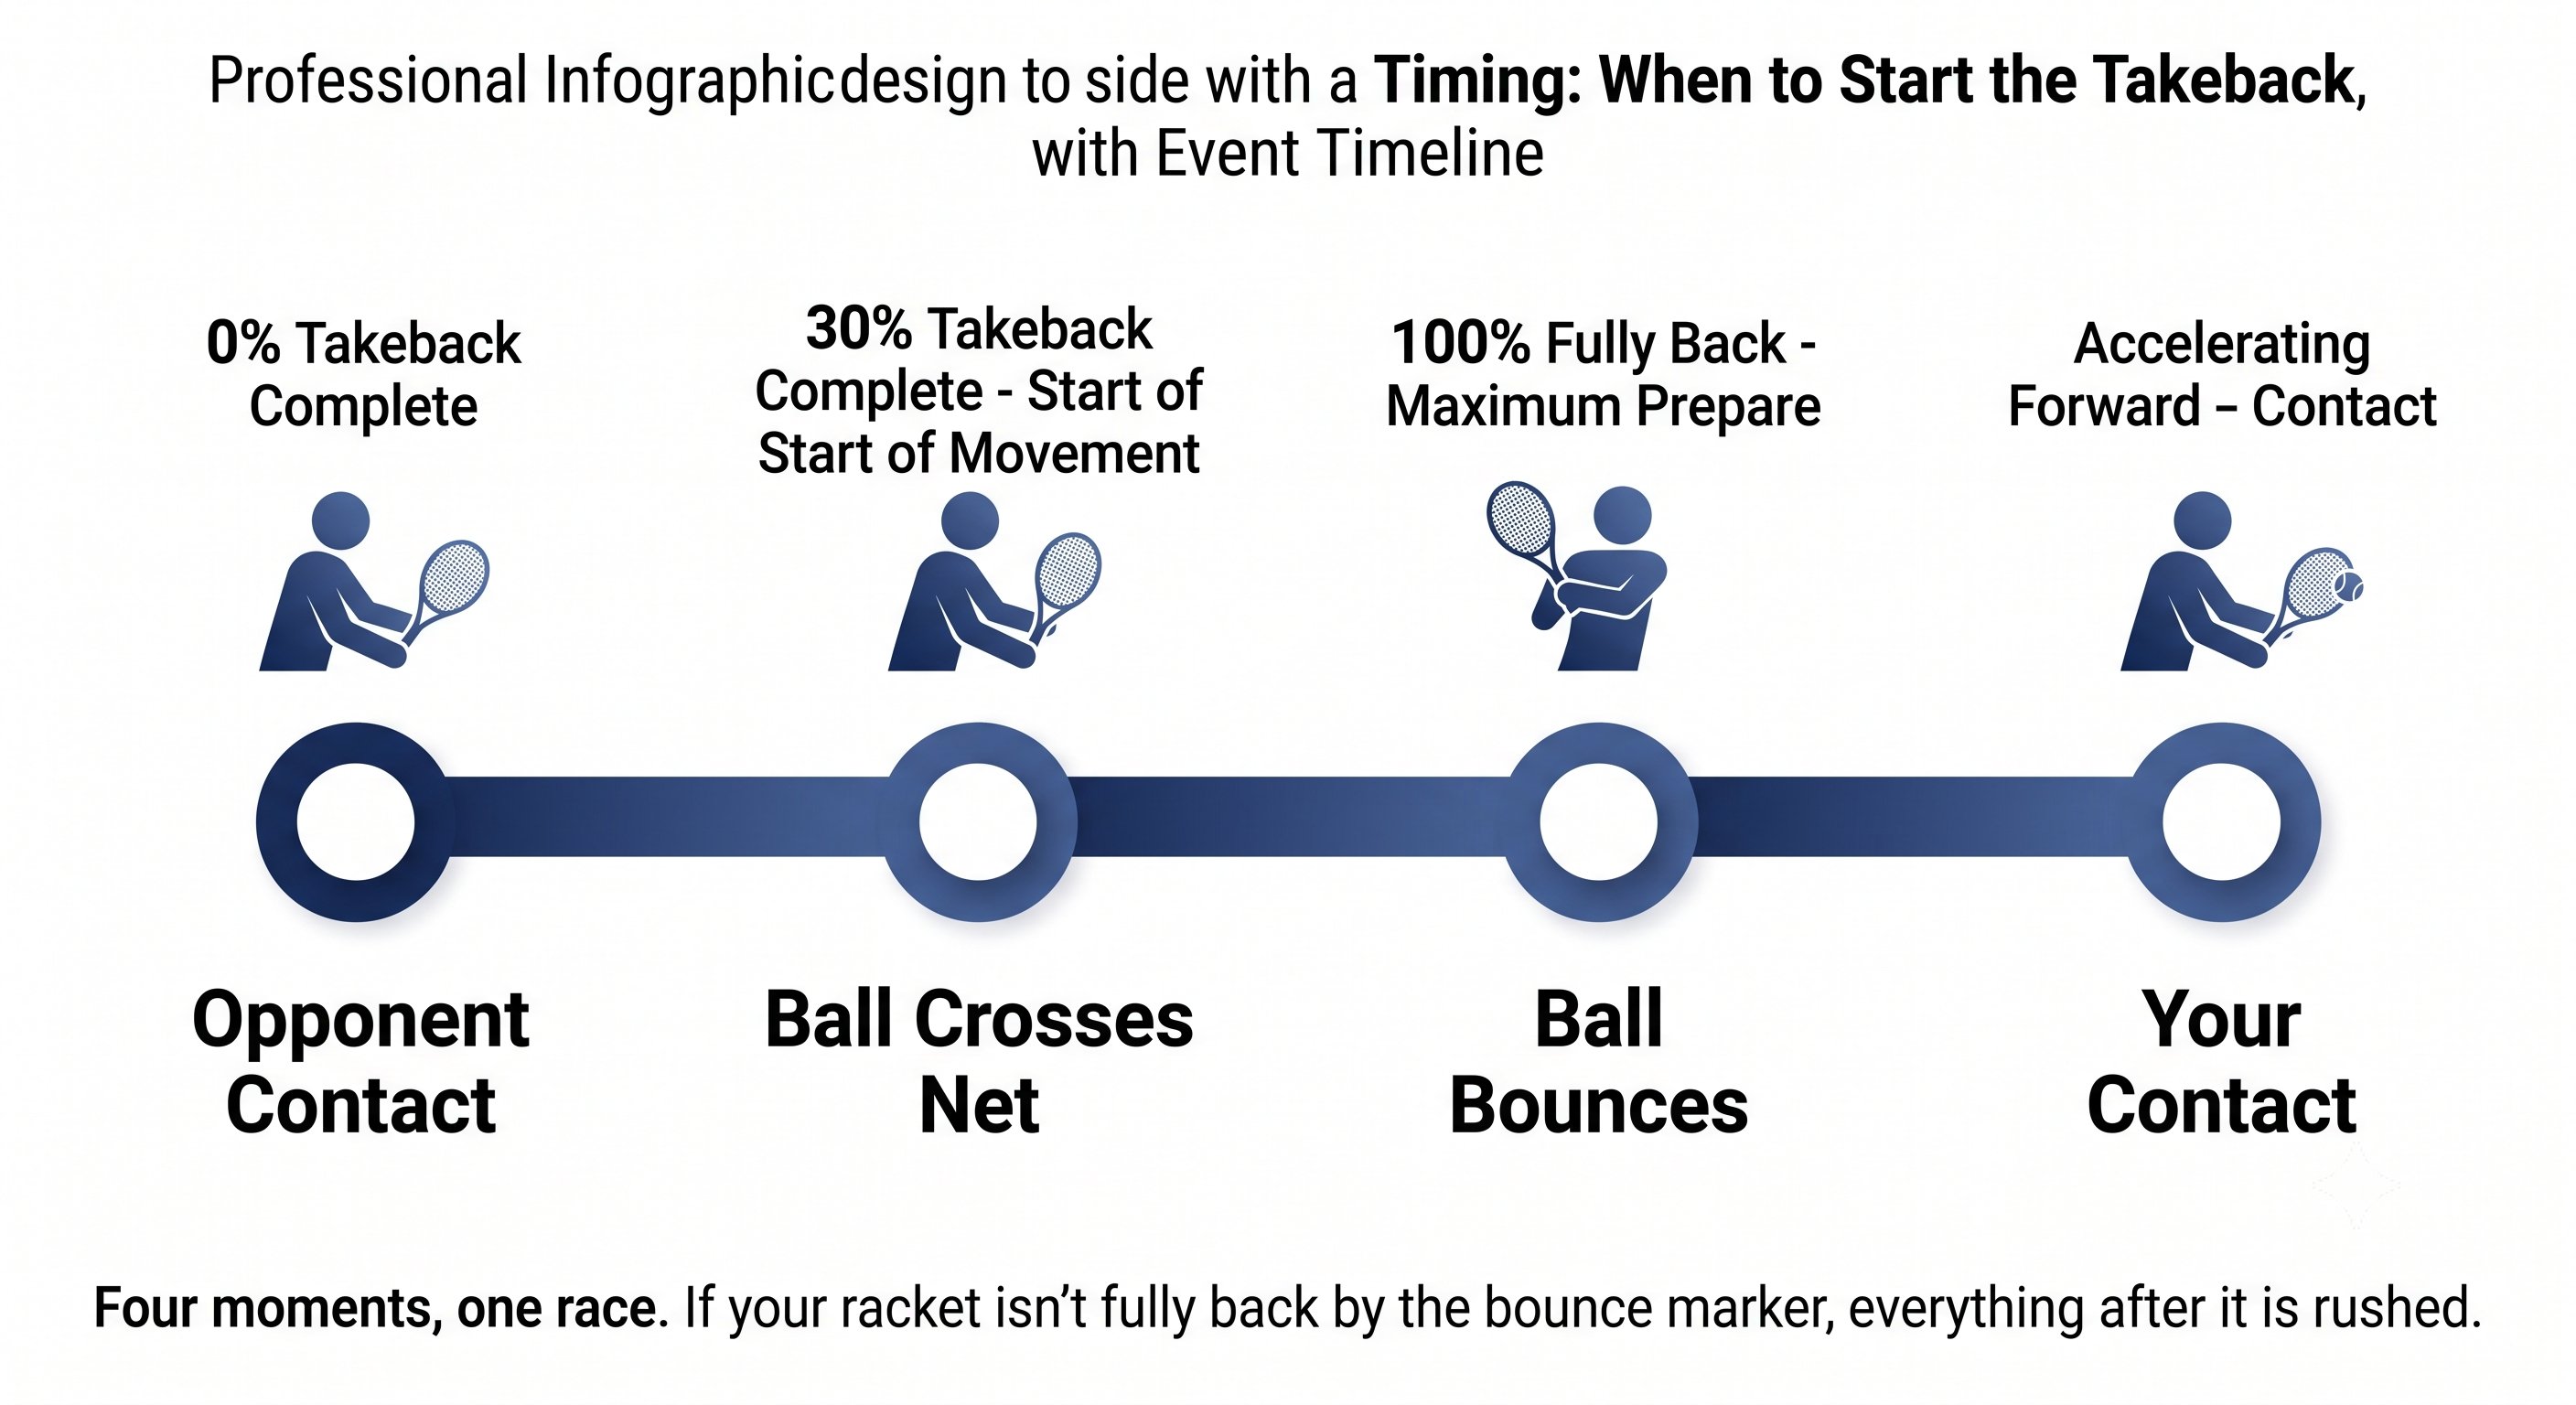
Energy Store — Figure 5
Chapter 6: Transmission 5 figures
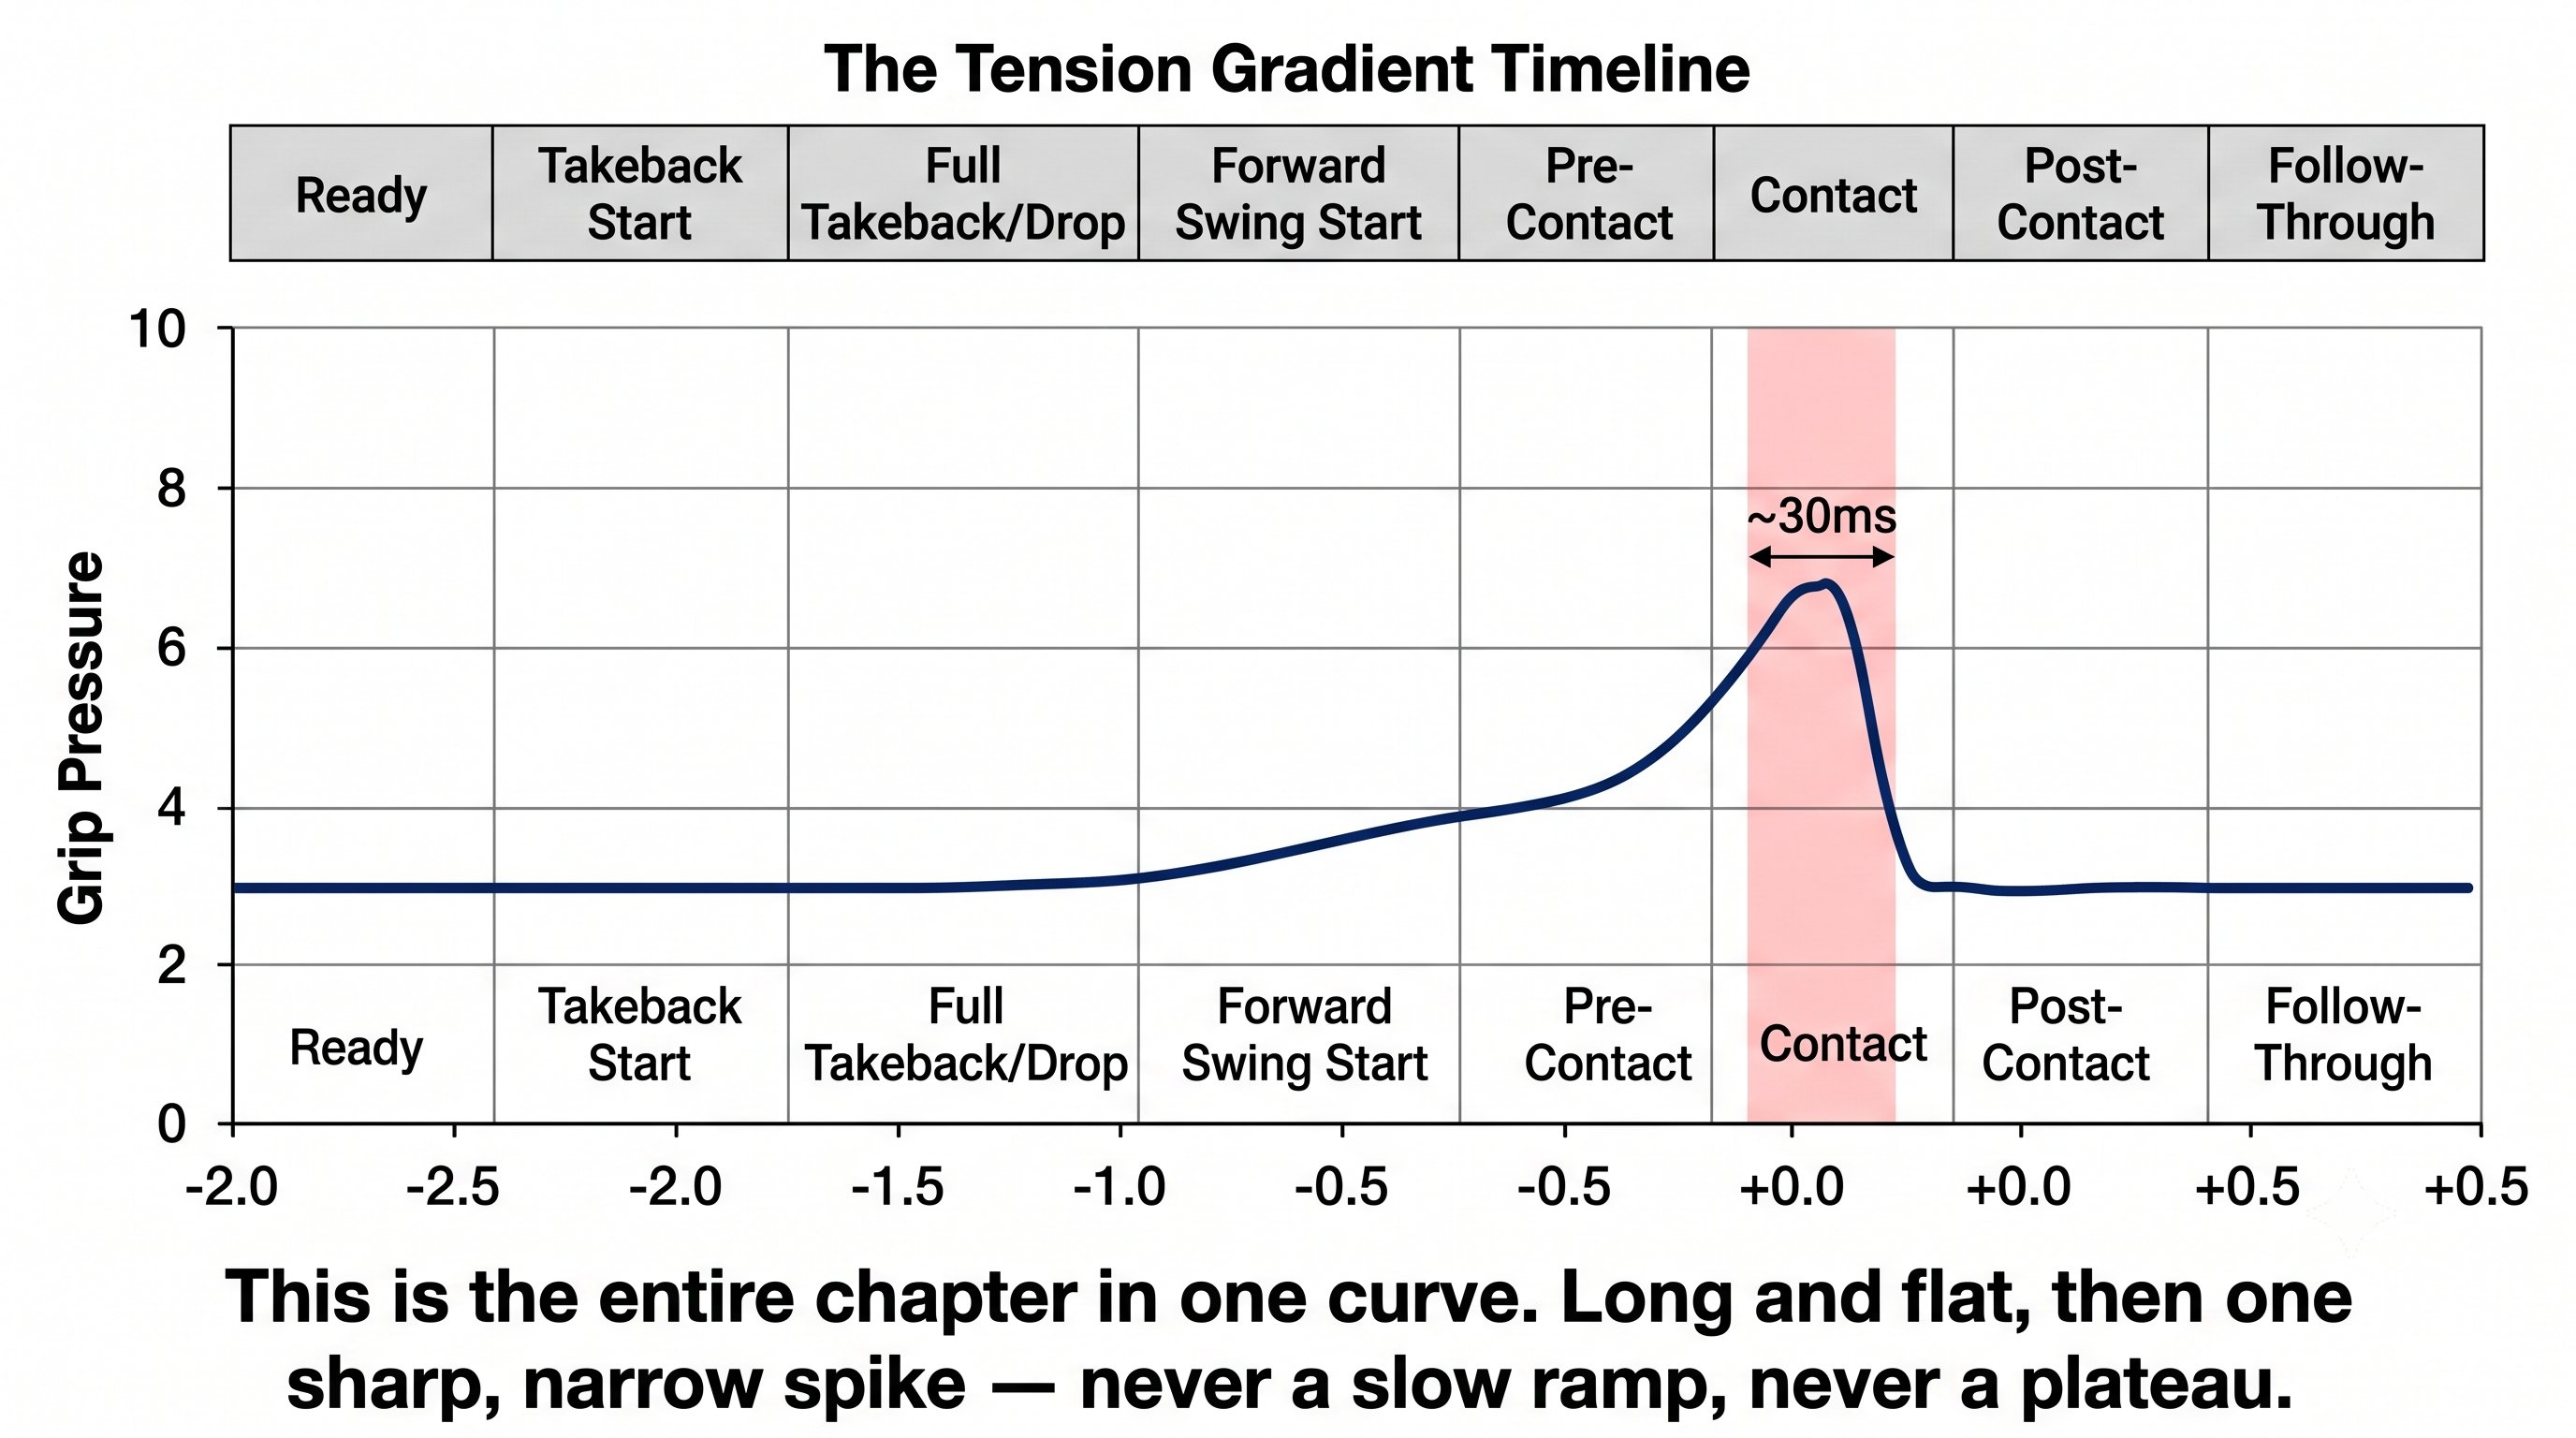
Transmission — Figure 1
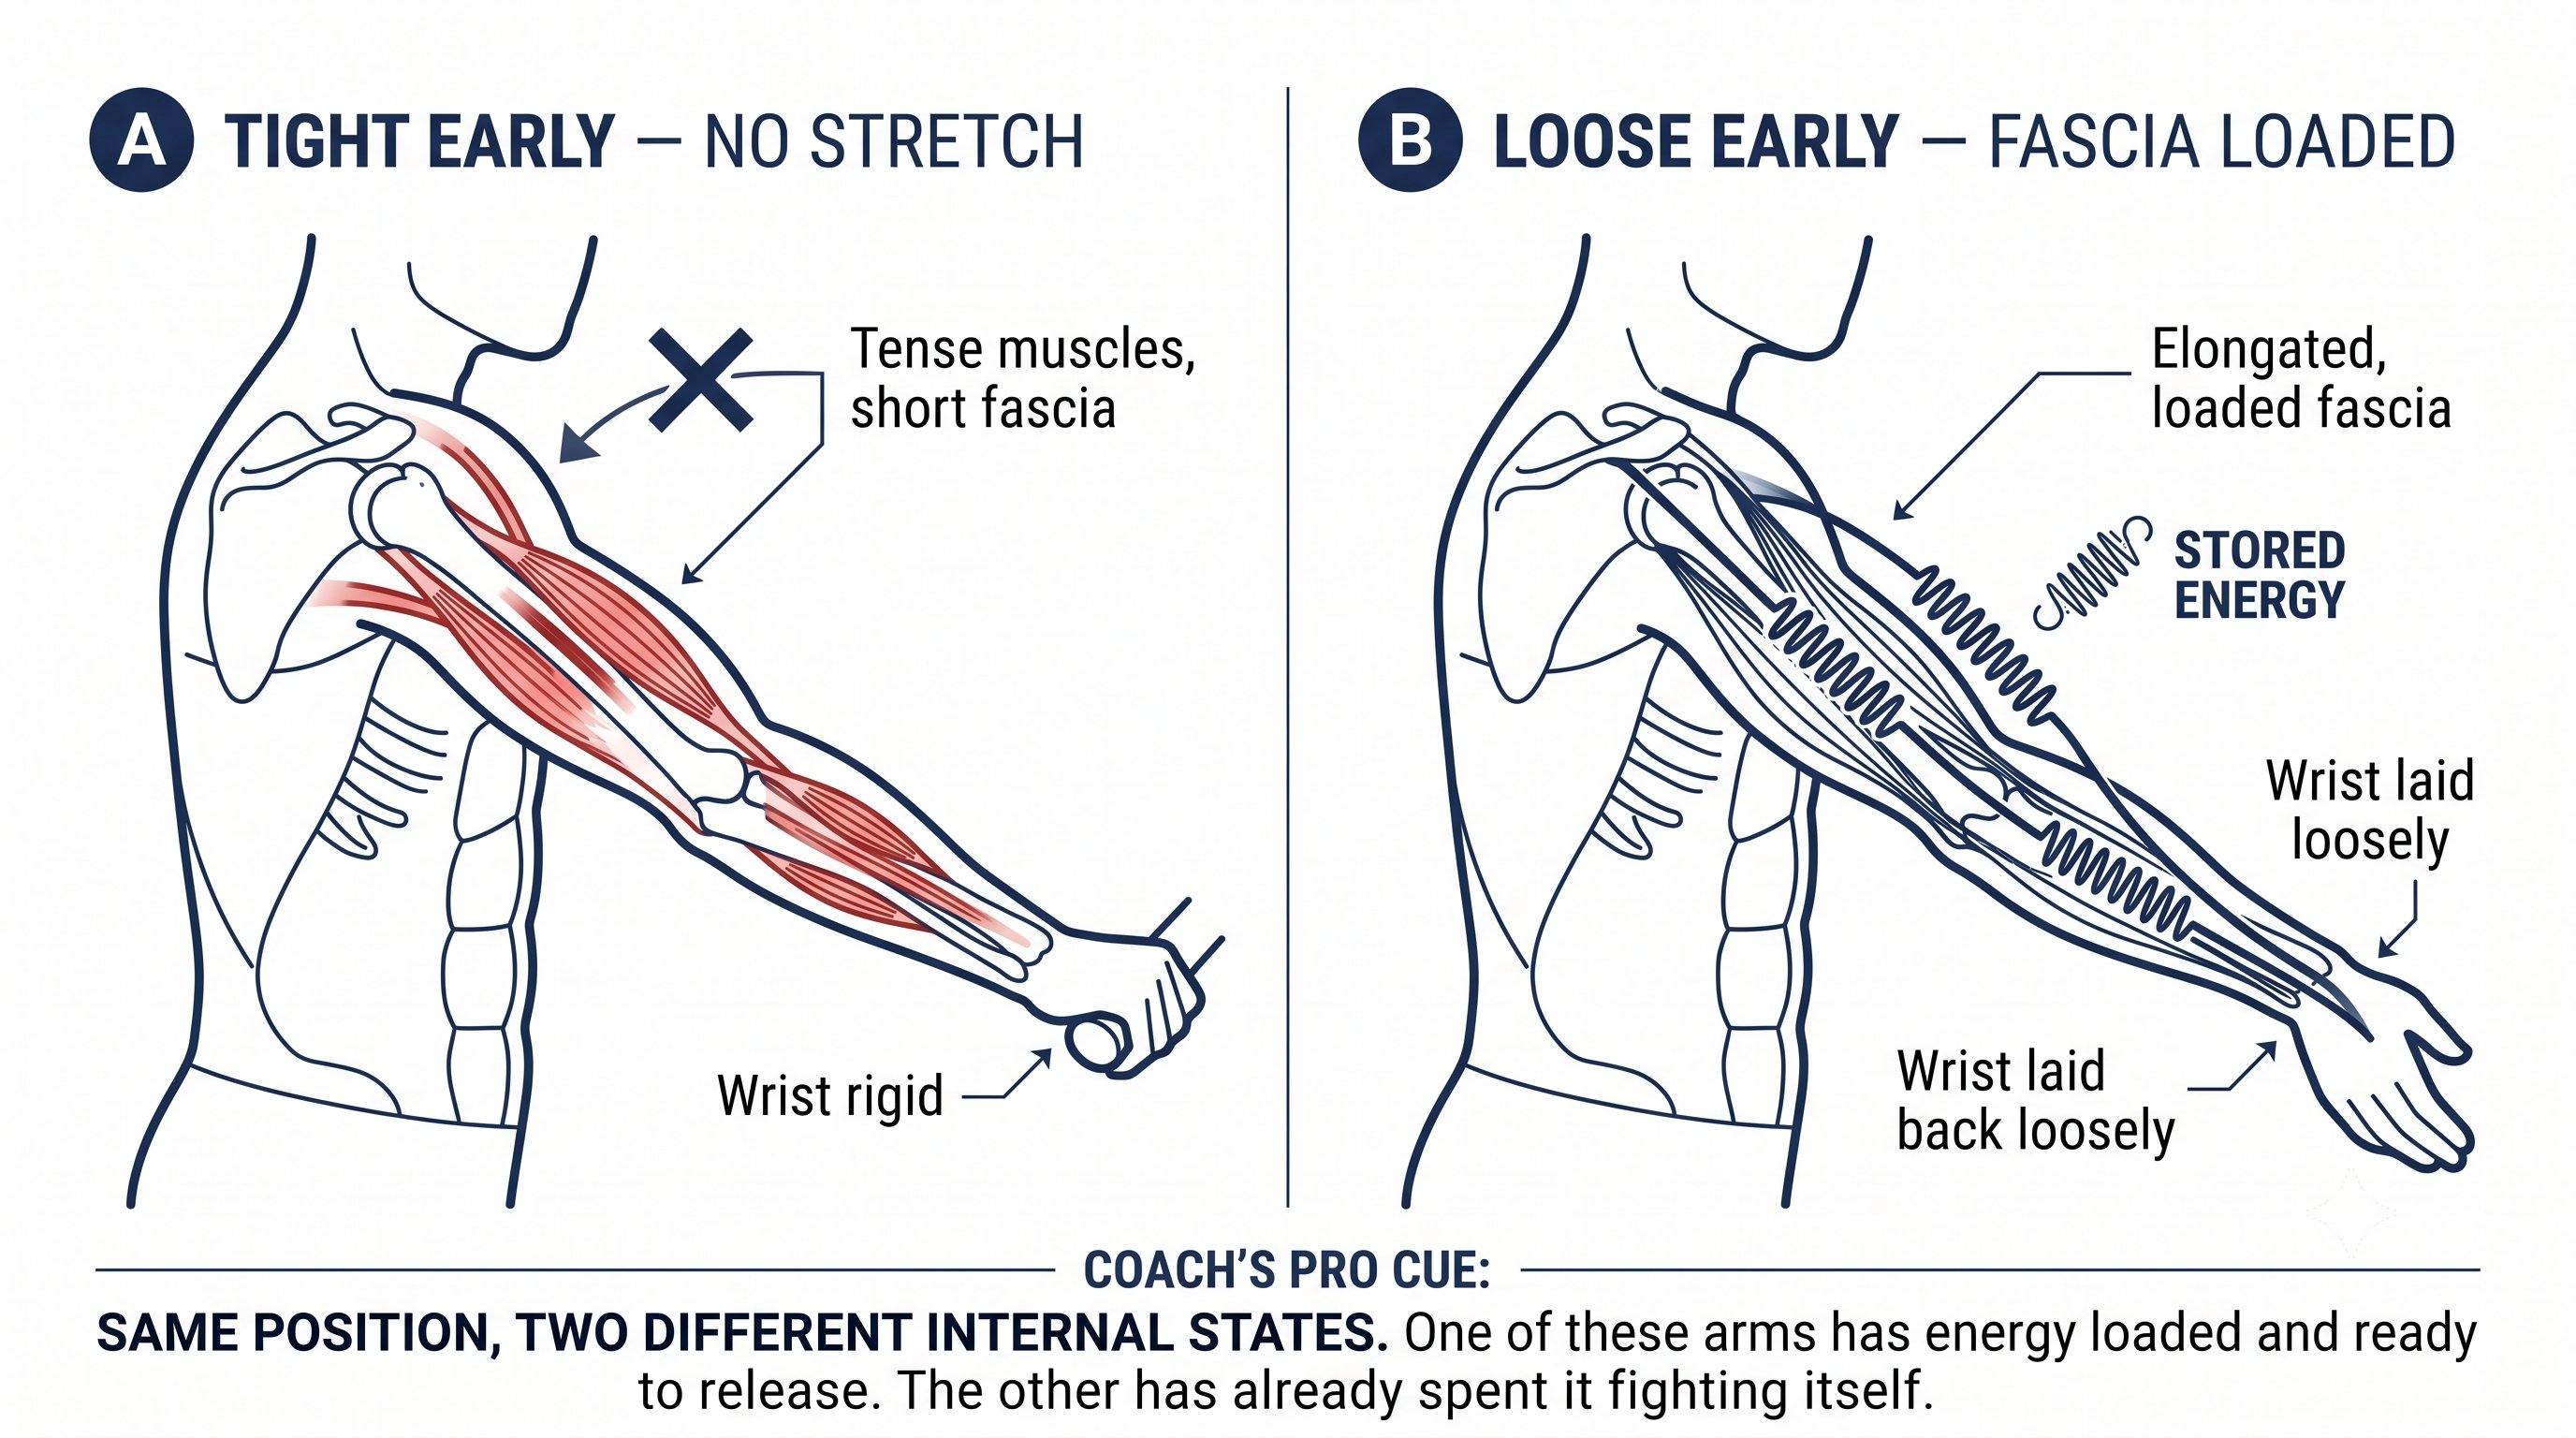
Transmission — Figure 2
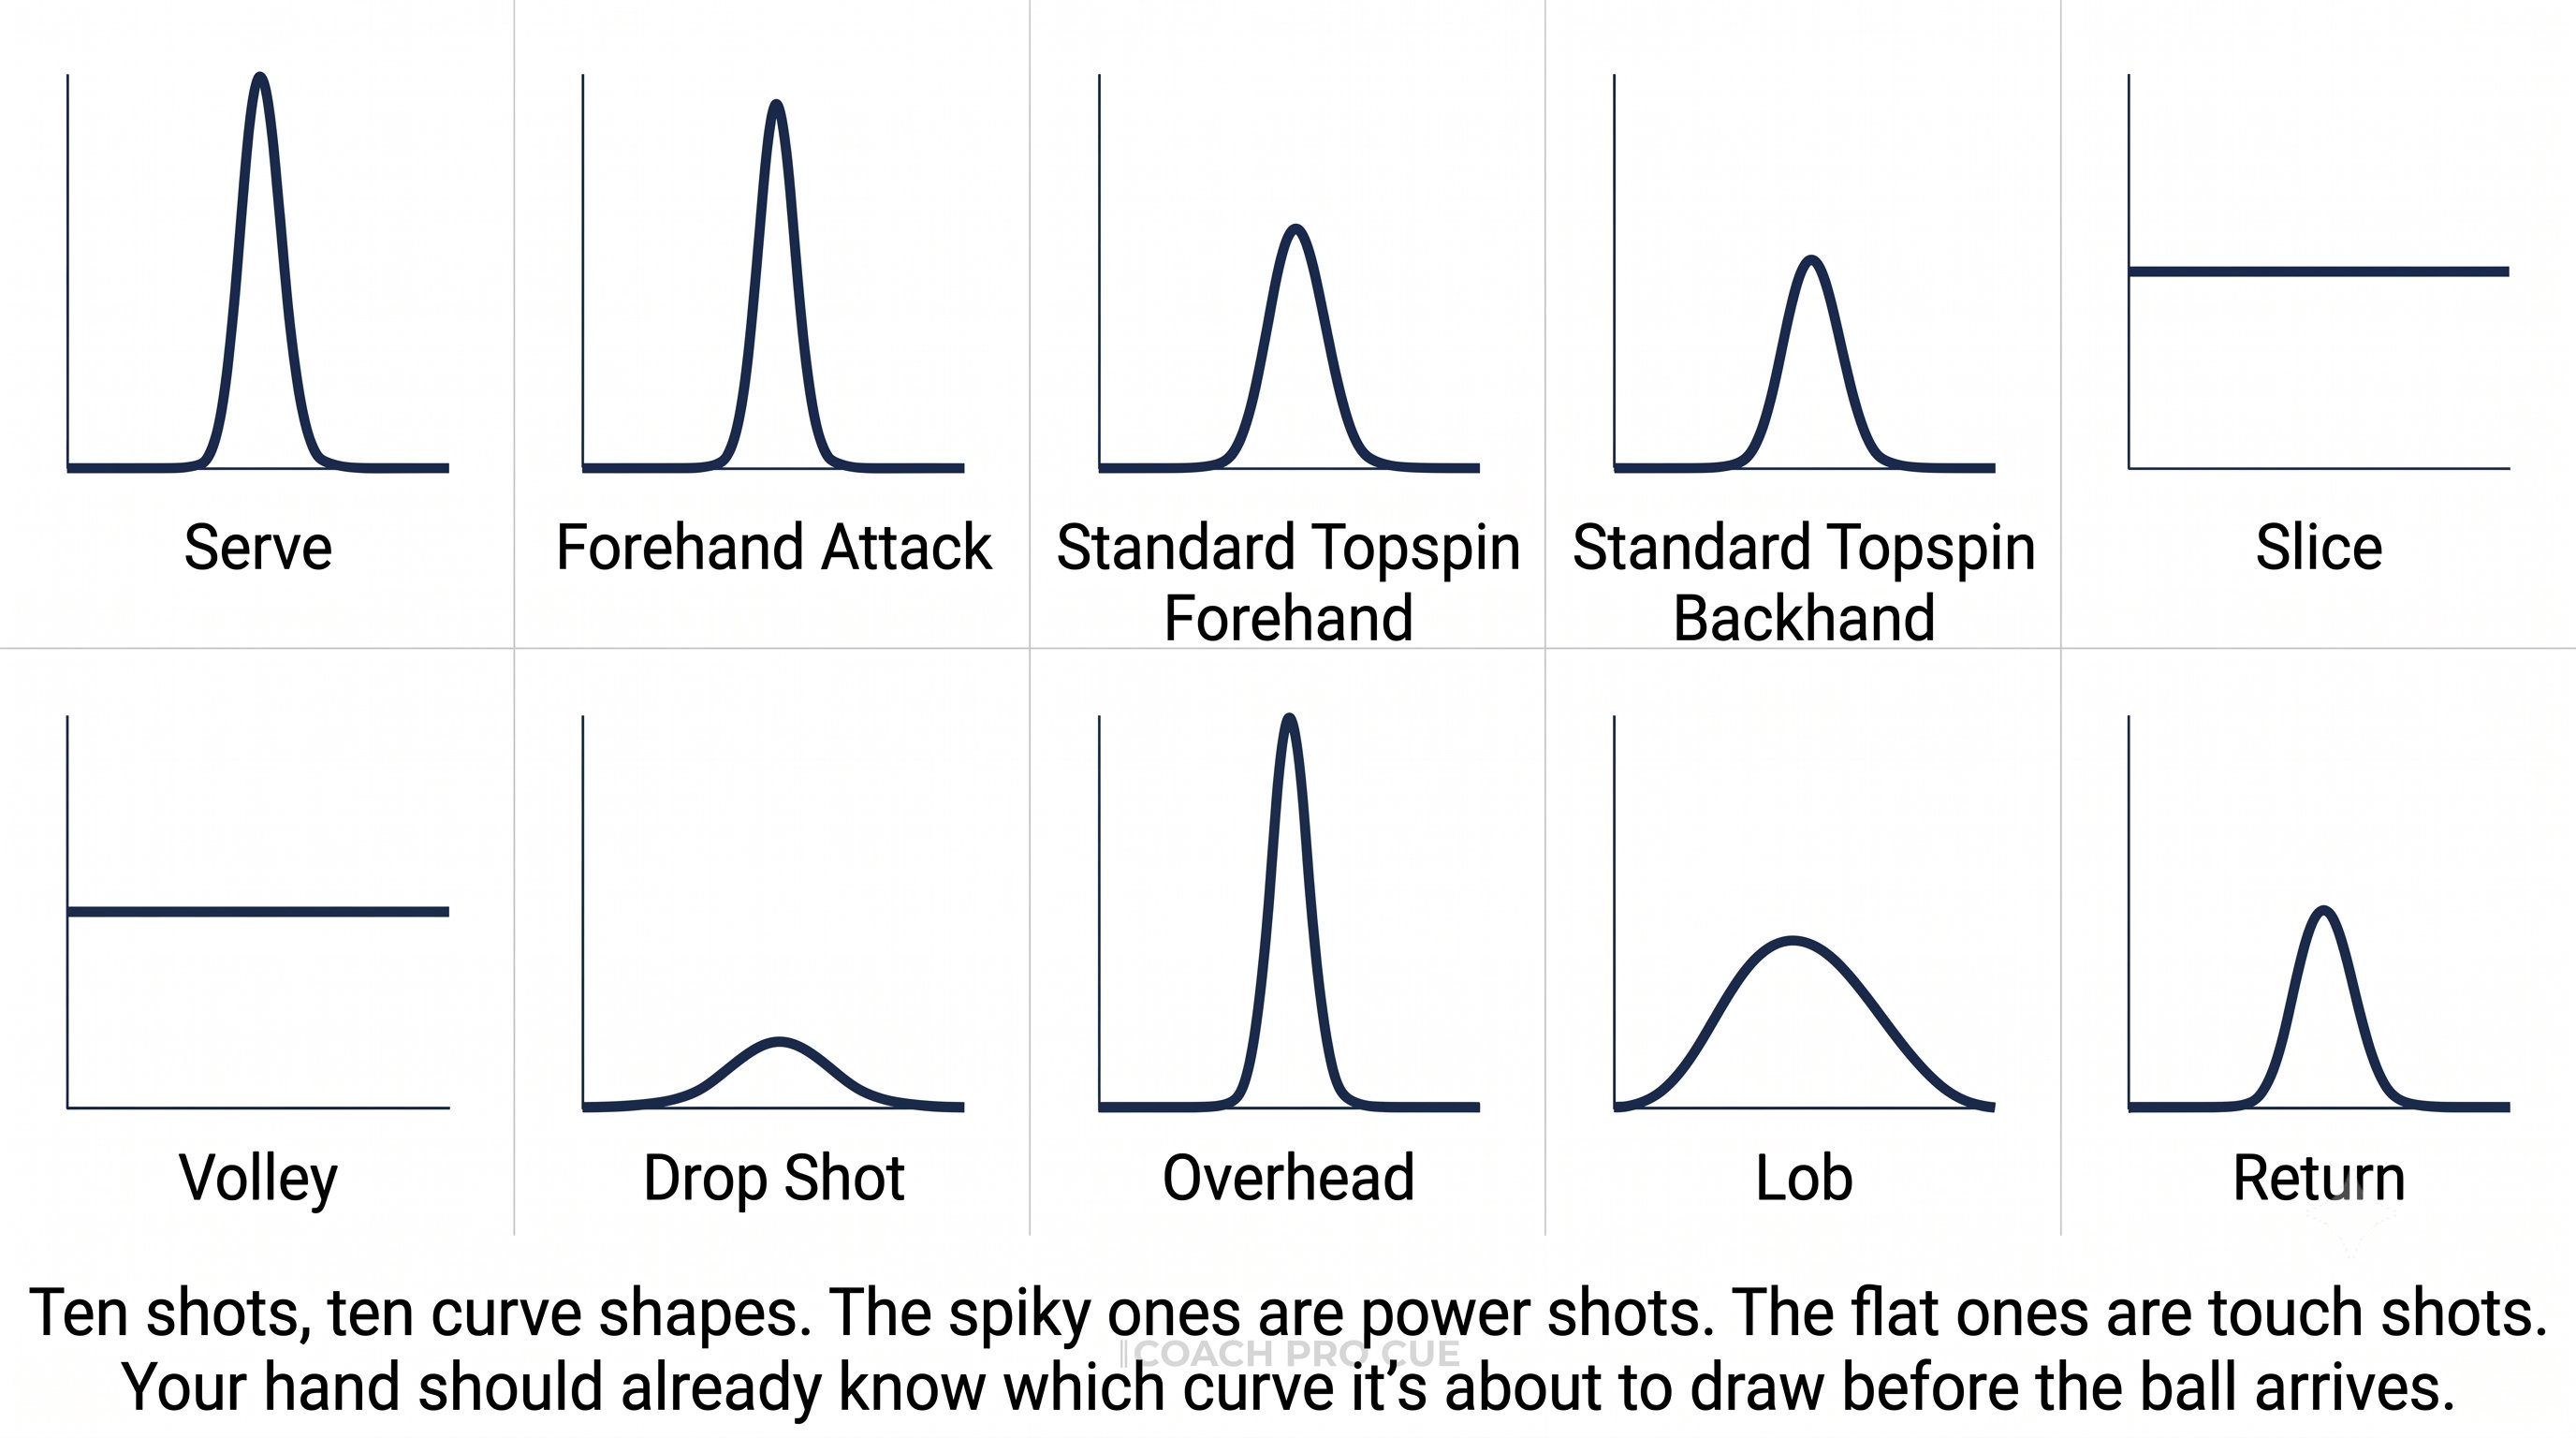
Transmission — Figure 3
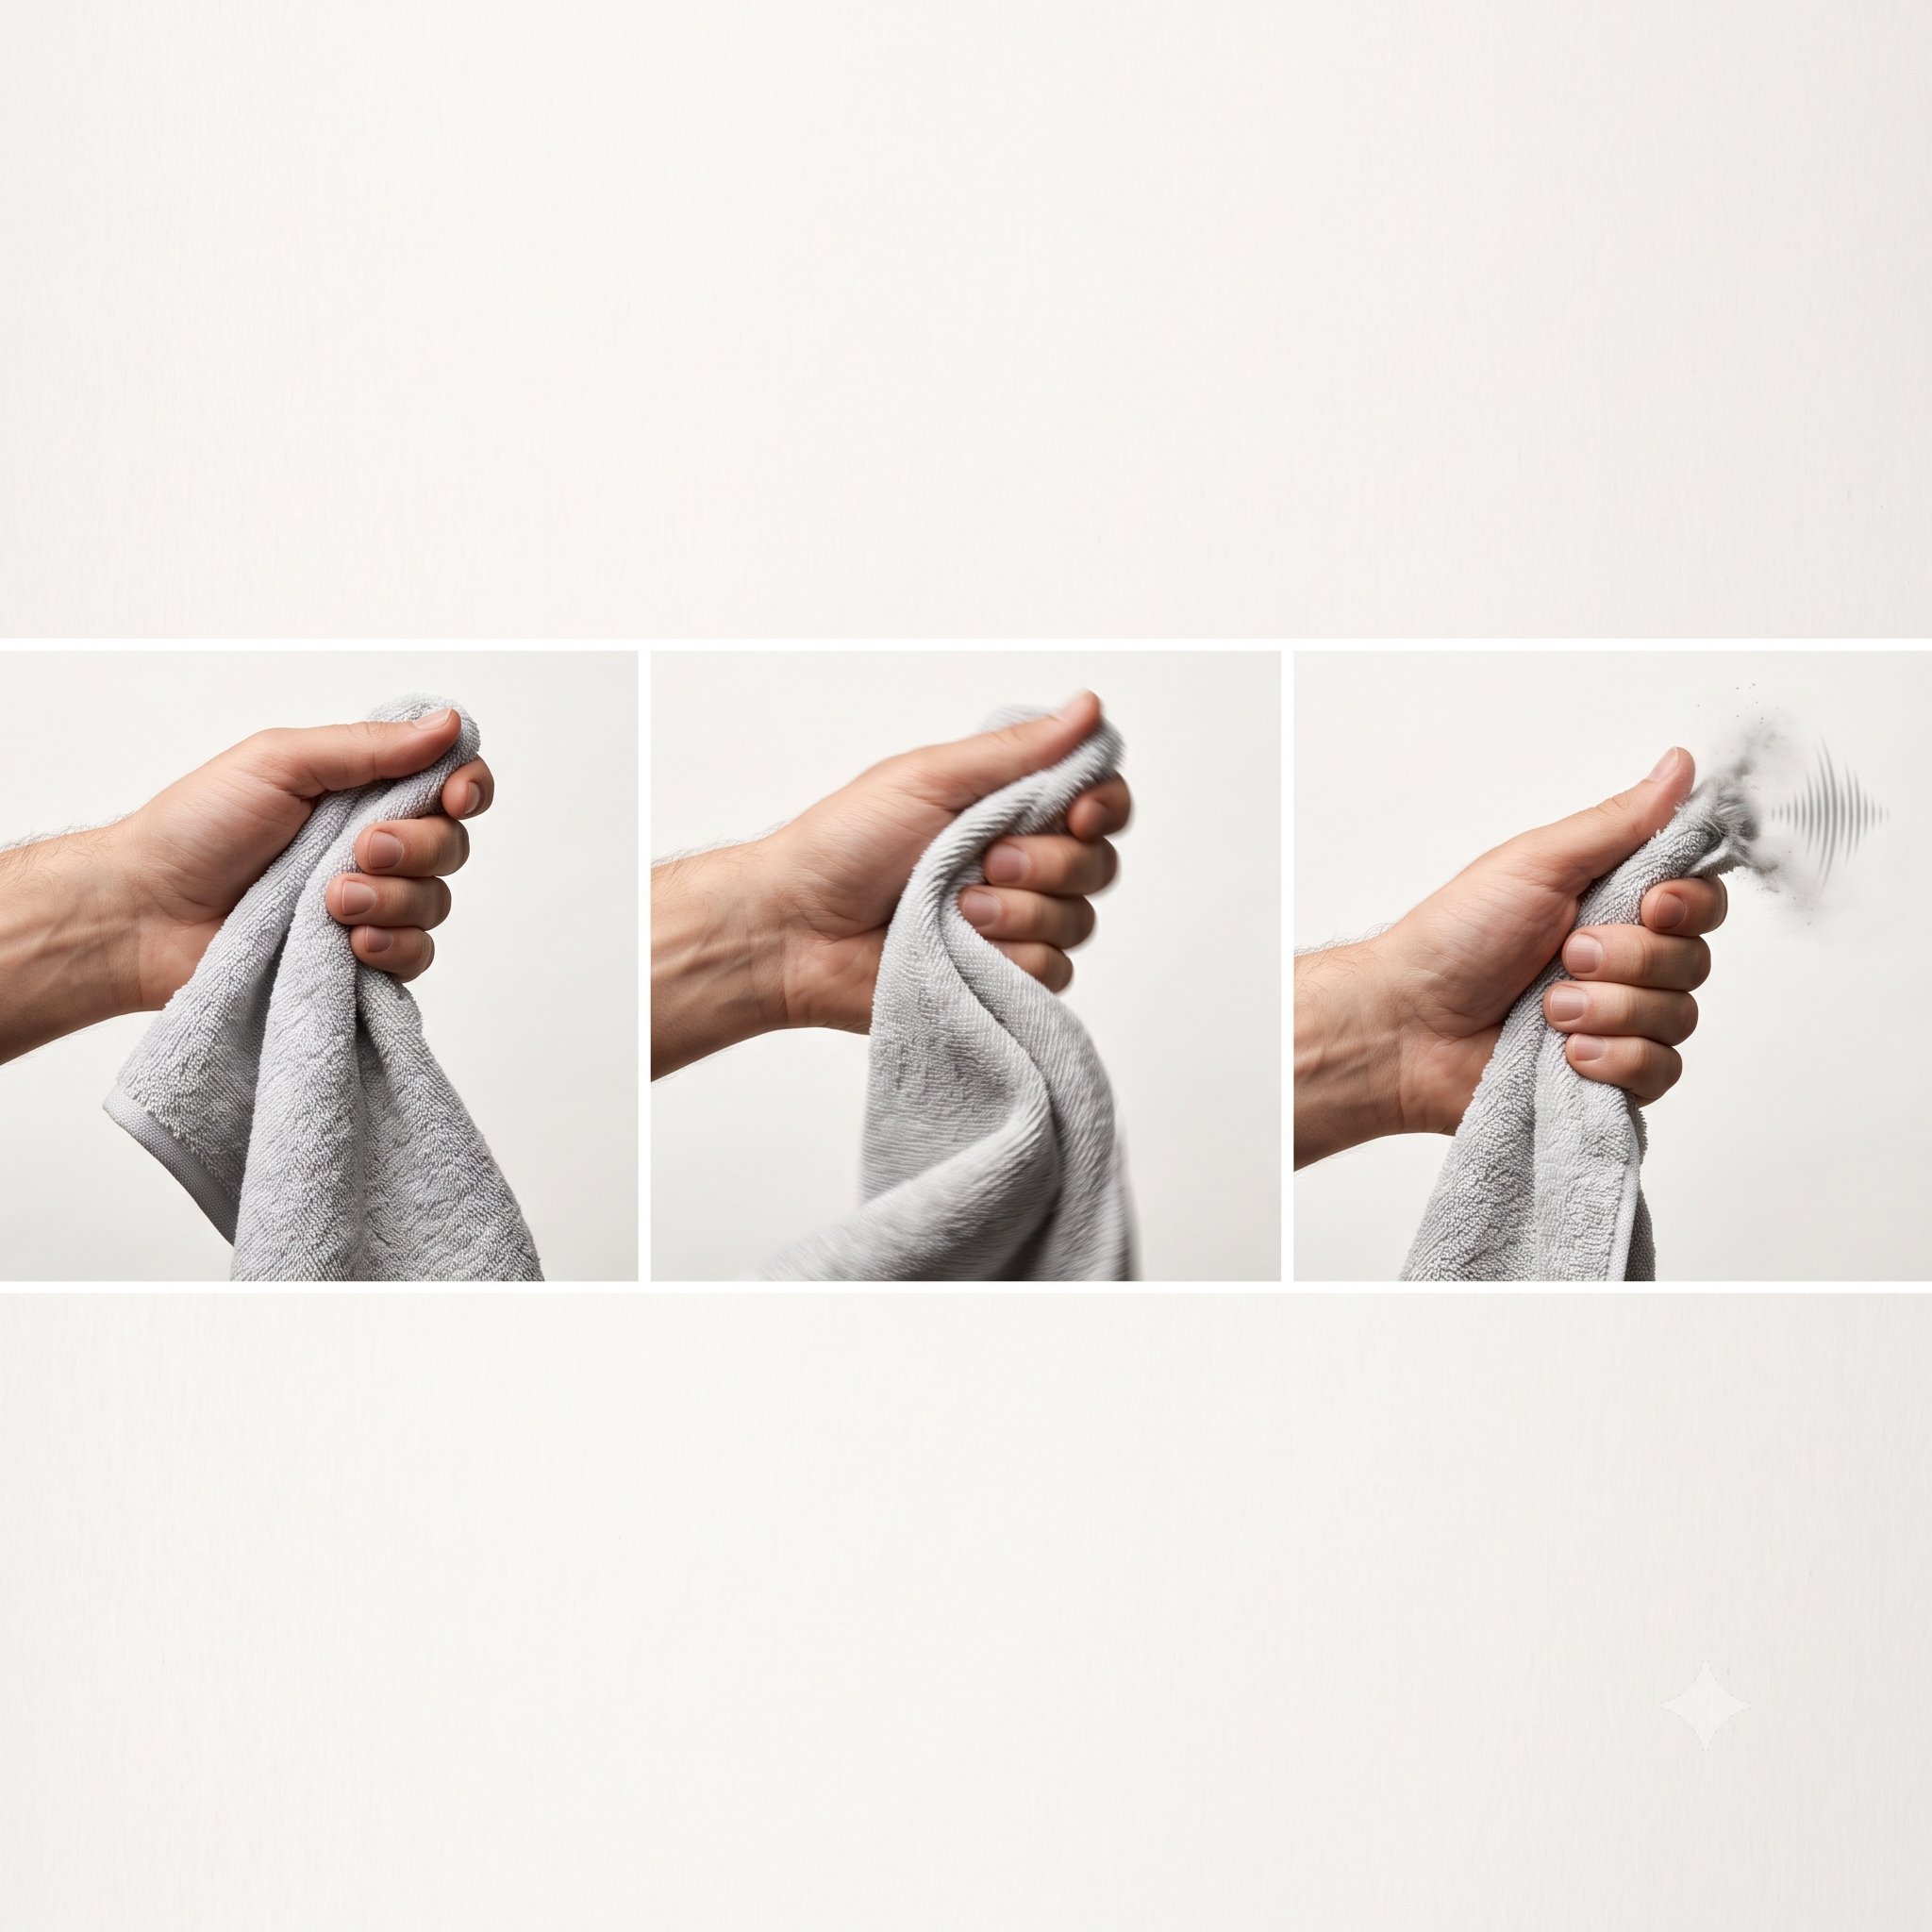
Transmission — Figure 4
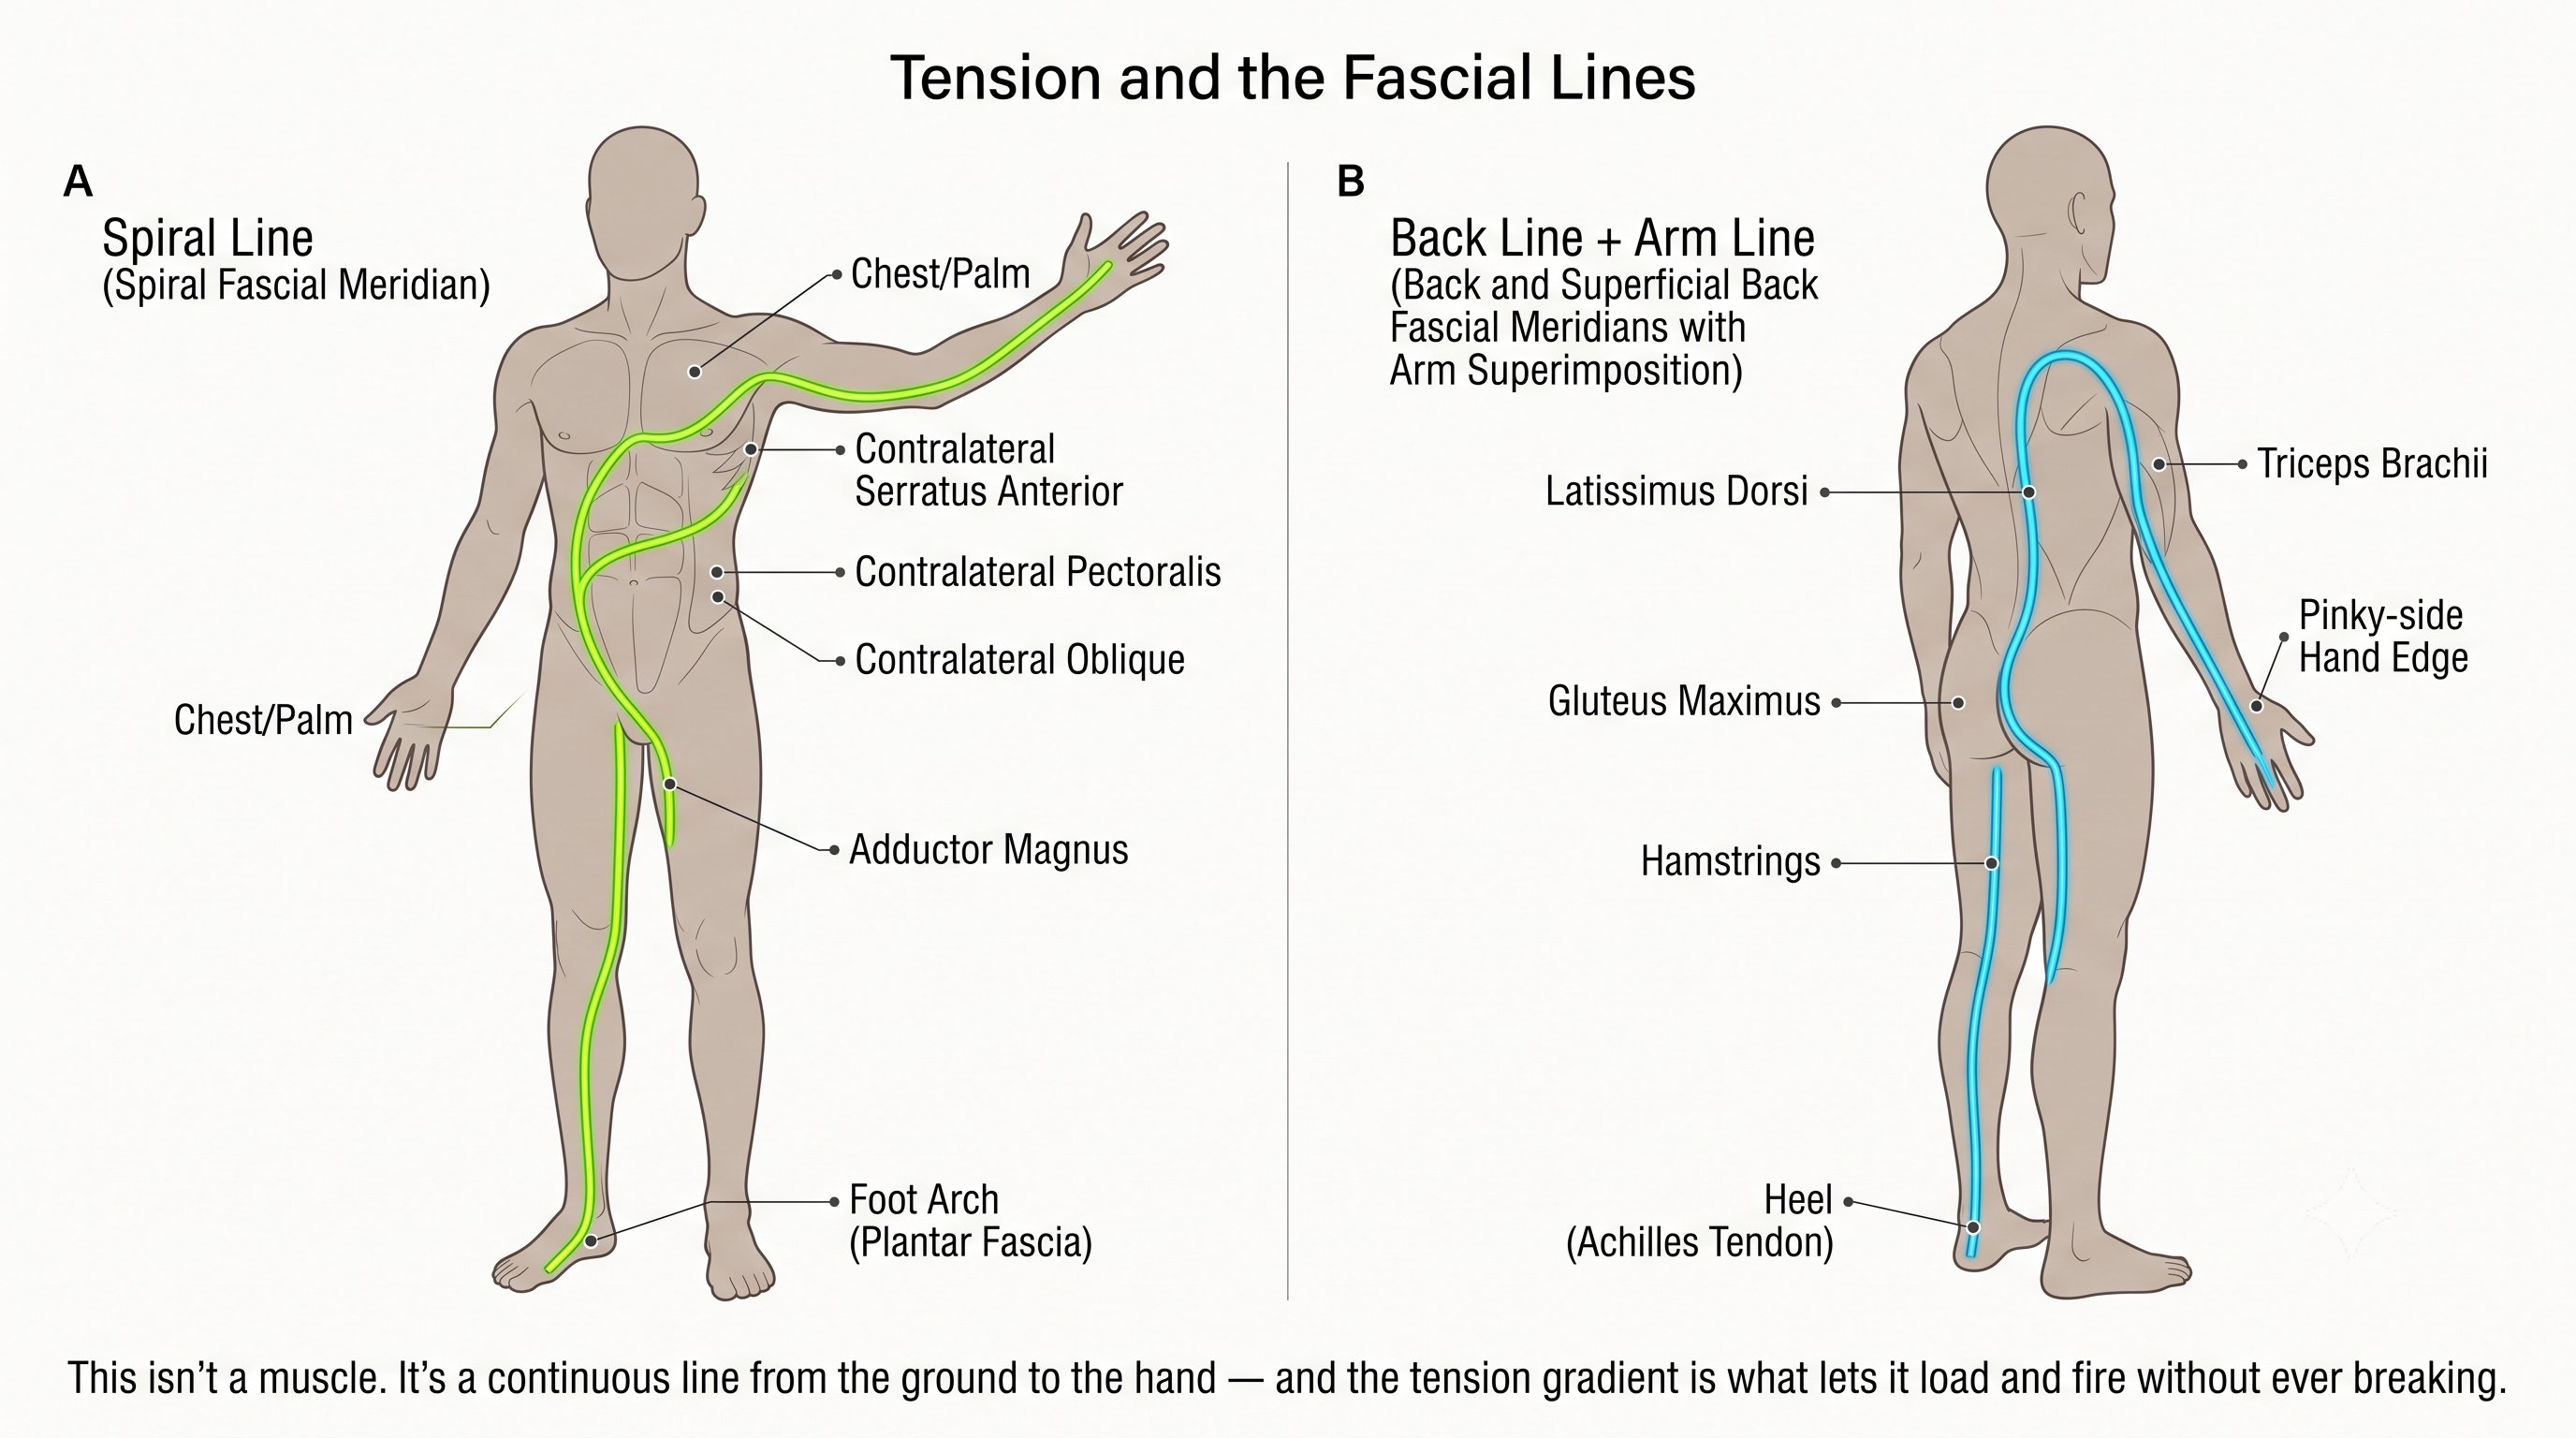
Transmission — Figure 5
Chapter 7: The CORE System 5 figures
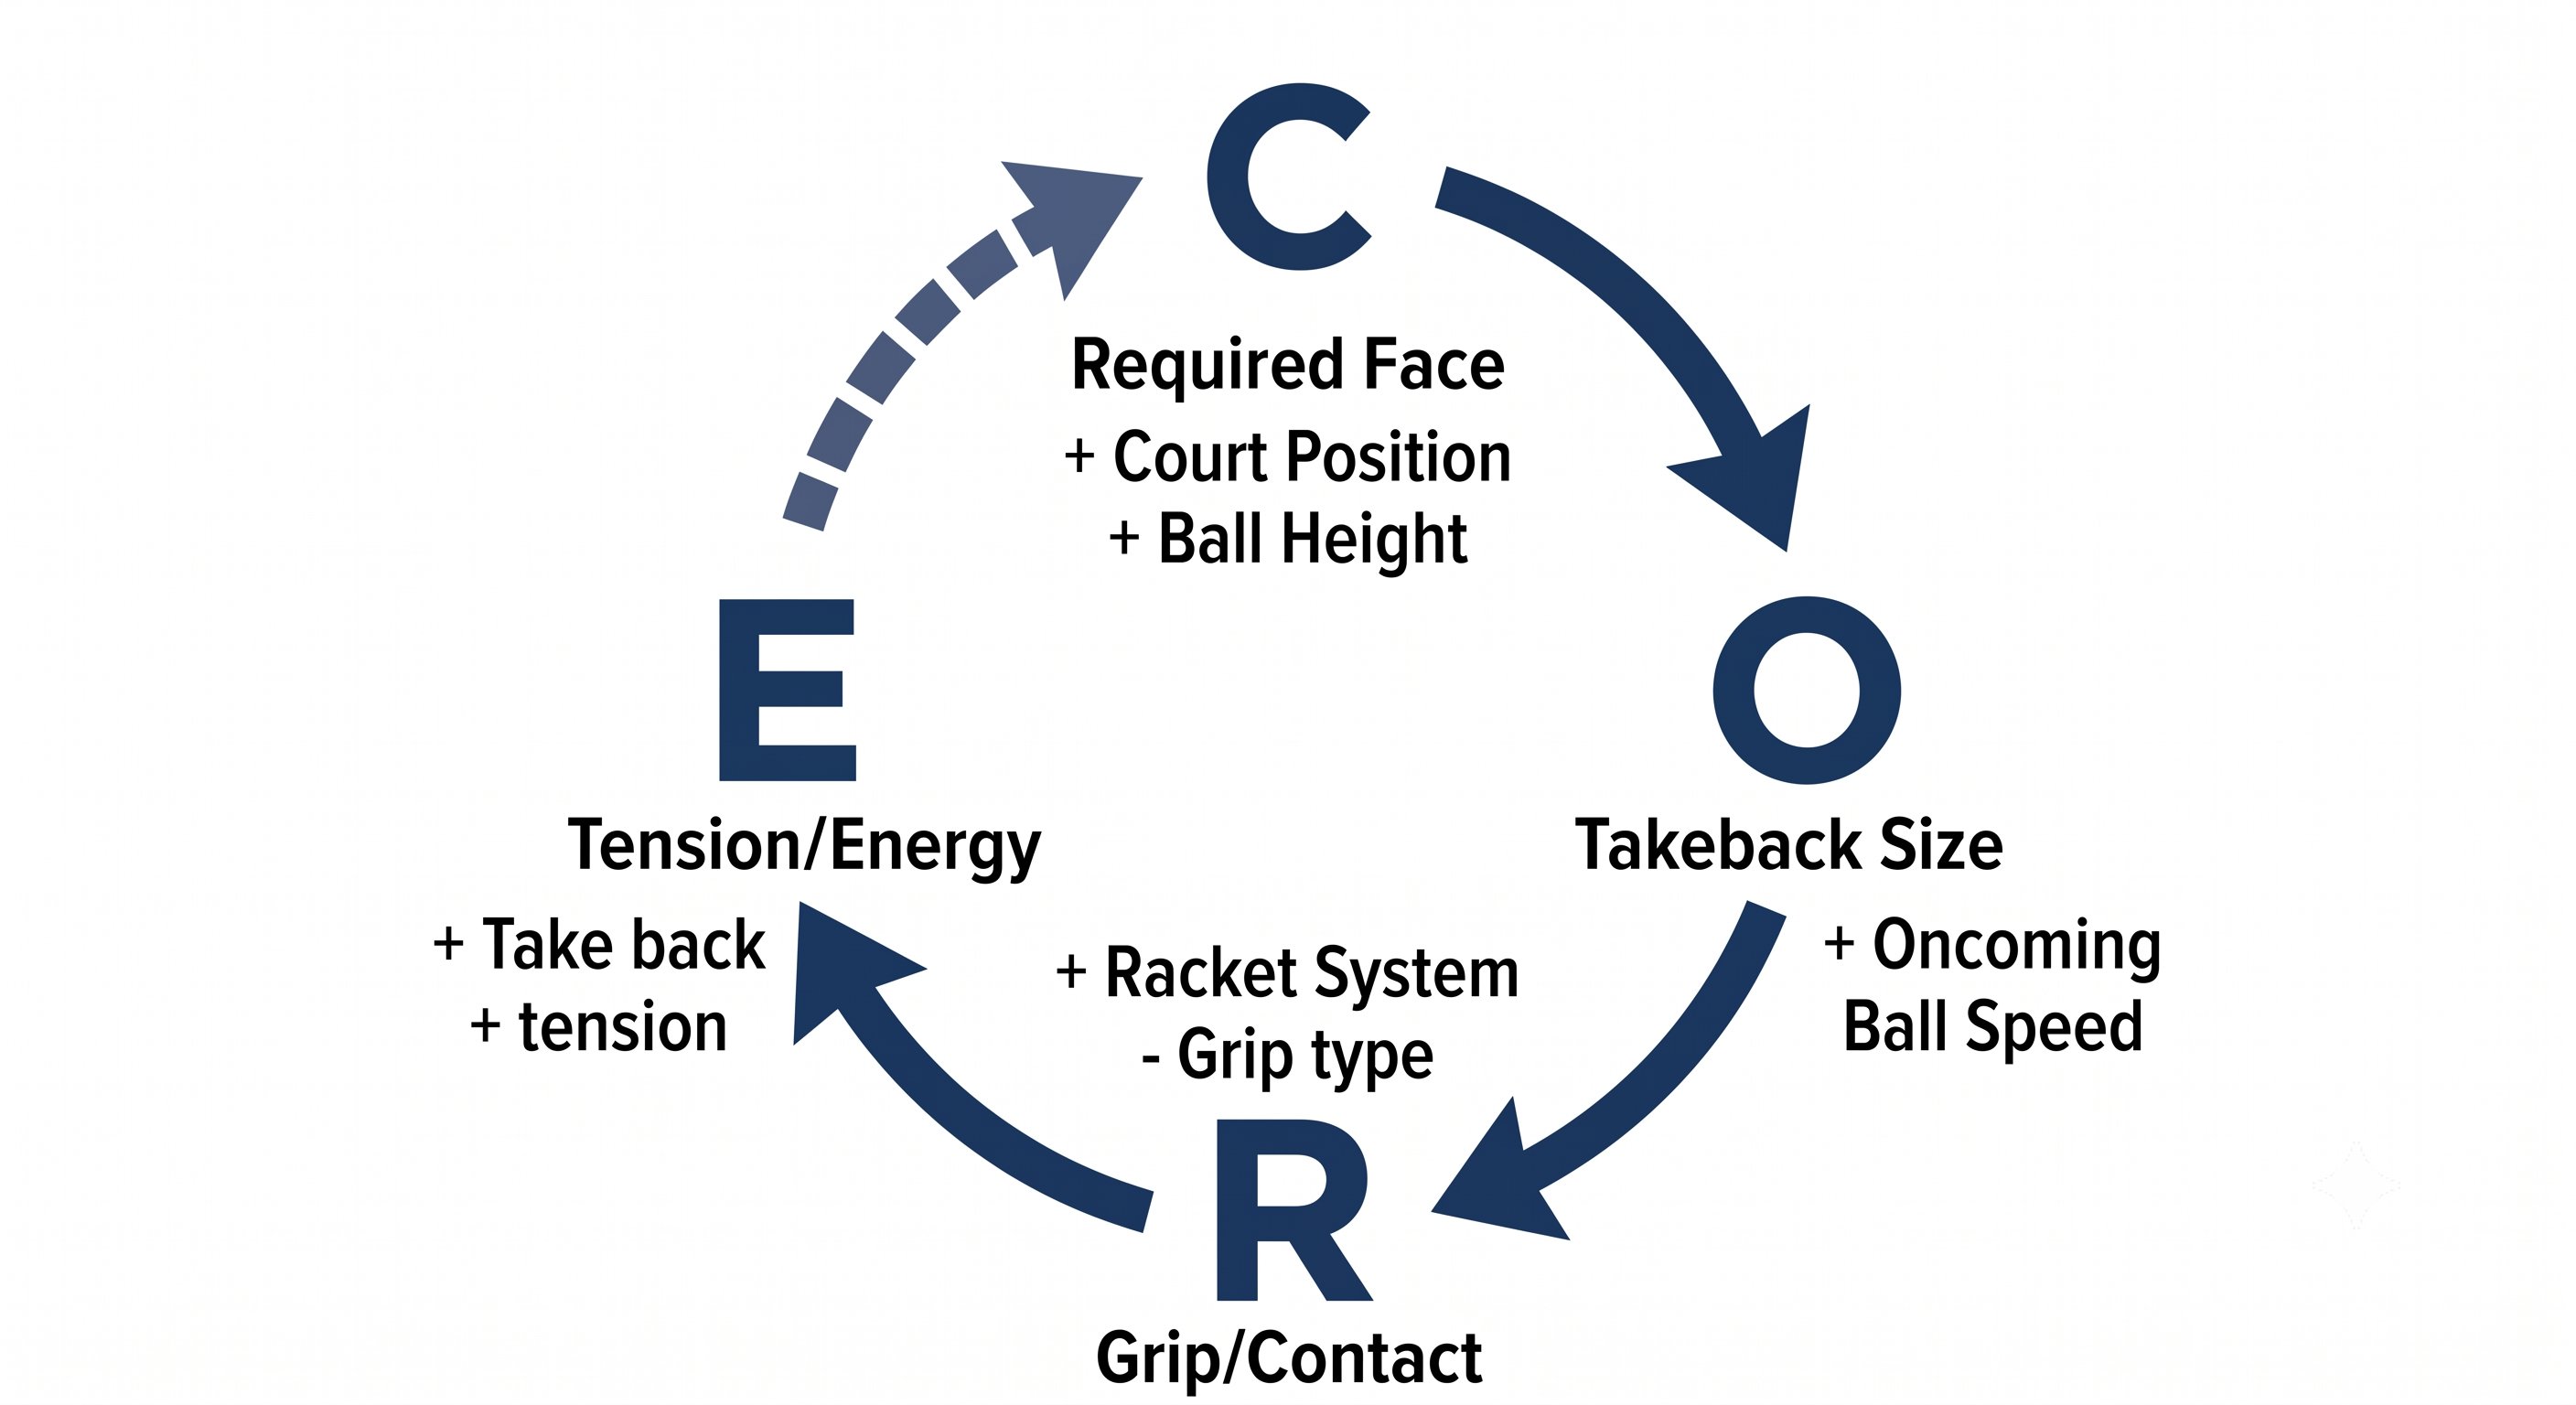
The CORE System — Figure 1
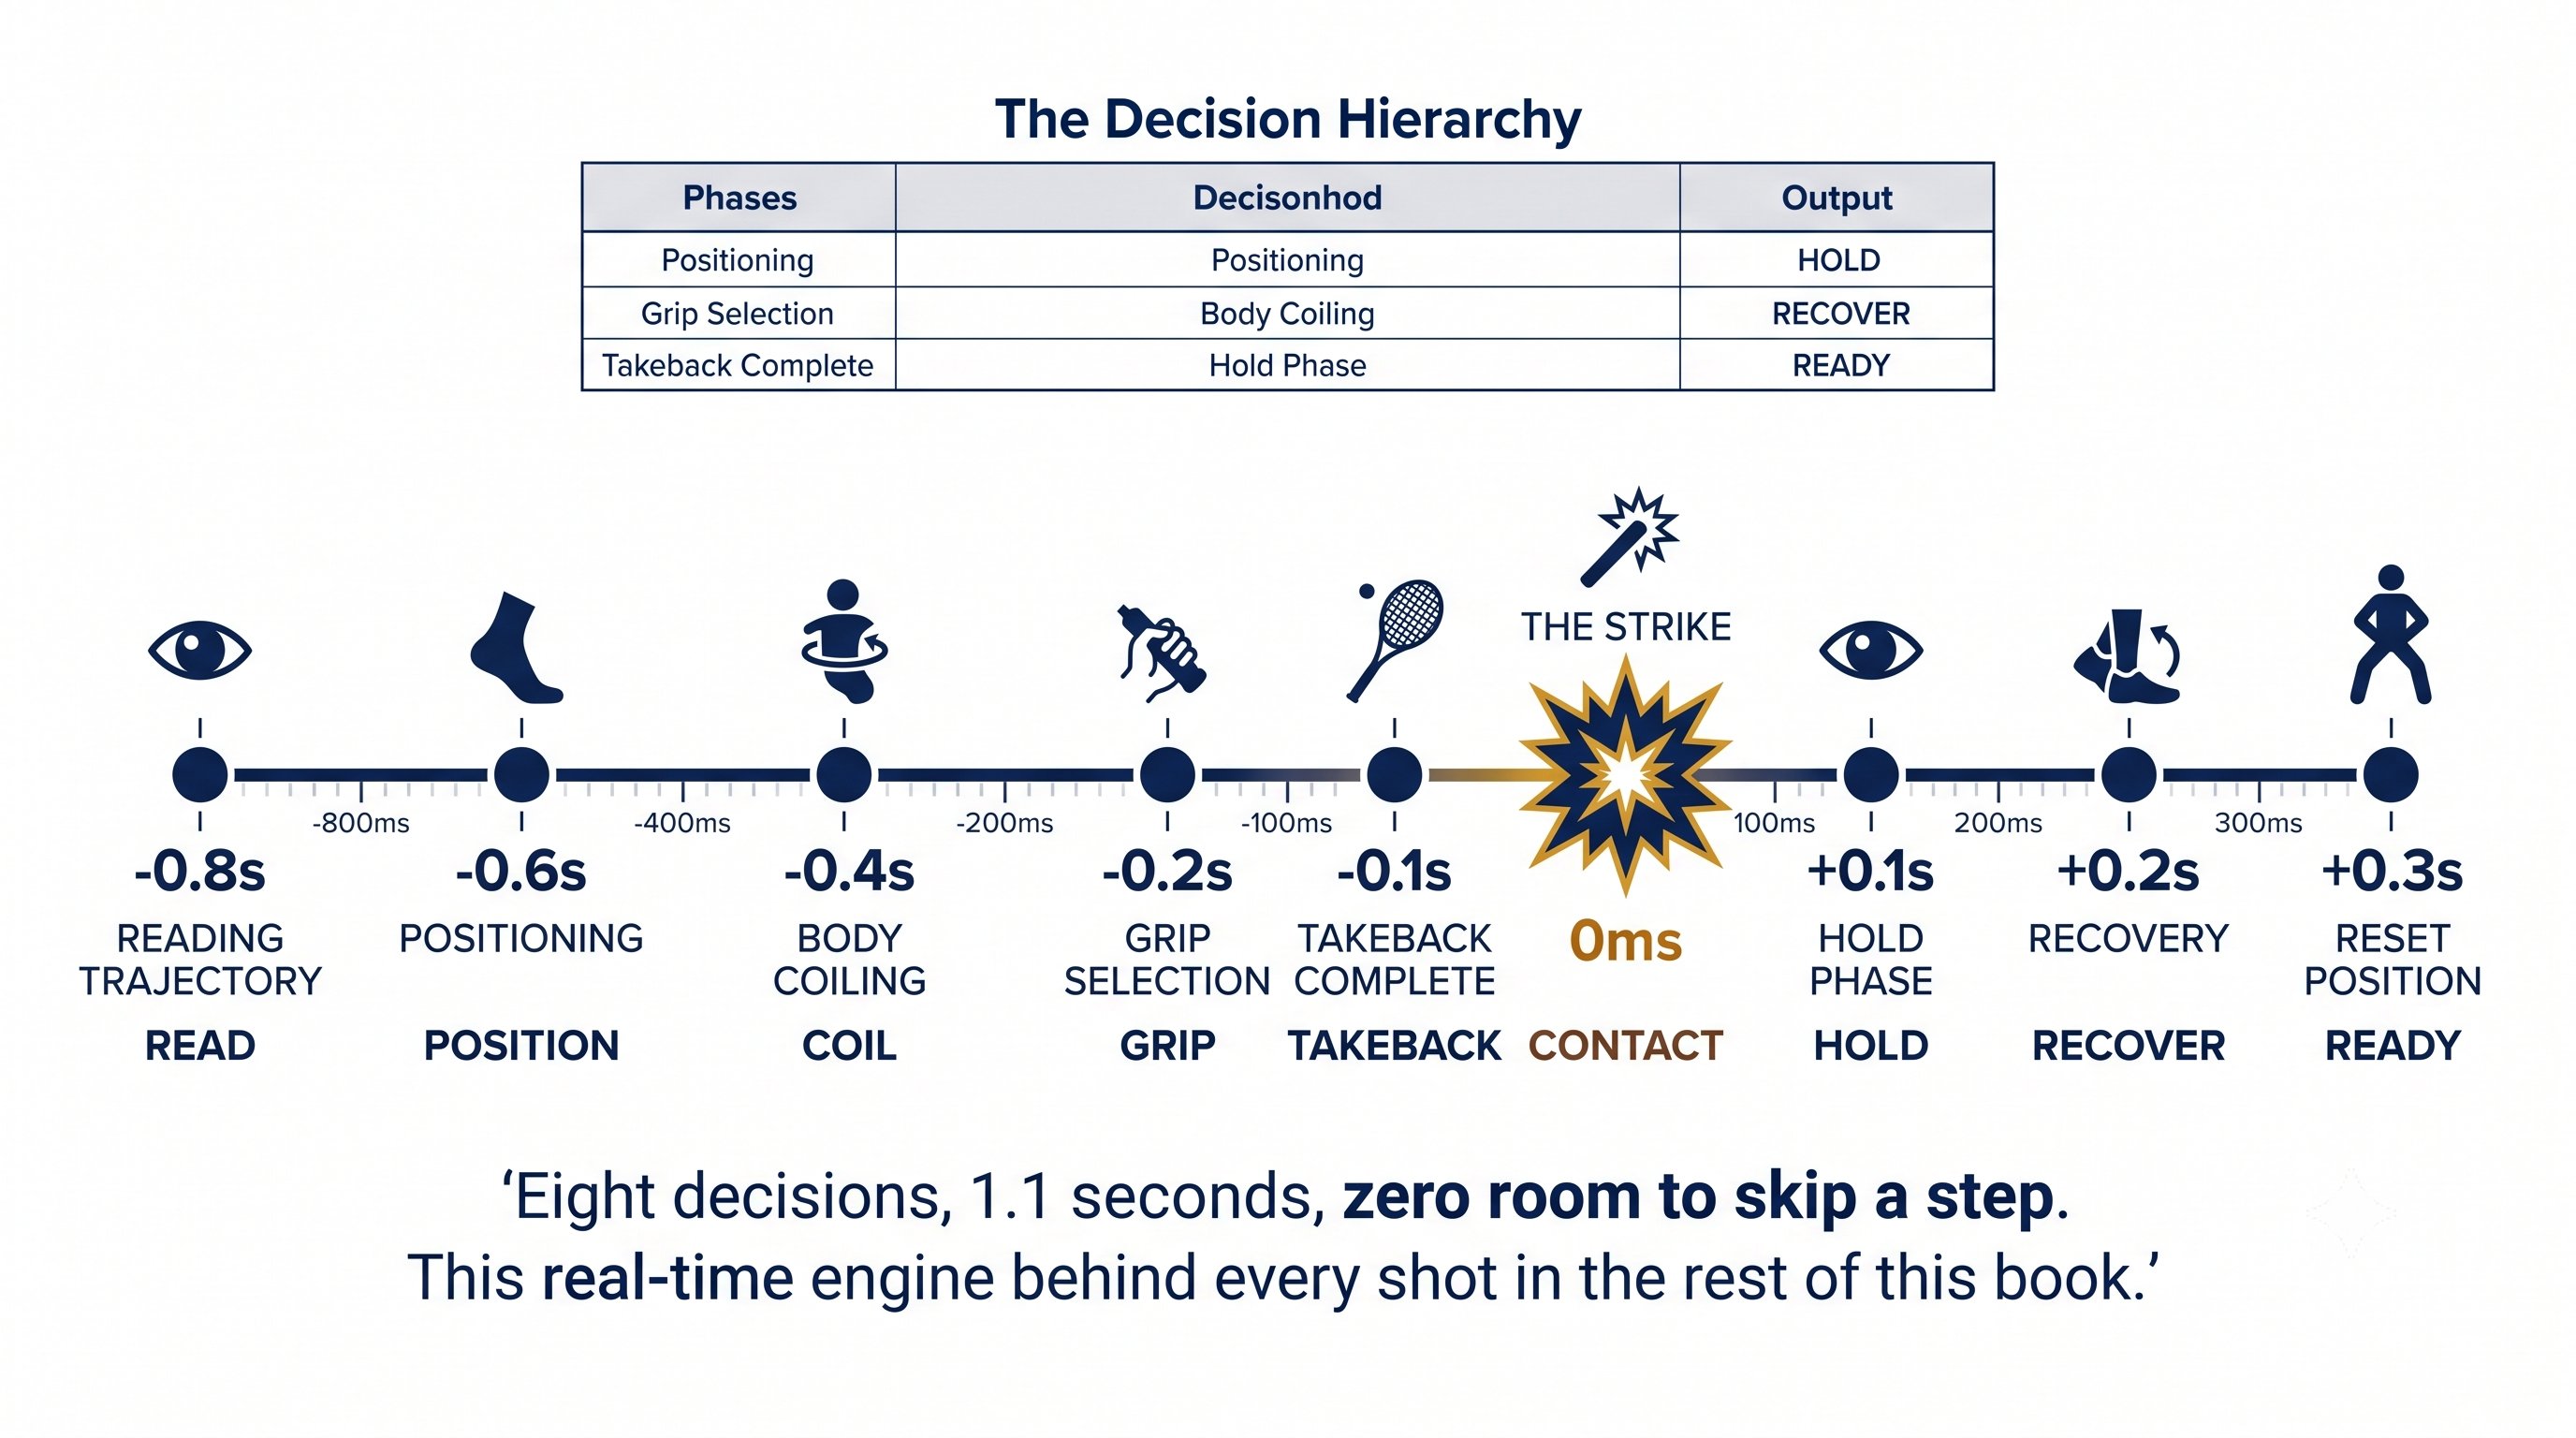
The CORE System — Figure 2
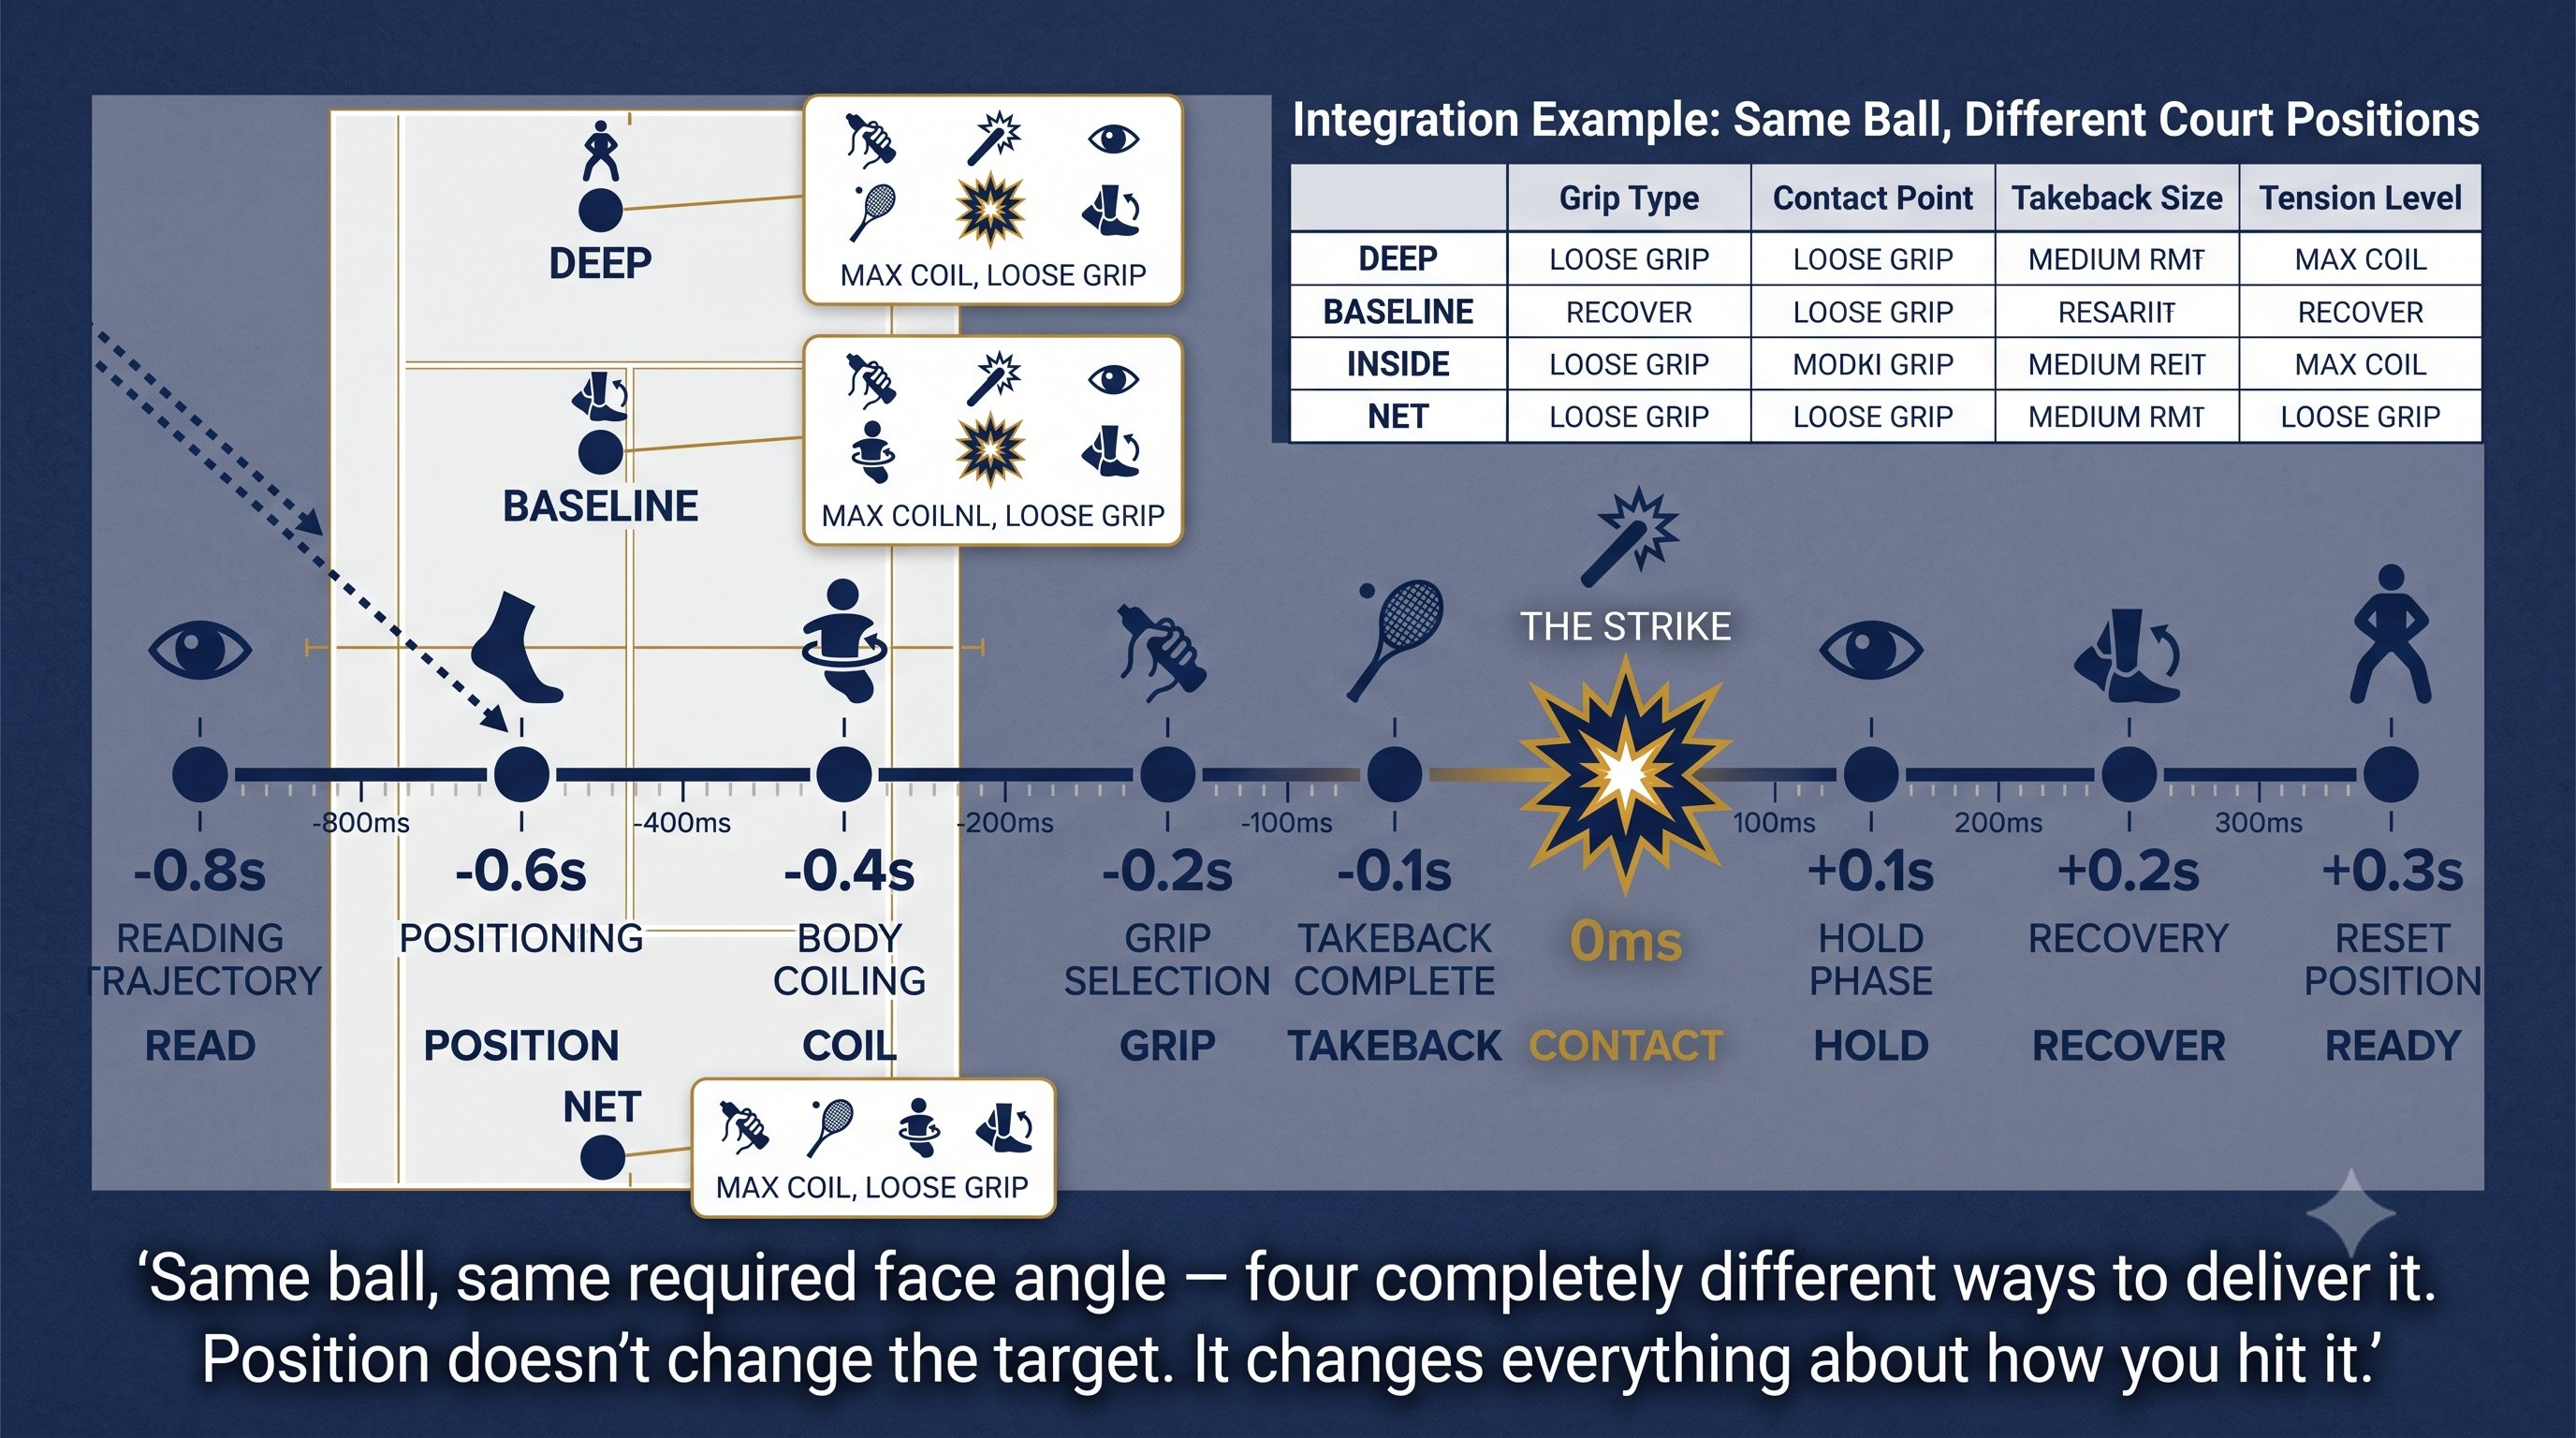
The CORE System — Figure 3
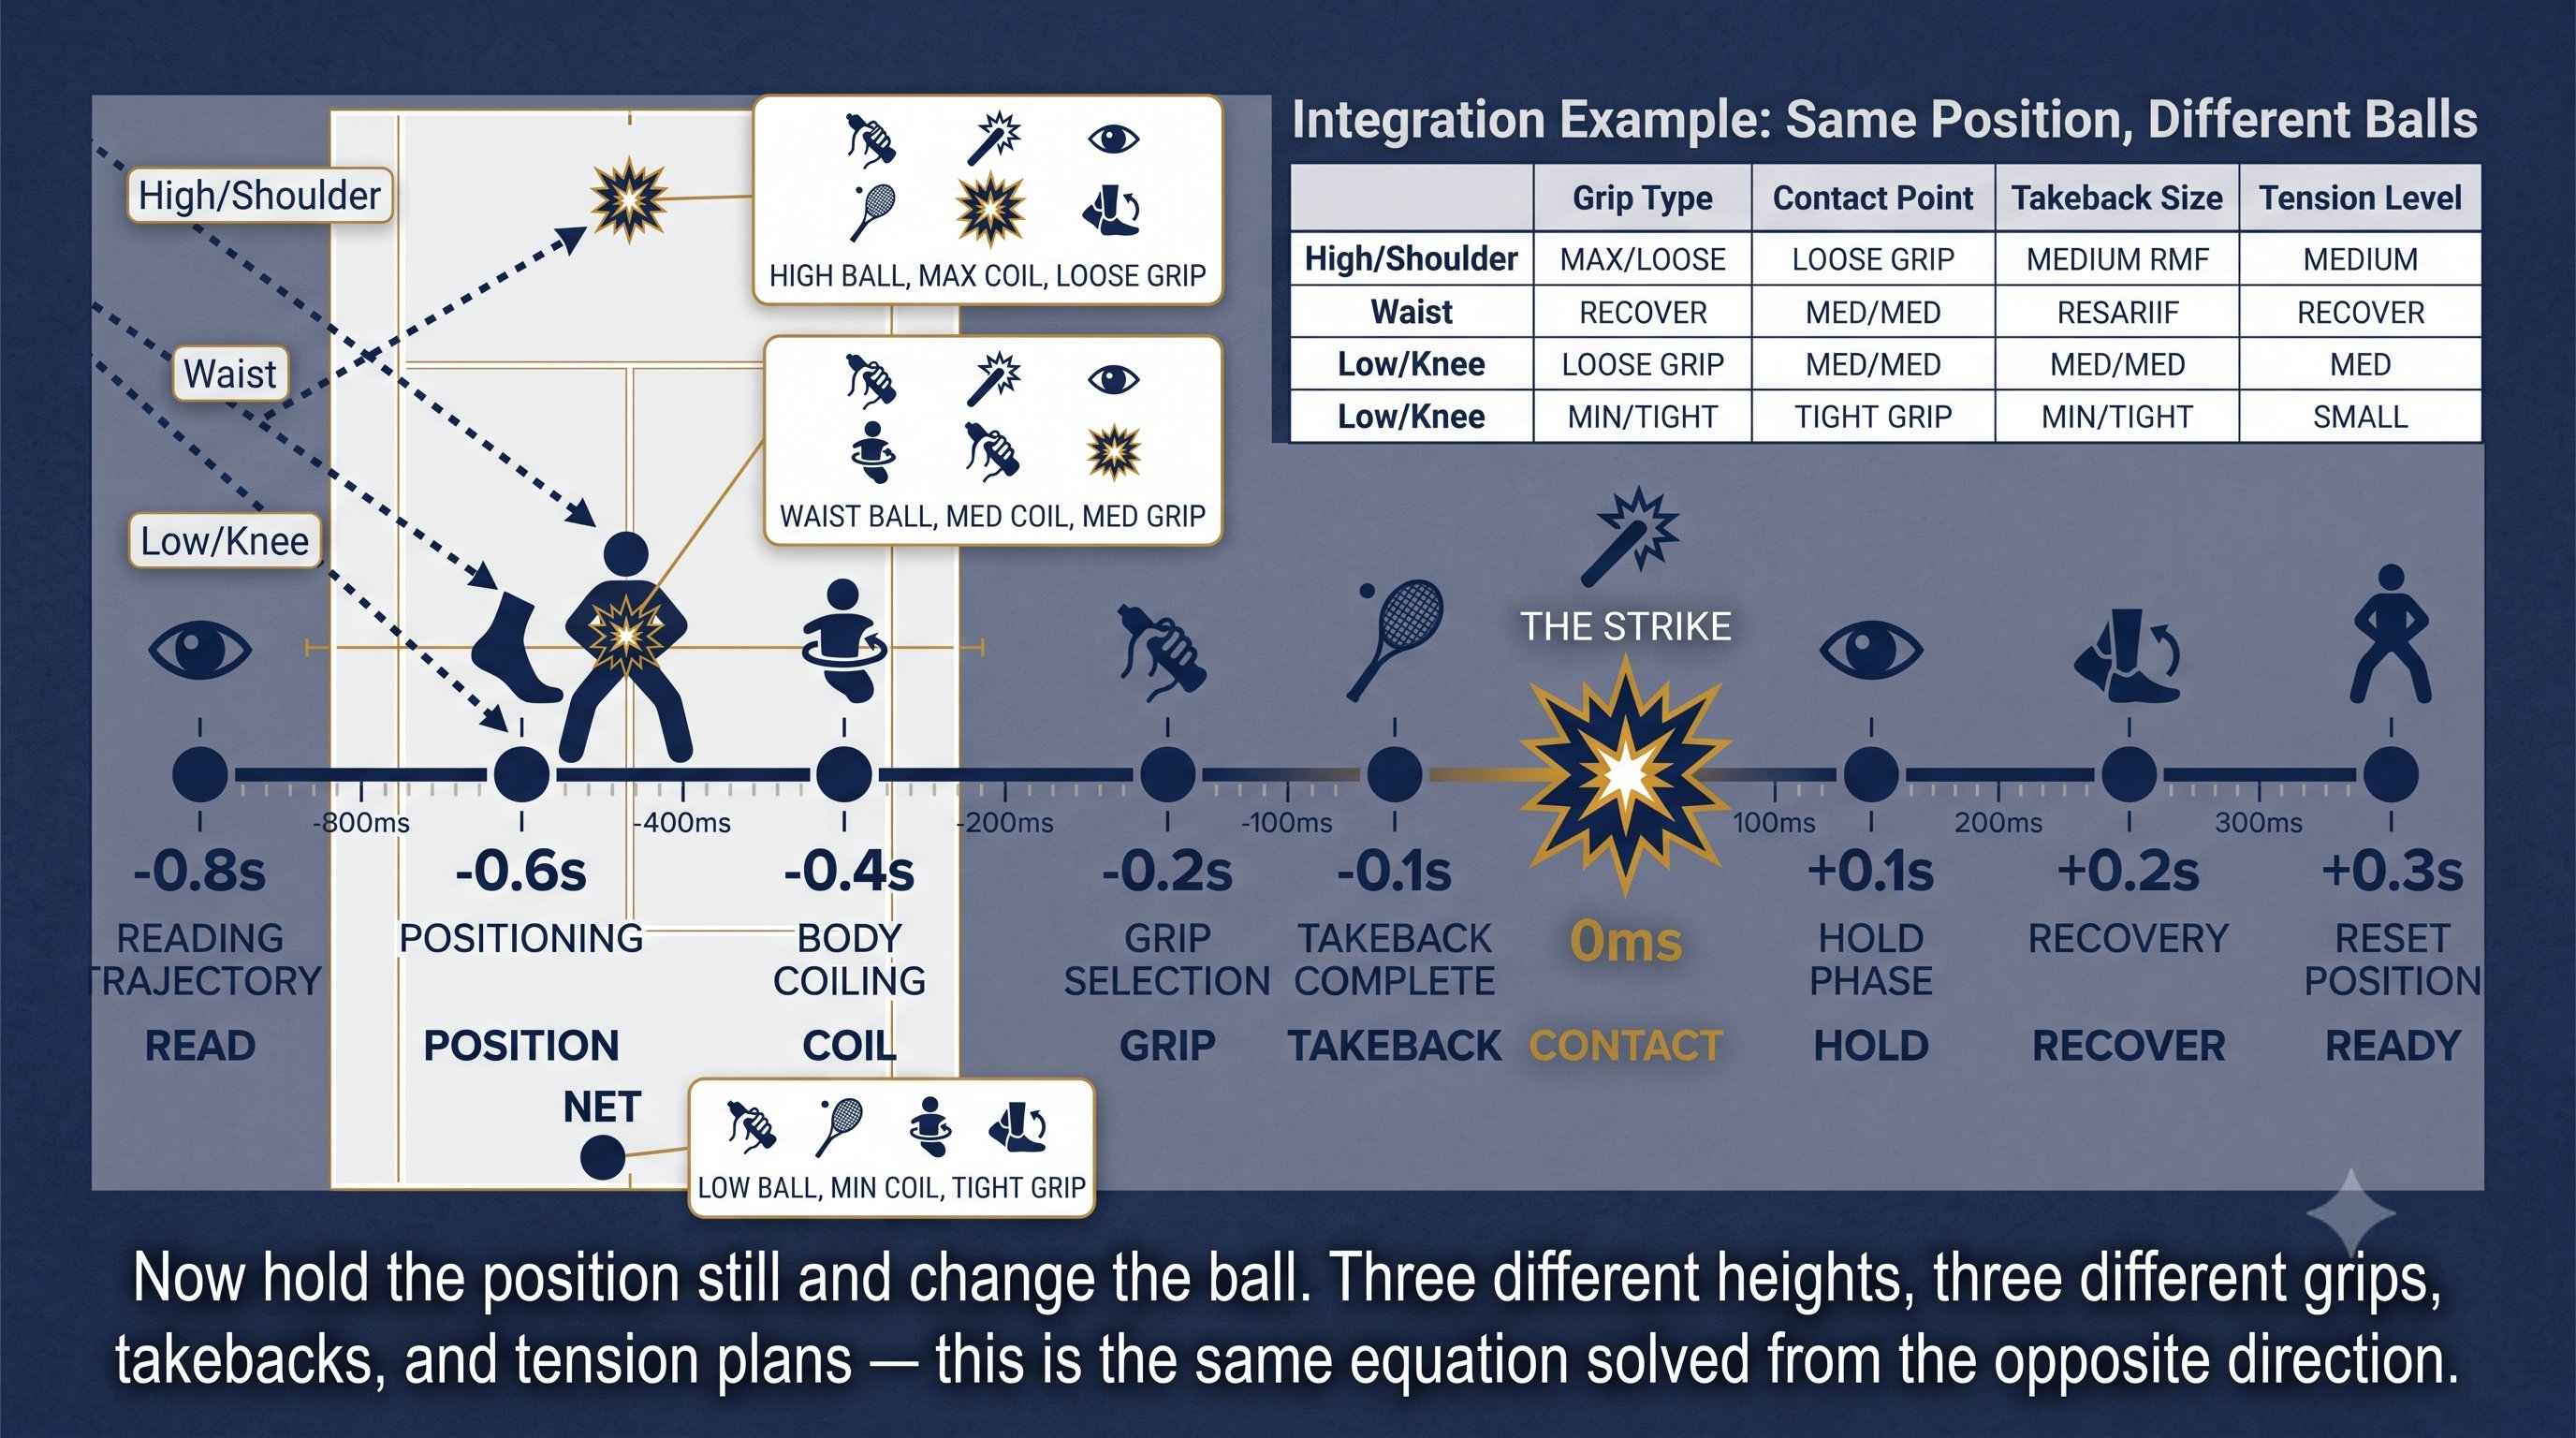
The CORE System — Figure 4
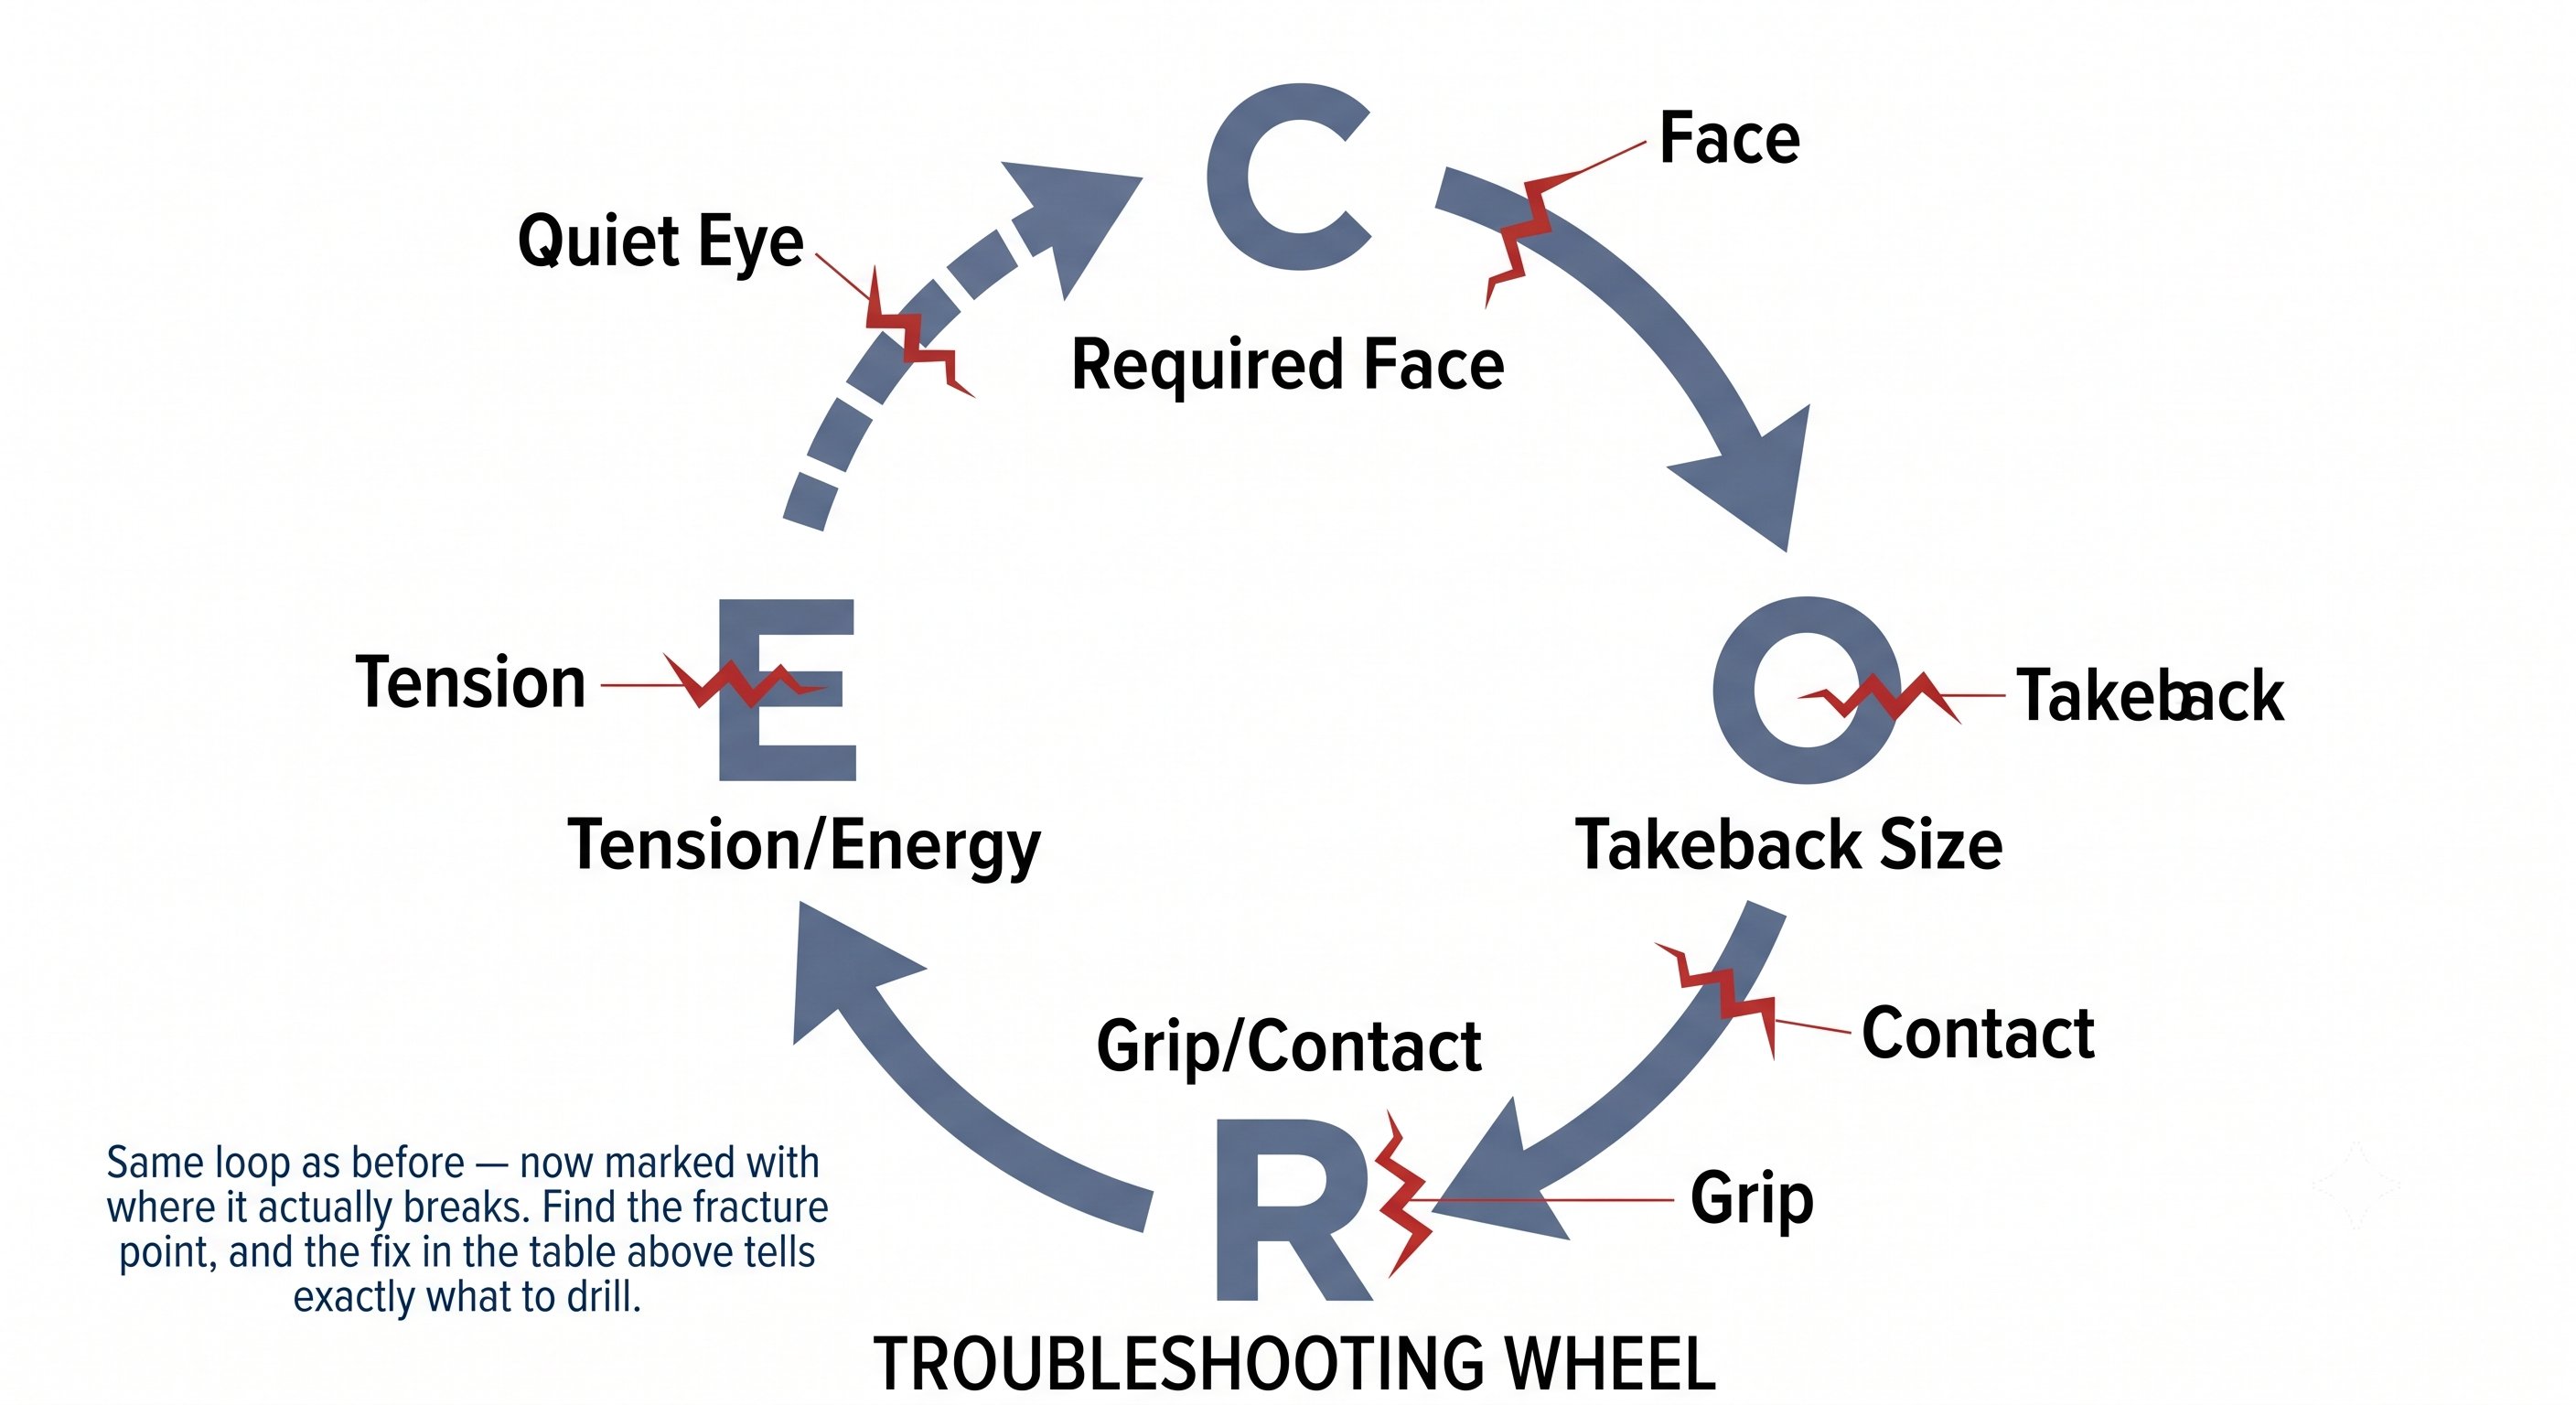
The CORE System — Figure 5
Chapter 29: Physical Preparation 6 figures
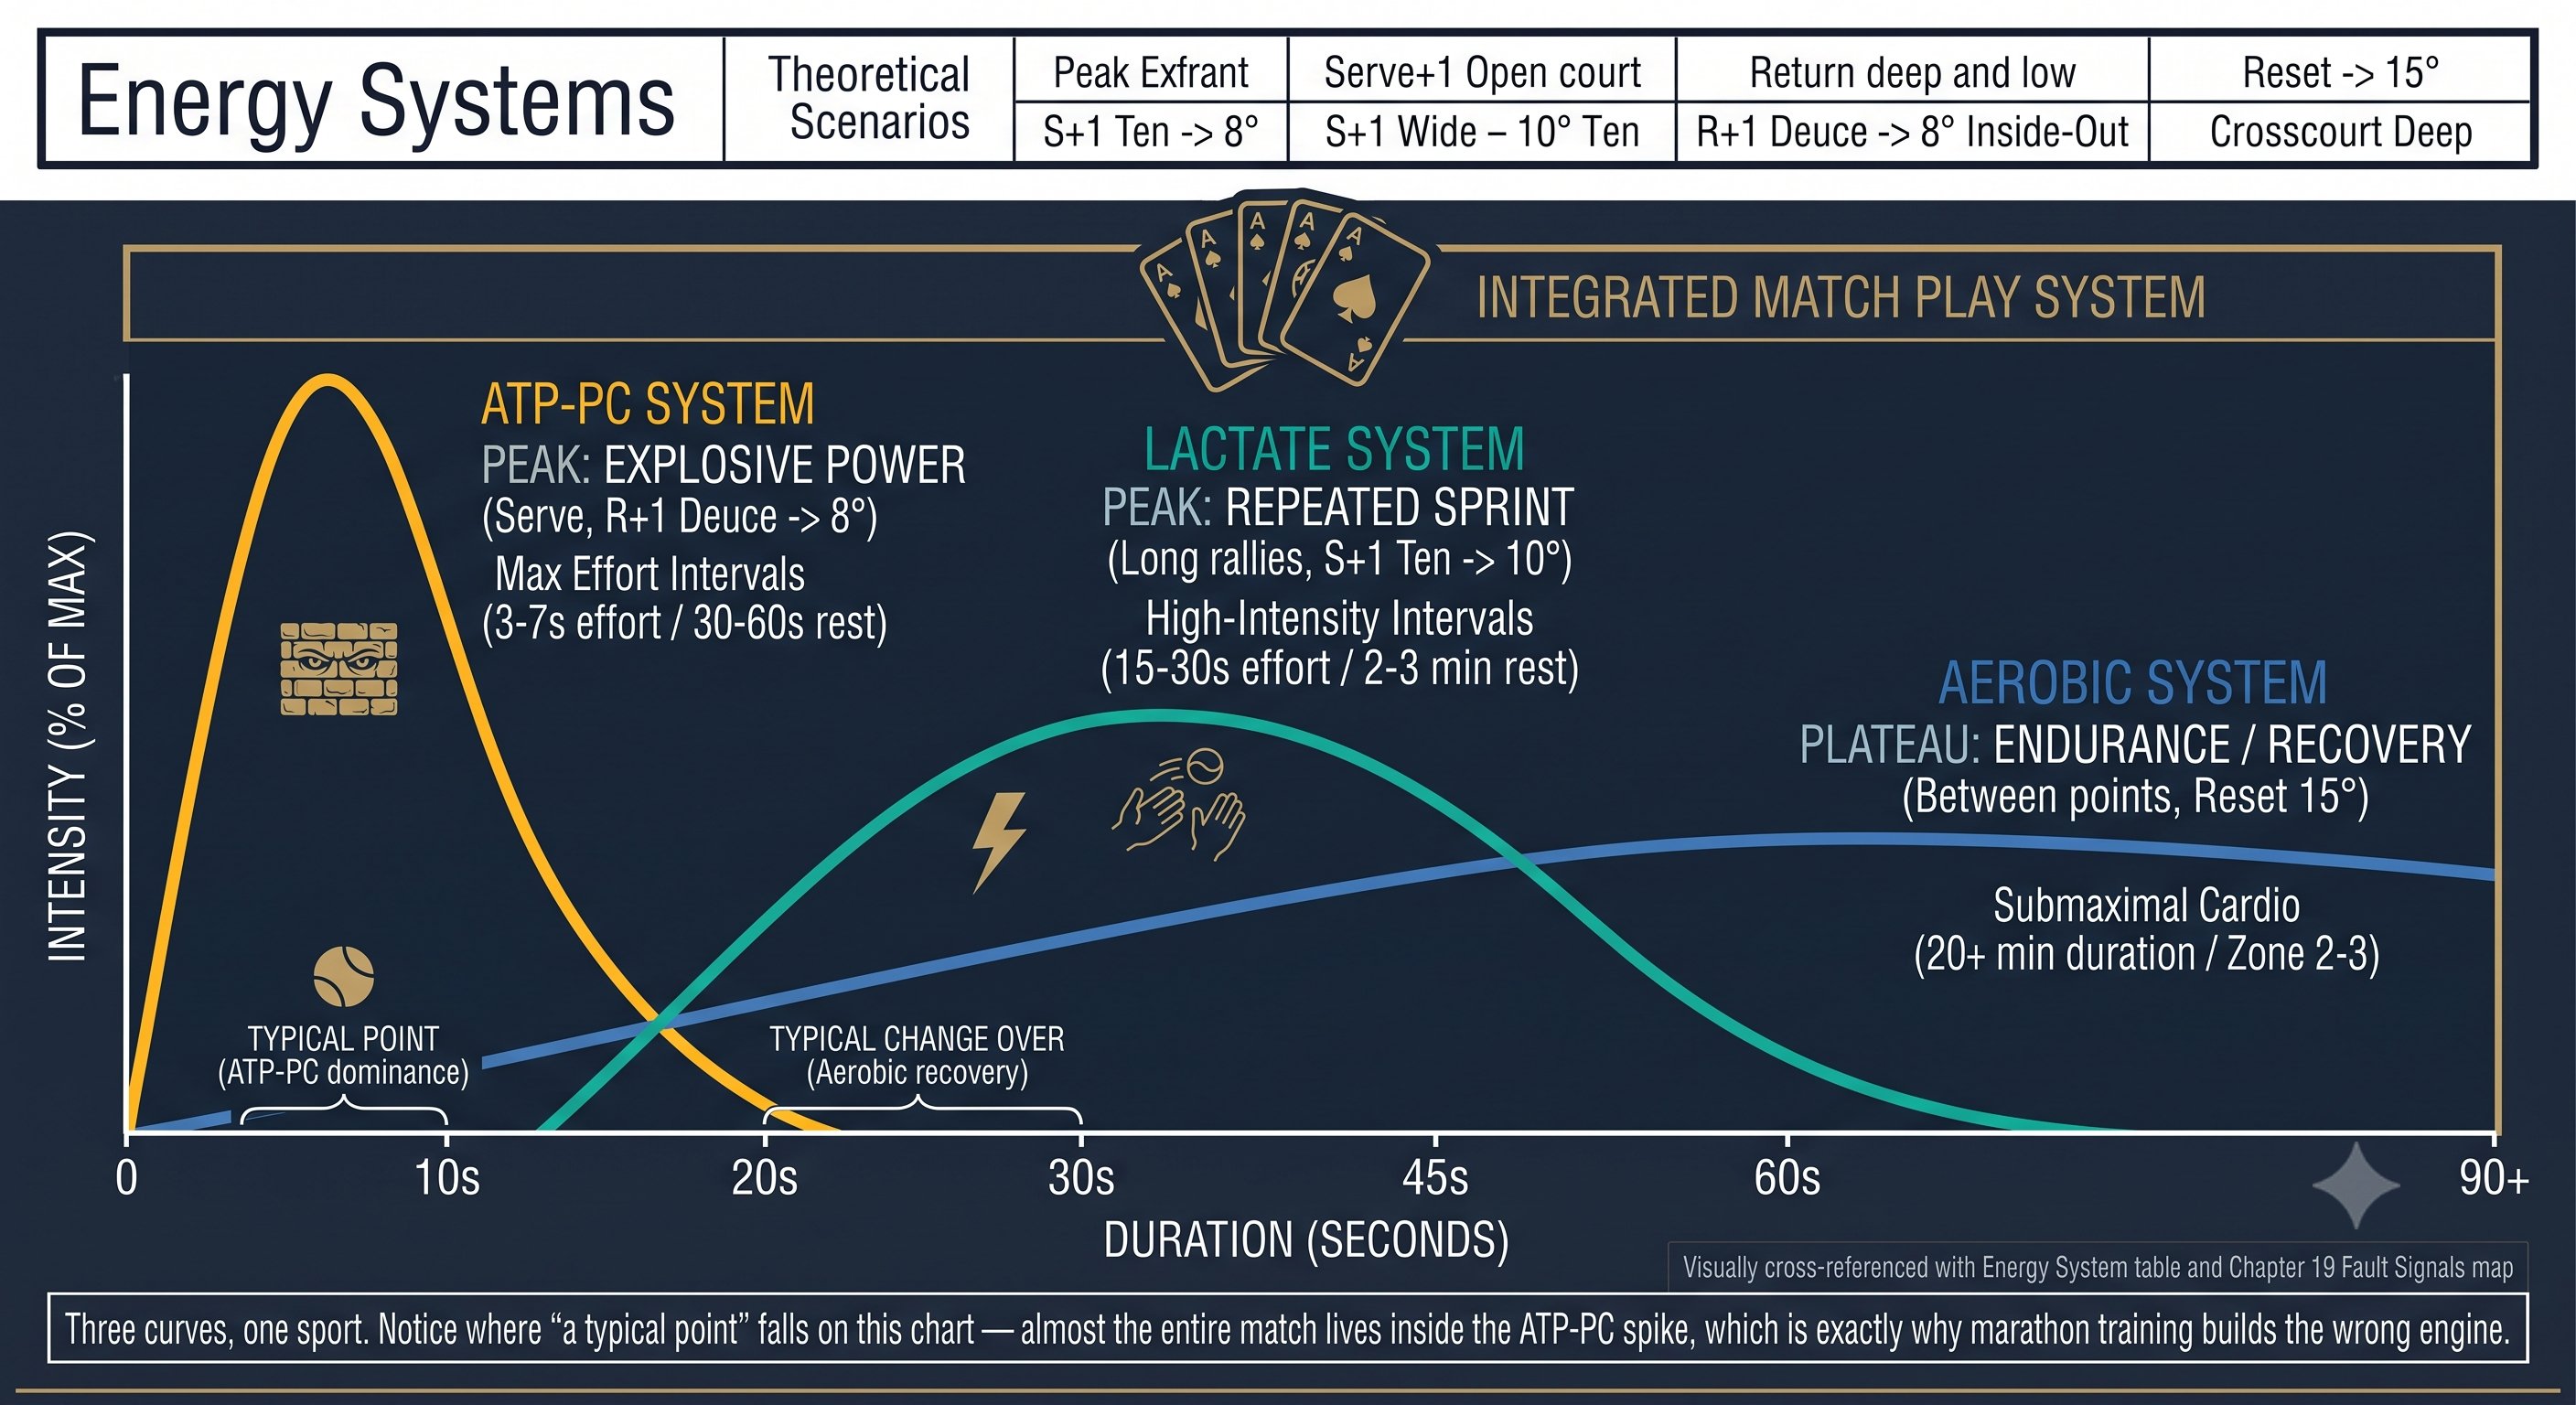
Physical Preparation — Figure 1
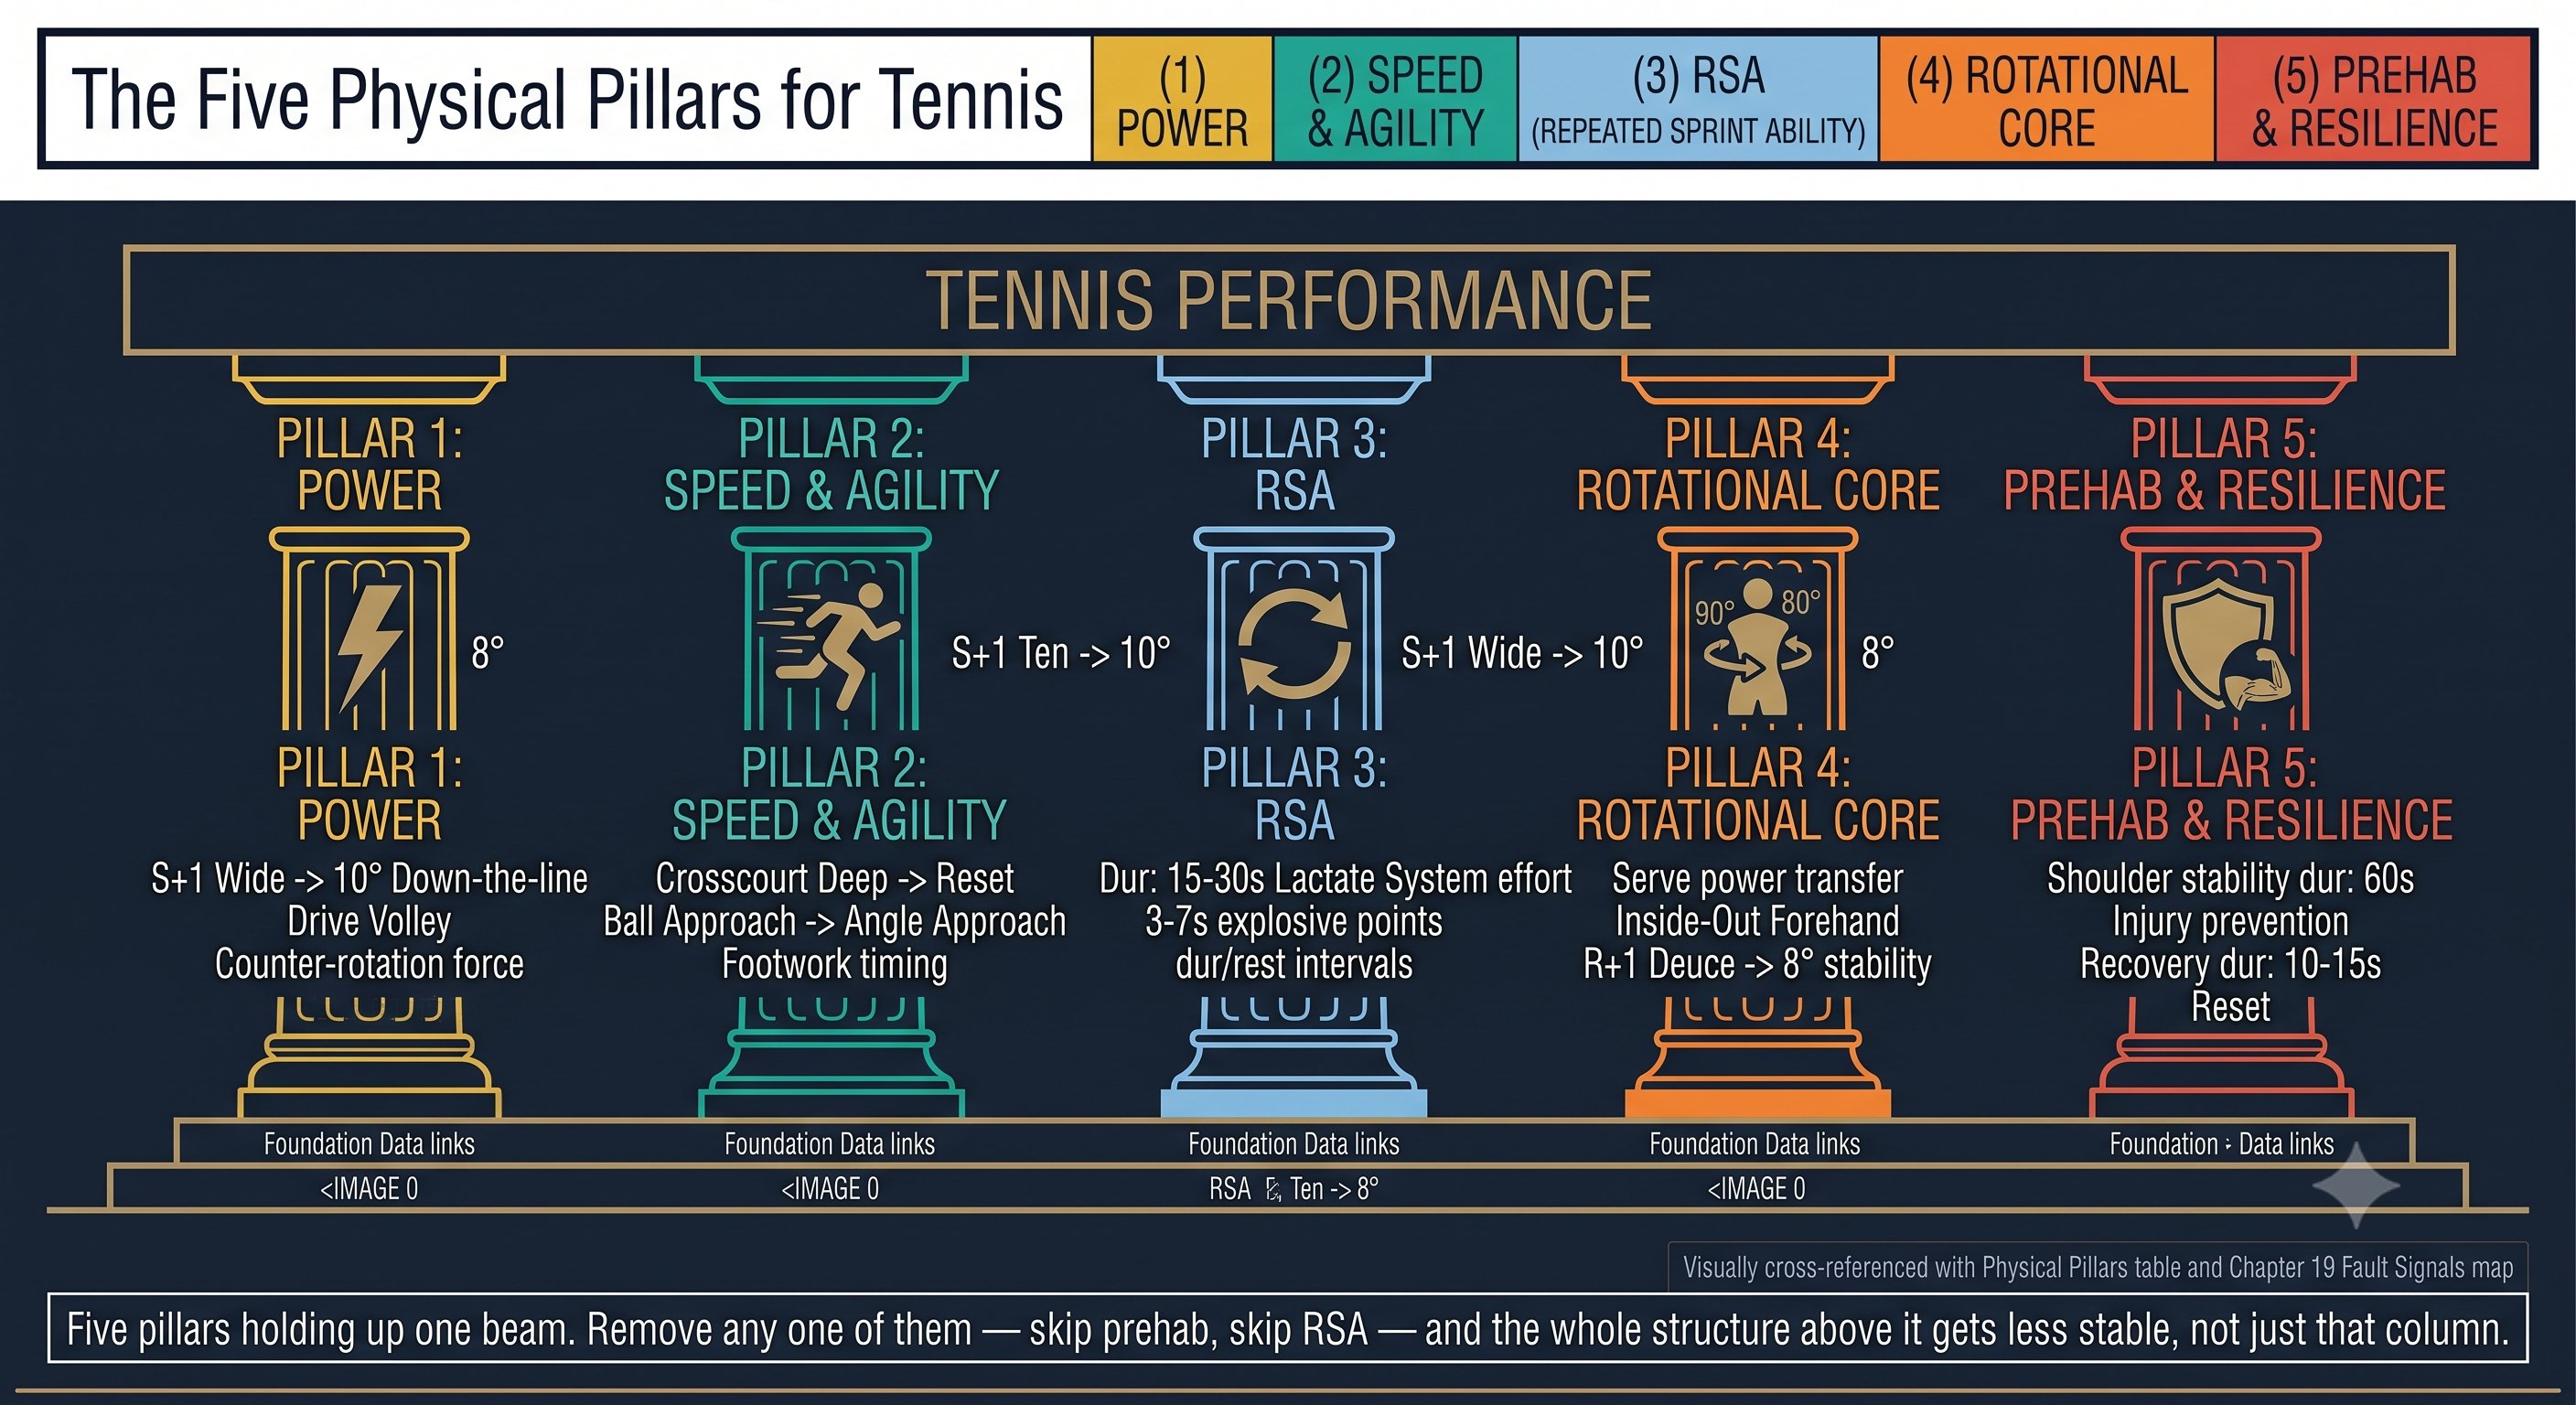
Physical Preparation — Figure 2
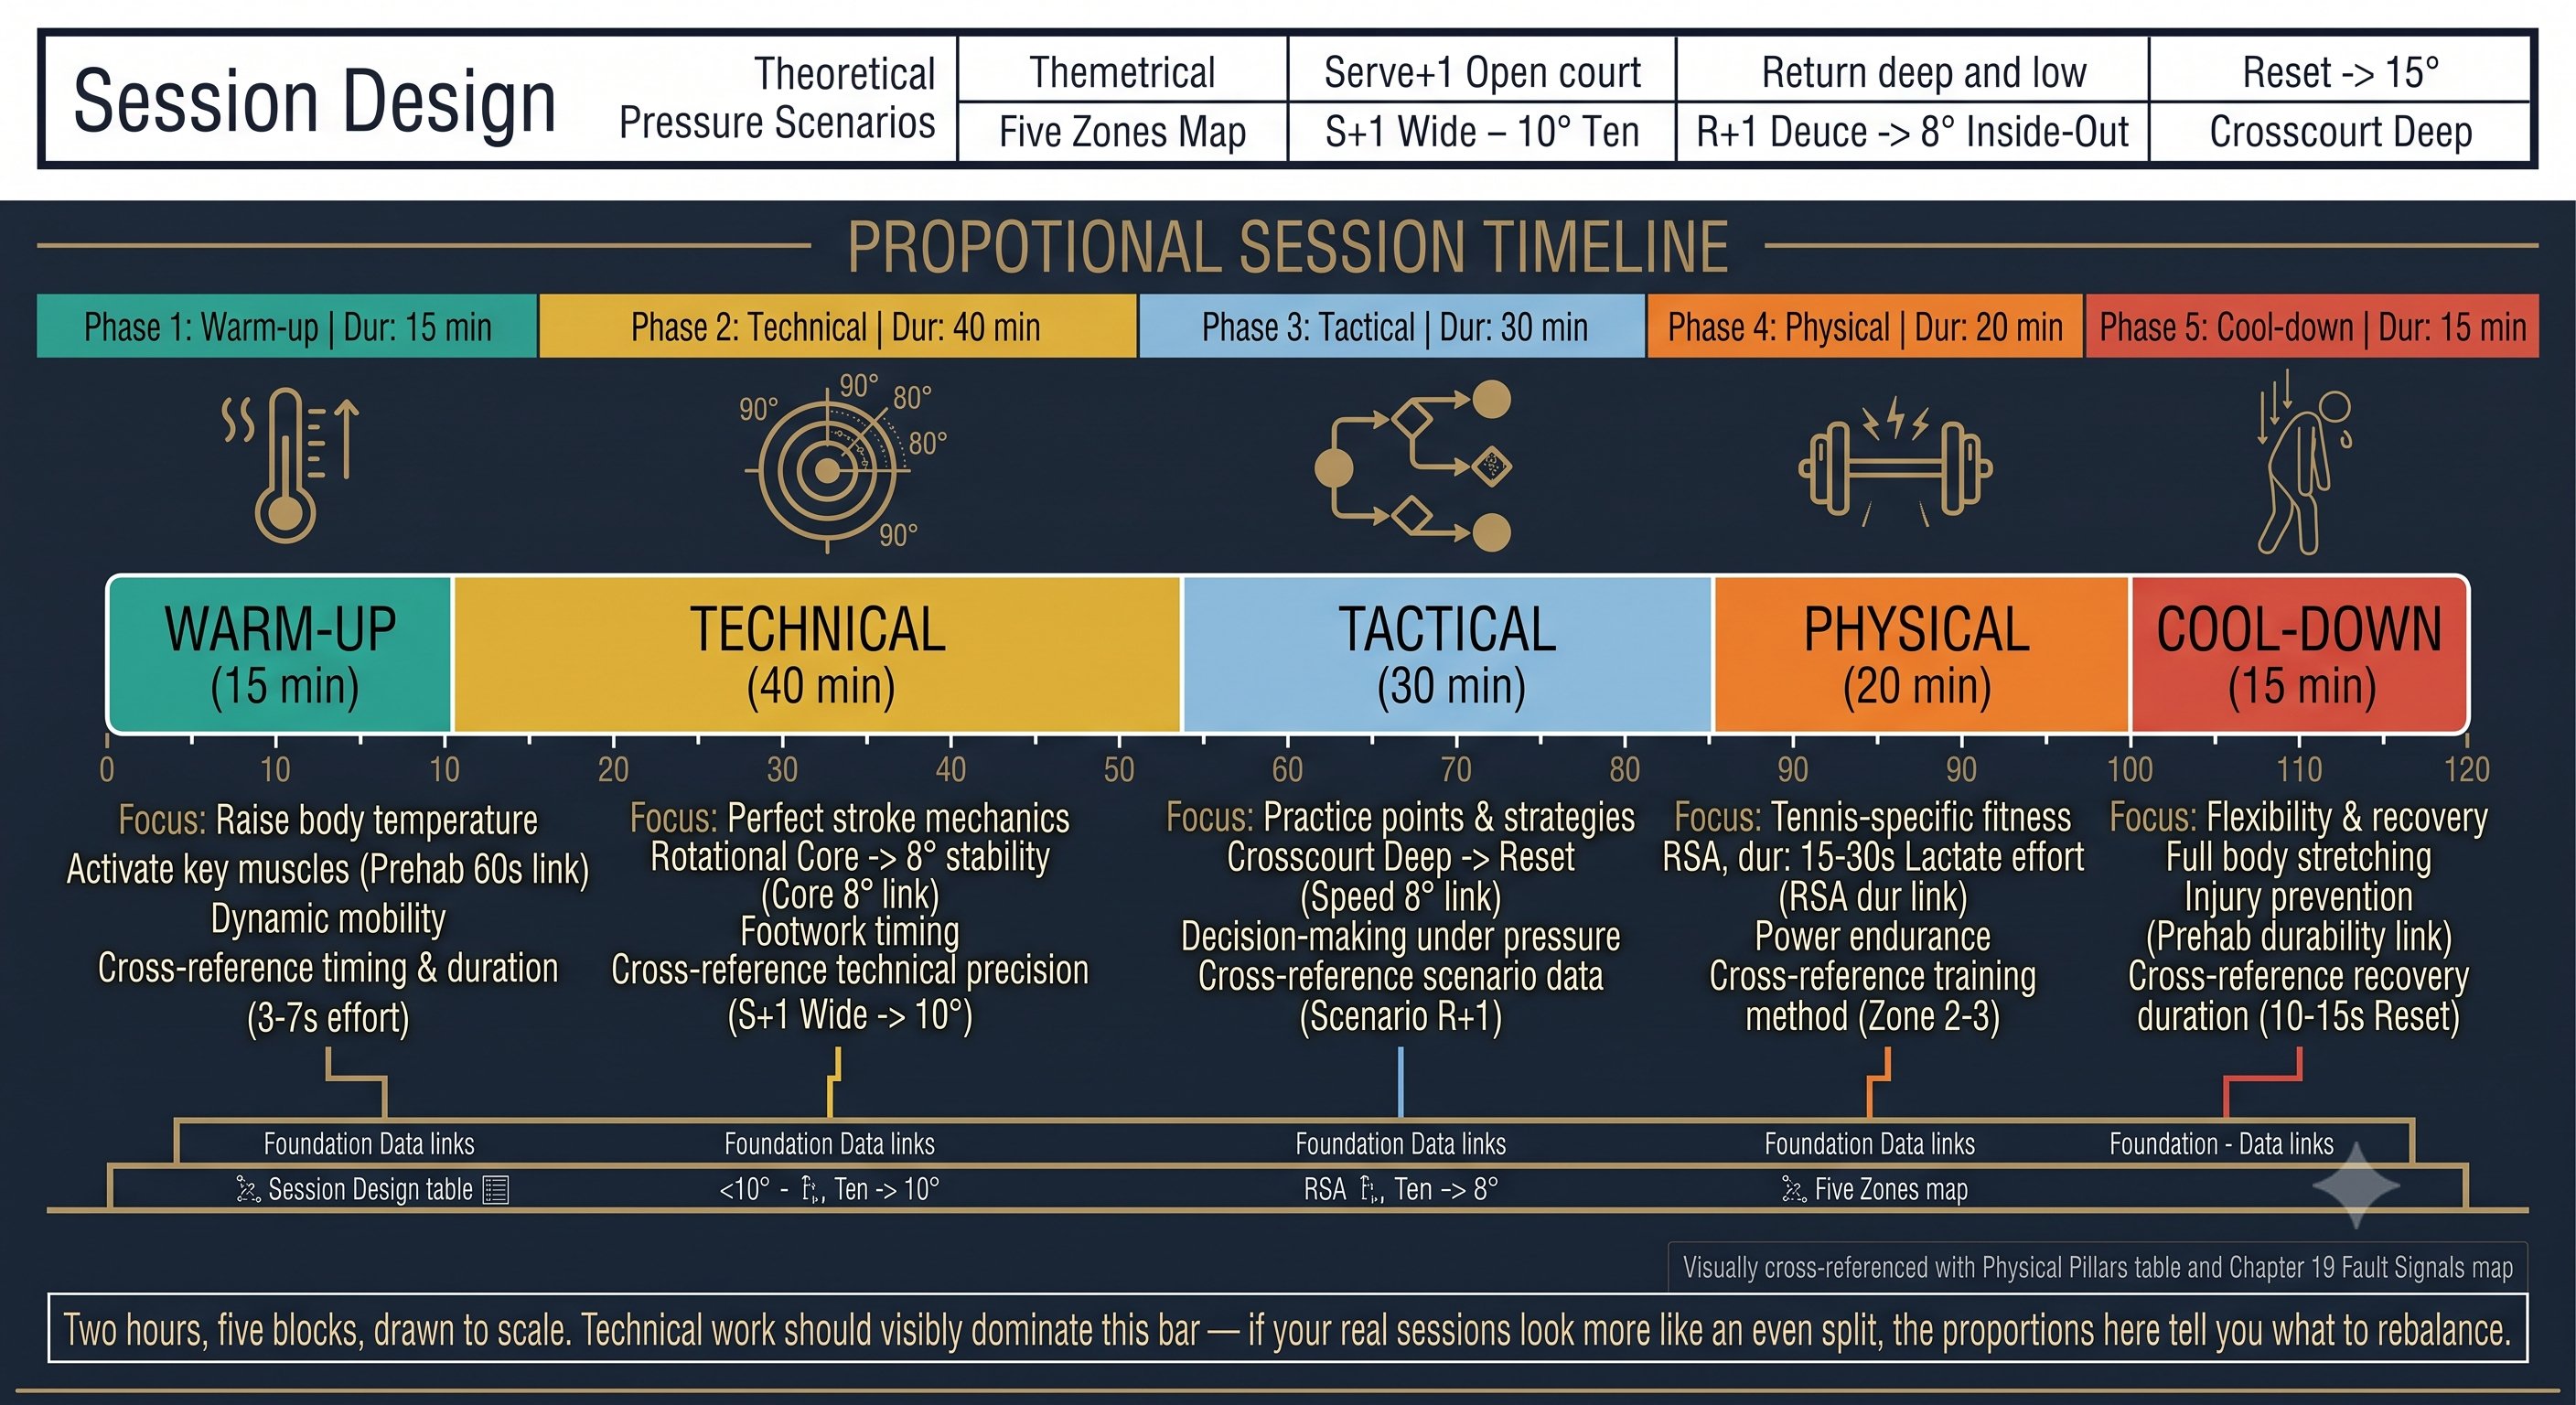
Physical Preparation — Figure 3
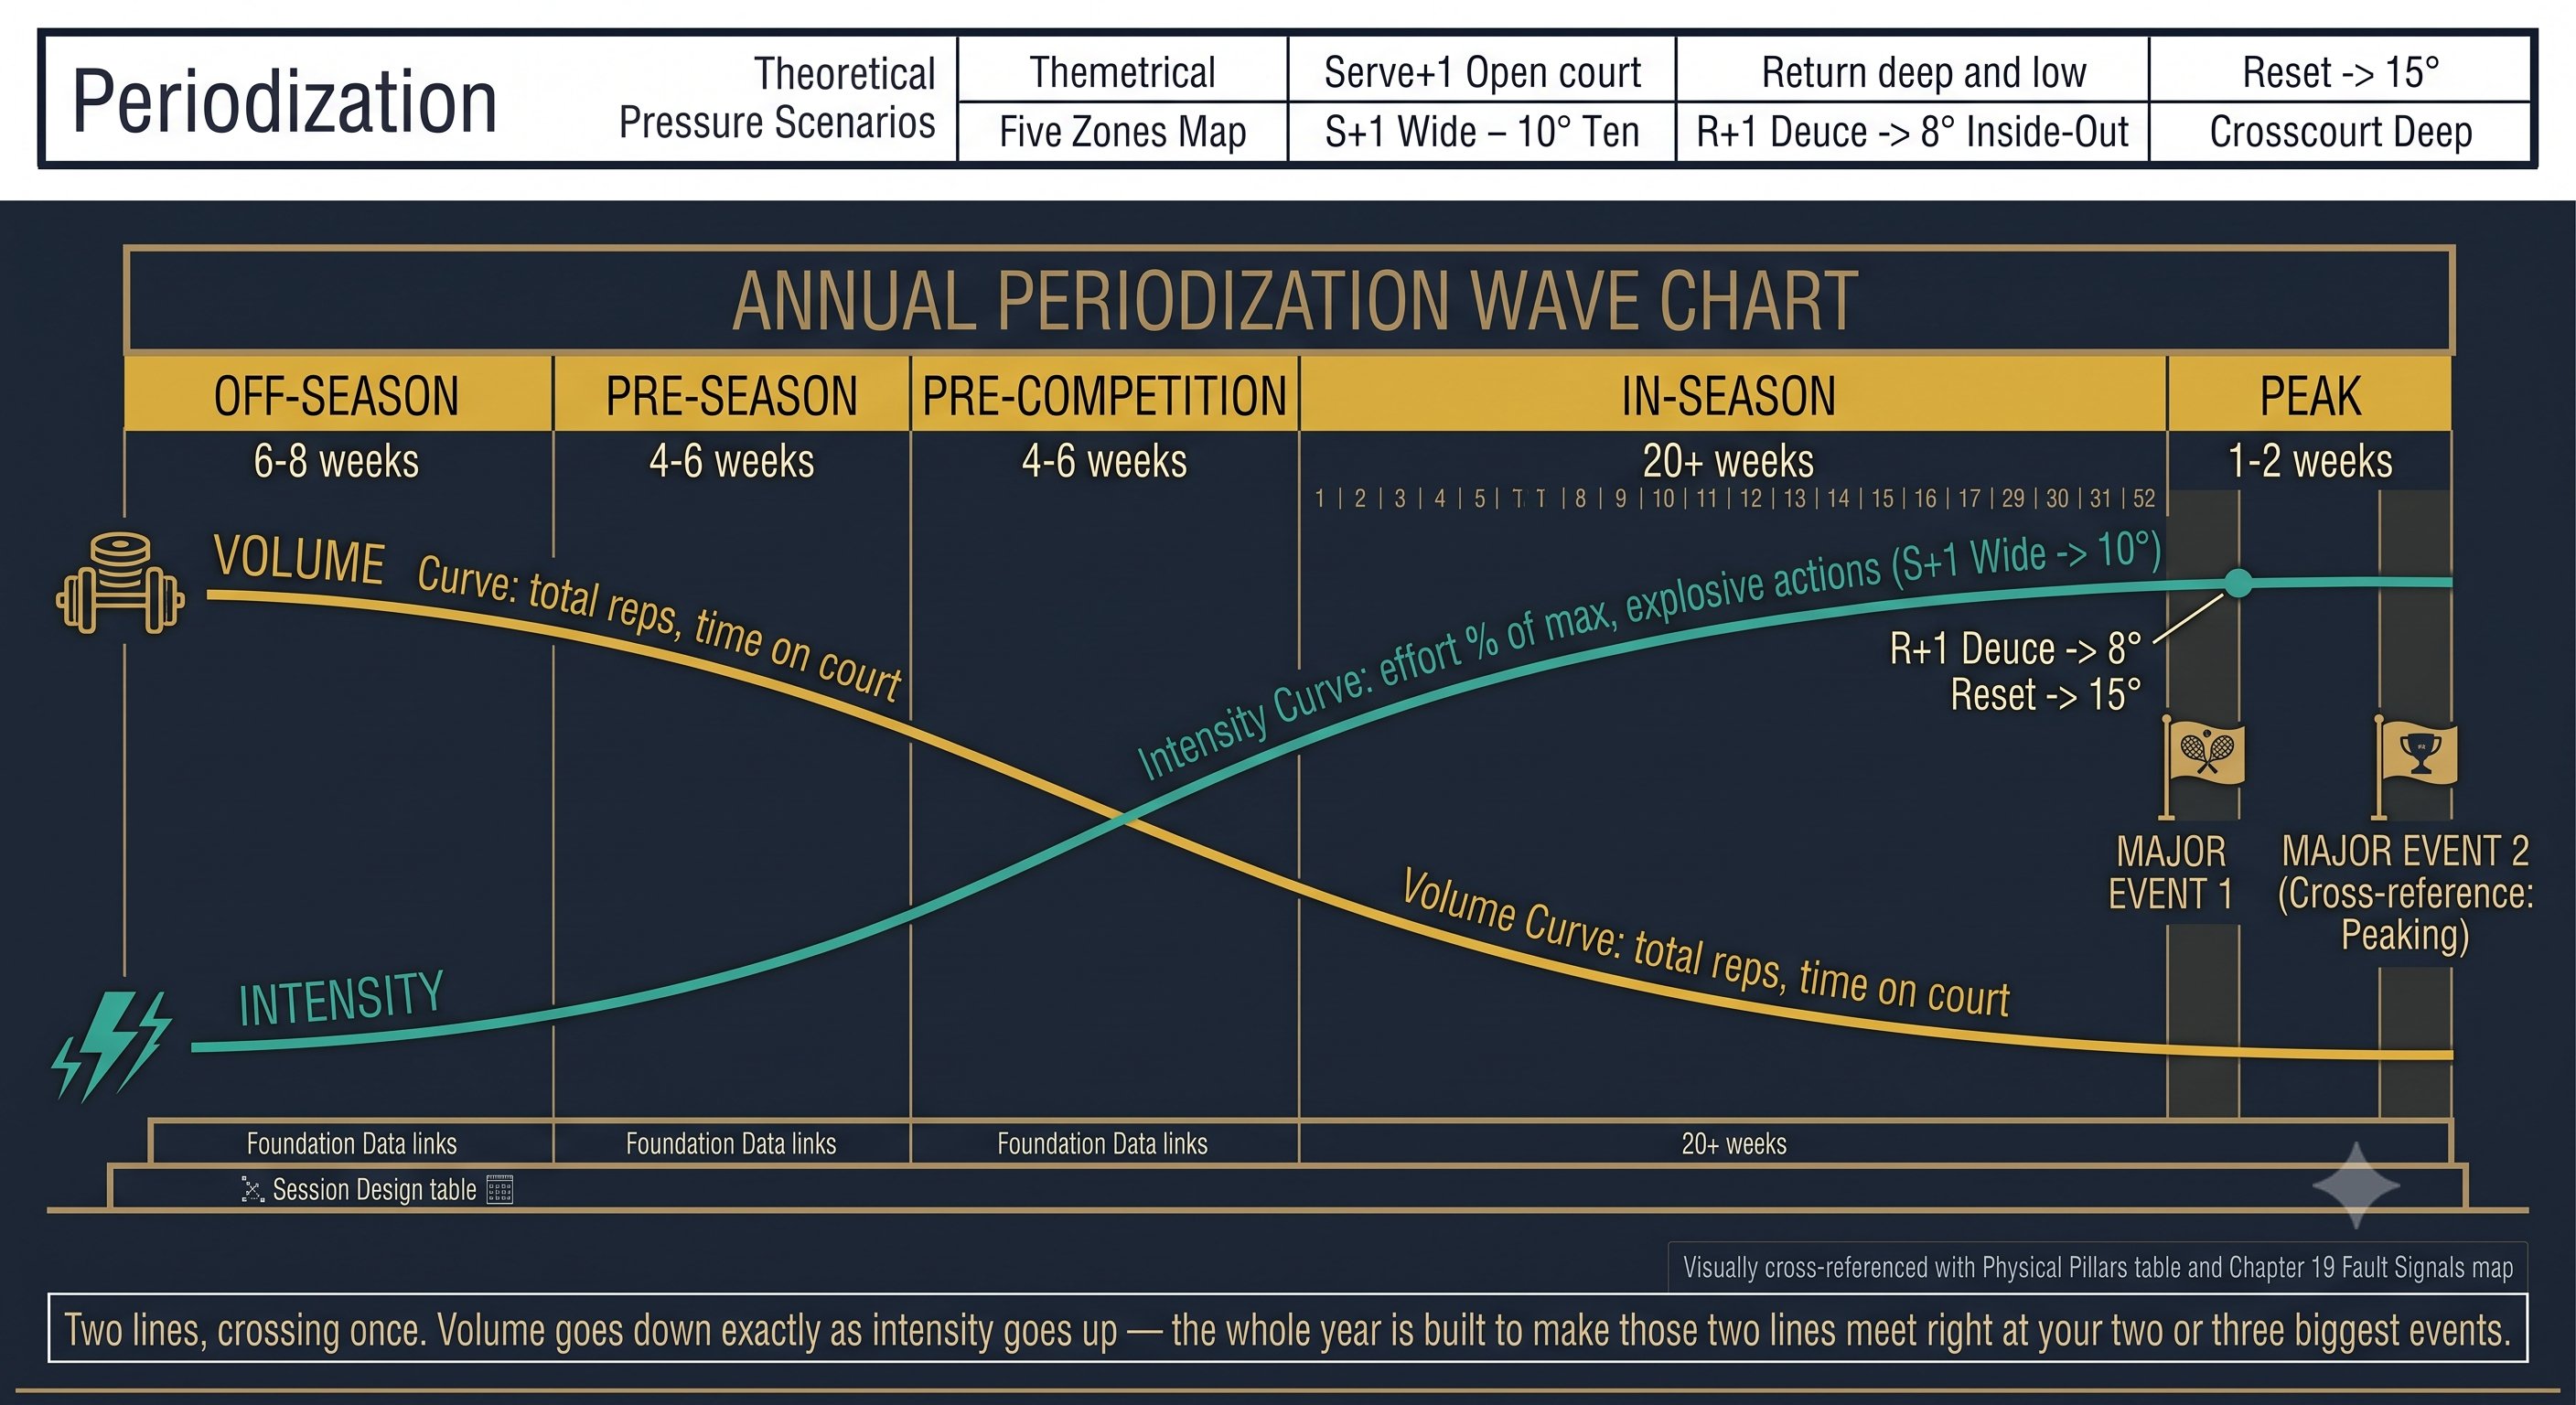
Physical Preparation — Figure 4
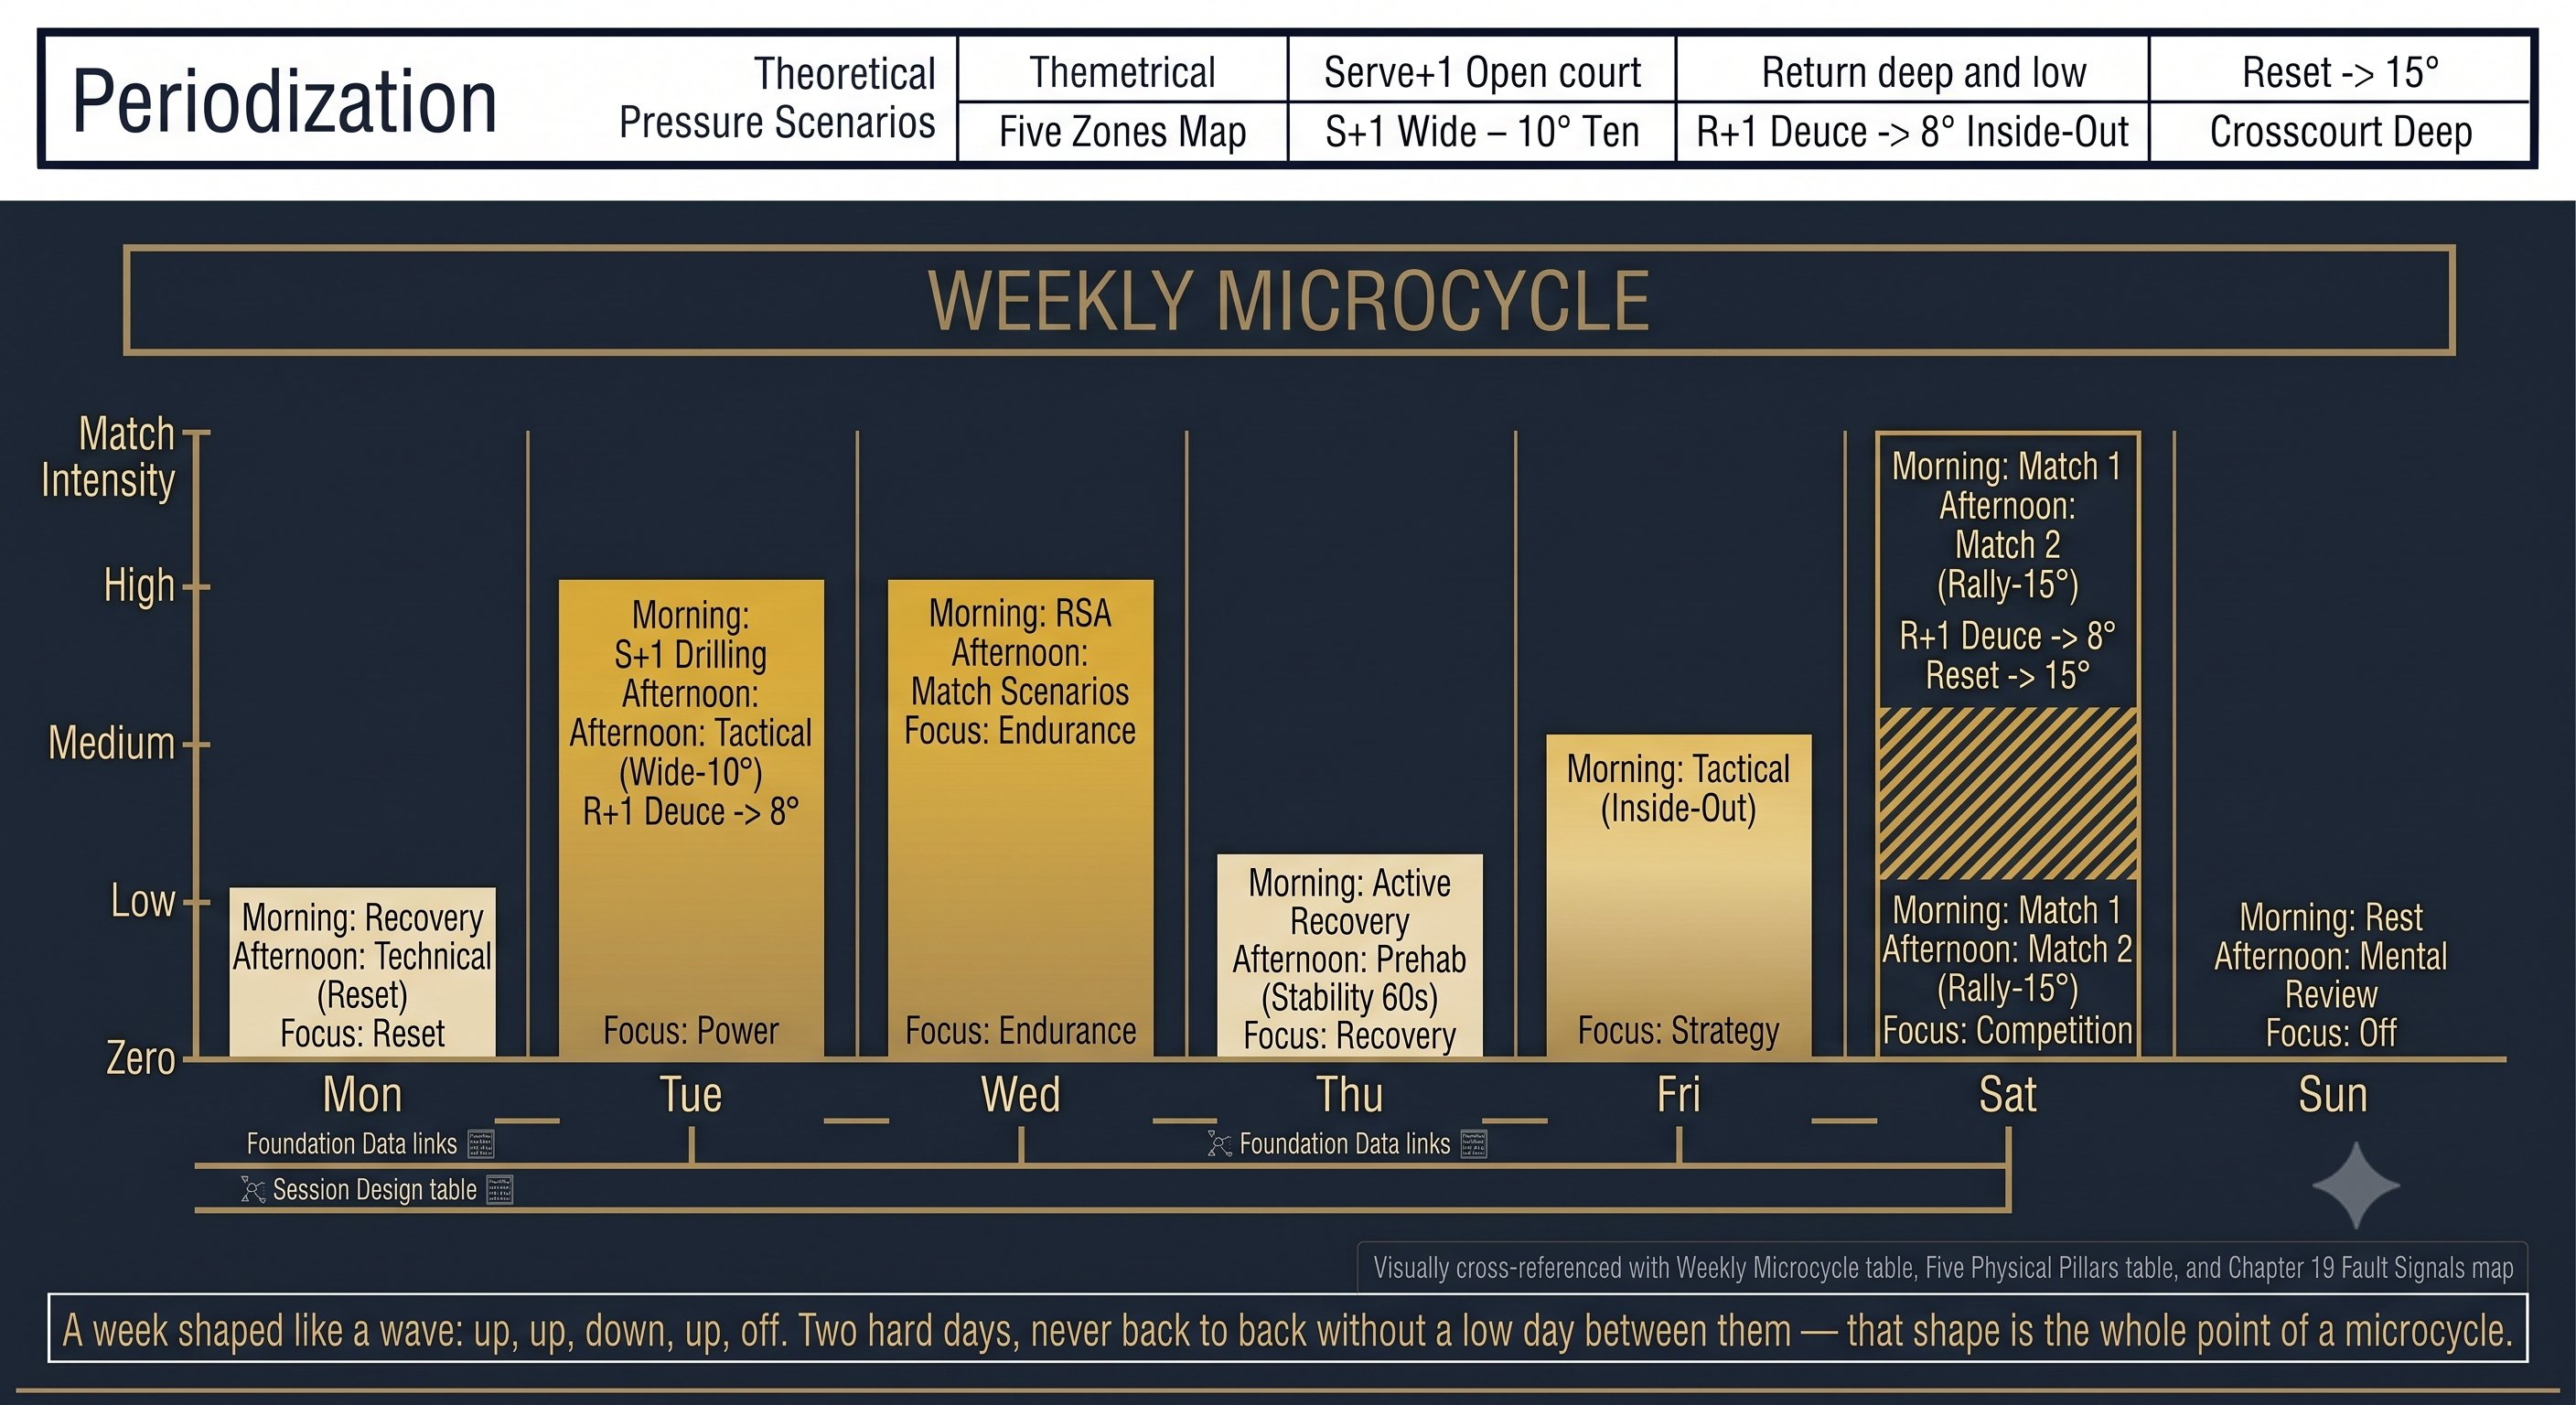
Physical Preparation — Figure 5
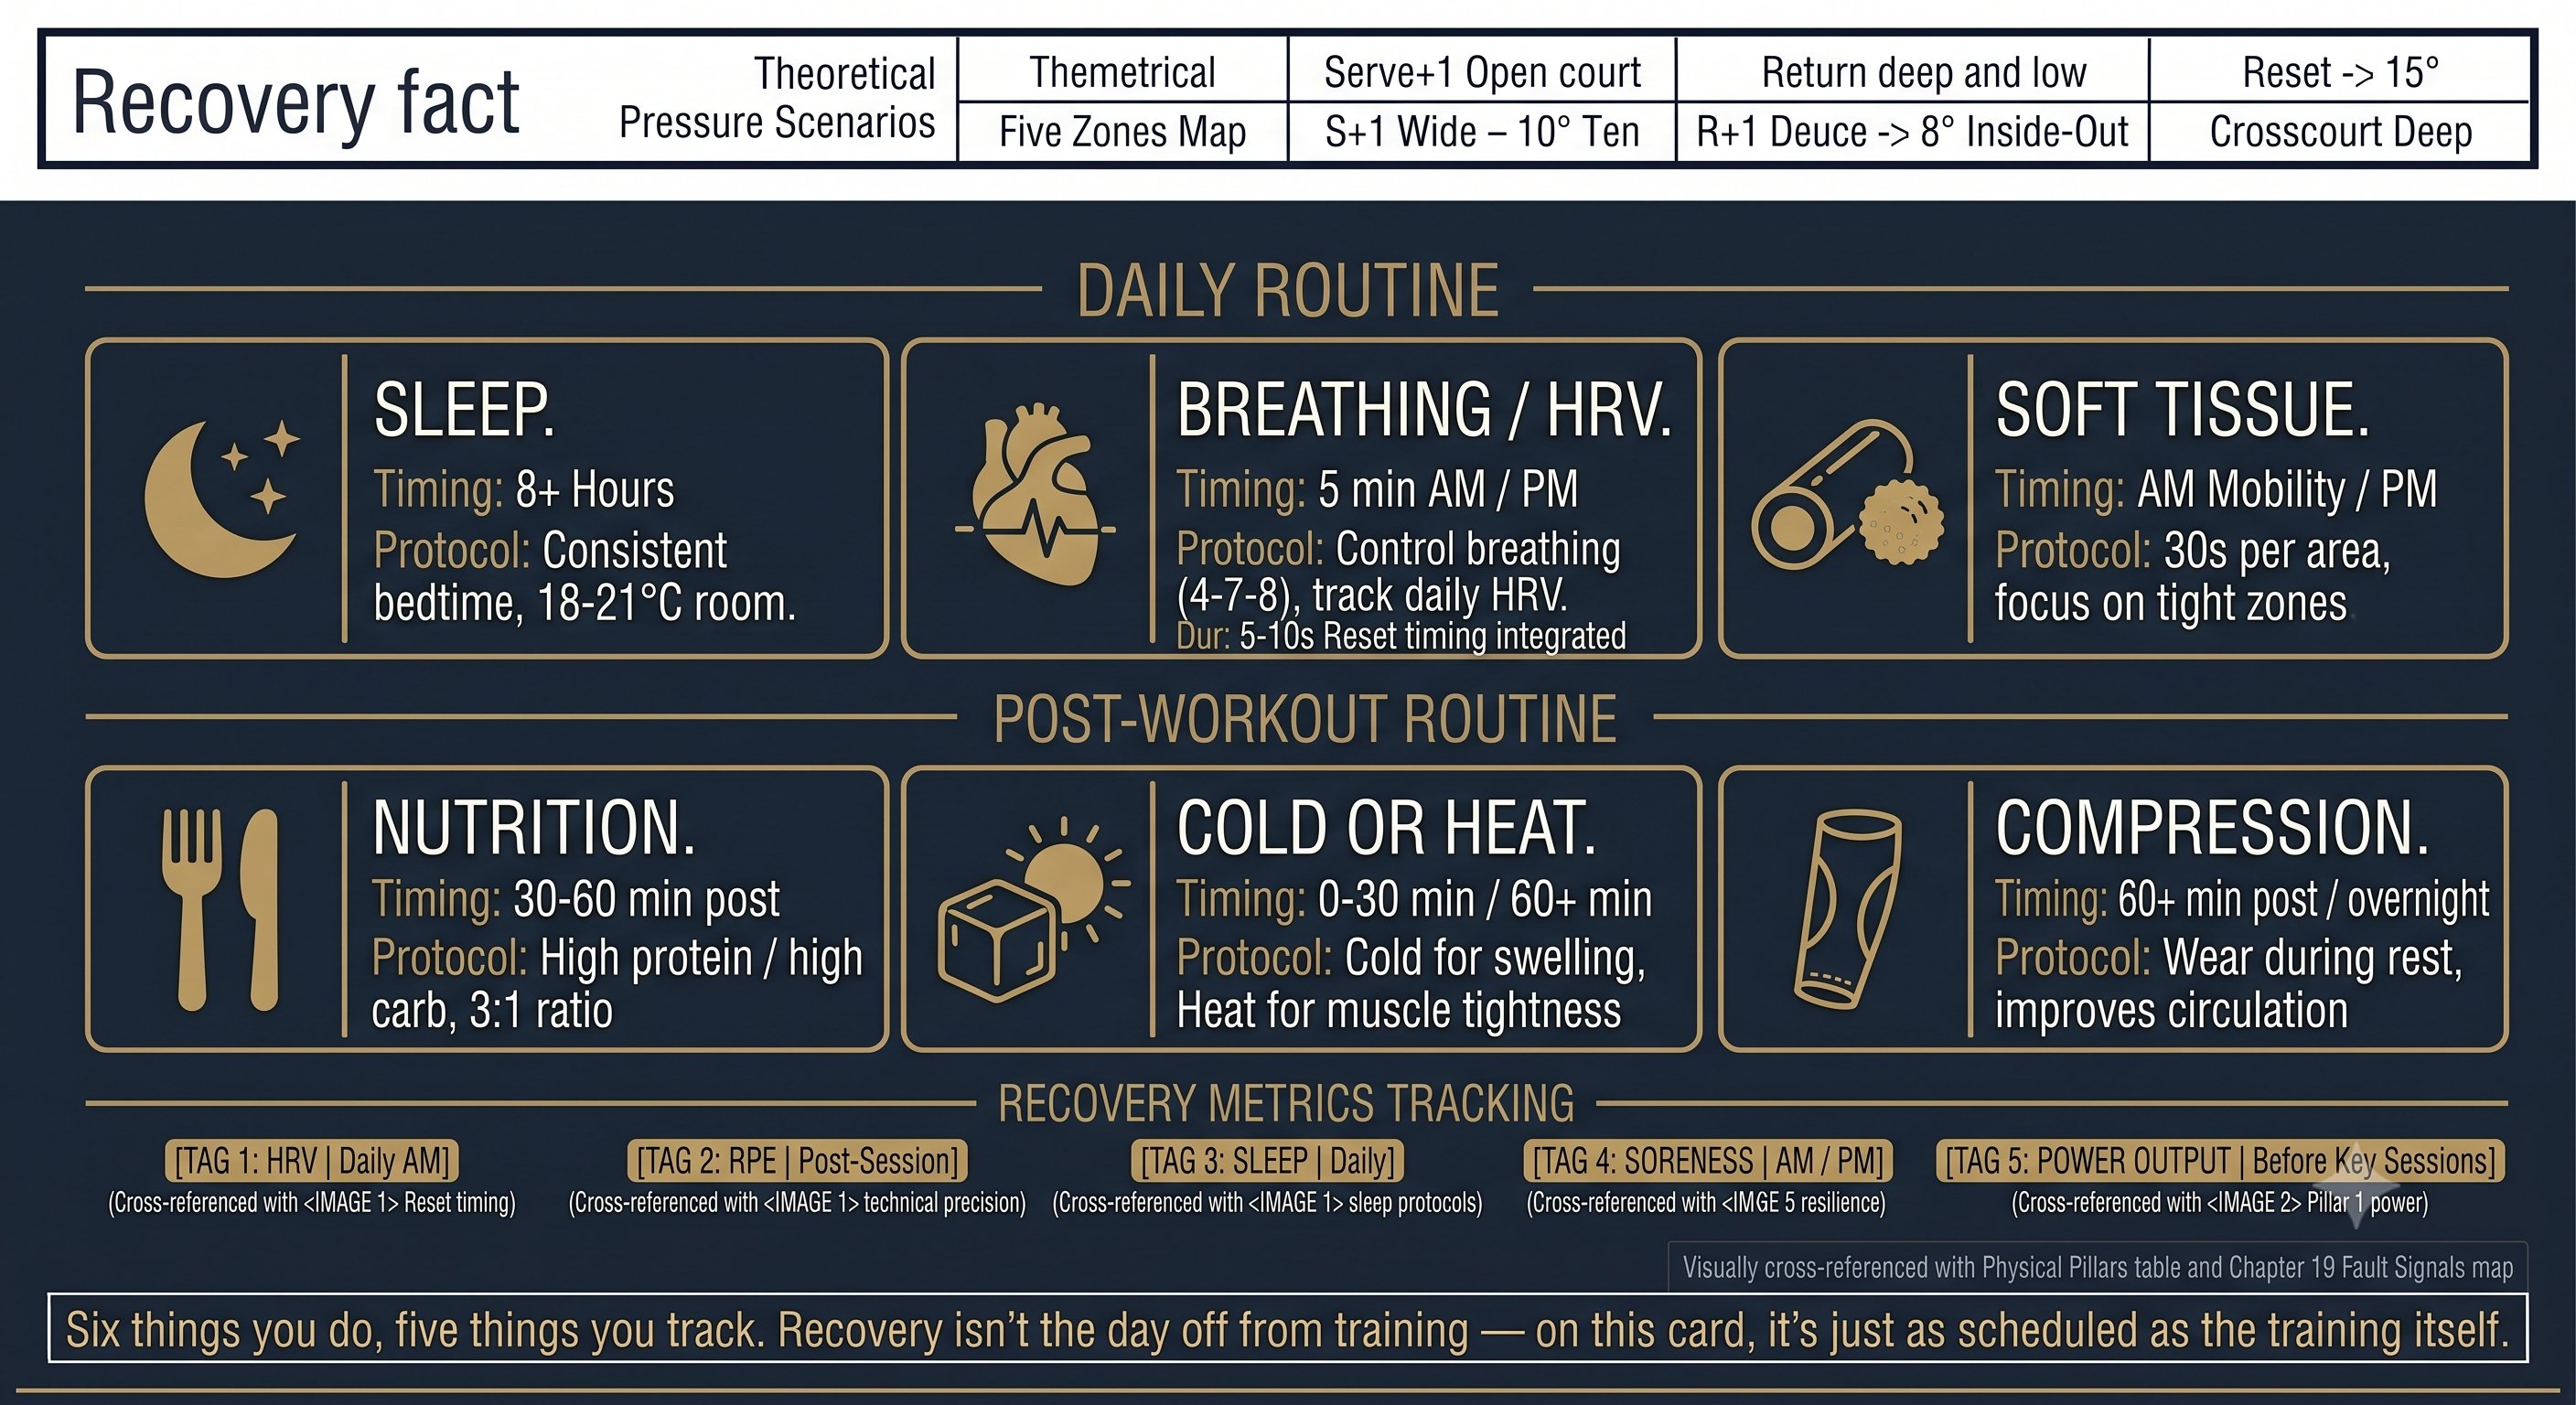
Physical Preparation — Figure 6
Chapter 30: The Unified System 5 figures
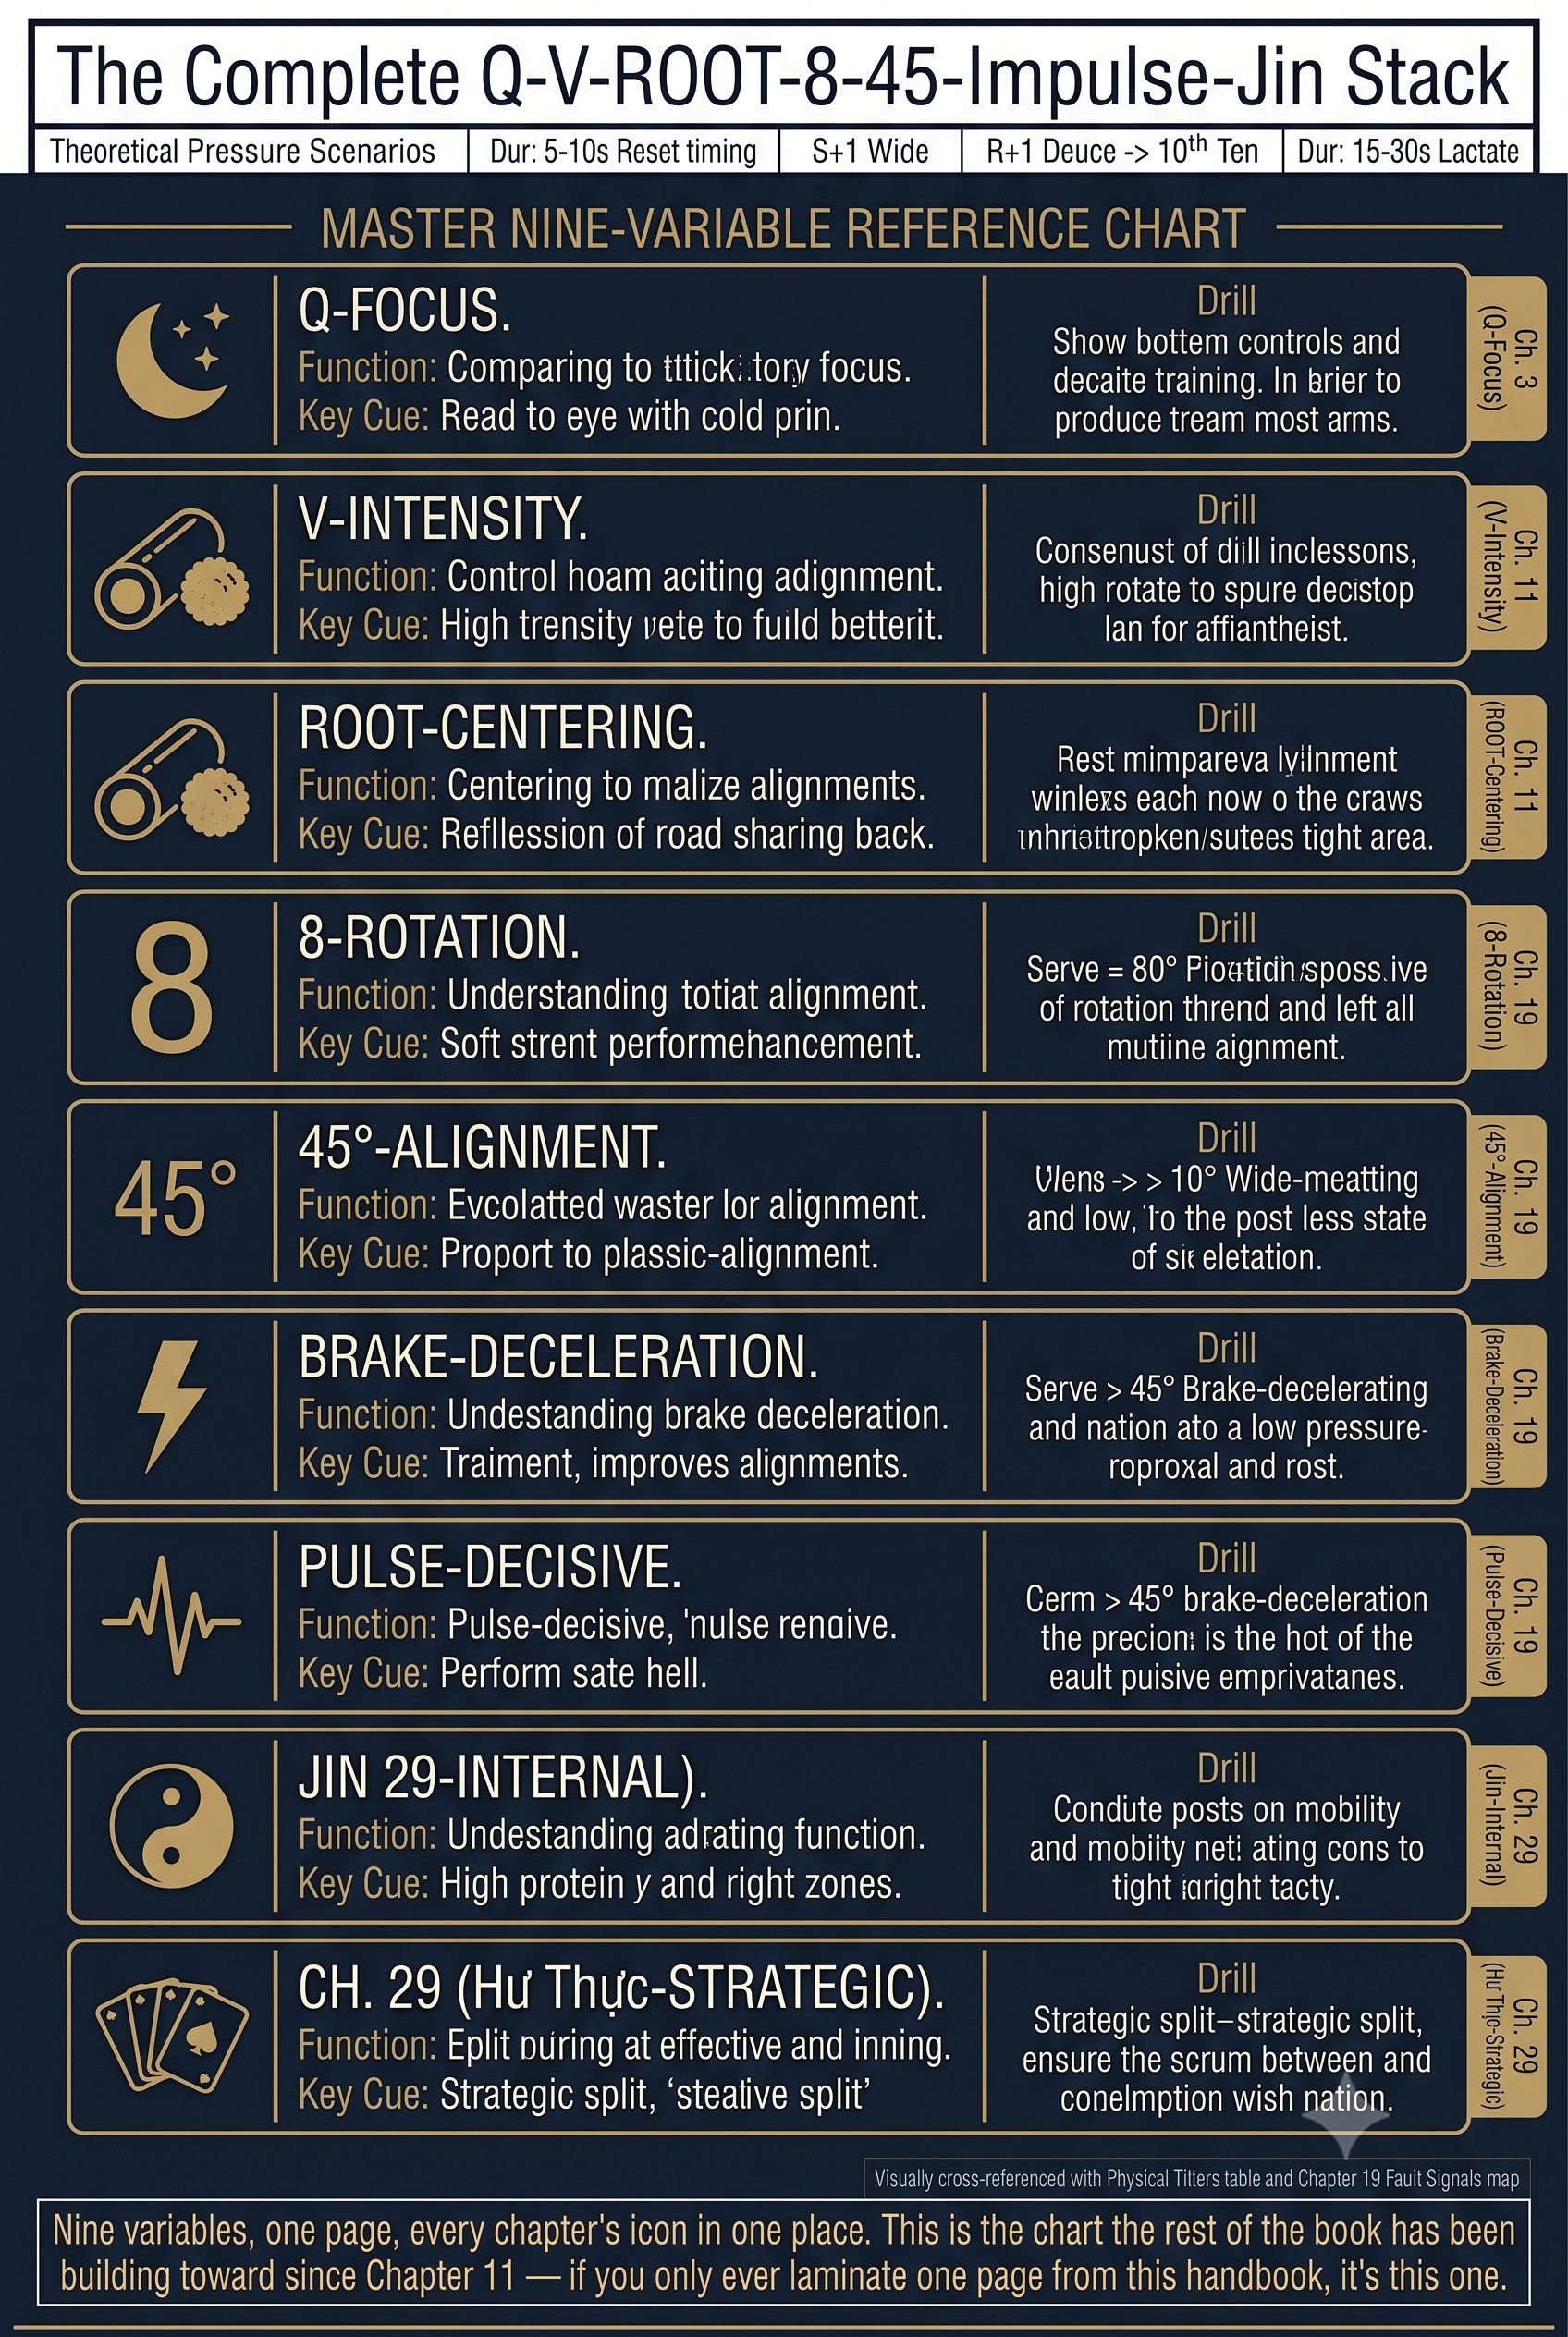
The Unified System — Figure 1
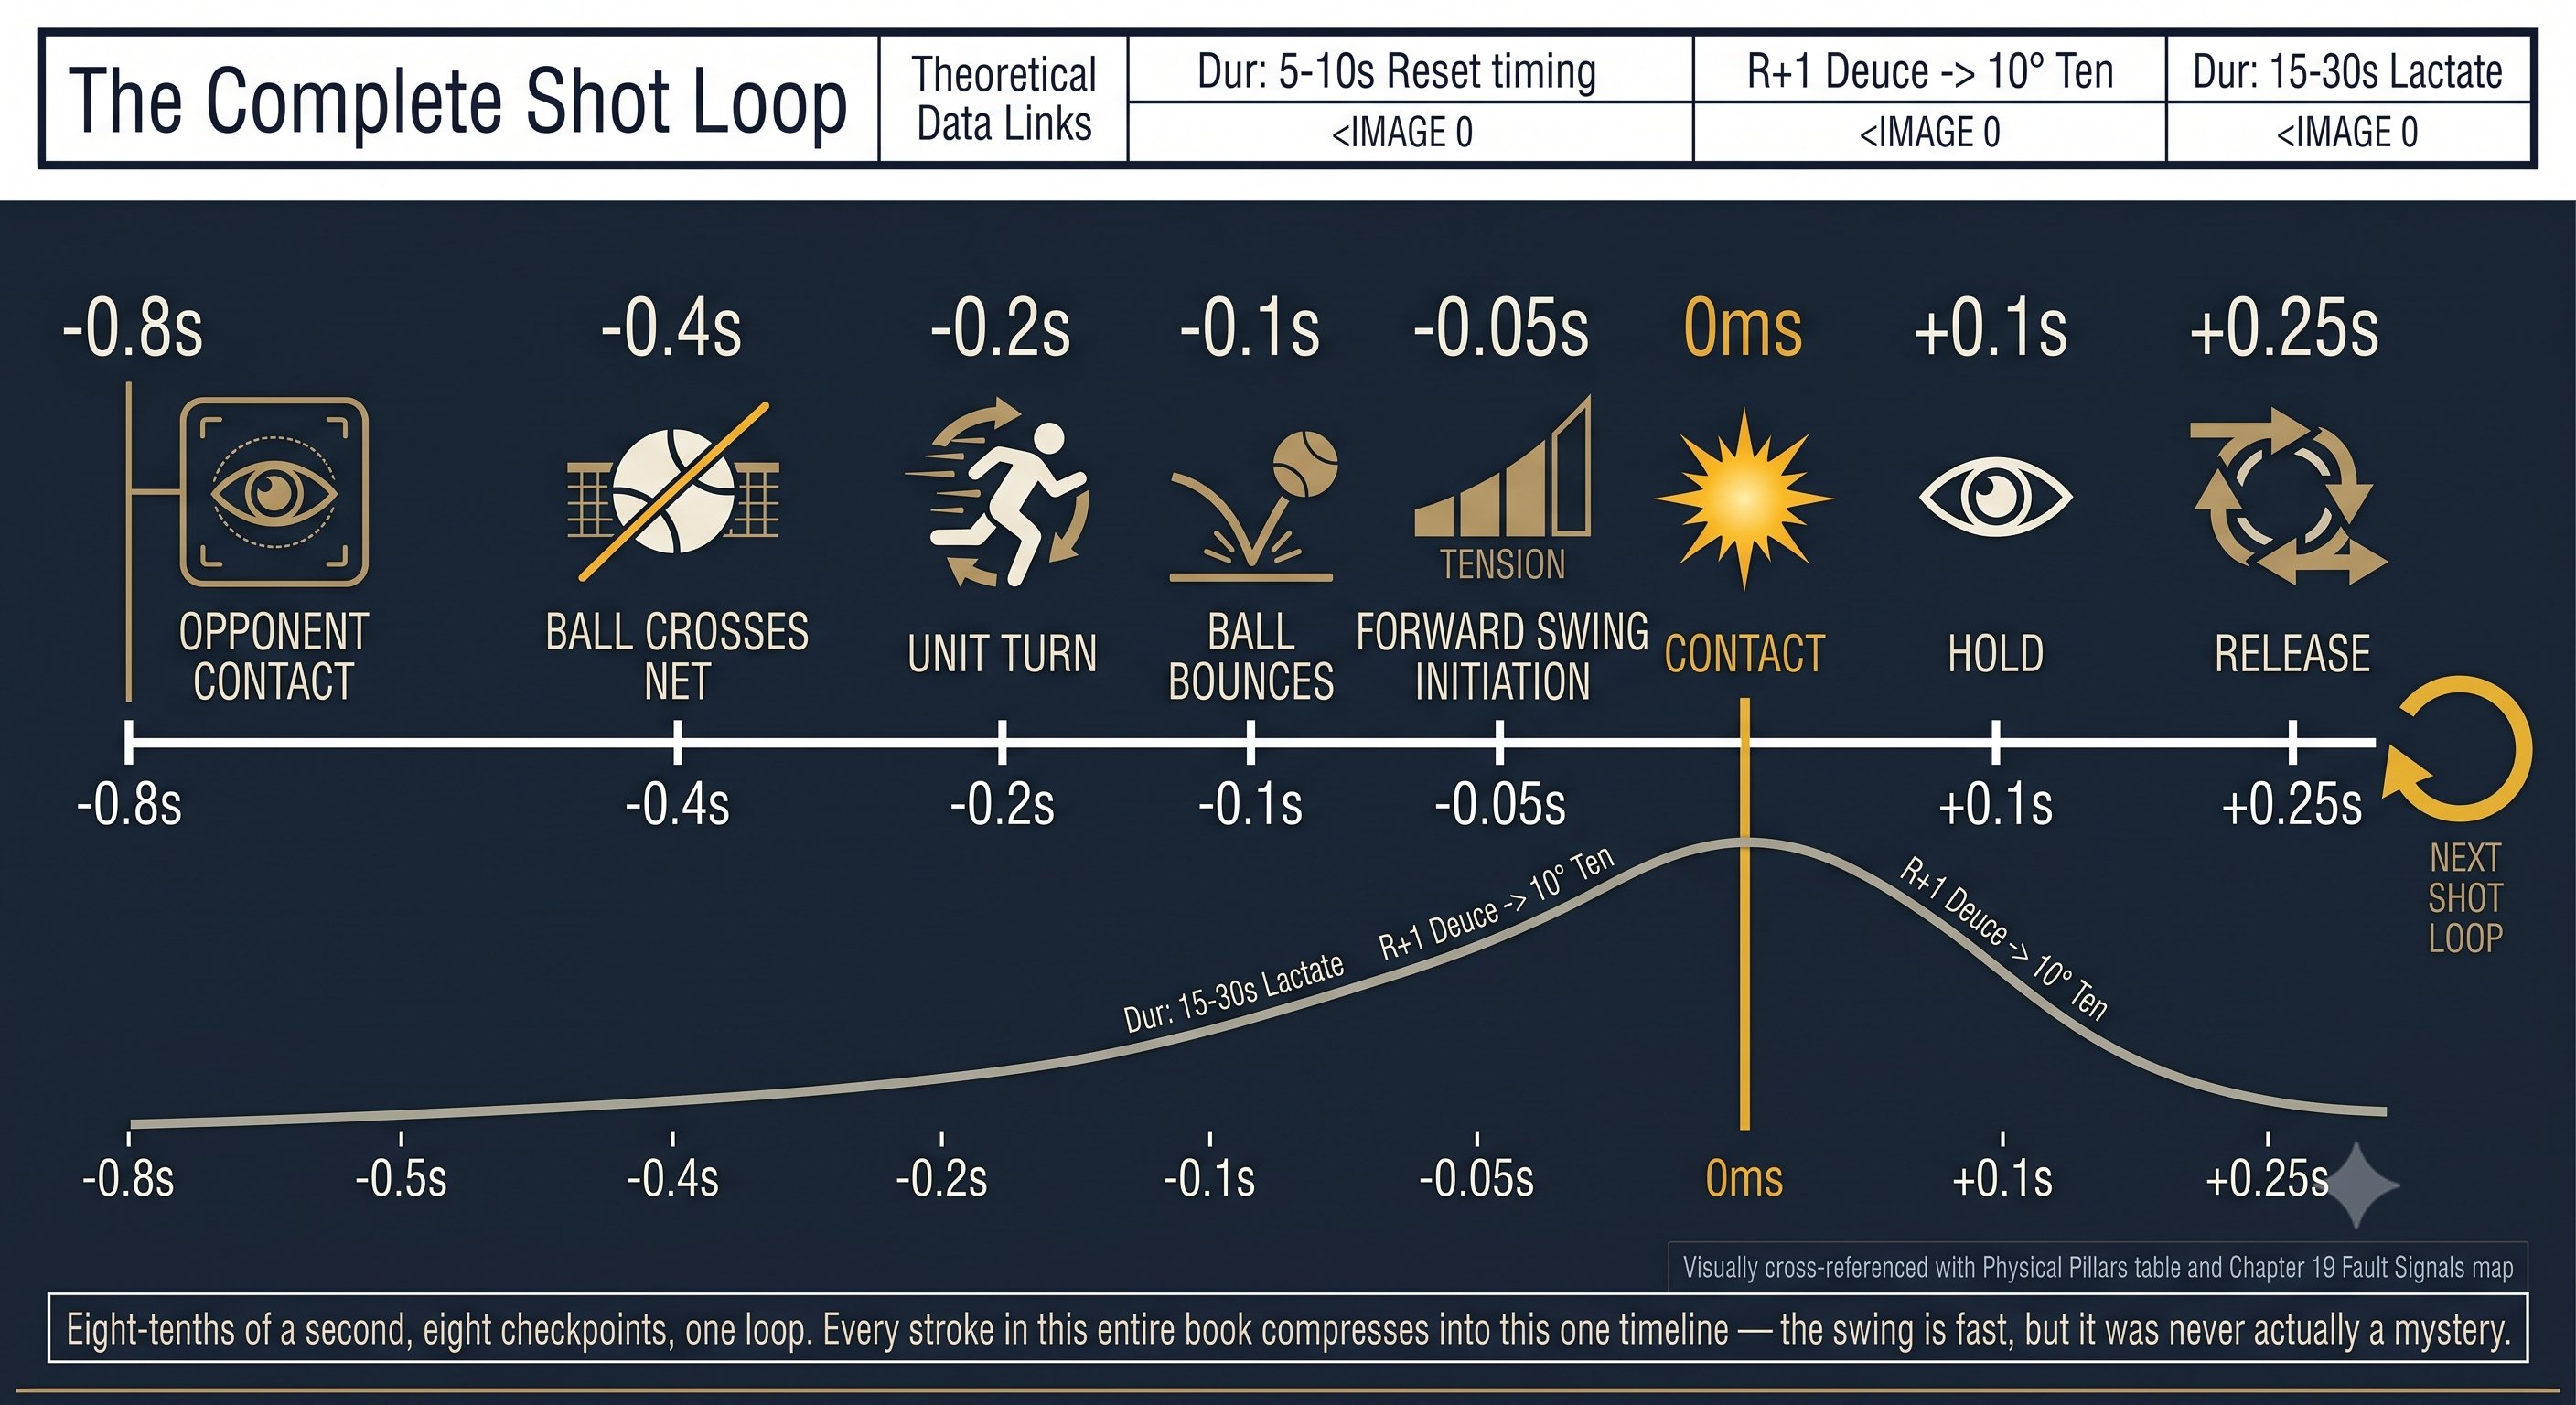
The Unified System — Figure 2
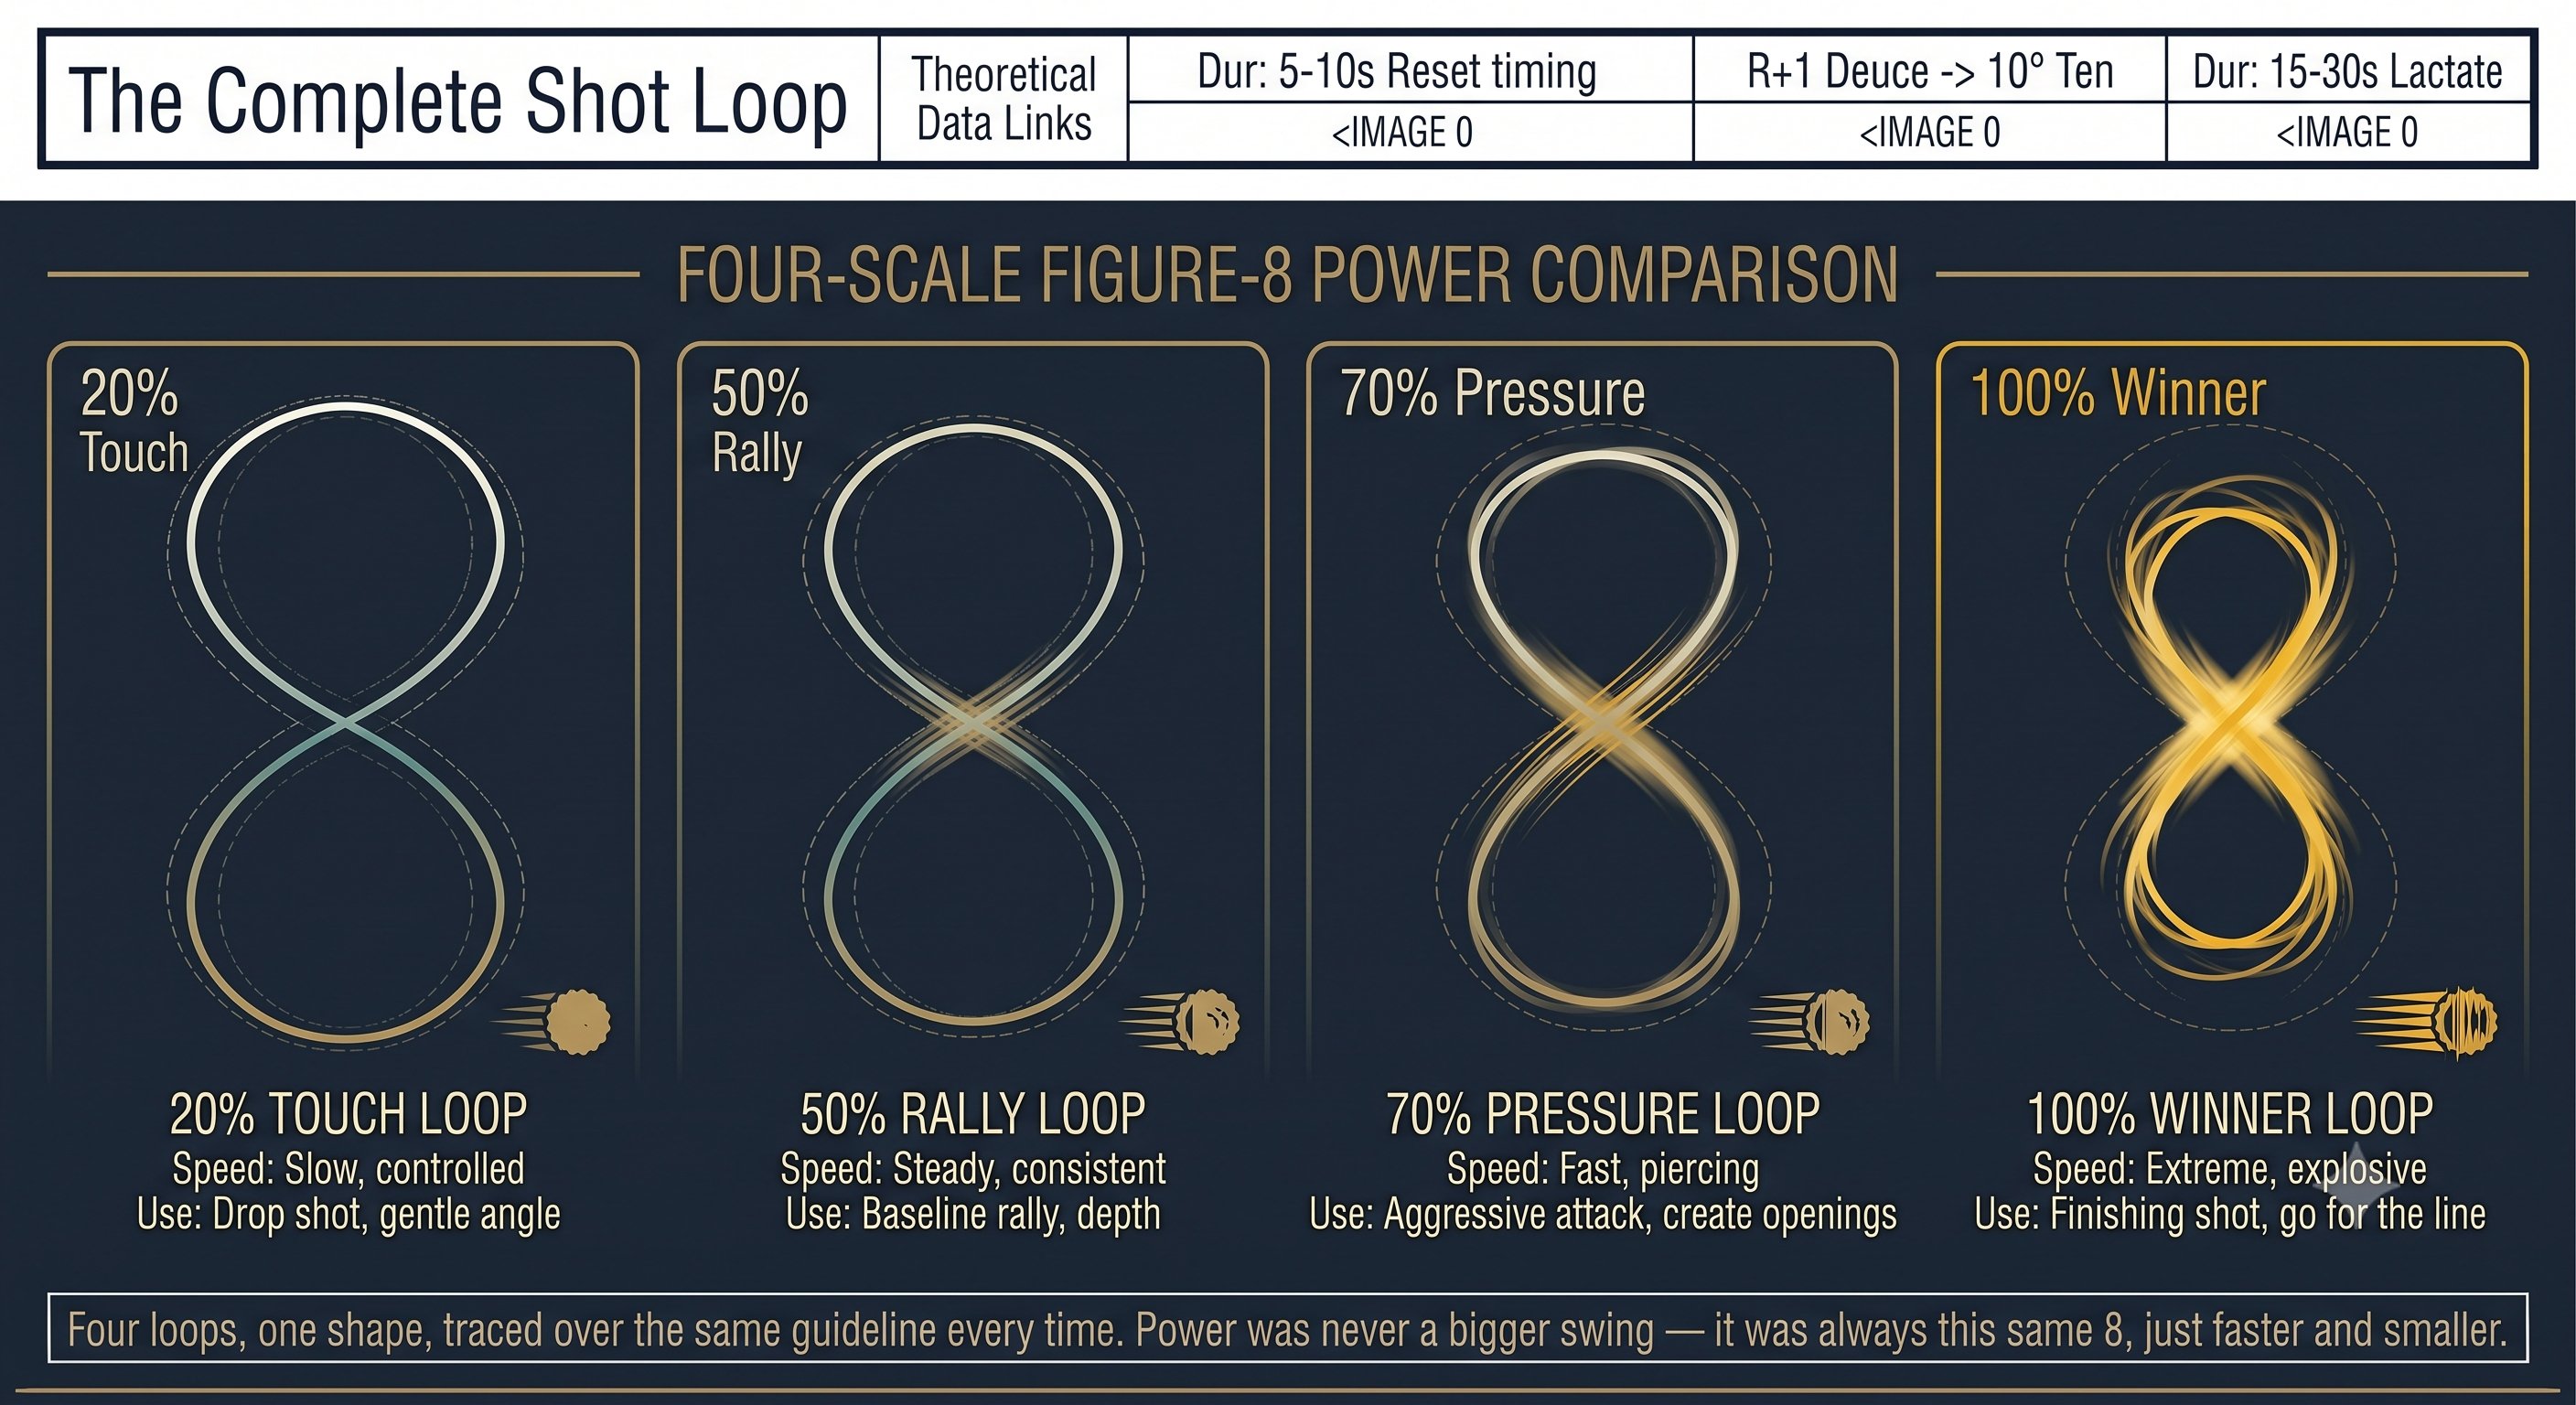
The Unified System — Figure 3
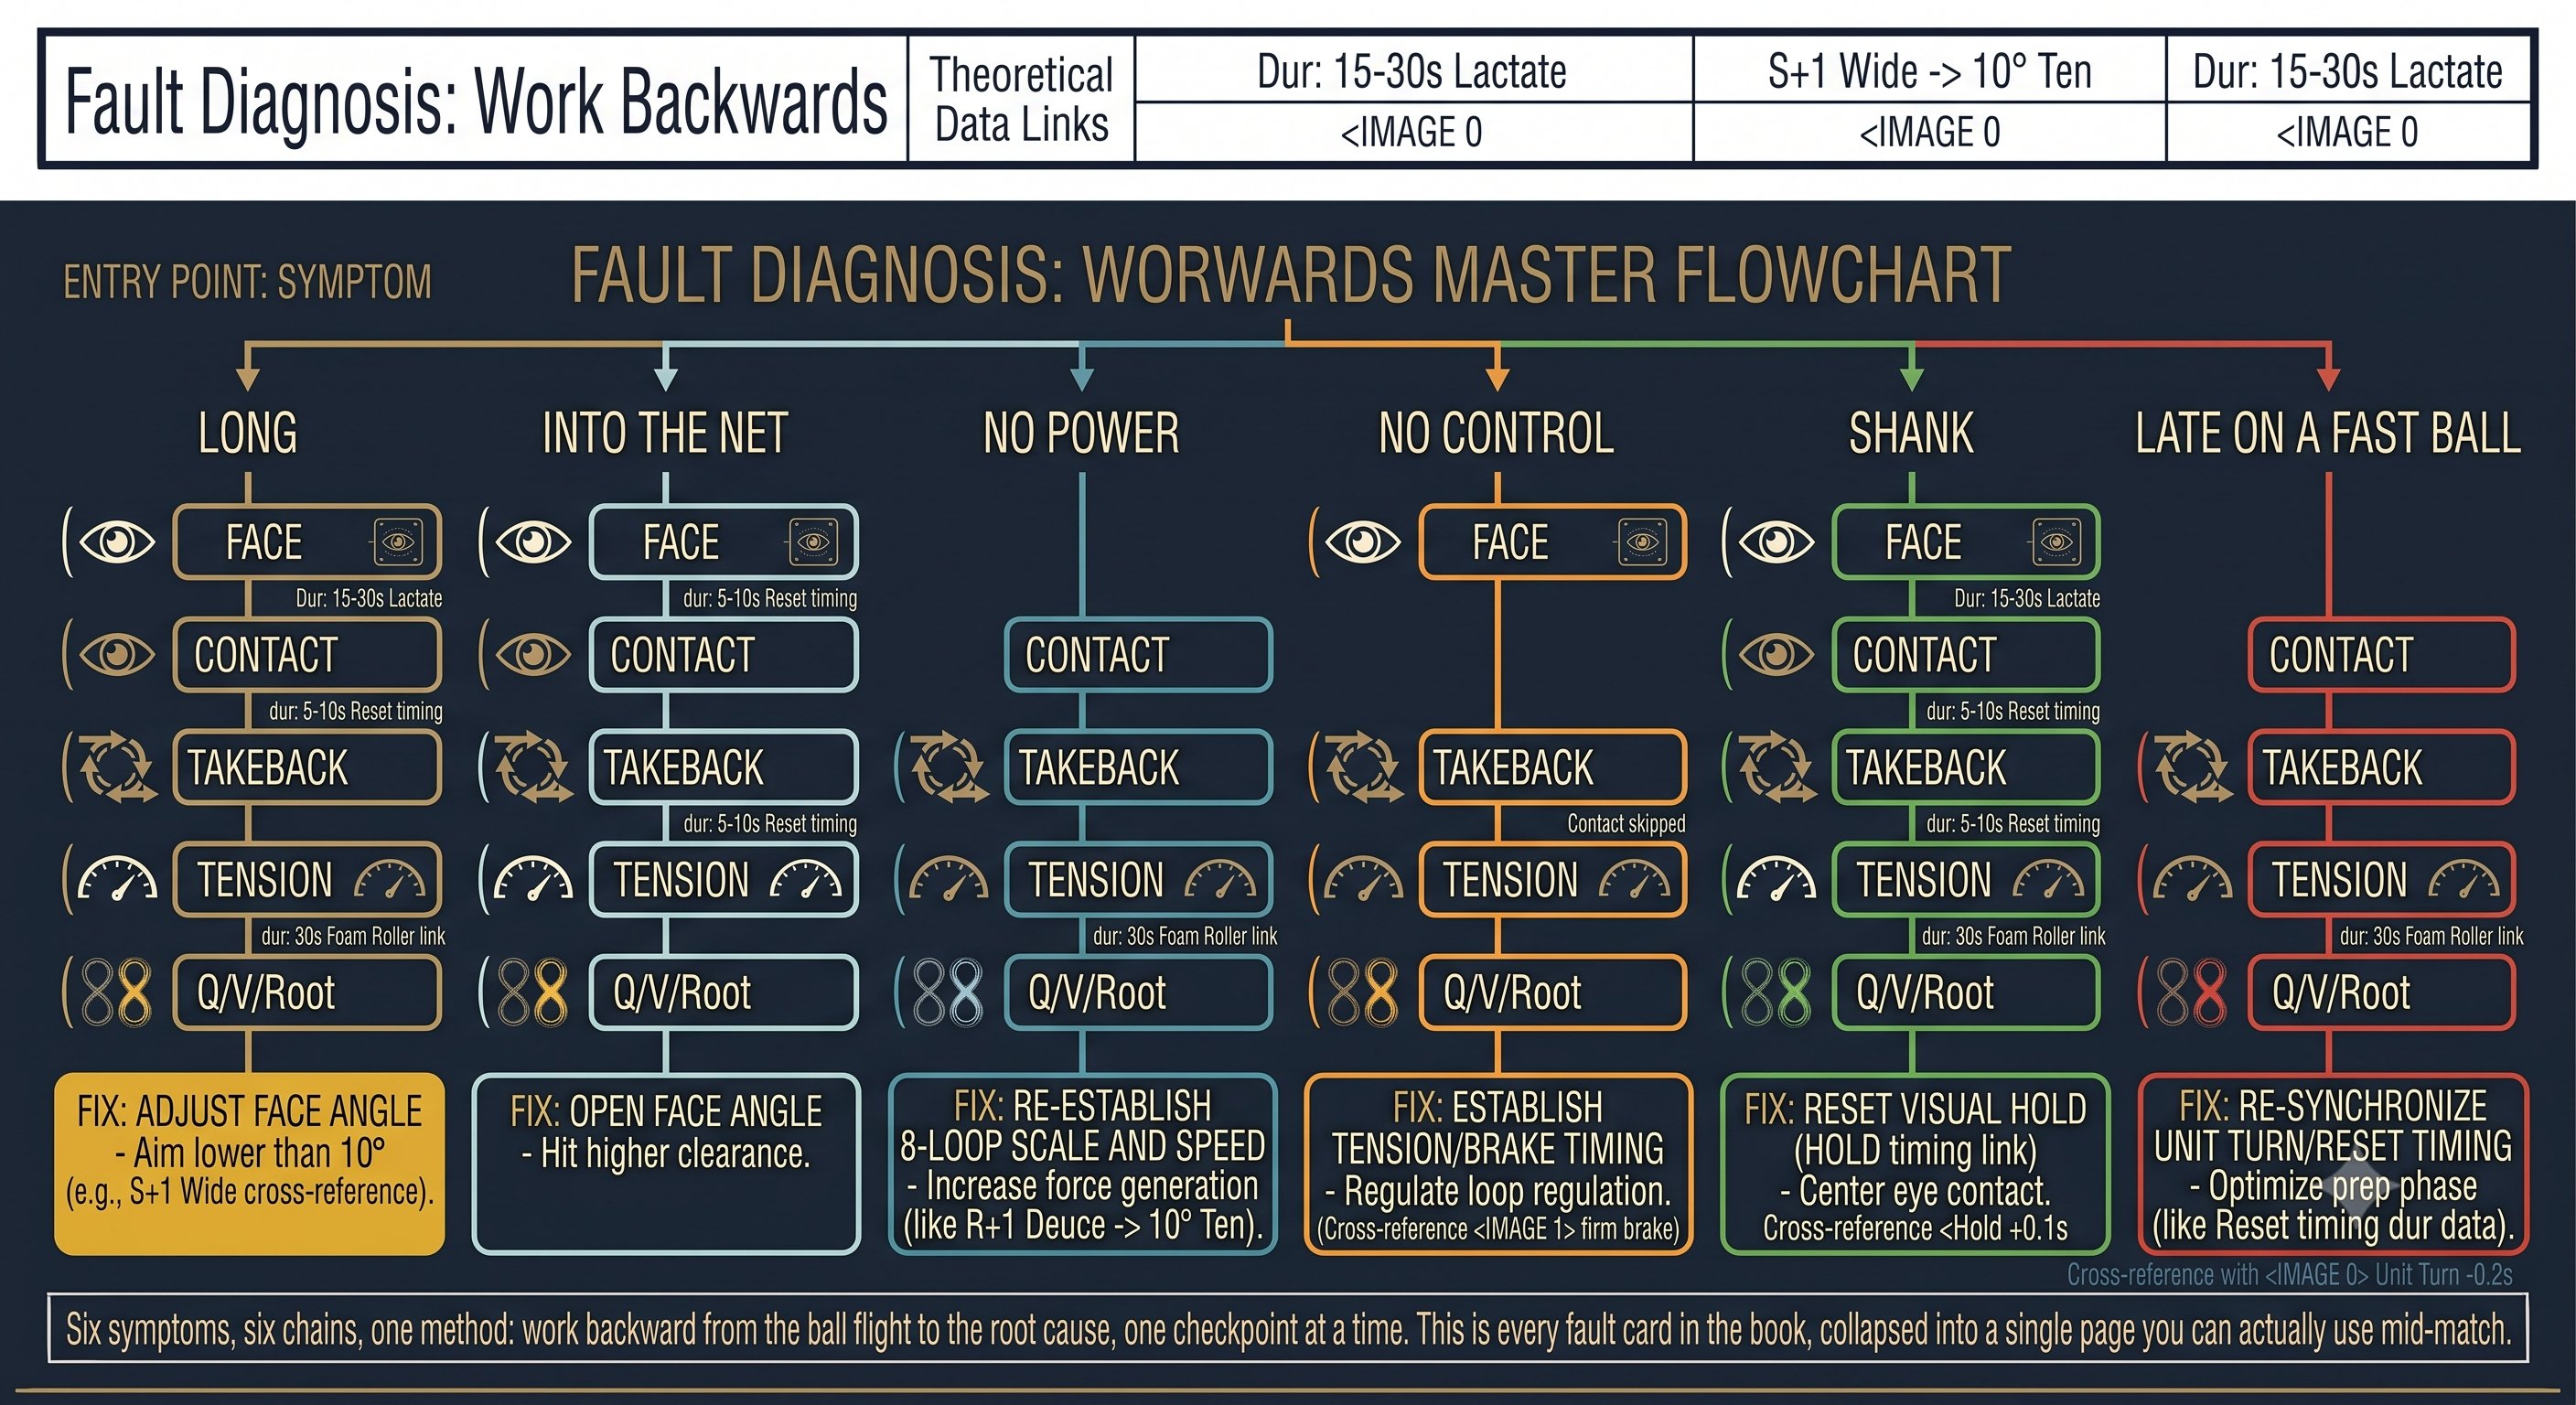
The Unified System — Figure 4
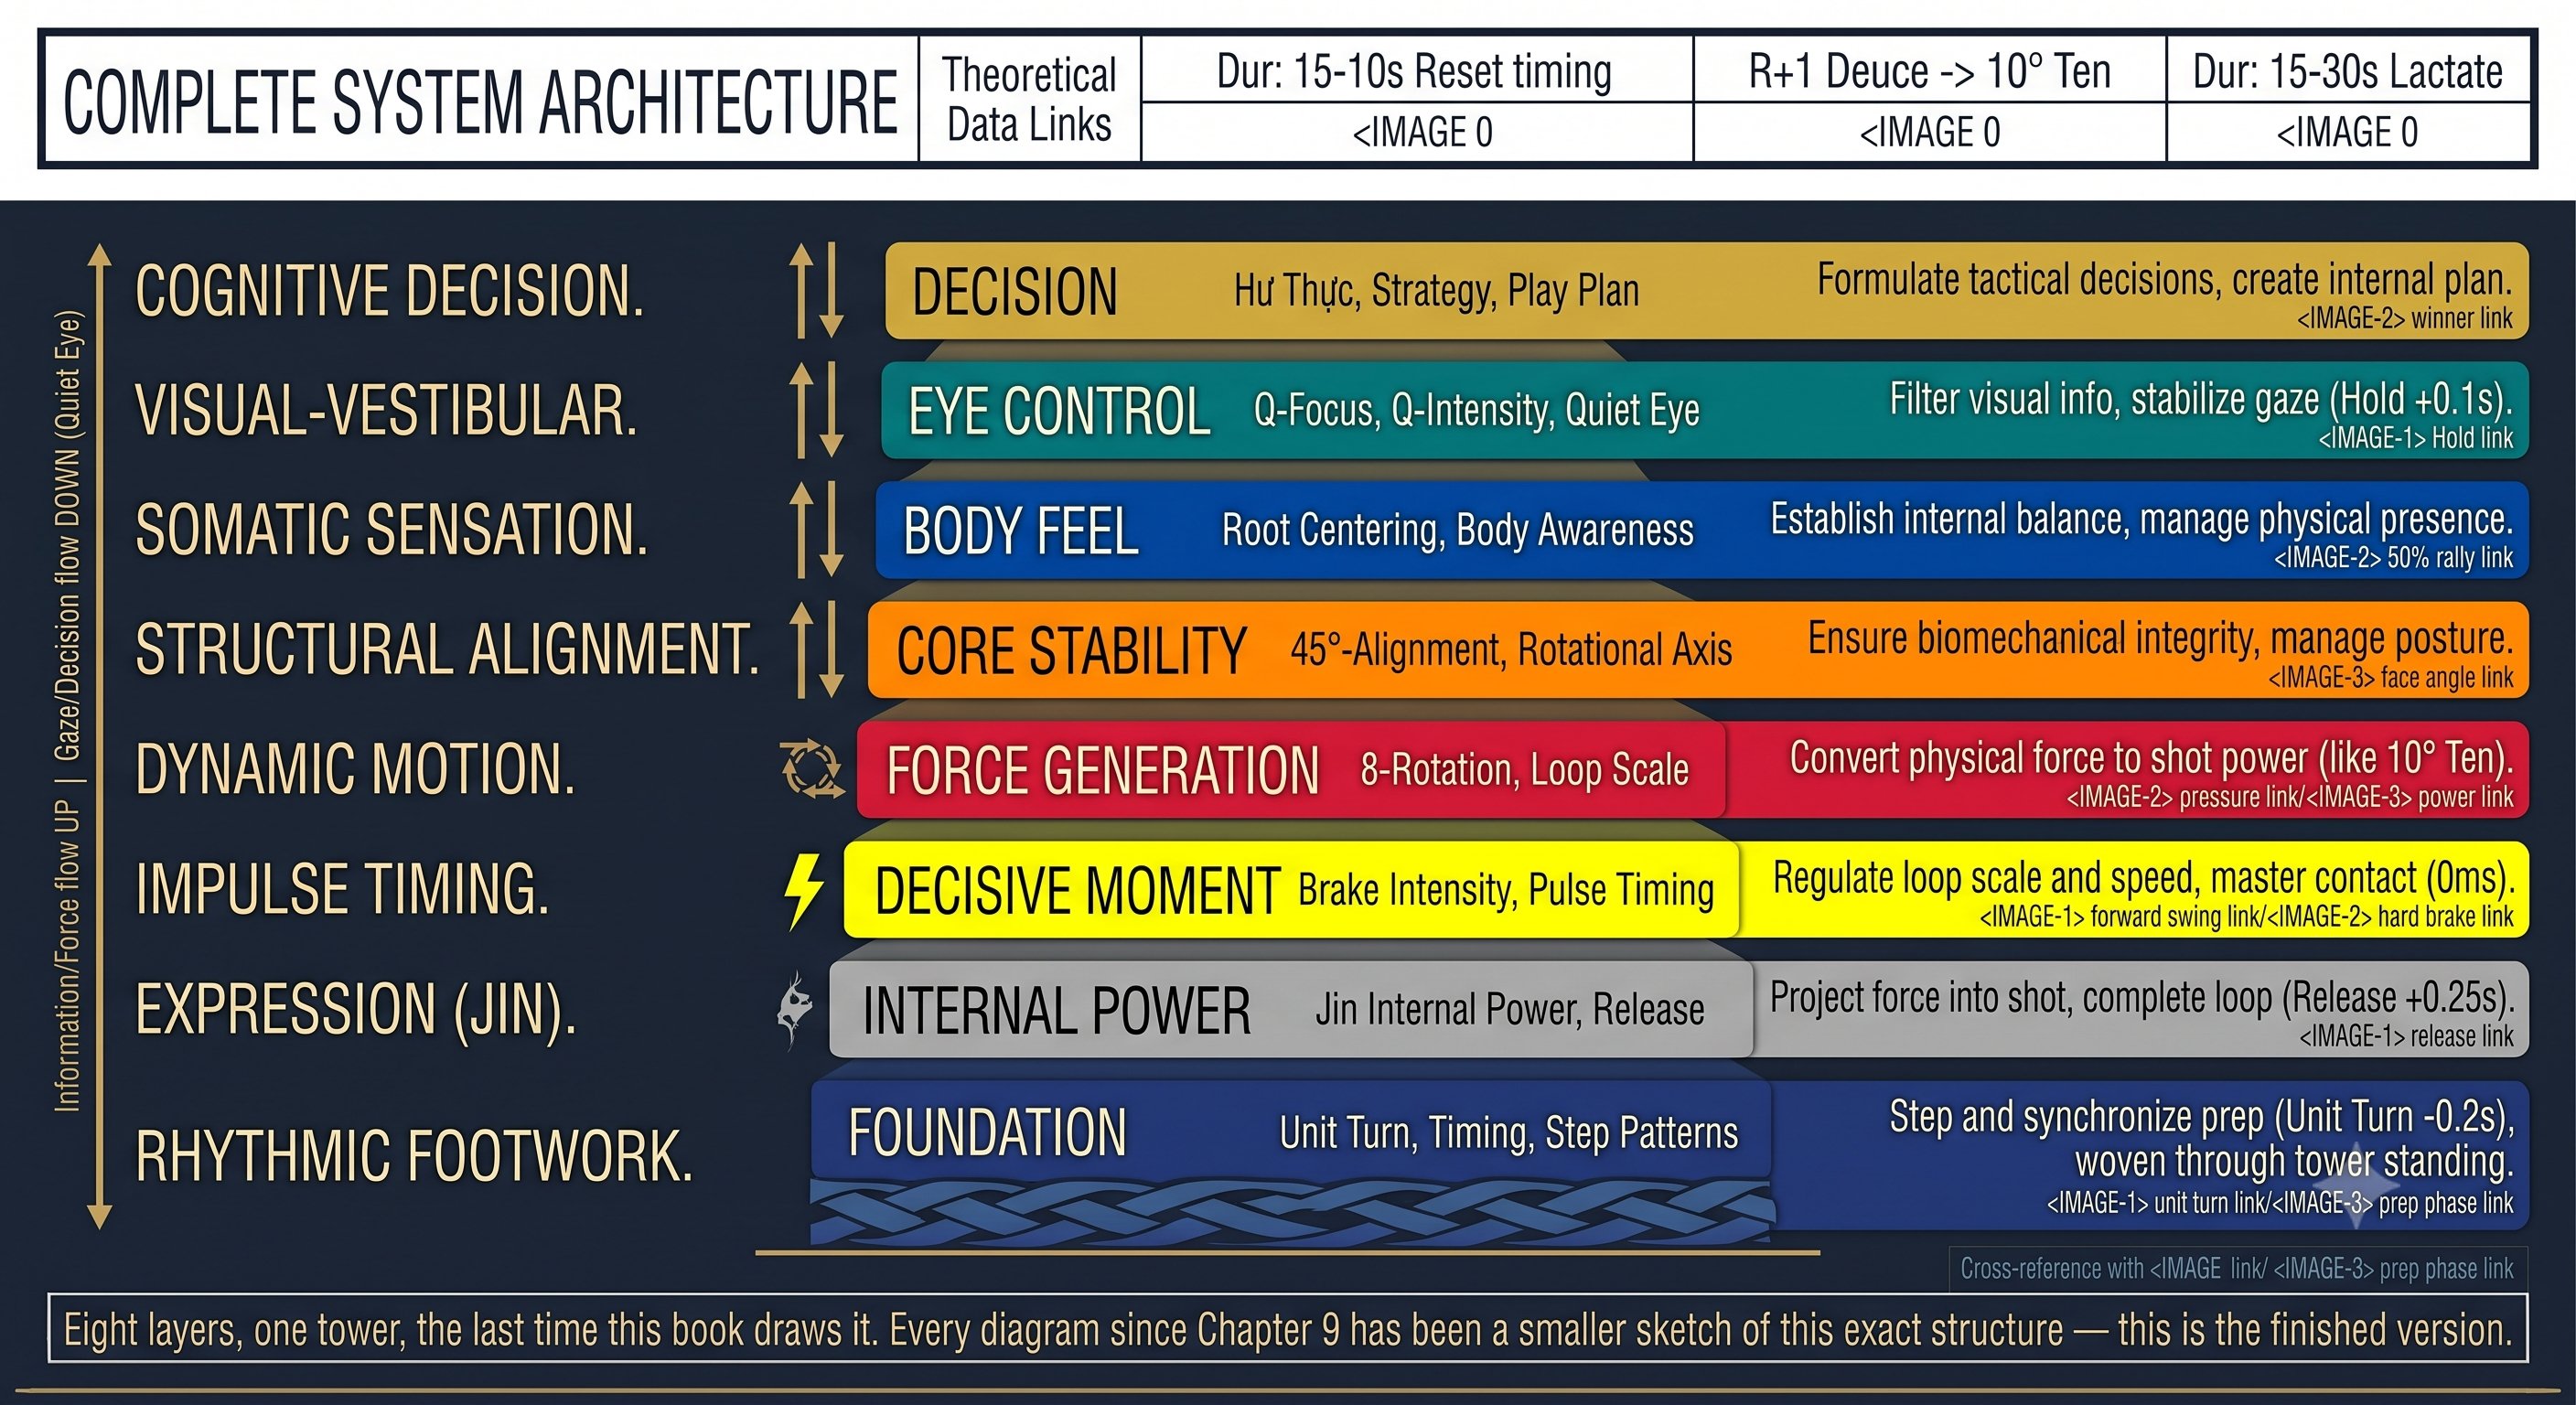
The Unified System — Figure 5
4. Complete System Architecture
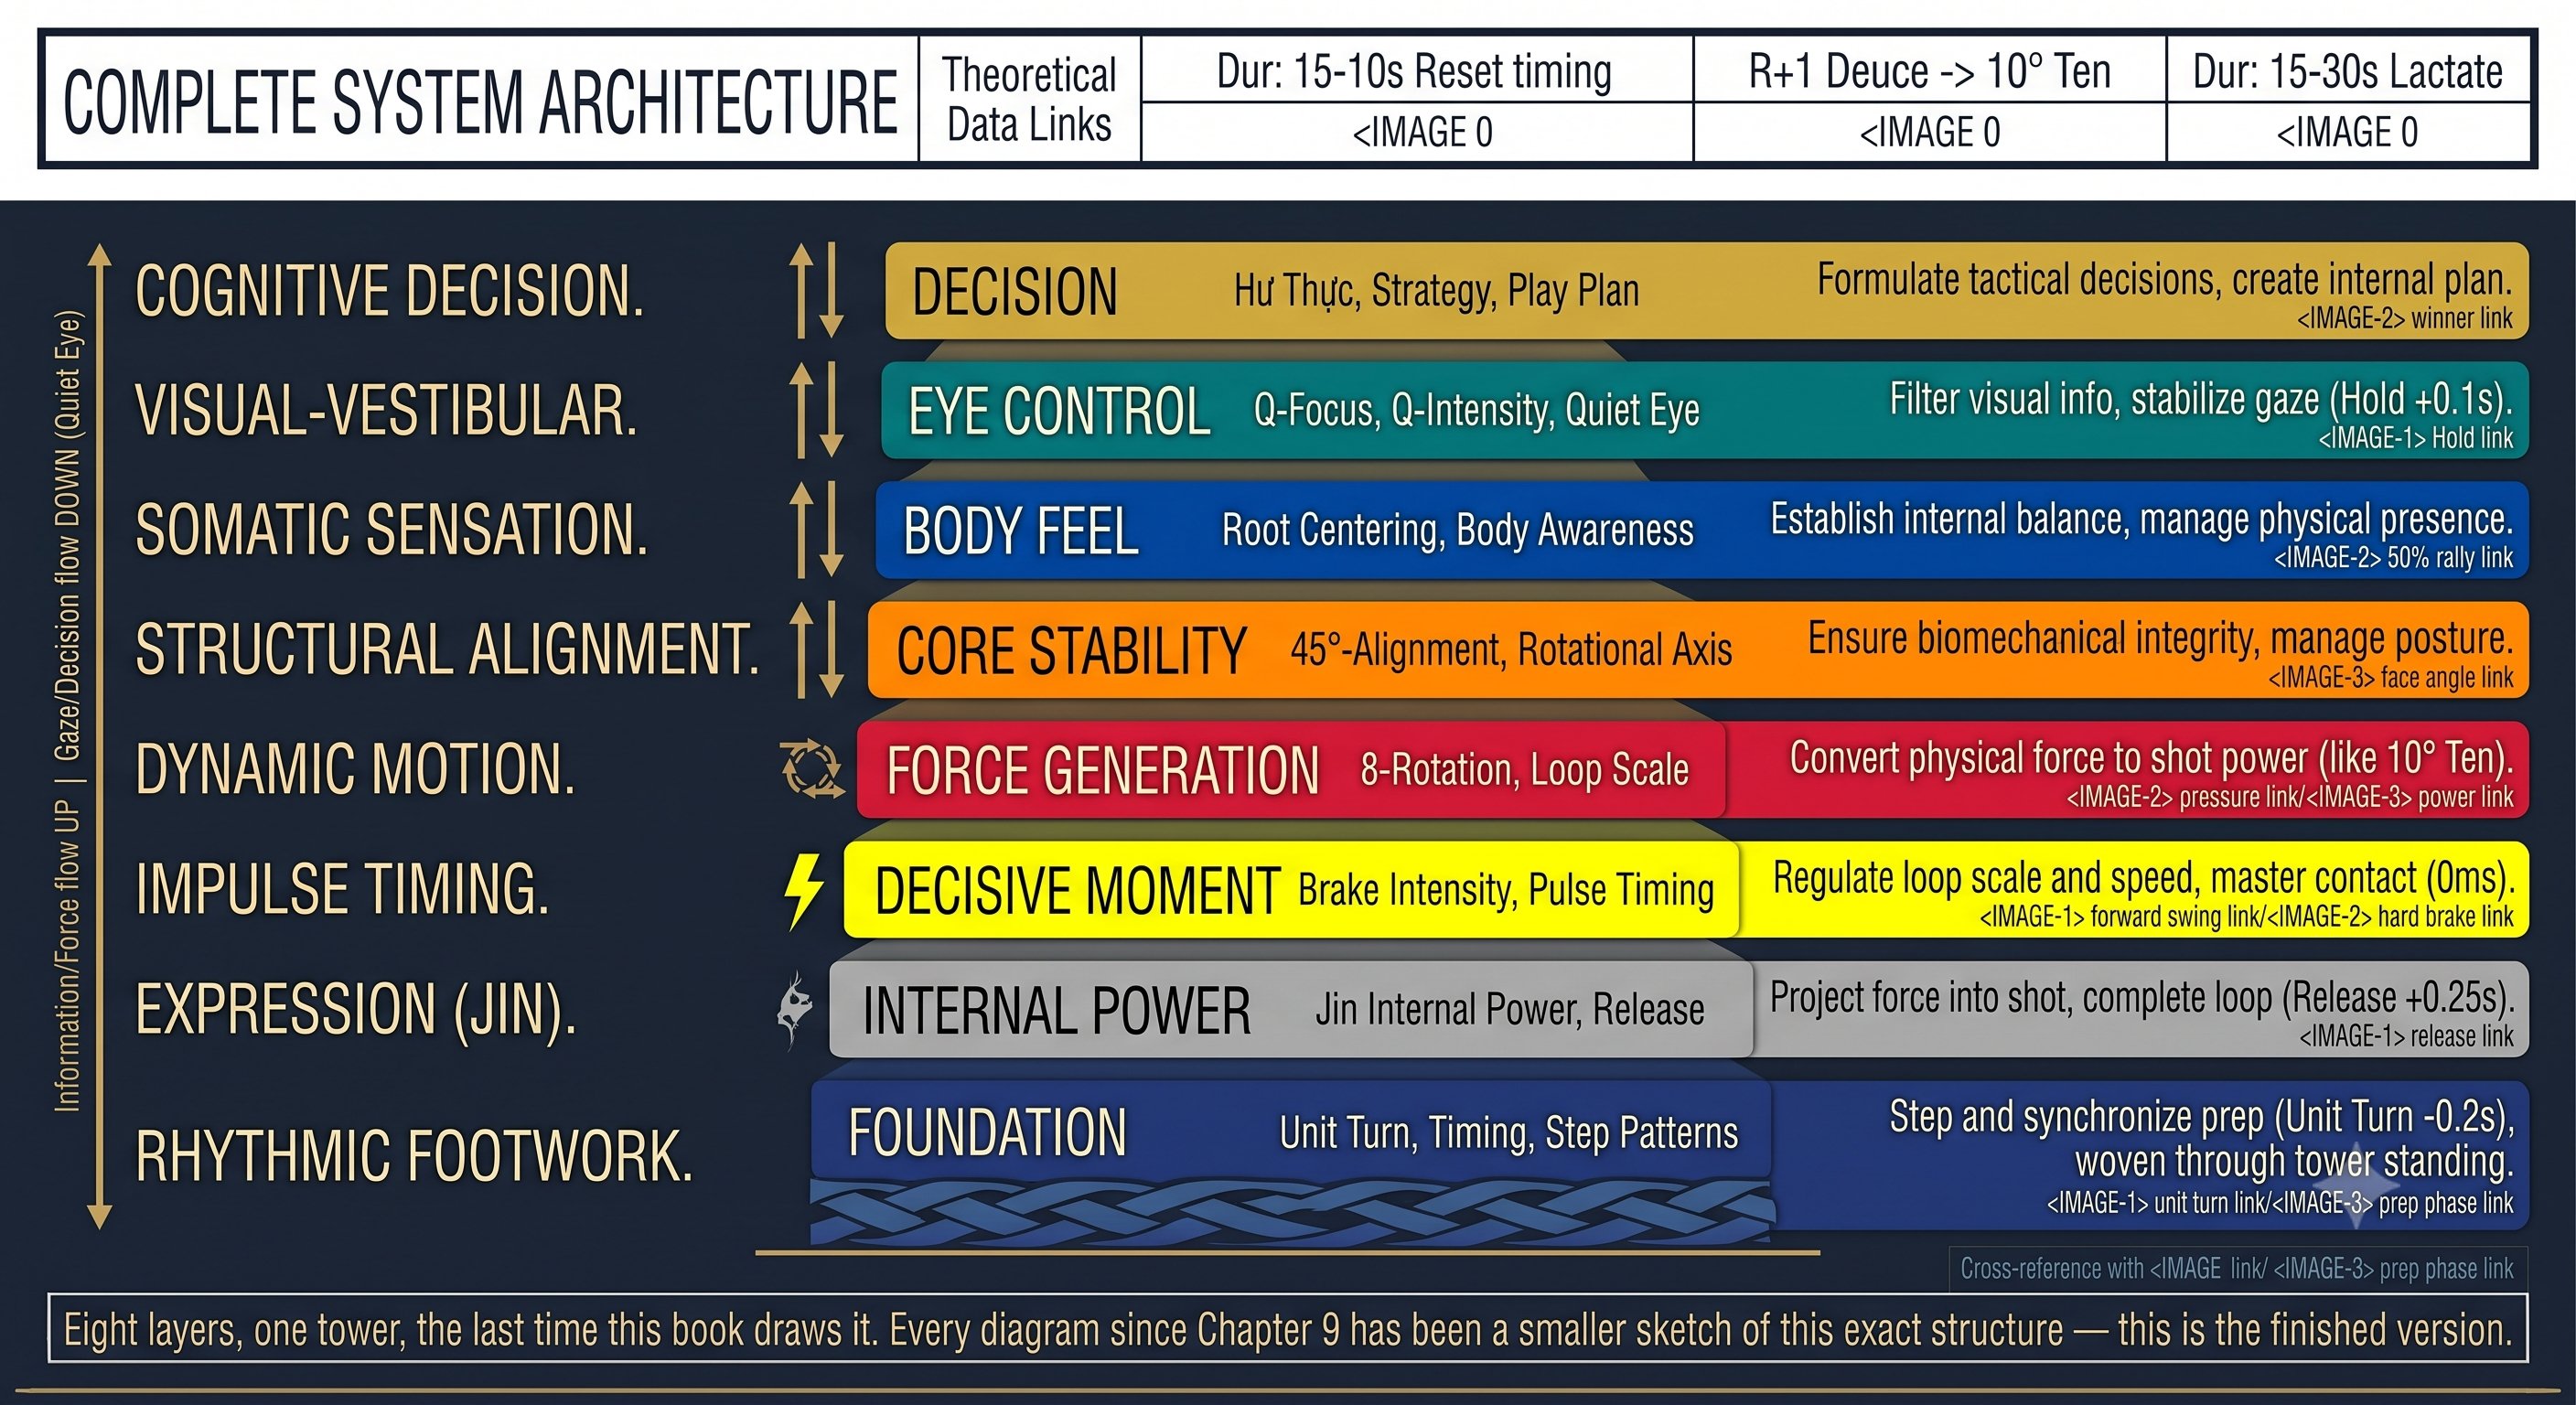
Explore Related Resources
Diagnostics Tool → Drills Library → Visual Coaching Library →